How to Work with Natural Light

Poppy Drayton in a scene from “The Little Mermaid” where we were blessed with beautiful evening light

Natural light can be beautiful, but it is not easy for a cinematographer to work with. Continuity, dynamic range, hardness and intensity are all potential challenges.

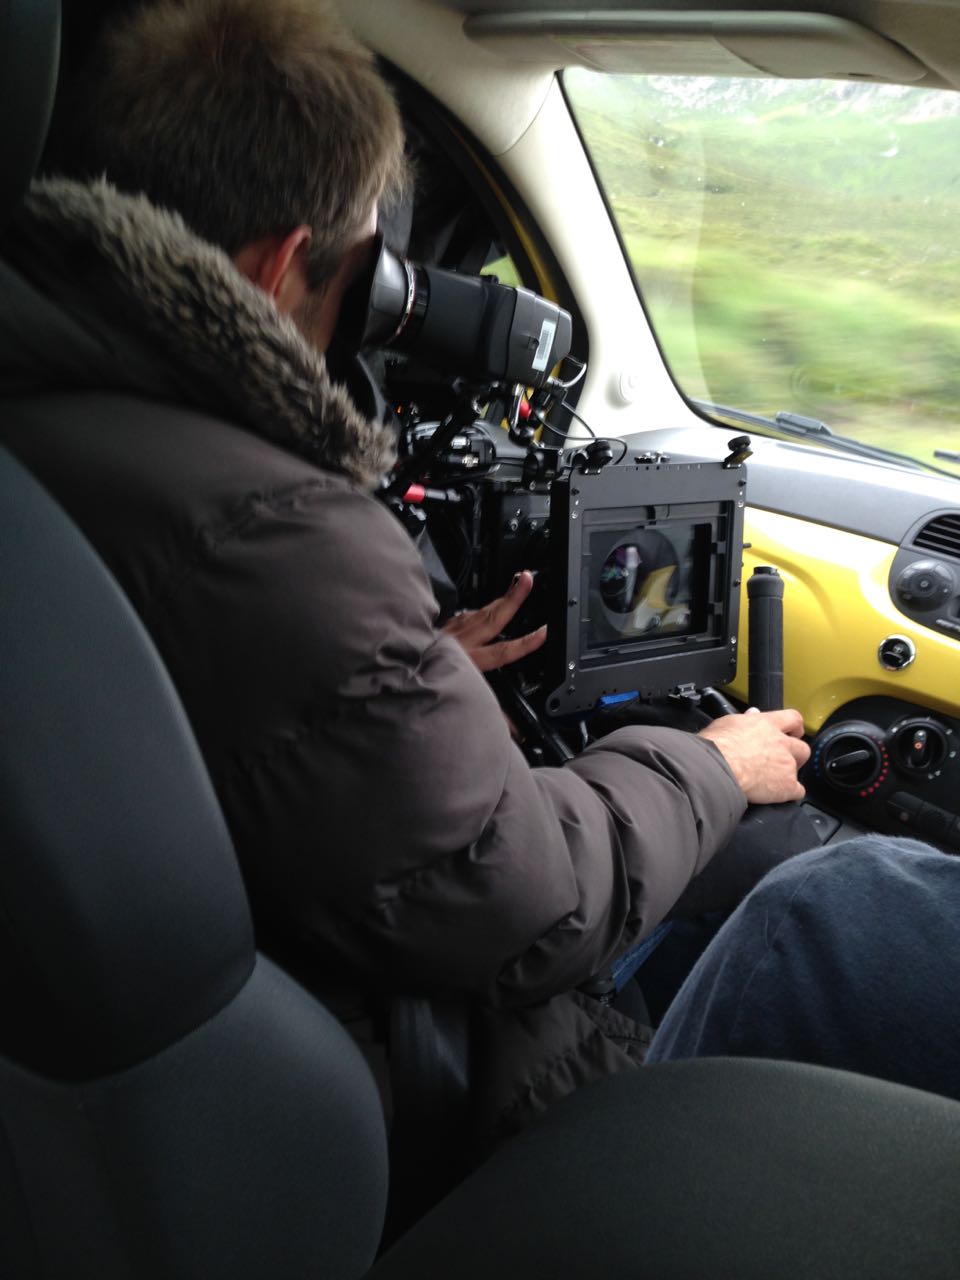
The most obvious difficulty with natural light is that it is forever changing. It can do stunning and unexpected things, but if you don’t move quickly it’s gone. Anyone who’s ever filmed a sunset scene and had the director push for another take after the perfect light has gone knows the disappointment it can bring.

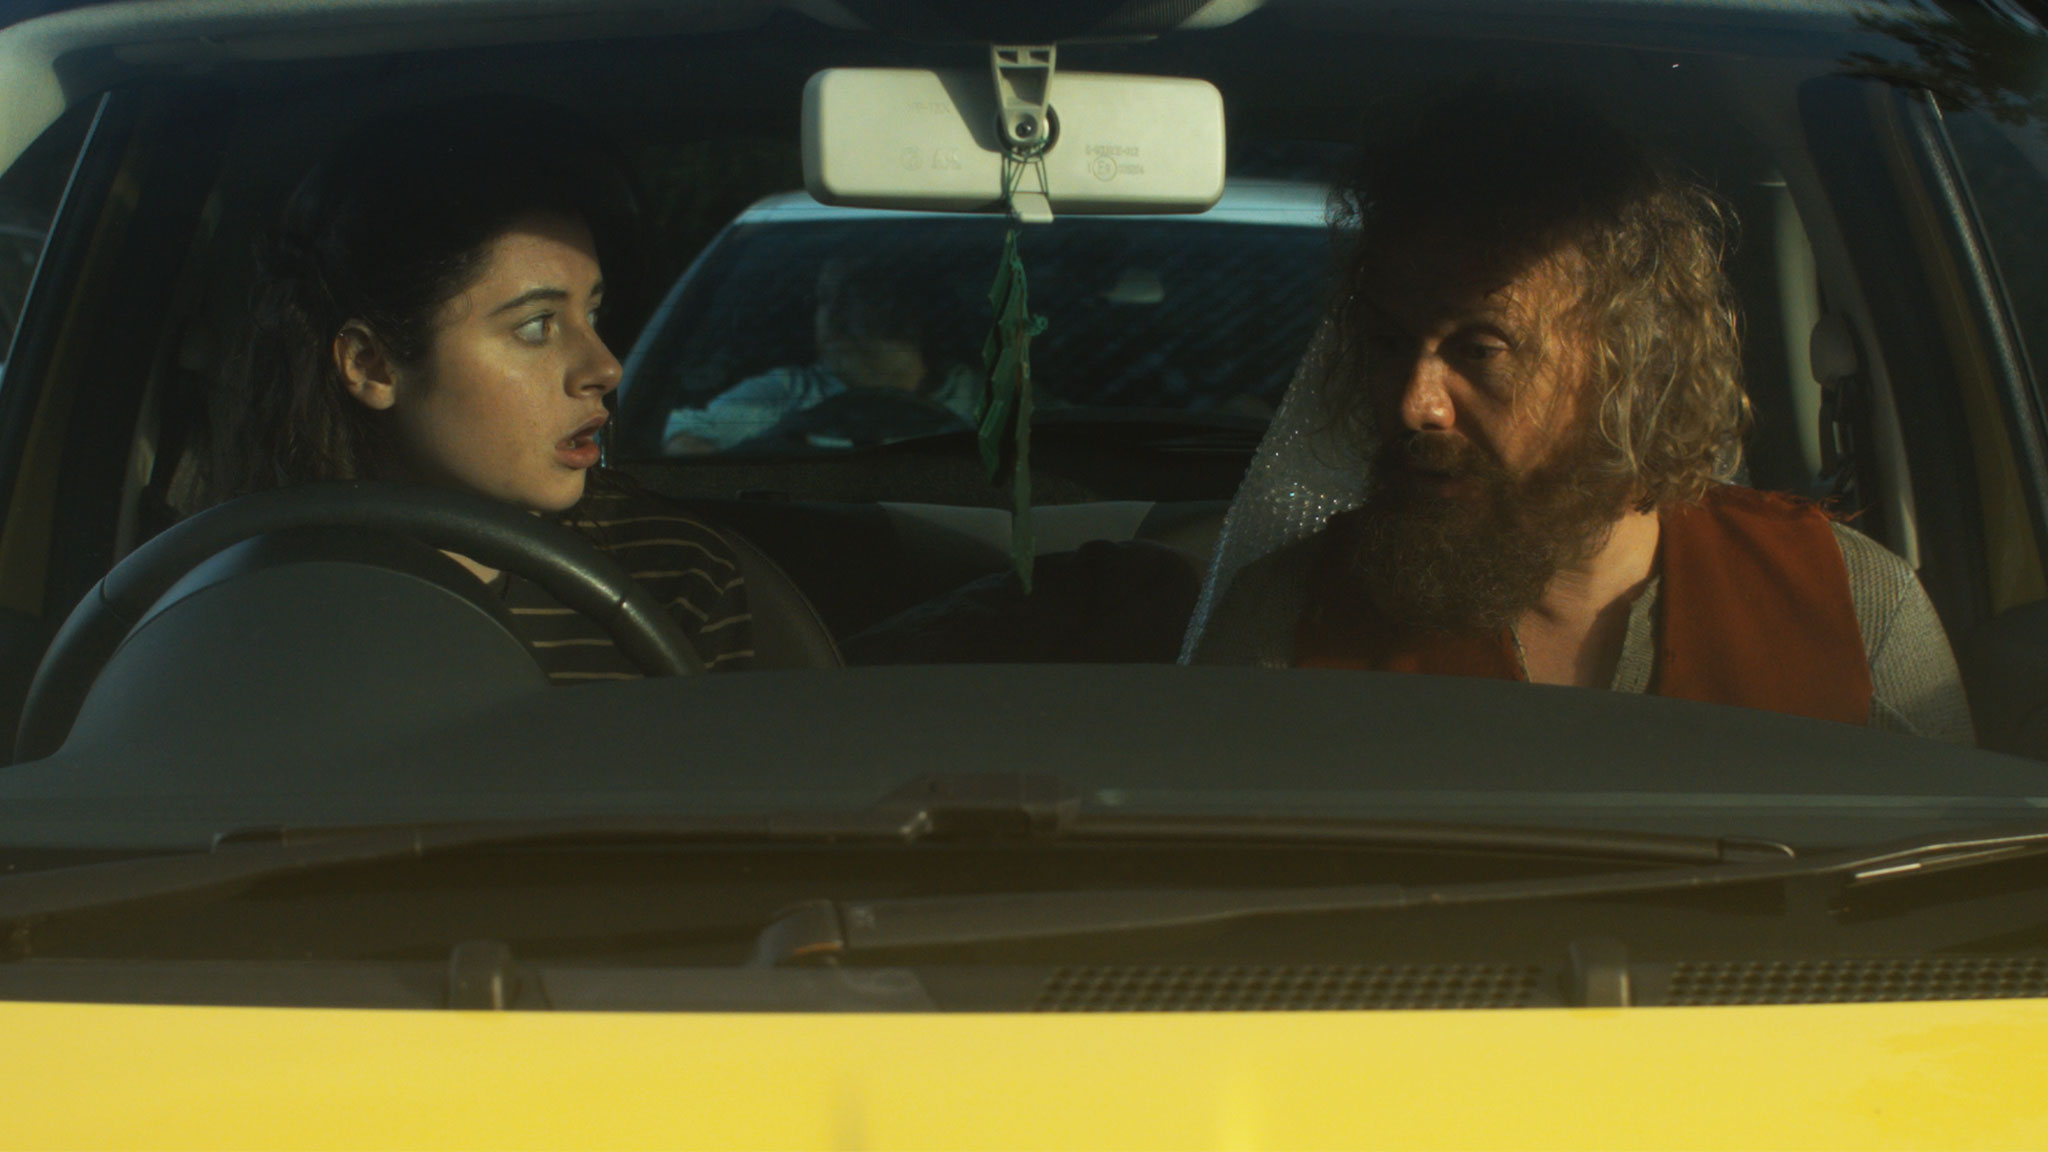
Preparation is key. Previewing the sun path using an app like Helios Pro or Sun Seeker is essential, as is working out the blocking to make the best use of the light. For The Little Mermaid I shot a sunset scene with three actors up to their waists in the Atlantic Ocean. I had to make sure, through rehearsals on dry land, that they would end up with their backs to the sun so that I would be shooting towards it.

Shooting the ocean scene for “The Little Mermaid”

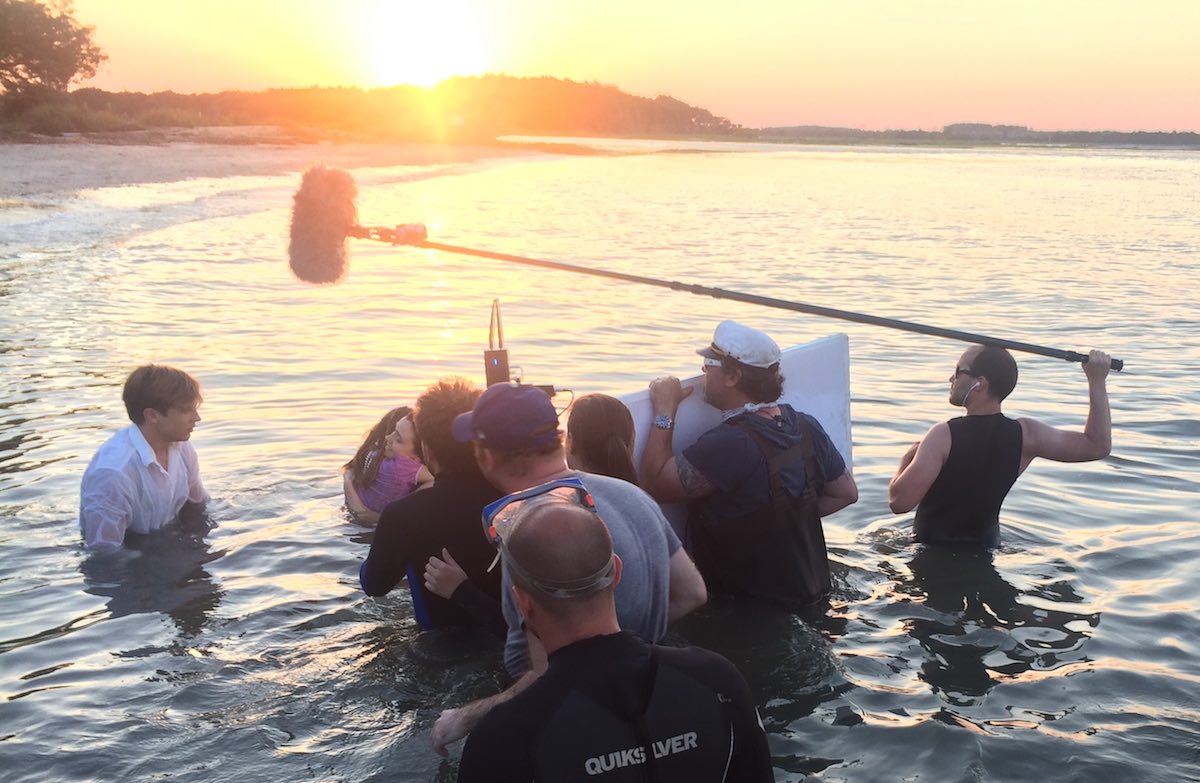
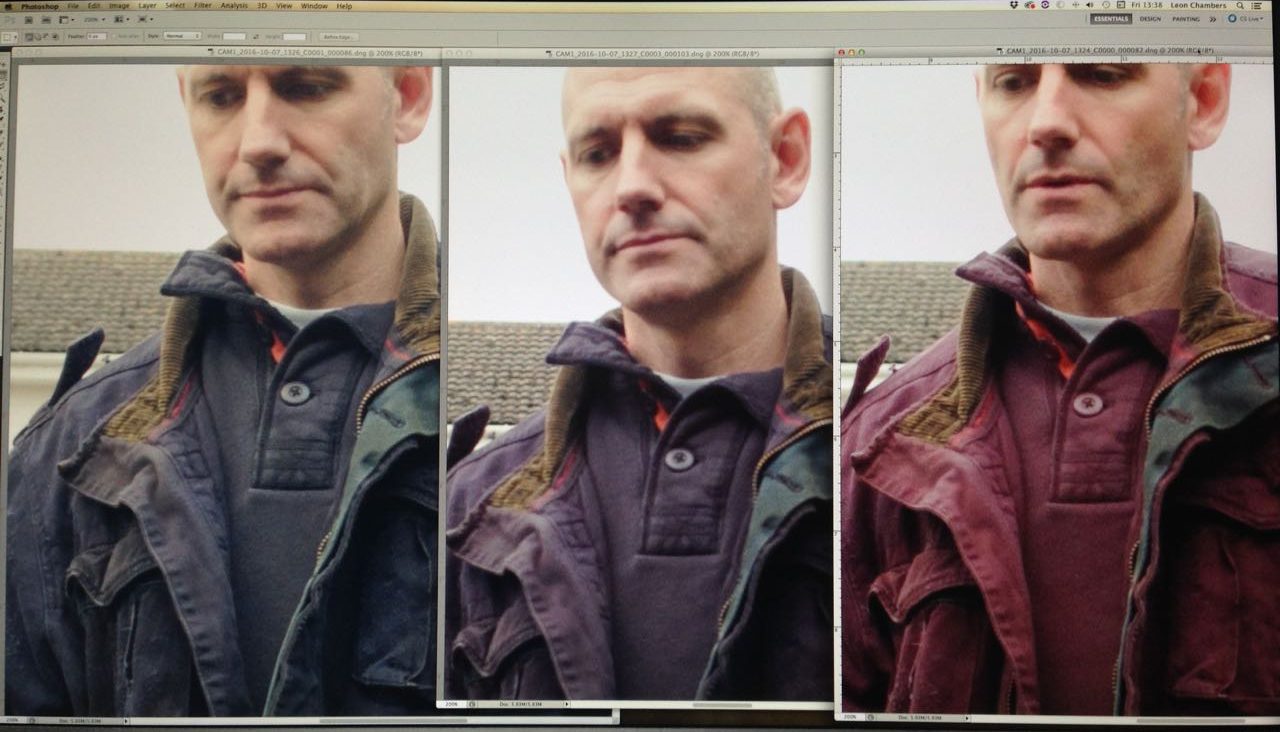
I also had a grip next to me with a poly-board to bounce some of the sunlight back into the actors’ faces. This brings us to dynamic range, the fact that there may be too much or too little difference between the brightest and darkest areas. Too much contrast is common with exteriors under direct sun, or interiors with small windows or dark walls. Too little is often the case with overcast exteriors, or interiors with large windows or white walls.

As in my Mermaid example, shadows can be filled in using a reflector, be that the 5-in-1 collapsible kind that are widely and cheaply available, a white poly-board, a frame of Ultrabounce or even a white bedsheet. These will be much less effective indoors, where you may well need to add an artificial fill light, perhaps bounced off the ceiling.

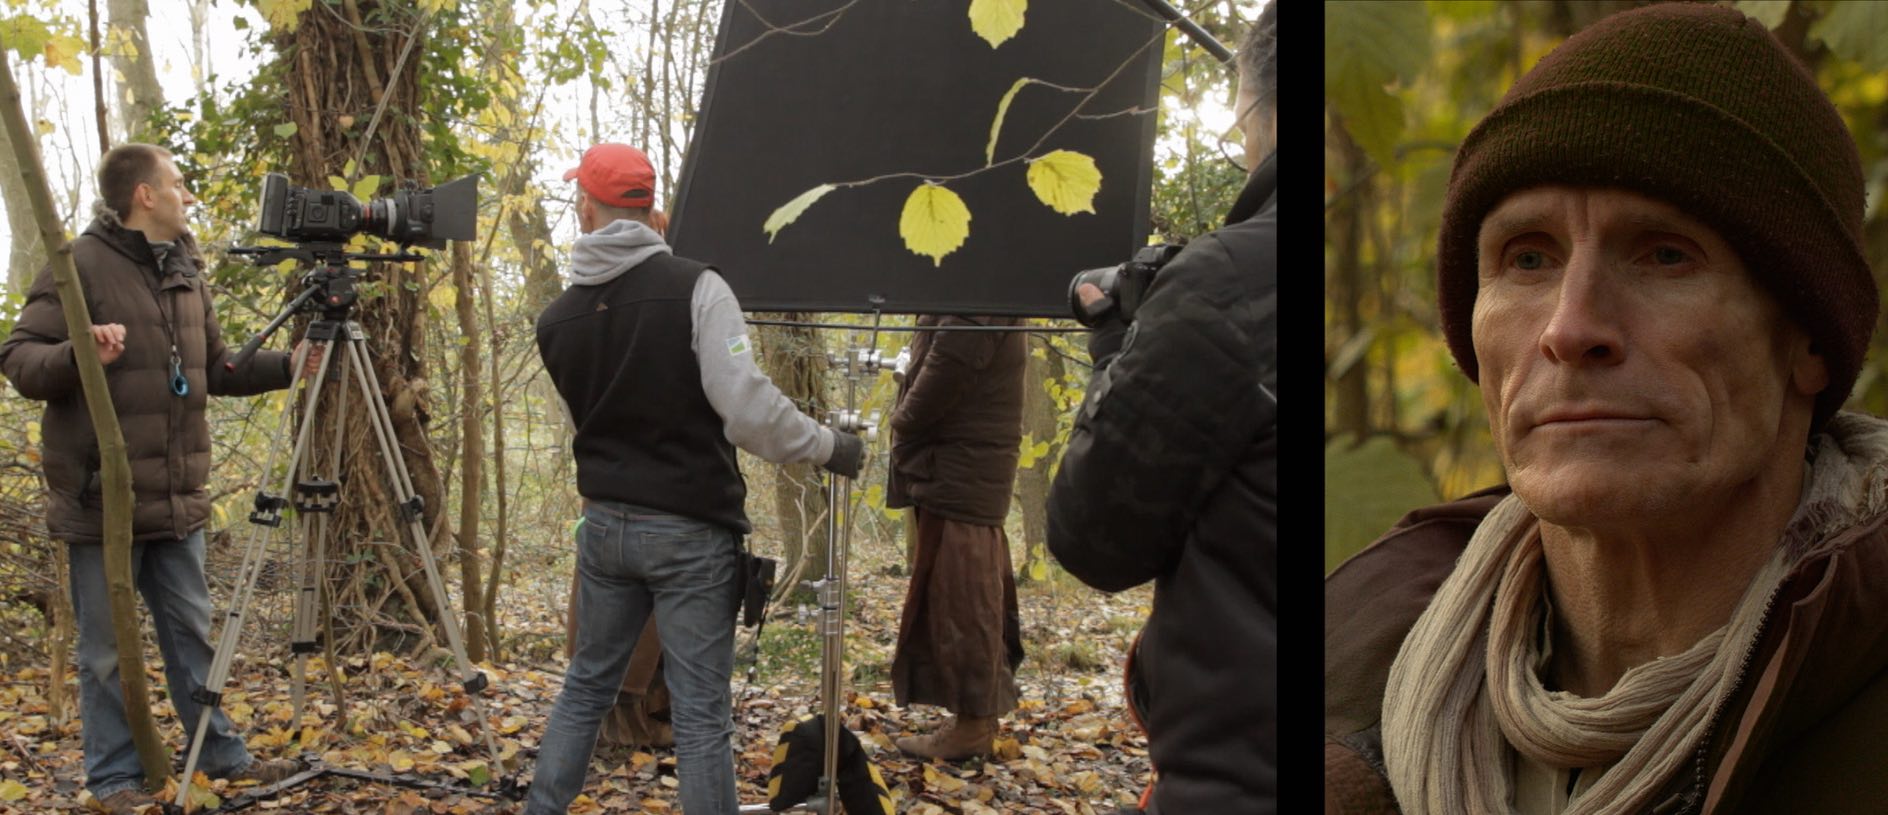
If the light is too flat, contrast can be reduced using negative fill. Anything black can be used for this – a flag, a bedsheet, or the black side of a poly-board or 5-in-1 reflector. Typically this is placed to cut the light on the side of the talent’s face nearest camera to get the most shape in the image.

A demo of negative fill from my online course, “Cinematic Lighting”, available on Udemy

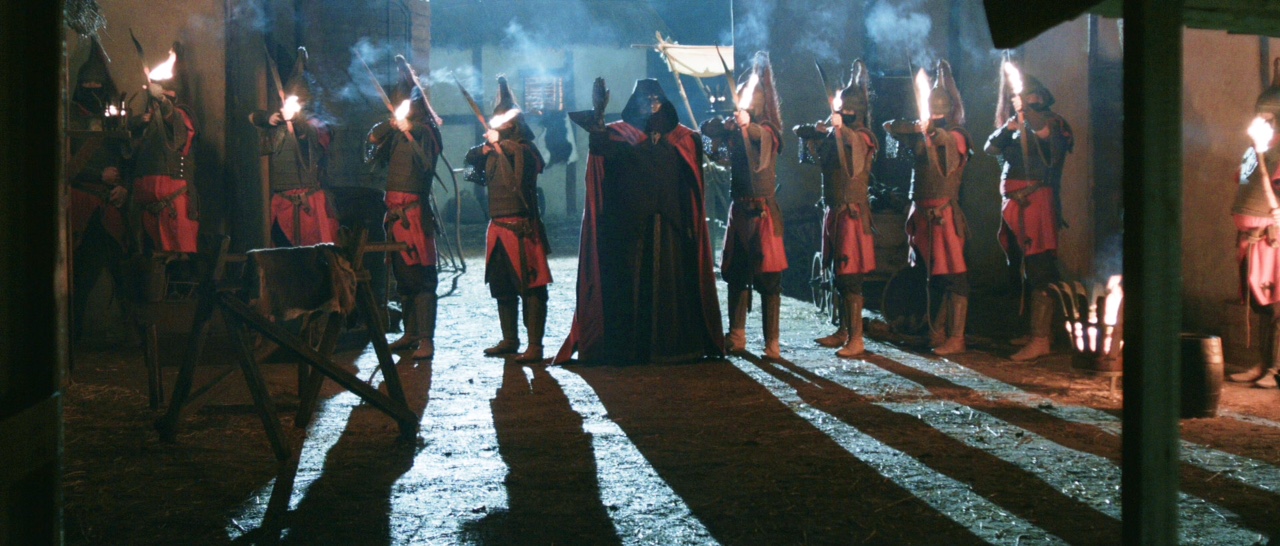
Direct sun is often too hard to be flattering, particularly in closer shots. The solution is to introduce some kind of diffusion between the actor and the sun. This could be anything from a shower curtain to a 12×12’ frame of Full Silk. 5-in-1 reflectors can be stripped down to a translucent white disc that works well for tight shots.

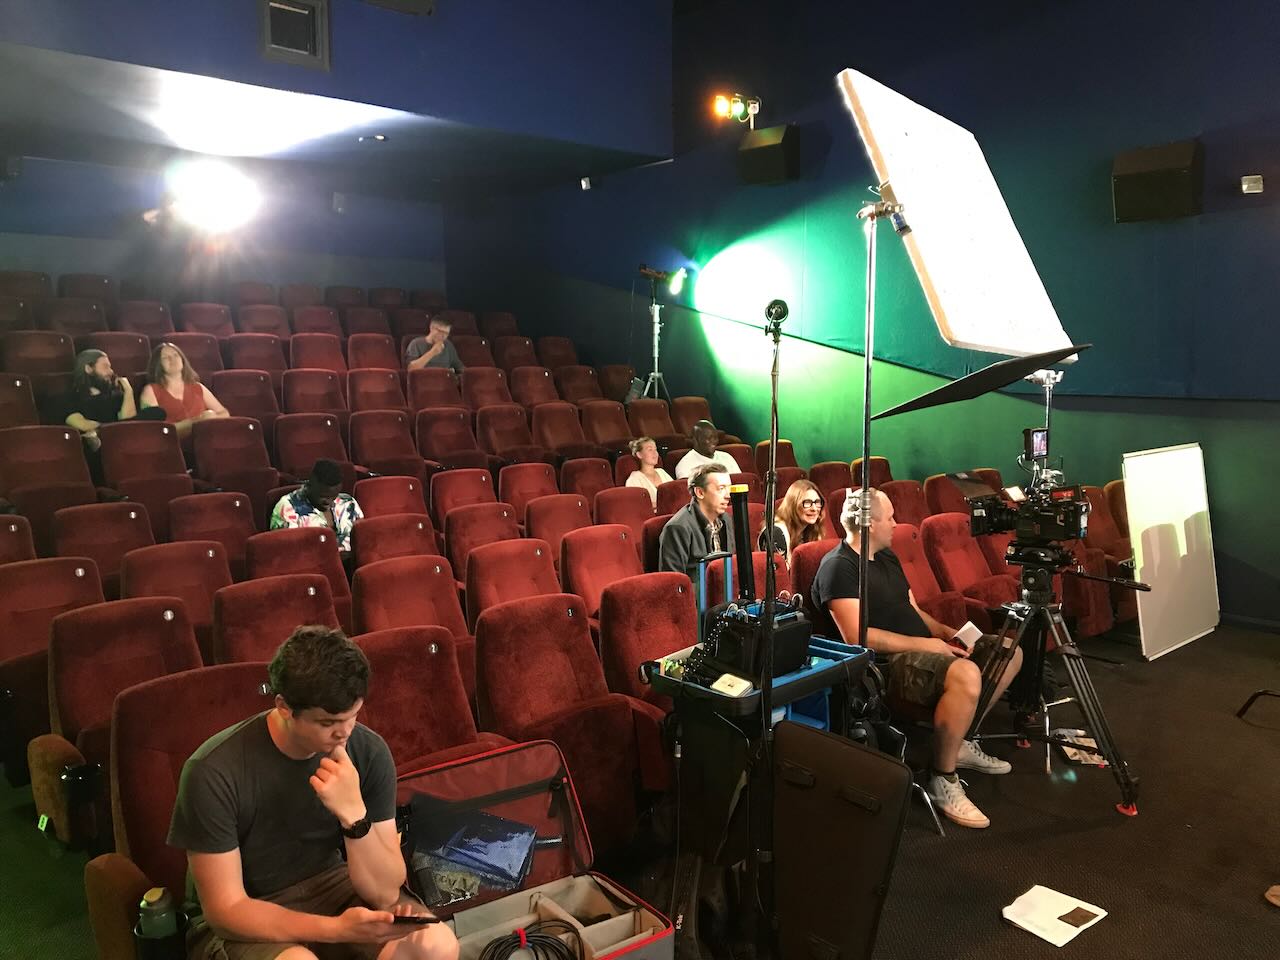
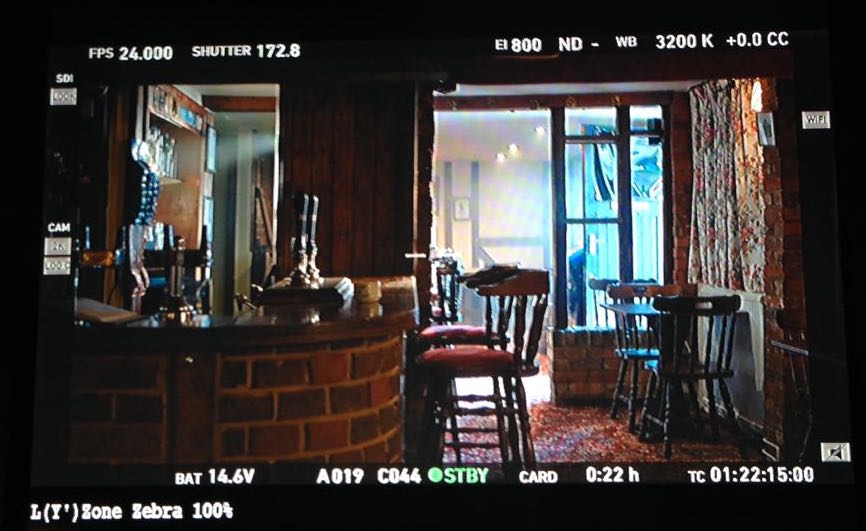
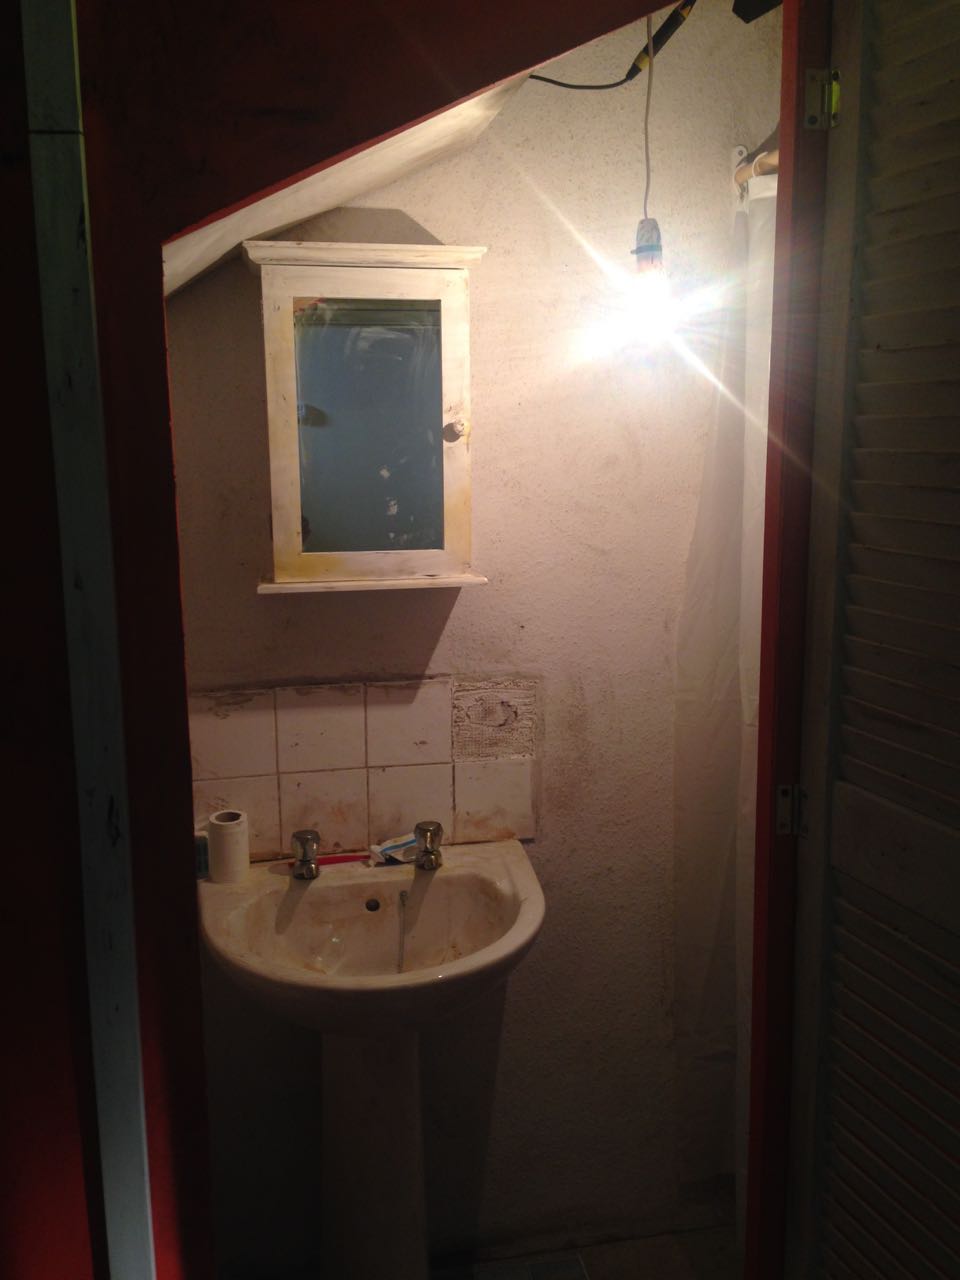
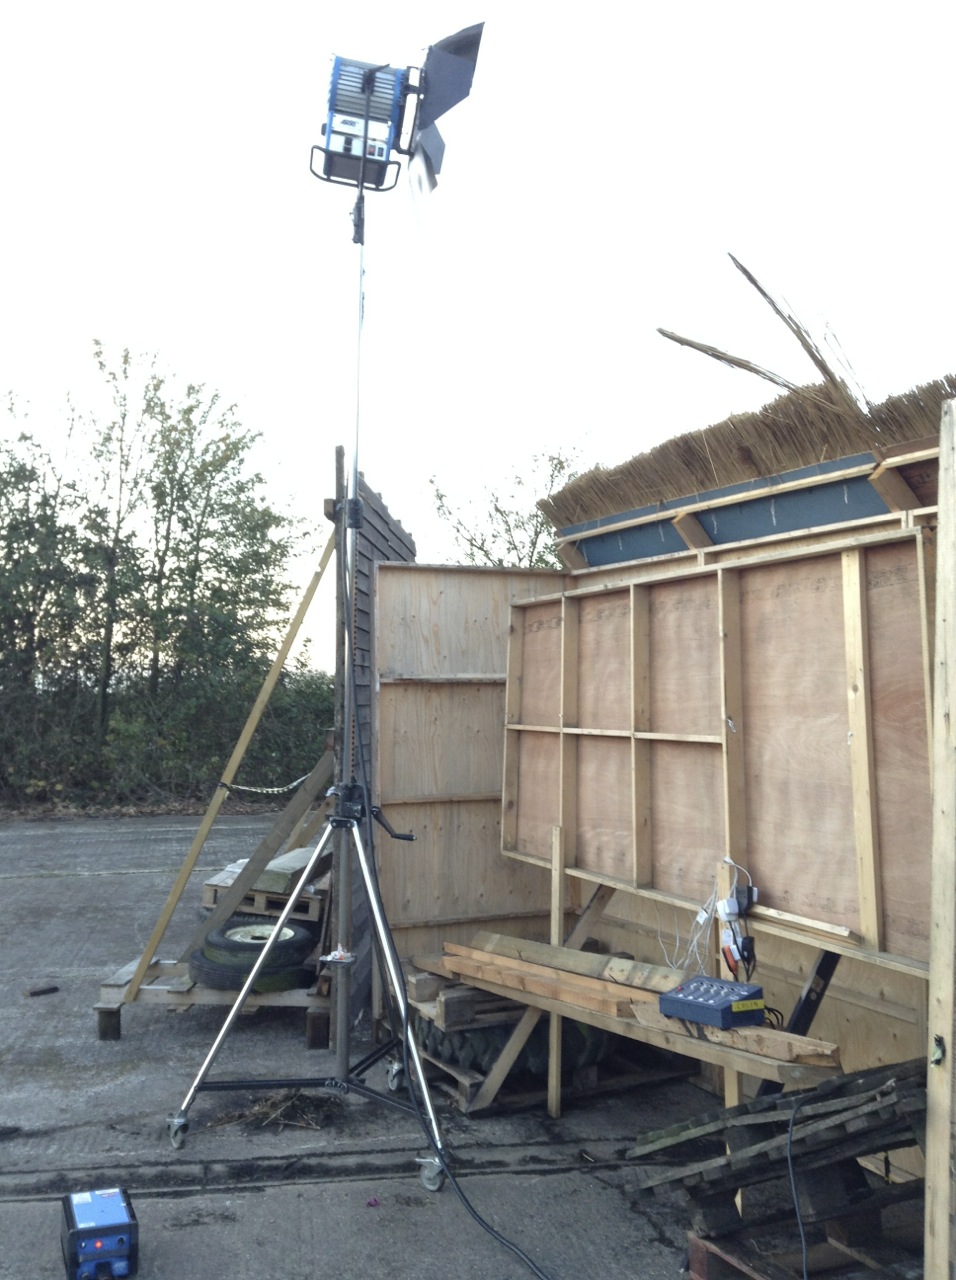
Indoors the trouble with natural light is that there might not be enough of it. If you like what it’s doing but just need more, try setting up a soft artificial source outside the window. A bigger production will often use 12K or 18K HMIs firing into Ultrabounce, but that requires a serious rental budget and a big generator. A smaller HMI pushing through a diffusion frame won’t be quite as soft but will be much cheaper. 

If that’s not possible either, the next best thing is a soft source like an LED panel rigged indoors above the window. By having the source indoors you will lose the natural shaping of the light that the window frame gives you, but some of this can be regained by fitting a honeycomb or egg-crate.

Hard reflector

Another option is to place a hard reflector – essentially a mirror on a C-stand – outside the window and angle it to reflect the brightest part of the sky, or even direct sun, into the room. The great news for anyone working on a tight budget is that any old mirror will do, so long as you can find a way to position and angle it conveniently.

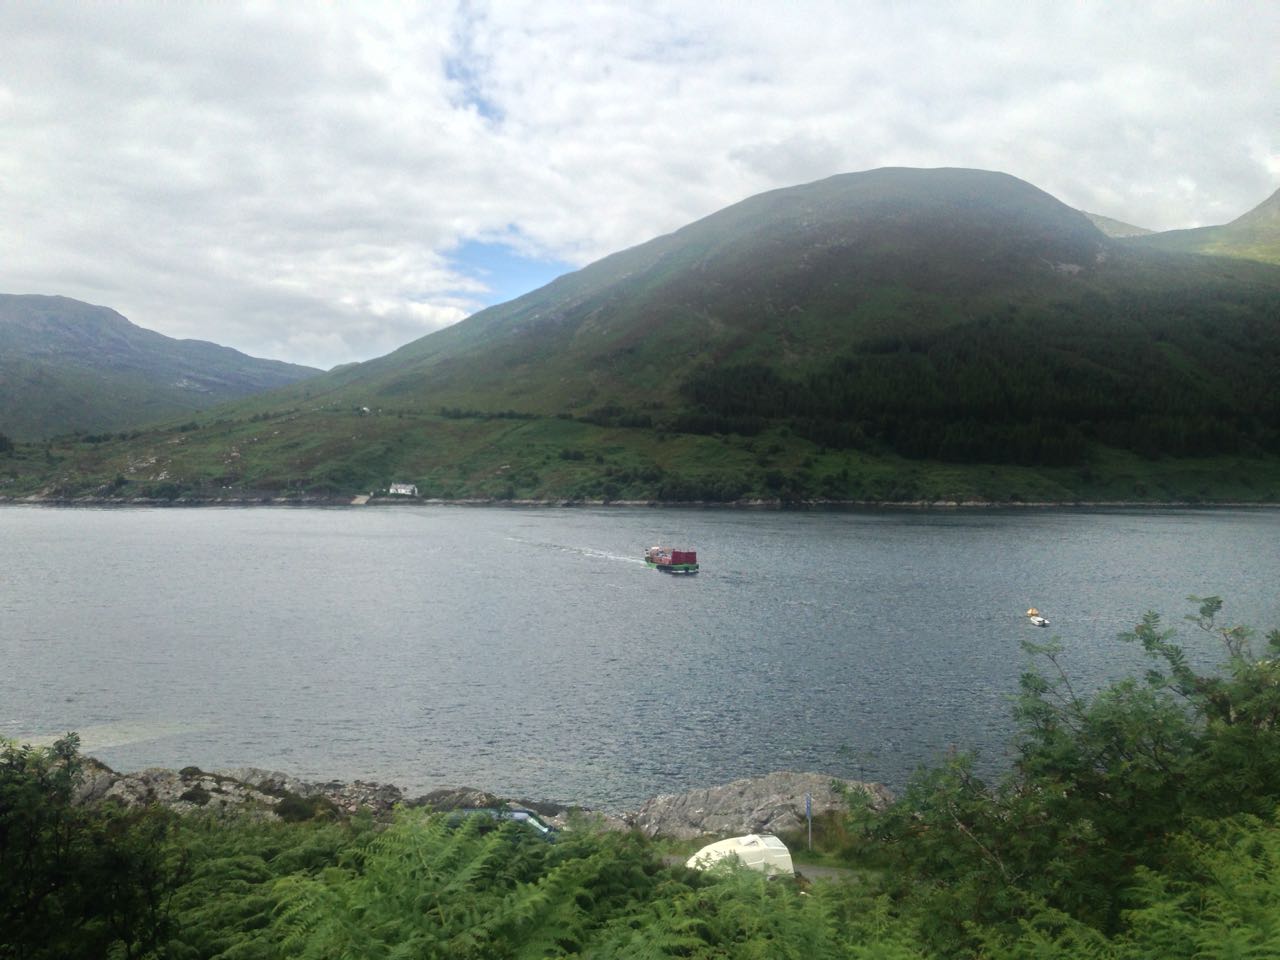
The opposite problem is one all DPs have to tackle at some point – namely direct sun coming into a room and moving across it, spoiling continuity. Choosing a north-facing location will save a lot of trouble here, otherwise flags will need to be rigged and regularly adjusted as the sun moves, unless you can move quickly enough to shoot everything before the light has noticeably changed.

Natural light can be one of the biggest challenges for a cinematographer, but also one of the greatest gifts and highest goals to emulate.

How to Work with Natural Light

“Harvey Greenfield is Running Late”: Week 3 Part 2

Day 21

Photo by Jonnie Howard

A morning full of short running scenes, all shot as oners on the Steadicam by Luke Oliver. Pretty much every crew member had had a cameo by this point, and today it was my turn. My character: Nerdy Cyclist. Alright, technically it was just Cyclist. The nerdy bit was just me (a) beefing up my part and (b) playing to type.

For the afternoon we moved to The Lab, a cocktail bar, where we filmed one of the fantasy/imaginary scenes that cuts with the very first shot we did of Harvey back on Day 1. Mixologist Tom was dressed in an elaborate all-black costume so Stephen and I hit him with two tungsten lamps, one either side, at an angle somewhere between side-light and backlight. This cut him out from the background, showed up the layering in the costume, edge-lit the cocktail shaker and liquids being poured, and deliberately kept Tom’s face dark. Quadruple win!


Day 22

We returned to Othersyde to pick up the one scene we dropped there on our most packed day of principal photography, Day 7. I referred to the blog post to help get the vibe of the lighting the same. The main motivation was the real streetlamp at the front of the site, which we wrapped using an Aputure with a lantern attachment, rigged on a mini boom. Another Aputure lantern gave a cool moonlight wash on the venue’s terraced outdoor seating, and a blue-gelled 300W tungsten fresnel uplighter replicated what we did on the other side of the building last year. A 2K blasted light from the direction Harvey has come; this light represented the ongoing wedding, so we had a couple of people moving around in front of it for dynamic shadows.

I ended up turning off the first Aputure for the wide as it seemed to kill the mood, but we brought it back for the close-up to show more of Paul’s face. To represent the light of his phone as he turns it on, Stephen held a PavoTube just above the camera and twisted it quickly around to face Paul on cue. We adjusted the eyebrow on the camera to flag the tube’s light off the phone itself.

There were a few bitty pick-ups to do while we were outside with access to power, including a “BOV” – a POV of a bee. We did this with the probe lens on Jonnie’s Canon C200, which I had to float around and then jab into Paul’s neck. Sorry, Paul.

At 1am we moved into an adjacent industrial street – having decided that it was unreasonable to have Paul shouting dialogue in a residential area at that hour – for some Steadicam shots. I went to the Gemini’s low-light ISO 3200 and Stephen hand-bashed a lantern on a boom pole to fill Paul in between streetlamps, which became a fun dance when we had to do a 270° orbit!


Day 23

We convened at Cambridge’s Castle Hill. Nearby Indian restaurant Namaste Village kindly agreed to let us shoot a brief scene there at the last minute, even having one of the staff do a spot of acting. I posted a video breakdown on Instagram – here it is:


View this post on Instagram


A post shared by Neil Oseman (@neiloseman)

Back outside we filmed a nice sequence of shots ending with a 360° pan following Harvey as he walks around the top of Castle Hill talking on the phone. As the other end of the phone call had been shot with Steve’s head sometimes out of frame, we went the other way and gave Harvey loads of headroom, capturing some nice clouds along the way.

Then it was time for another pick-up from Day 7, reshooting the tent scene for continuity reasons. Again we put a light on one side and black-draped the other to get some shape into the light inside. This time we used a wider lens, the 14mm, and with the help of a runner I handheld it over Paul rather than trying to squeeze the tripod in around him like last time. He got a nasty shock when I accidentally knocked the matte box off and it hit him in the face. Er, sorry again.

After wrapping a few of us went back across the road to Namaste Village, where the food was excellent.


Day 24

On our last day we caught up to the elusive pick-up that was always meant to be a pick-up: the scenes with Harvey’s mum. We took over Rachel’s grandmother’s house for several hours, most of the shots being in a corner of her living room. Unusually I was drawn to a corner that didn’t have a window in it, because it had the best furniture and dressing to establish the character in our standard 24mm tableau shot.

But this meant – with all the windows behind camera – that it was a challenge to make the lighting interesting. We faked a window just off camera left using a diffusion frame with muslin and a grid over it; Stephen bounced the 600D into it from across the room. I closed the room’s curtains as much as I could get away with before the lack of natural fill light started to make it look like night. (For later scenes we closed them all the way and put a 300D behind the muslin, as pictured above.)

To add more interest to the shot I played around with the positions of two table lamps and a floor lamp. Pausing to check my script breakdown notes from last year I saw that I had written “a single practical floor lamp” in the lighting column; too many lamps would kill the scene’s sad tone. This is a good example of a breakdown keeping me honest as a DP and preventing me from getting carried away doing stuff on set just because I can (though that definitely still happens sometimes). I ended up with just one lamp in the back of the main shot.

After some variations on that main shot for later scenes, and a brief scene in the kitchen, we packed up and headed out for exteriors. Most of these were happy flashbacks from the early days of Harvey and Alice’s relationship, and Jonnie wanted to fill them with filmic references. First up was a Jules et Jim homage with the pair racing across a bridge, then a “remake” of one of Jonnie’s own amateur films with Harvey and Alice spinning around holding hands. For POV reverse shots we put the tripod on the point which they span around, and I set the panning tension to zero so that they could pull the camera around themselves by holding the moose bars (handgrips).

Next was a Manhattan-esque shot with the couple on a bench looking up at Ely Cathedral. We clearly weren’t going to light the cathedral on our budget, so we set up around sunset and waited for the streetlamps to come on and the ambient light to drop to a nice dusky level. We rolled when the daylight was metering at T1.4 at ISO 800, though I exposed at T2. To cut Harvey and Alice out from the background a bit Stephen stood just out of frame with an LED lantern motivated by a nearby streetlamp.

He pulled the same trick at our next location, a passageway beside Prezzo, where we did actually have to light a small portion of the cathedral wall as well, using a battery-powered Aputure (200X I think). We couldn’t have done it for long on the batteries we had, but fortunately it was a brief scene.

Our final set-up was a Poor Man’s shot of Harvey running at night. We did this on the green beside the cathedral because it was a handy open space where we could get a completely dark background save for a few dots of distant lights. Stephen armed a FalconEyes over Paul and swung it back and forth to create the illusion of passing streetlamps. The shot needed a tiny touch of fill, so we taped a PavoTube to the top of the matte box, setting it to 1% intensity and taping over most of it to get it down to a low enough level. (I was at ISO 3200 and on a 14mm lens, so mere inches from Paul’s face.)

Then Rob said the magic words, “It’s a wrap.” Like most micro-budget projects there are still a few loose ends to be shot, but those will be done with Jonnie’s camera and no crew. For most of the cast and crew Harvey Greenfield has run his course and I’ll see them at some distant time for the premiere. Thank you Stephen Allwright (gaffer), Jeremy Dawson (spark), Hamish Nichols (1st AC), Fiyin Oladimeji (2nd AC) and Nana Nabi (2nd AC daily) for all your hard work, and to Jonnie for bringing me onto this fun and creative film. Huge thanks also to Global Distribution, Red and Sigma who supported us with equipment which brought the whole thing up a level. The rough cut is already fantastic and I can’t wait to see it finished.

Read all my Harvey Greenfield is Running Late posts:

“Harvey Greenfield is Running Late”: Week 3 Part 2

“Harvey Greenfield is Running Late”: Week 3 Part 1

Photo by Jonnie Howard

Day 17

Our first location was a medical training ward populated by creepy dummies; we had a brief flashback scene to do around a hospital bed. When we arrived there was nice warm sunlight coming in through the frosted glass behind the bed, so we made sure that stuck around by putting an orange-gelled Aputure 600D out there. Inside we wrapped this with a FalconEyes and Stephen added some soft fill because I wanted the scene to feel romantic. To get some green into the frame (a calming colour in the film’s visual language) we stuck a couple of Nanlite PavoTubes into the background as practicals.

While Hamish (our new 1st AC) and Fifi were building the camera I faffed about with the Prosup Tango slider, trying to figure out a way to have the track go over the bed so we could pull straight back from Paul. It proved impossible simply because the track also ended up in frame, and instead we simply set it up beside the bed. It took a bit of clever blocking by director Jonnie to ensure that the camera could point directly along the axis of the track, rather than at an angle, which would have broken the established visual grammar of the film. This is the sort of thing that takes a bit of time to get back into after months away from the project, but it’s important to get it right.

Next we moved into the foyer, which we were playing as a bank. There was plenty of natural light but we made sure to keep that in the background, neg-filling behind the camera, and adding a key (a Rayzr MC 200) at 90° to the talent (Alex Wilber), who was partly facing towards a computer monitor on that side of camera anyway. A heavily dimmed 2K served as backlight.

After a brief panic when we thought we were missing our favourite lens, the 14mm, we moved to Cambridge 105’s studio a couple of blocks away. A special guest star played a Tony Blackburn-esque DJ and threw in some brilliant improvs.

We fought a battle against the high, bright sun that kept trying to come in the south-facing window, despite us having diffed a lot of it, and blacked out the whole top section, and having blinds partly lowered, and the windows having some special solar coating on them anyway. Once again we fired in the 600D, which probably did very little compared with that sun, and wrapped it inside with a FalconEyes, and added the PavoTubes into the background for colour. The DJ’s computer monitors were set to 60Hz, but I’d learnt my lesson from last year and immediately set the shutter to 144° to sort that out.


Day 18

We were at Anglia Ruskin University for the day, mostly in one of their media studios. Here we had to shoot a number of things against a black backdrop, mainly to cut into the climax of the film. These included a 180° camera move using the university’s track and dolly. I thought briefly about doing some elaborate lighting rig in which lamps would have to be dimmed up and down to maintain backlight and eliminate front-light as the camera circled, but then I came to my senses and we just fired a Source Four straight down onto the makeshift table that the two actors were hunched over so that it would bounce back up to them. I was using the Soft FX 1 to match the look of the Happy Place scenes from Day 3, which helped to take the harshness out of the highlights where the Source Four was directly hitting the cast.

A little later Jonnie started flinging things in front of the camera. Had he finally cracked? No, he just wanted some lovely slo-mo shots of key props arcing through a black void. We went to 120fps, the Red Gemini’s maximum 4K frame rate, and the higher native ISO of 3200. We were able to make a stop of somewhere between T4 and T5.6 by bouncing two 2Ks into an 8×4′ poly just out of frame, and using three triple banks of the uni’s linear cyc lights in the grid as backlight.

After lunch we came to a couple of crucial shots that were dropped from the night shoot on Day 10, meaning we had to replicate the lighting from Vinery Park. We used the cycs again, a Source Four on a stand as a special flaring backlight simulating the park’s streetlamp, and a couple of 2Ks through a diffusion frame as the key. Although we were back to 24fps we still needed loads of light because one of the set-ups was on an f/14 probe lens sliding into Harvey’s mouth! “It feels really weird,” Paul remarked. Yep. And sorry for bashing you in the teeth with it.

As our time on the campus ticked down we moved across to another building to shoot a call centre scene. We went for our 24mm “tableau” frame that we’ve used to establish all the characters who ring Harvey in their own environments, followed by a couple of other set-ups. We kept the talent’s (Kate Madison) eye-line between the camera and the windows for a nice short key, beefing it up with a FalconEyes, and added a dimmed 2K backlight and some warm PavoTubes in the background (orange being the stress colour in the film’s visual language).


Day 19

The good folks at BBC Breakfast were up bright and early, set up at the Granta beside Sheep’s Green, shooting live news footage of what was widely forecast to be a record-breakingly hot day. We were up pretty early too, watching from the banks of the Cam at 5:30am as the BBC drone flew over, and hoping that it wouldn’t ruin a take (which it didn’t).

We were shooting Harvey Greenfield‘s only stunt, which I probably shouldn’t spoil by describing. We’d given Stephen the day off, and my trusty 5-in-1 reflector was our only lighting gear, but of course there was no shortage of sunlight. I used the white side for most set-ups, running along beside the Steadicam later in the day to keep Paul’s face filled in when he wasn’t facing the sun.

There was an interesting moment when we had the sun in the background of a low-angle shot. As I’ve experienced before, the Soft FX filter reflected a rectangle of light onto the subject. But even when we took it out, the IRND filter did the same thing. Do all filters do it, I wonder? Must test that one day.

We wrapped a little after 3pm, as the heat was reaching its maximum. Despite all the dire warnings (and drone-worthy news coverage) it hadn’t been too hot to work. We were all sensible with hydration, shade and sunblock, and I even swam in the Cam a couple of times during the day to cool off. You don’t get to do that very often on a shoot!

Straight after wrap I went for another swim in Jesus Green Lido, whence a Channel 5 news crew were broadcasting live weather reports with the pool in the background. The presenter was positioned in the shade and they’d set up a 600D on either side of him to fill him in. Believe it or not, that would inspire the next day’s lighting.


Day 20

First up was a one-shot flashback scene at the Arts Picturehouse. We used the 600D as the “projector”, positioning it just barely out of the top of frame, and a 4×4′ poly armed over the camera as the screen bounce. During the takes Jeremy wiggled his hand in front of the 600D to create dynamics in the flare.

The day’s main scene was a fake advert starring a nineties keep-fit icon. The aim was a cheesy infomercial vibe, with a 4:3 aspect ratio and over-the-top acting. We cross-front-lit the scene with the Aputures 300D and 200X (thank you, Channel 5), with only a bit of diff on them. I over-exposed by a stop and took out the Soft FX filter to make the image even less filmic. I framed with a lot of headroom and even did a deliberately late tilt-down at one point. When the actual aerobics start, we went even more naff by adding two PavoTubes into the background and the Rayzr MC behind camera, all flashing nasty disco colours. It was great fun.

By the time we moved onto the last scene – another 24mm phone call, in a GP’s waiting room – it was at least 39°C in Cambridge and the UK’s temperature record had been broken.

There’ll be more from this shoot in next week’s post. In the meantime, you can read all the Harvey posts here. Note that the link will display them in reverse chronological order, so scroll down for the older ones.

“Harvey Greenfield is Running Late”: Week 3 Part 1

“Harvey Greenfield is Running Late”: Week 2-and-a-Bit

Day 11

In a conference room at a business centre in north Cambridge we set up for a scene in which the titular Harvey arrives titularly late for a big meeting at work. Here we were joined by my good friend Alan Hay, who voiced all the pre-recorded male characters in the stage play, and now portrays Harvey’s overbearing boss Bryan on screen.

A TV monitor in the background of Bryan’s shot, displaying relevant graphics, gave us some trouble. Neither the 50Hz or 60Hz “flicker free” modes in the monitor’s menu lived up to their names. The best – though not perfect – results were achieved by setting the camera’s shutter to 144°, which works out as 60Hz at our frame rate of 24fps. (Next week’s post will be dedicated to the maths behind this. I bet you can’t wait.)

Stephen and James rigged several Astera tubes to the ceiling, which we mostly used to give everyone a tungsten-coloured backlight whichever direction we shot in (Harvey’s stress colour again). The key light was motivated from the window, which we weren’t able to light from outside of, but we generally used the Litemat 2S to punch up or wrap the natural light from that direction. We used floppy flags on the opposite side of the room to stop too much ambience from the atrium spilling in.

Unfortunately by the time we wrapped the meeting scene we were left with a difficult choice: to rush a long and funny scene in Bryan’s office, or to postpone it for some future pick-up shoot when we could do it justice. Jonnie wisely chose the latter, allowing us to decamp to a private home in Arbury and get ahead with the scenes set in Harvey’s house.

First up at the house was a happy flashback of Harvey and Alice dancing in the bedroom, which Amanda had dressed in calming shades of green. We shot towards the window at 48fps and supplemented the natural light with a single Astera tube in a corner.

Next was a less positive flashback set at night. As it was still broad daylight I closed the curtains, framed out the window and set the white balance to 3600K to turn the remaining light seeping through the curtains into a dim nighttime ambience. I had asked Amanda to provide matching practicals on the bedside cabinets, which we now turned on and dimmed to get a nice warm orange glow. This looked great but left the actors’ faces very under-exposed, so we added a 300W tungsten fresnel motivated by one of the tablelamps. (The thing you see hanging in front of it in the above photo is a makeshift flag to stop the other tablelamp from casting an unrealistic shadow.)

Then it was back to daylight – again natural light supplemented by an Astera – and the camera had to stay locked off so that Jonnie could jump-cut to this shot from the same angle at night. Stephen and James set up the lighting while the daylight faded. The main element that I wanted was a streak of sodium streetlight through a gap in the curtains, again part of the stress colour theme, which was achieved with the Aputure 300D gelled appropriately. We wanted to give the impression that this was bouncing off the wall and edge-lighting Harvey in his second position, but in reality we used the tungsten 300W fresnel – now hidden on top of the wardrobe – to get this effect. We bounced two Astera tubes, set very blue with a bit of green mixed in, off a wall to provide ambience.

Overall the frame was still pretty dark, so I decided to do something I’ve seen advised for night scenes before but never actually done: I reduced the ISO by one stop and opened the iris to compensate. Read my article about ISO if you want to understand all the ins and outs, but essentially doing this allowed one more stop of light to reach the sensor – that’s more information to grade with – without increasing the apparent brightness of the image.


Day 12

Back in the house, this time downstairs in the kitchen. We had three daylight scenes to shoot here, and the lighting approach was to push in soft light through the windows using the Litemat or an Aladdin, with some harder streaks where appropriate from the Aputure. Hiding another Aladdin on top of a cabinet and firing it into a corner of the ceiling was a good move by Stephen to raise the ambience in the room while still keeping some directionality.


Day 13

Our first task today was to return to the cemetery and pick up a dropped shot from day 8. Then it was another Steadicam/rickshaw scene on an Ely street where rain, traffic and a recalcitrant beer can combined to make things quite tricky.

After lunch we had a strict two-hour window in which to shoot three scenes with a hired limousine. The first required it to be driving around, so Filipe (sound mixer), Olga (focus puller) and I squeezed into the front of the main cabin, shooting down the length of the vehicle on the 14mm to where Paul and Alan’s characters were sitting at the back. Jonnie rode in the front passenger seat and watched the monitor over my shoulder. Next to him was an Aladdin which I could use for fill when necessary, but mostly I relied on the dynamic natural light. The heavily tinted windows were a big help, allowing me to retain most of the detail in the sky outside without under-exposing the talent.

When we returned to base, Stephen had all the flags, bolton and lights ready to move into position around the limo for the night scene. His custom-built LED was gelled with Urban Sodium again to key Alan, and an Astera tube inside the limo provided the impression of a passing ambulance.

Then we were left with less than 25 minutes to capture a daytime dialogue scene around the limo. Jonnie had storyboarded it as three set-ups but there was only time for one. Rupert came to the rescue, quickly balancing his Steadicam as Jonnie devised a camera move that would hit all the needed beats.

After a couple more Steadicam shots we moved on to a scene in a hospital car park, a rare moment of calm for the beleagured Harvey. We shot this mostly on the slider, capturing the dialogue in another single developing shot that taxed poor Filipe again but set exactly the right mood for the story. The natural light was very shapeless, so Stephen set up some floppies on one side and bounce on the other.

The day brought principal photography to an end for Stephen and for leading man Paul Richards, both of whom have done stellar work despite the long hours and high energy levels required.

Just after I wrote this Jonnie sent me a rough edit of the limo/hospital sequence and it has turned out very nicely indeed.


Day 14

We convened at a farm near Mildenhall to film Billy the pig farmer, one of the many people who hassles Harvey by phone during the story. In a last-minute casting coup Billy was portrayed by 1st AD Rob Oliver with the unscripted addition of his mother Shirley. A comedy duo to be reckoned with. Between takes we scattered food around to entice the porcine supporting artists into the right positions.

After completing this sequence we all took it in turns to hold a piglet. I’m not sure why.

The final scene of principal photography was a spoof charity appeal for “No More Racism UK”. We shot this down at Ely riverside again, where a crowd steadily gathered to watch us film an old white lady throwing bread at a black couple. We captured the whole thing on the slider with the 50-100mm zoom at 48fps and with the Soft FX 1 for extra cheesiness. To get the depth of field as shallow as possible with our limited ND filters I went down to ISO 250, the downside being a reduction in highlight detail which threatened to blow out the feathers of a white swan in shot. I’m sure that’s symbolic somehow.

We wrapped at the astonishingly reasonable time of 3pm and reconvened in the evening for a pizza-fuelled celebration at Othersyde. The shoot was great fun, the whole team has worked really hard, and I look forward to seeing everyone again for the pick-ups.

The “Harvey Greenfield” camera department: 1st AC Olga Lagun, 2nd AC Fiyin Oladimeji and me
“Harvey Greenfield is Running Late”: Week 2-and-a-Bit

5 Lighting Tips from Classic Art

A few weeks ago I discussed compositional techniques which we can learn from the work of JMW Turner. This time I’m looking at the use of light, and I’m broadening the scope to cover a few other classical artists whose works have caught my eye at galleries lately.

Without artificial illumination, these old masters had to make the most of the light God gave them. Here are five examples of their techniques which we can trace directly forward to cinematographic techniques of today.


Cross-light

“Mornington Crescent Nude” (circa 1907) – Walter Richard Sickert

Decades before DPs started encouraging directors to shoot interior scenes towards windows to achieve the most interesting modelling, Sickert had the same idea. See how the light from the window in the background throws the model’s body into relief, giving it form and dimension? Cross-light is commonly used today in commercials for sport and fitness products, to emphasise muscle tone.

See also: Lighting Techniques #6: Cross-light


Background strokes

“Tancred’s Servant Presenting the Heart of Guiscard in a Golden Cup to Guismond” (circa 1675) – Adriaen van der Werff

What caught my eye about this painting was the slash of light on the background wall in the top left corner. It may seem trivial, but a little stroke of background light like this can really elevate the quality of a shot. Here it anchors the corner of the composition and gives us a hint of the room’s decor, adding interest to what would otherwise be a black void behind Guismond.

While lighting the subject of the shot is clearly a DP’s priority, it’s important to find time to paint in the surroundings even if they’re in the deep background or extreme foreground.

“Drive” (DP: Newton Thomas Sigel)

See also: 5 Ways to Use Hard Light Through a Window


Haze

“Chloe Idille” (1811) – Salomon Gessner & Carl Wilhelm Kolbe

This monochrome etching has a tremendous feeling of depth, and it is achieved purely through contrast. The further away an object is, the more air there is between that object and your eye. Since air isn’t 100% transparent, that distant object appears lighter and lower-contrast than closer objects. Gessner and Kolbe capture this effect beautifully here.

Many cinematographers today use hazers to create or enhance this atmospheric effect, even for interiors. In the days of miniature effects, smoke was often used to create atmospheric haze and increase the feeling of scale. On Blade Runner, for example, Douglas Trumbull’s VFX crew sealed the motion control stage and used infra-red sensors linked to hazers to automatically keep the smoke level constant during the long-exposure passes over the futuristic cityscape.

“Blade Runner” (DP: Jordan Cronenweth)

See also: Depth Cues in Cinematography


Golden hour

“Abingdon” (1806) – Joseph Mallord William Turner

Painters figured out centuries ago that the most beautiful light is found at the beginning and end of the day. It’s partly due to the cross-light effect (see above) of the lower sun, and partly due to the beautiful orange colour caused by the greater amount of atmosphere the sun’s rays must pass through. To shoot the perfect sunset, you’ll need patience, and a sun-tracker app or at least a compass. Ensure the schedule permits you to try again another day if clouds spoil the view.

“Raiders of the Lost Ark” (DP: Douglas Slocombe)

See also: Sun Paths


Wet-Downs

“The Boulevard Montmartre” (1897) – Camille Pissarro

This is the only night image in a series of impressionist oil paintings which Pissarro executed from a hotel window overlooking the Boulevard Montmartre. What makes it particularly beautiful is the wet street, turning what might otherwise have been a dull grey central swathe of the image into an arena of alternately shadowy and glittering reflections.

Cinematographers shooting night exteriors on streets will often have the tarmac hosed down for four reasons: (1) as already noted, the beauty of the reflections; (2) the deeper blacks and increased contrast; (3) the extra exposure gained by the light sources bouncing off the water; and (4) avoidance of continuity problems if it rains.

A scene from “Terminator 2” (DP: Adam Greenberg) on a street that’s been wetted down

See also: 7 Considerations for Night Shooting

5 Lighting Tips from Classic Art

5 Tips for Shooting Water

As well as the general principles of cinematography like three-point lighting, short key and so on, there are specific principles that apply to certain situations only. Since these situations don’t always come up, it can take a little longer to develop a mental toolkit to get the best out of them. One such situation is shooting water – scenes by riversides, on beaches, beside swimming pools or in bathrooms. What are the tricks you can use to get the most cinematic look?


1. Use a circular polarising filter

4952a23d13929fe1903f601843a9ef4d
Without (left) and with (right) a polarising filter

A polarising filter cuts out all light waves except those travelling in a certain plane. Since reflections are usually only in a single plane, by rotating a circular polariser filter until you hit the right angle, you should be able to reduce the reflections you’re seeing. This can have an impact on how water appears on camera. On an overcast day, a CP will allow you to reduce the reflections of the grey sky, making the water look clearer and bluer.


2. Get sparkly

All the evidence you need that shooting towards the sun is good.
Shooting towards the sun provides both lovely backlight and sparkles on the river in this shot from Stop/Eject.

Water will always look prettier, particularly large bodies of it, if the sun is sparkling on it. How do you capture this on camera? Use the principle that the angle of incidence equals the angle of reflection, the same principle you use when positioning a bounce board. As with all day exteriors, shooting at the correct time of day is critical. You want the sun to bounce off the surface of the water and into your lens, which means being on the opposite side of the water to the sun, with the camera facing the sun. Use a top flag on your matte box (a.k.a. “top chop” or “eyebrow”) to prevent lens flare if you so wish.

img_1527


3. Get rippling light

Using a paddling pool and a par can to create a rippling light effect on The Little Mermaid. Note the black fabric as per tip 4 below.
Using a paddling pool and a par can to create a rippling light effect for close-ups on The Little Mermaid.  Note the black fabric as per tip 4 below. At the white end of the paddling pool you can see the stool where the talent sat.

The same principle can be applied to capture rippling light effects on walls, faces, etc. This time you want the sun, or artificial light source, to bounce off the surface of the water and hit your subject. You can suggest an off-camera body of water when there is none by carefully positioning a fish tank, paddling pool or similar in relation to the light and your subject.


4. Kill the bottom bounce

img_1529

Beware that not all the light will bounce off the surface of the water. Some will pass through it, bounce off the bottom of the pool and then hit your subject. If the bottom of the pool isn’t a dark colour, this unmoving bounce light will overpower the rippling light coming off the surface. Lay duvetyne or other black fabric on the bottom of the pool so that the only bounce is from the surface.


5. Fake it

A grip standing by to fake rippling watery light on The Little Mermaid
Grip Sawyer Oubre standing by to fake rippling watery light on The Little Mermaid

If you need to create a rippling light effect without using water, you can fake it with a sheet of blue gel on a frame in place of the water surface. Wobble the frame slightly (only slightly, or the sound department will start to yell at you) and the gel will ripple in the frame, creating a similar effect to water. Thanks to my key grip on The Little Mermaid, Jason Batey, for introducing me to this technique.

Another way to simulate watery light is to bounce a lamp off silver paper or fabric which is being rippled by a fan. More on this technique here.

What about shooting UNDER water? Just one tip for that: hire an underwater DP.

5 Tips for Shooting Water

“Above the Clouds”: October Pick-ups

Day 21 / Friday

My wallet plays a vital part in adjusting the tilt of the camera.

Two and a half months on, and most of the team are back for three days of pick-ups on this comedy road movie. (Read my blog from principal photography here.) Director Leon Chambers showed me some of the rough cut last night, and it’s shaping up to be a really warm, charming film.

Principal was photographed on an Alexa Mini in Pro Res 4444, with Zeiss Ultra Primes and a half Soft FX to take off the digital edge. Since the pick-ups consist largely of scenes in a moving hatchback – the film’s signature Fiat 500 “Yellow Peril” – Leon has invested in a Blackmagic Micro Cinema Camera. Designed for remote applications like drone use, the BMMCC is less than 9cm (3.5″) square, meaning it can capture dashboard angles which no other camera can, except a Go Pro. Unlike a Go Pro, the BMMCC can record Cinema DNG raw files with a claimed 13 stops of dynamic range.

Leon has fitted the camera with a Metabones Speed Booster, converting the BMMCC’s Super 16 sensor to almost a Super 35 equivalent and increasing image brightness by one and two-thirds stops. The Speed Booster also allows us to mount Nikon-fit Zeiss stills lenses – a 50mm Planar, and 25mm and 35mm Distagons – to which I add a half Soft FX filter again. A disadvantage of the Speed Booster is the looseness it introduces between lens and camera; when the focus ring is turned, the whole lens shifts slightly.

Filtration causes the first pick-ups hiccup when we realise that leading man Andy’s blue jacket is reading pink on camera.  This turns out to be an effect of infra-red pollution coming through our .6 and 1.2 ND filters. Yes, whoops, we forgot to order IR NDs. Fortunately we also have a variable ND filter, which doesn’t suffer from IR issues, so we switch to that.

img_1282
Left to right: variable ND, .6 ND, 1.2 ND. As you can see, there is a pronounced magenta shift on the non-variable filters.

Lighting follows a similar pattern to principal, with a little bounce and negative fill outside the car, and Rosco 12″x3″ LitePads on the dashboard for eye light inside. On the move, Rupert and I monitor and pull focus wirelessly from a chase car. Referring to the false colours on an Atomos Ninja, I radio Leon to tweak the variable ND between takes when necessary. I miss the generous dynamic range of the Alexa Mini, which so rarely clipped the sky – and I do not buy the manufacturer claims that the BMMCC has only one stop less, but it still does an amazing job for its size and price.


Day 22 / Saturday

I start the day by reviewing some of yesterday’s footage side-by-side with Alexa Mini material from principal. They are very comparable indeed. The only differences I can detect are a slightly sharper, more “video” look from the BMMCC, and a nasty sort of blooming effect in the stills lenses’ focus roll-off, which reminds me of the cheap Canon f1.8/50mm “Nifty Fifty” I used to own.

A couple of quick shots at Leon’s, then we move to his friend Penny’s house, where a donkey and a horse look on as we set up around the Peril in Penny’s paddock. There are some inserts to do which must cut in with scenes where the car is moving, but since we don’t see any windows in these inserts, the car remains parked. Two people stand, one on either side of the car, each sweeping a 4’x4′ polyboard repeatedly over the windscreen and sunroof. With heavy cloud cover softening the shadows of these boards, the result is an effective illusion that the car is moving.

img_1300

After lunch we have to capture additional angles for the traffic jam scene originally staged on day 14. By an amazing stroke of luck, the sun comes out, shining from almost exactly the same direction (relative to the car) as Colin bounced it in from with Celotex during principal. To begin with we are shooting through the windscreen, with a filter cocktail of half Soft FX, .6 ND and circular polariser. Since Andy is no longer wearing the blue jacket, I decided to risk the .6 ND rather than stacking multiple polarisers (the variable ND consists of two polarising filters). The next shot requires the camera to be rigged outside the driver’s window as the car drives away (pictured right).

Then we set up for night scenes to cut with day 11, which, like the inserts earlier today, we achieve using Poor Man’s Process. Instead of polyboards, Gary sweeps a 1’x1′ LED panel gelled with Urban Sodium over the passenger side of the car to represent streetlights. Rueben walks past the driver’s side with another 1’x1′ panel, representing the headlights of a passing car. I’ve clamped a pair of Dedos to Rupert’s Magliner, and Andrew dollies this side-to-side behind the Peril, representing the headlights of a car behind; these develop and flare very nicely during the scene. For fill, the usual two 12″x3″ LitePads are taped to the dashboard and dimmed to 10%.

For a later stretch of road with no streetlamps or passing cars, I use a low level of static backlight, and a static sidelight with a branch being swept in front of it to suggest moonlight through trees.


Day 23 / Sunday

After a brief scene against a tiny little micro set, we have more scenes to shoot around the parked Peril – and it’s supposed to be parked this time, no movement to fake. Unfortunately it’s raining, which doesn’t work for continuity. Although I’m worried it will block too much light, the crew erect a gazebo over the car to keep the rain off, and in fact it really helps to shape the light. I even add a black drape to increase the effect. Basically, when shooting through the driver’s window, it looks best if most of the light is coming through the windscreen and the passenger’s window, and when we shoot through the windscreen it looks best if most of the light is coming through the side and rear windows; it’s the usual cinematographic principle of not lighting from the front.

img_1304
Shooting through the driver’s window

After another driving scene using car rigs, we move to our final location, a designer bungalow near Seven Oaks. Here we are shooting day-for-dusk, though it’s more like dusk-for-dusk by the time the camera rolls. I set the white balance to 3,200K to add to the dusky feel, increasing it to 4,500K as the daylight gets bluer for real. The extra one and two-thirds stops which the Speed Booster provides are very useful, allowing us to capture all four steadicam shots before the light fades completely.

And with that we are wrapped for the second, but not final, time. Crucial scenes involving a yet-to-be-cast character remain for some future shoot.

Keep up to date with Above the Clouds on the official Facebook page or Instagram account.

“Above the Clouds”: October Pick-ups

“Above the Clouds”: Week 4

IMG_0725Day 18 / Tuesday

Yesterday some of the crew started the long drive up to Skye, but for a lucky few – me, MUA Helen and actors Naomi and Andy – our journey starts today with a flight from Luton to Inverness. From there it’s a two-and-a-half-hour drive across the Highlands to the Kyle of Kochalsh, where Gary is waiting for us with his motorhome and the crafty table all set up. Soon afterwards the vans arrive, and the Yellow Peril. From 4pm we are shooting on a little ferry, big enough to hold three or four cars, as it pootles back and forth, back and forth between Skye and the mainland. It is, I think, the most stunning location I have ever shot in. The mountains tower over us from either side of the water, which sparkles in the sun. Although the light turns cloudy pretty quickly, the scene looks epic. All I do is add the usual dashboard LEDs in the picture car, and some sky bounce from Celotex, and darken the skies a little with an ND grad.

IMG_0713

Day 19 / Wednesday

For some reason there’s no water at the cottage where many of us are staying, so it’s a slightly whiffy cast and crew that rocks up in another stunning location this morning. In common with the whole shoot to date, the weather – and therefore the light – is very changeable. We have to roll between the squalls that drift across the valley. An interesting continuity issue arises with the mountains in the background of shot: the light on them keeps changing as clouds move across them. The weather here really is something else; this morning we saw a rainbow so close and so low to the ground that it felt like we could have walked over and touched it.

IMG_0751In the afternoon we’re at yet another stunning location, a bench overlooking a bay. For once the light is fairly constant and sunny, which gives us lovely sparkles in the sea. Again I frame the master like the painting in the Turner, with the horizon bang on the vertical centre of frame: clouds above, landscape and characters below. When we flip around to shoot the singles, the light is hard on the actors’ faces, but frontal, which at least is the most flattering kind of hard light. And it fits well with the dialogue, which references it being sunny, so it wouldn’t make sense to put a diffusion frame up. All I do is have runner Jacob stand just out of frame with some poly, which lifts the shadows a little and makes sure we see into Naomi’s eyes when she looks away from the sun.


Day 20 / Thursday

IMG_0768Various small driving scenes to start with. Rupert and Max reconfigure the camera as per our test of week 2, and I climb into the Yellow Peril’s modest rear seat to capture the action. I black out the rear window to get a classic dark-to-light depth effect: underexposed backs of seats in the foreground, the actors (including Naomi’s reflection in the rear view mirror) correctly exposed in the midground, and the view through the windscreen slightly overexposed in the background.

We also shoot exterior up-and-pass shots of the car amidst the spectacular scenery, before crossing the Skye Bridge to record a scene in a mainland village. Here we’re shooting dusk-for-night, so I set the white balance to 3,200K and heavily grad the sky. For shots inside the car, I plaster multiple Litepads over the windscreen, gelled with half CTO. The intention was for these to represent the car’s courtesy light, but with a fair amount of daylight coming into the vehicle the effect is more subtle, serving only to warm up what would otherwise be very cold skin-tones at 3,200K.

IMG_0775On the final set-up, appropriately enough, a car with clouds painted on it happens to drive by. And with that, principal photography is wrapped. There is a fifth week to do at some point, perhaps September, when a certain critical role has been cast, but for now the shoot is over. Andy, Naomi, Helen and I will meander back to Inverness tomorrow, while the rest of the crew drive south. I’ve had a great time, and I look forward to seeing a rough cut and shooting the remaining scenes later in the year.

Keep up to date with Above the Clouds on the official Facebook page or Instagram account.

“Above the Clouds”: Week 4

“Above the Clouds”: Week 3

IMG_0572Day 12 / Sunday

A split day, starting with two scenes at two different petrol stations (one of them open!). It’s a sunny day and when the cast stand next to the Yellow Peril (the picture car) they are bathed in yellow bounce. We build on this by bouncing more light with the gold side of a Lasolite.

IMG_0590Next we have some interiors in a soup kitchen, which will intercut and contrast with the dining room scenes from day one. Whereas the dining room had perfect three point lighting with a Rembrandt key, I want the soup kitchen to look much less pleasant, so I use toplight, broken keys and cross-light to bring out the texture of the peeling walls.

Our last scene is a night exterior. A sodium vapour security light which we can’t turn off is already backlighting the set. Rather than fighting it, we beef it up using the 1.2K gelled with Urban Sodium. This forms half of a cross-backlighting set-up, paired with a 1×1 LED panel gelled with Quarter Plus Green. Another 1×1 gelled with Mustard Yellow provides a pool of light in the background, while the 4×4 Kino gelled wth full CTB supplies a tiny bit of ‘moonlight’ fill. I’ve never lit a scene with so many different colours, but it feels realistic because there are so many different kinds of streetlamps and security lights in our towns and cities these days.


Day 13 / Monday

IMG_0595In the pub all day. The scenes are meant to have an evening feel, so we black out the windows with thin weed-blocking material which lets a little light through, and close the curtains. On a tungsten white balance we get just a little blue glow coming through the curtains. The window in the door has no curtains, so we gel it with .9 ND and it looks convincingly dusky outside.

Fairly standard stuff today, lighting wise. Cross-backlighting for bar scenes, a bit of blue glow in the deep background from a kino to give depth and show up the smoke.

We echo the Turner scenes with a symmetrical shot of Andy and Naomi seated in front of the fireplace. For a soft, pleasing key we bounce fire both the Dedos into a poly board. A double CTO-gelled LED panel on the floor enhances the backlight from the fire, and the pub’s practicals do the rest.

One of the last close-ups we do has an alcove in the background. It bothers me that the brickwork in there is the same shade and tone as the foreground brickwork – we’re losing the dimensionality – so I have Colin run in with a bit of half CTB to cool down the sconce slightly and separate the alcove.


Day 14 / Tuesday

IMG_0612

IMG_0613More micro sets in Leon’s living room. One of them is a tiny under-the-stairs bathroom, which we light with a single bare bulb hanging down into the shots. Again the Alexa’s dynamic range allows me to hold all the highlights and shadows, even when Andy is inches from the bulb, and it looks completely authentic on camera.

For the first time I try gelling the Rosco Litepads to match the tungsten Dedos. It doesn’t work; the Litepads are noticeably greener. If I try that again I’ll need to spend some time to find the correct cocktail of minus green and CTO gels.


IMG_0633Day 15 / Wednesday

After one final micro set in Leon’s living room we move upstairs for some crucial scenes in the master bedroom. I light it with a 2.5K HMI coming in through the window, that being really the only option. I shape this with gels, diffusion and black-out on the window or the lamp-head itself. For example, when we do Naomi’s close-ups I stick two or three layers of opal to the middle section of the window. That way we keep the nice hot streaks on the background wall, but Naomi has a much softer light on her.

The only other sources are the two 6×2″ Litepads hidden in the wardrobe behind a key prop, dimmed right down so they just silhouette the prop very, very slightly. For the final bedroom scene I go purely with available light, since the sun is now shining in at a nice angle, hitting the bed and bouncing back up into Naomi’s face.

It’s our last day in Kent, and many of the crew will be returning home tonight and commuting for the rest of the week, so it feels like the end of an era. Nevertheless, we remain detached and professional. No-one kidnaps Naomi’s stuffed dog Rupert and messages a picture of him tied up and gagged with gaffer tape, and definitely no-one retaliates by kidnapping Colin’s dashboard Spider-pig.


Day 16 / Thursday

IMG_0642

We are at Longcross Studio & Test Track, an ex-MOD facility in Berkshire. We stage a traffic jam on a road originally built for tank trials. The 85mm lens gets more use than it has the whole shoot so far. The compression of perspective works perfectly for the scene, enhancing the feeling that the characters are hemmed in both physically and psychologically.

Most of the action takes place inside the car and is shot raking across the characters from a side window. To get the best shape to the natural light, we black out the sunroof and place negative fill on the window closest to camera, then bounce in extra light through the windscreen.

The rota polar sees extensive use again, although sometimes it reveals weird circular patterns in the car’s window glass.


IMG_0650Day 17 / Friday

Our second day at Longcross, and this time we’re using the main loop of track. It’s non-exclusive, so occasionally a prototype sports car zooms past us, or a stills photographer hanging out of the boot of an SUV.

Day-playing grip Darren has brought his universal mount which we use as a hostess tray, shooting in through the passenger or driver’s windows. (Leon is not a fan of bonnet-mounted shots.) The rig prevents us from closing the window, which necessitates minor rewrites, but the shots look great and allow us to cover large swathes of dialogue relatively quickly.

The picture car is towed on an A-frame by Andrew’s Landrover. Riding in the Landrover are Leon, Rupert and me, each with a monitor. Leon’s shows a clean picture, Rupert’s of course has focus assist, and I switch mine between clean and false colours so that I can monitor the exposure as we go around the track. Leon connects his mixer to the Landrover’s stereo so that we can all hear the dialogue. Communication back to the picture car is achieved via radio with Max, hiding on the back seat, popping out to slate and even reading in lines for a phone conversation.

IMG_0658Col rigs the two 6×2″ Litepads to the dashboard. They mitigate the sunroof’s toplight by filling in the shadows very slightly, but more importantly they put a sparkle in the actors’ eyes, which always helps the performances come across on camera. I take a light reading inside the Yellow Peril before each lap, but due to the number of trees around the track, light levels during the takes are about two stops below what I get in the car park when we’re prepping. Fortunately the cloud cover is fairly consistent today so there aren’t hot patches of sun to contend with.

Today wraps the English portion of principal photography for Above the Clouds, and we sadly say goodbye to Colin, Zoë, Alice and Andrew. It’s been a really fun team to work with, and it will be strange next week without them.

“Above the Clouds”: Week 3

Lensing Ren – episode 5

Season one of Ren: The Girl with the Mark has come to an end, and to ease the pain a little, here’s one last video breakdown of the show’s cinematography. This week I talk about the exterior scenes from daylight through sunset to night.

Here is the lighting plan for the final scene:

Village-night-1080p

Check out the article I wrote during the shoot about the sunset scene if you’re still hungry for details. And here is an unpublished blog post I wrote during the shoot about the village night exteriors…

The 2.5K HMI backlight
The 2.5K HMI backlight. The dimmer board for the Cyclotron can be seen in the lower right.

The last two days of principal photography on Ren were actually night shoots. It was great to take the village set that I’d shot in natural light for five weeks and chuck some of my own light at it.

In his American Cinematographer interview about The Monuments Men (February 2014), Phedon Papamichael said, “My big night-exterior lighting setups usually have one source” – often a backlight, judging by the examples given in the article – “and then I use whatever practicals are in the shot.” My approach is much the same, though a big source for me is a 2.5K HMI, not an Arri T12, sadly!

One of the Urban Sodium-gelled 800W Arrilites beefing up the braziers

I knew our key shot was going to be Ren’s POV looking up the street to the Kah’Nath Master flanked by several archers, with Karn and Baynon in the background. I set up my 2.5K dead in the back of the shot, its stand hidden by the furthest house facade.

Another of the Urban Sodium-gelled 800W Arrilites beefing up the braziers
One of the Urban Sodium-gelled 800W Arrilites beefing up the braziers

The plan was for the archers to light their arrows from two braziers, one either side of the street, so Chris Dane and Amanda Stekly dressed these in accordingly. I set up an Arrilite 800 near each one, choosing Urban Sodium gel to give the “firelight” a grungy colour appropriate to the bad guys. (I was shooting on a tungsten white balance to turn the HMI moonlight blue.)

The dimmers controlling the Arrilites

Chris – by this time well-attuned to my lighting needs – also rigged a third brazier to act as the key light for himself (Karn) and James Malpas (Baynon), towards the back of the set. The Arrilite for this one I gelled with full CTO for a yellower, friendlier colour.

All three Arrilites were run through in-line dimmers, and various bystanders were co-opted to flicker them throughout the evening.

Bulbs
The Cyclotron

I rigged a Cyclotron behind the window of the background house – four 100W bulbs under a sheet of CTO, wired to Colin’s dimmer board so they too could be flickered, suggesting firelight inside the house.

The Celotex bounce board

I figured that the front of this house would still be very dark, being out of range of the Arrilites and facing away from the HMI, so I had gaffer Richard Roberts rig a Celotex board to bounce some of the HMI light back onto it. As it turned out, when it got dark and we fired everything up, there was lots of bounce off the set pieces closest to the HMI anyway. This was a nice bonus that gave us more options when blocking Karn and Baynon’s actions, without having to set up extra lamps.

A sunset view of the lighting set-up from roughly the master camera position. The LED panel on the right was used only as a work light.
A sunset view of the lighting set-up from roughly the master camera position. The LED panel on the left was used only as a work light.

When the braziers were lit and the Master and soldiers strode onto the set in their awesome costumes (courtesy of Miriam Spring Davies and stand-in wardrobe supervisor Claire Finn), we all felt we had a truly epic sequence in the can.

Ren archers

If you’ve missed any of Lensing Ren or Ren itself, here’s a playlist featuring every episode of the fantasy series, interspersed with the corresponding cinematography breakdowns:

Lensing Ren – episode 5