Undisclosed Project: Elevation

Prep for the yet-to-be-announced Shakespearian feature continued last week. Tuesday and Wednesday saw me on Zoom calls with the producers – discussing camera kit quotes – and the costume designer. “Will we see enough of his face through this headgear?” was a question for the latter. She in turn asked how white a white coat should be, and how dark surrounding characters should be to make one person in black stand out. Difficult things to quantify, but important.

The week’s main event was another two-day recce with the director and production designer. The designer had produced beautiful and detailed mood-boards for every room, and had even started to bring in the right furniture and test paint colours. The main aim of the recce was to discuss and sign off on his decisions so that decoration and dressing could step up to full steam.

As we moved from room to room, trying to keep in story order whenever possible, the director revealed lots of his thoughts about the tone and key beats of each scene. I was pleased to find that these were largely in a similar vein to notes I had amassed on my own spreadsheet. And when they weren’t in sync, that was very useful to know at this stage! For most scenes I showed him a reference image or two, again from my spreadsheet, to double-check that we were on the same page.

We were visited during the recce by a grip who had come to see whether a crane would fit into our main location, and if so what kind of crane and whether it could achieve the shots we wanted. I had envisaged using a Giraffe like the one we had on The Little Mermaid, but the grip suggested we would be much better off with a 23ft Technocrane and a basic remote head, as this can telescope and retract rather than only sweeping around in an arc. We measured the distances to see where the camera could end up, and then I used Artemis Pro – a director’s viewfinder app – to see what framing that would translate to with various lenses. One of our most important shots should just be possible at the full extent of the arm, combined with the full range of a 25-250mm zoom.

Whether the budget can afford the crane, however, is yet to be confirmed. This week I am due to conduct camera and lens tests, and once I’ve made a decision on those then we will know what is left for fancy grip equipment!

The only other thing to happen last week was the hiring of a data wrangler. Since I lined up the 1st and 2nd ACs quite soon after my own hiring, the camera department is now complete.

Undisclosed Project: Elevation

20 Years of Blogging

Today is the 20th anniversary of my first ever blog post. On March 4th, 2001 I wrote the inaugural “journal” entry on the-beacon.com, a website about a terrible no-budget action move I was writing, directing, producing, etc, etc. (clip below). My blog continued across two other project-specific websites for the next few years before they all got integrated into neiloseman.com in 2011.

There is a history of my blogging exploits in my 1,000th post from January 2015, and if you’re interested in blogging yourself, I shared some tips not long afterwards. (The post you’re reading now is the 1,261st, in the unlikely event that you care.) If you visit the Blog Archive page you can delve back into my old posts, either by month and year, by production or by topic.

It is strange to think how different the world was when I wrote that first post. The Twin Towers were still standing. Buying a take-away latte was swanky and cosmopolitan. Ordering something remotely meant getting a catalogue, then filling in a form and posting off a cheque and waiting up to 28 days. Your choice of filming formats came down to celluloid or standard definition DV. Everyone still took their holiday snaps on 35mm. The internet was all dial-up. VHS was still the dominant home video format, though DVD was on the rise. “Netflix” was probably something fishermen did. Superhero movies were rare. Flat screens and touch-screens were a sci-fi dream. I for one didn’t own a mobile phone. There was no social media. The term “blog” had been coined but wasn’t widely known. And the idea of a pandemic shutting down the world for a year, keeping us from our loved ones and making us all mask up in Tesco’s was utterly inconceivable.

Blogging has certainly been useful to me. It helps me to organise my thoughts, and I frequently check my old posts to remind myself how I did something so that I can repeat the trick… or avoid making the same mistake again! It’s even got me work, writing for RedShark News since 2017 – a website edited by none other than Simon Wyndham, fight choreographer for that blog-starting film of mine, The Beacon. That in turn has led to me writing for British Cinematographer magazine since the end of last year.

It’s quite fitting that now, as back in March 2001, I am prepping for a feature film, and sharing that process on this blog (albeit in vague terms, as the project hasn’t been officially announced yet). The budget may be a tad bigger, and I may only be DPing rather than doing pretty much all the major jobs myself, but some things haven’t changed; in my second ever post, I complained about my main location being closed due to a disease outbreak…

20 Years of Blogging

Undisclosed Project: Iteration

I continue to saturate myself in the script for the yet-to-be-announced Shakespearian film. Some other little projects I had going on have now wrapped up, leaving me free to concentrate purely on this production, which is due to start shooting a month from now.

I spent the best part of last Monday reading a new draft of the screenplay and updating my spreadsheet of notes to reflect the changes. Going back over this spreadsheet and the script and re-evaluating them from different angles formed a signficant part of the rest of the week. On Thursday, for example, I focused on the swordfight (narrows it down, Shakespeare fans!), scouring YouTube for reference videos and noting which camera angles seem most dangerous and engaging. In fact, watching references was another big part of the week. I worked my way through the whole Godfather trilogy (above), some more episodes of Servant, bits of several action movies that have a specific type of night exterior, and a couple of the lead actor’s recent films, to see how other DPs have lit and lensed him.

At the end of the week I went back over the spreadsheet and filled in at least one idea for every scene that did not yet have an entry in its “camera” or “lighting” column. Sometimes this would be an idea for a specific shot – e.g. “angle from outside the window looking in”; sometimes it would be a general vibe for the camerawork – e.g. “close, handheld, intimate”; sometimes a specific source – e.g. “soft top-light rigged to ladder”; sometimes a more general lighting note – e.g. “group in a patch of light, surroundings dark”.

Production sent over the quotes they have received for my camera list. At least one of them was within the budget, so that’s good! This week I’ll discuss that with the producers and hopefully decide which rental house we’re going with.

Speaking of equipment, a cheap novelty optical item arrived from eBay. I used this and my iPad to shoot a very rough demonstration of how we might achieve a special effect in camera, sending the video to the director for his feedback. He liked it, and wants to add in a few more instances of it throughout the film.

Another idea I proposed was a lighting effect, for which I sent the director this video I’d found online (below). I don’t intend to do something exactly like this in the film, but I saw a way it could be modified to our story. I ended up shooting my own rough test that is closer to how I see it working in our film.

Less exciting than any of the above, but very important, was taking an online Screenskills course in Covid awareness. I’d done the Basic Awareness course already, which takes about 30 minutes including a brief quiz, but Screenskills were offering free places for HoDs on a more in-depth course, so I signed up. This consisted of a three-hour presentation about the virus, how it can spread on set and what can be done to mitigate it in various departments, followed by another quiz. I learnt a few new things and my awareness was indeed raised.

Undisclosed Project: Iteration

Undisclosed Project: Collaboration

Prep on the yet-to-be-announced Shakespearian feature continued last week. (Read the previous week’s post here.)

On Monday I went back to the location with the gaffer, someone I’ve worked with several times before, and looked at all the spaces we will be using. It is too early to start any lighting plans, but we talked in general terms about what sort of instruments we might want to use and roughly where. The gaffer had already seen my lighting mood board (above) and we had discussed the overall look on the journey to location, so we were already on the same page about what we are trying to achieve. He had some technical conversations with staff at the location about the existing lighting and power sources, and we finished the day by checking out one of the film’s few exteriors as it was getting dark, in order to see what existing sources there are for the night scene we will be shooting there.

I spent a significant chunk of Wednesday on a Zoom call with the production designer, and a couple of other crew, going through each of the spaces again and finding out what changes the art department are planning to make to them. It was great to see the designer’s reference images and to show him some new ones of my own so that we can bounce off each others’ ideas and keep the film on a coherent track. This is especially important as we intend to rely heavily on practical lights for many of the rooms. The location has some already in place, but we will be adding lots more.

The designer mentioned The Shining as a useful reference for the project. To my shame, I had never seen it, a mistake I swiftly corrected. I immediately saw that the designer was right, as the film’s setting of a single, large, empty location lit almost entirely by tungsten practicals in the public areas and fluorescents in the service areas has a lot in common with our intended look for this project.

I lost no time in passing the reference on to the gaffer, and to the director, who I spoke with on Friday. We discussed a number of general topics – approaches I think is the best word – and he updated me on some changes to the script.

I’ve been developing a large spreadsheet breaking the script down scene by scene, with basic info like location, time of day and a brief summary of the action, as well as notes on character, camera and lighting, and a couple of the most relevant reference images. This will get more detailed and specific as prep progresses.

Watching reference material is a big part of the process at the moment. As well as The Shining, I’ve recently checked out Alfonso Cuarón’s Roma, M. Night Shyamalan’s Servant, Ingmar Berman’s Fanny and Alexander, and I have Francis Ford Coppola’s Godfather trilogy on my list too. Shoot for the moon and you might land on the roof, right?

Finally, with the help of my 1st AC, I put a very rough camera list together. My hope is that soon I can conduct tests to make a final decision on camera and lenses.

Undisclosed Project: Collaboration

Undisclosed Project: Exploration

Last week saw the start of prep for me on a new feature film. The project hasn’t officially been announced yet, so I’ll simply say that it’s an adaptation of a Shakespeare play.

Prepping a feature can seem a bit overwhelming sometimes, more so than actually shooting it. At least when you’re shooting, you only have to worry about one scene at a time. Where do you start when prepping 100 minutes of moving images?

Familiarity with the script is the first thing. I’m one of those people who was put off Shakespeare by being forced to study him at school, so – other than a few famous lines – I knew nothing about this play until I was hired a few weeks ago. Since then I’ve endeavoured to become as familiar as possible with the material, both the play and the film script.

The director wrote a 24-page treatment which makes very clear the themes he wishes to draw out of the play, but last week was my first opportunity to sit down with him and start to get inside his head. This was part of a two-day recce of the film’s single location: the first day exploring the space and seeing what was available; the second day starting to pin down exactly where we would shoot what.

This is an unusual adapation set in no particular period (the director says it should have “a feeling that’s not now”) so the possibilities are wide open. I have developed a mood board of 60-odd reference images, and last week was a chance to see what chimed with everyone else.

Also present at the recce were the production designer and other members of the team, and I began to see the directions they were going in with their own creative contributions. These of course inspired further ideas for my cinematography, as did a conversation I had with the lead actor. “The camera is a character,” he said as we discussed how to handle the soliloquys.

I always think about how camerawork can reflect and enhance character, but I’ve rarely thought of the camera as its own character. On a similar theme, the director’s treatment describes a “clever, all-seeing camera”. Actualising that idea is a fascinating challenge for me. What does the camera want? What is its relationship with the other characters? How do those relationships develop as the film goes on?

These are the kind of broad, over-arching ideas that must be grappled with in these early days of prep. Soon I will have to draft an equipment list and get into all kinds of other specifics, but it’s important to allow time for exploration.

Undisclosed Project: Exploration

“The Little Mermaid”: Prep Diary Part 2

This is the second part of my flashback to spring 2016 and the pre-production for The Little Mermaid. Part one is here.


Weeks 3 & 4

Nothing much seems to happen the third week of prep. After the Shirley shoot finishes on Monday, I take Tuesday off. I’m so exhausted I can barely move, which bodes ill for the 26-day slog of principal photography that’s coming up! Things are quiet in the office on Wednesday and Thursday, and Friday is Good Friday so it’s a holiday. The three-day weekend is enjoyable but also frustrating given how much prep there is still to do.

Next Monday I go scouting with Anthony, the new locations manager. He takes us to a quarry ten minutes down the road from the office, where we finally find the cliff we’ve been searching for since prep began. The location has a lot of potential for many scenes, so we’re very pleased. (Ultimately it went unused because of safety concerns.)

On Tuesday there’s a page turner, which is like a table read only without the cast. We spend five hours going through the script, asking questions and addressing issues that might come up. I try to clarify certain things in the script and make sure everyone knows how Chris, the director, wants to approach things. (He’s just a talking head on my iPad right now, due to visa delays.)

Gaffer Mike and key grip Jason have arrived in town for the page turner, and on Wednesday morning we get down to the business of writing a lighting list. It’s difficult for me to get my head around the crew structure here in the States. The gaffer is the head of the electrical department, so they only deal with lamps and distro. Flags, cutters, nets, black-out, bounce boards and so on are handled by the grip department, led of course by the key grip… who also handles the camera grip, like cranes and dollies.

Most of the rest of the week is spent visiting locations with Anthony, Mike and Jason, while the latter two finesse the list and get quotes. On Wednesday evening I convene the camera department to debrief from the Shirley shoot and discuss what can be done to improve the crew structure, equipment package and workflow.

By the weekend it stills feel like there is much to figure out, and there is only one week left before principal photography begins. Still, I won’t be sorry to say goodbye to office work and get back on set.


Week 5

It’s the last week of preproduction and we should be spending it doing tech scouts and production meetings. But unfortunately many HoDs have been hired late, and there are lots of locations left to find, so it’s a frustrating week for me, waiting for stuff to happen. I try to nail down the grip and electrical items which are only required on specific dates, but it looks like some of that will have to be done as we go along.

I spend more time location scouting with Anthony, during which I realise just how time-consuming it is to drive around, spot possible places, make friends with the owners and just get to the stage where any of the crew can check it out.

We visit a possible beach location, a nice little spot on the same island we did the Shirley Shoot on. Chris, still unable to enter the US, participates by video call. He wants me to roll up my trousers and test the water, because the principal cast will have to spend hours in it. It’s nice enough for a paddle, but I don’t think I’d want to spend a day up to my waist in it. (Actually, that’s exactly what I and several other cast and crew end up doing.)

As the week goes on I spend less and less time at the office, because there simply isn’t much left I can do. I occupy my evenings swimming in the pool and binge-watching season one of Outlander, which Starz have made free for a couple of weeks here in the US. The cinematography in the first couple of episodes is utterly stunning, in fact it’s the most beautiful cinematography I’ve ever seen. It’s very inspirational, and I have a couple of good ideas for lighting A Little Mermaid as I watch it. (Recently I had the exciting chance to ask David Higgs BSC about lighting the Outlander pilot, for an article in the January issue of British Cinematographer.)

Chris finally arrives on Saturday, two days before the shoot. In the evening there’s a “pre-game” party by the pool. It finally feels like we’re making a movie. The equipment has all arrived, and there are trucks and trailers parked outside the production office.

On Sunday we do the closest we’re going to get to a tech scout. It’s great to be able to walk around a location with the directors at last. (Writer Blake has joined Chris as a co-director.) I try to use Helios, a sun tracker app, to work out when the sun will hit the back of the house, but in the end I trust my own estimation better. I whip out my light meter to check the contrast ratio between sunlight and shade; it’s 8:1 (3 stops), well within the Alexa’s dynamic range, but setting up an ultrabounce to fill in the shadows, as the key grip suggests, will make the image much more pleasing to the eye.

I figure out the broad strokes of the lighting for the interiors and let the G&E (grip and electric) team know the plan. With Larry, the 1st AD, I discuss how we’re going to maximise our two cameras in order to make our day.

I can’t believe we’re about to start principal at last. Five weeks is by far the longest prep time I’ve ever had for a movie. It’s feels like I’ve been here forever! But I’m only halfway through my time in Savannah…

Here are links to my diary entries from the shoot:

The Little Mermaid is currently available on Netflix around the world.

“The Little Mermaid”: Prep Diary Part 2

“The Little Mermaid”: Prep Diary Part 1

I’ll soon be starting five weeks of prep for a feature, and it’s got me thinking about the five weeks I spent in the spring of 2016 prepping The Little Mermaid. I published a number of entries from my production diary when the film was released, but the entries from pre-production have gone unseen… until now…


JANuary 12th, 2016

It is four or five months since Chris, the director, first mentioned the project to me. In that time he has been developing the script with the writer and producers, and I’ve read a draft or two. Last week I was introduced to the producers by email, and today Chris and I get together to start chatting about the film.

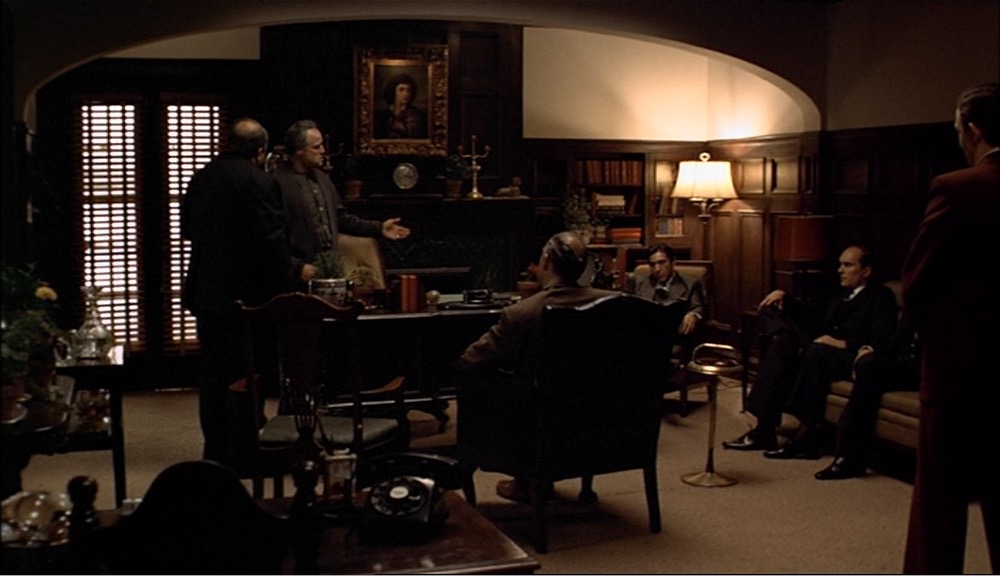
It’s just broad strokes today, nothing structured, nothing firm. He talks me through the next round of script changes and we watch some bits of DVDs I’ve brought. I’m not thinking photographically yet, just tone and genre, so we watch parts of The Rocketeer and Big Fish. I start to get some basic ideas of what Chris does and doesn’t like.

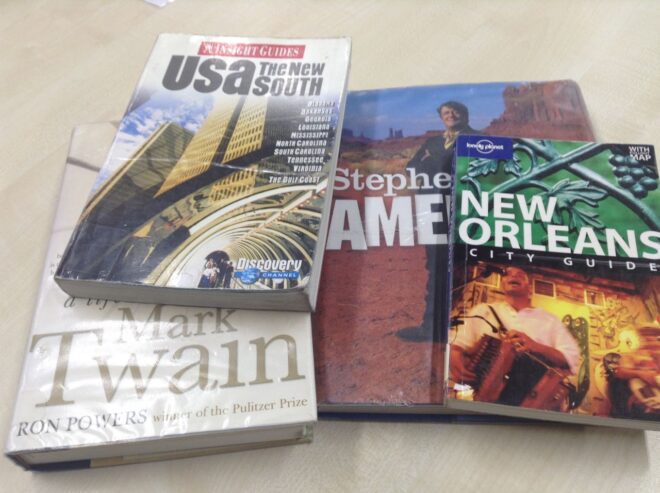
Yesterday I went to the library to get my head around the geography of the state our story is set in, and bit of the history and culture. I found a book called Photographing America and it has some interesting plates from the Deep South in the 30s and 40s. They set the stage for me in terms of architecture, landscape and clothing, but their gritty black and white photography is not appropriate for this film.

Chris and I Skype Fabio, the line producer, and later have a brief conference call with producers Armando and Rob. At this stage it is just about introductions. Chris enthuses about me to them, and curates some stills from Ren: The Girl with the Mark to wow them with. Armando responds positively – it’s just the look he’s after for this. Well, this is the second feature job Ren’s got me. Cheers, Kate!


Week 1

Since that day in London with Chris, I’ve done bits and pieces of prep around finishing up post on Ren. The script went through a few more drafts, I joined in a few conference calls with members of the team, and started a shot list.

But on March 5th I fly into Savannah, Georgia and I’m straight into full-time prep, living and breathing A Little Mermaid.

On Sunday I wake early, my body still five hours ahead of US East Coast Time. After talking to Chris, who’s still in the UK due to visa delays, I take a ten-minute walk through the sunny streets of Savannah to meet David, the storyboard artist. We eat blueberry pancakes with maple syrup and he shows me his boards for the movie’s finale. Chris Skypes in and we discuss the priorities. We need about 15 more sequences boarded – at least key frames – ASAP so that production designer Jay can be sure to accommodate our needs in the sets he is already starting to build.

At noon I head over to an apartment complex where Jay and line producer Fabio are staying. This place has a pool so I’m getting myself moved here as soon as I can. We spend seven or eight hours, with Chris on Skype, going through the schedule line by line, making sure everything is doable and everything is in the most efficient order.

Poppy Drayton is playing our mermaid. Back at the apartment I watch a trailer for The Shannara Chronicles and screen-capture all her close-ups. I analyse the lighting in each one, labelling them accordingly in a folder. Her time on this production is limited so I probably won’t get to camera-test her; I need to figure out how to light her based on what other DPs have done.

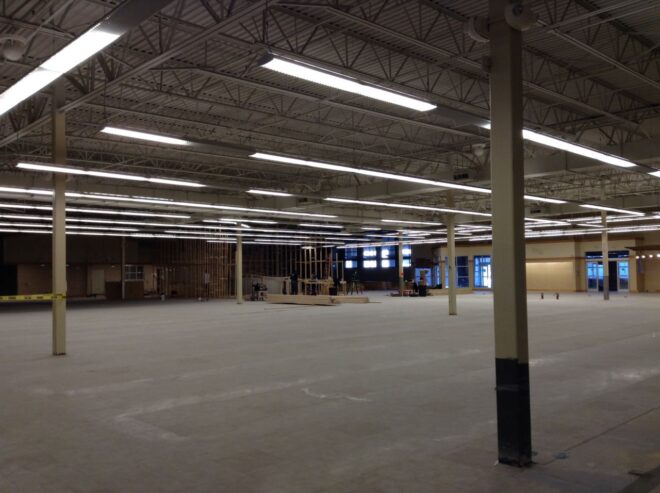
Monday is my first day at the warehouse. It’s an old supermarket that’s been gutted. There are four or five small offices and then a huge open space, part of which is occupied by the bones of the “rocky pool” set.

The week soon settles into a blur of video calls with Chris, interviews with potential camera assistants and gaffers, and lots of discussions about sets and locations. It’s really exciting to be shown around the space by Jay as he describes all the sets he’s going to build. For some scenes there is a lot of back and forth about whether they should be studio or location. We are working with a child actress and Chris is very keen to get the best performances, so the level of control we could get in the studio is very appealing, but that must be balanced against our art department budget.

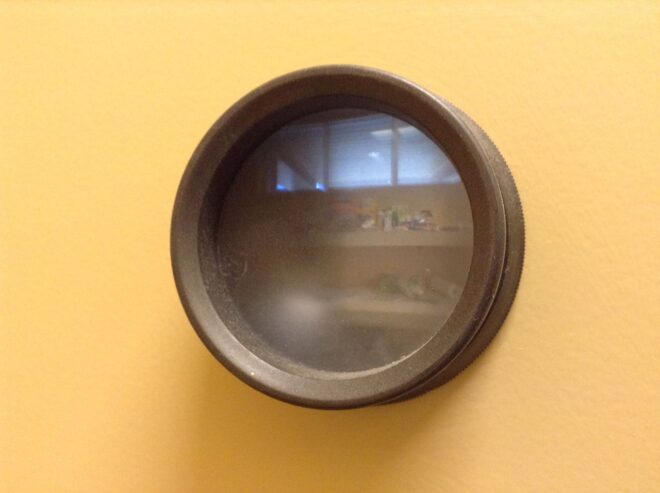
I’m assigned an office that’s just 6ft square but is very cool because it has a sort of camera obscura in the door so I can see a little projection of what’s outside. Of course the door doesn’t really close properly (particularly once I’ve run an extension cable in to compensate for the lack of functioning power sockets in the room) but never mind. By mid-week I have a monitor to hook my Mac Mini up to and I’m properly in business.

I task the PAs with printing out the script and taping it in a long line of pages along a wall along with the corresponding storyboards. Eventually we will add reference images and concept art, if I can ever get access to a functioning colour printer!

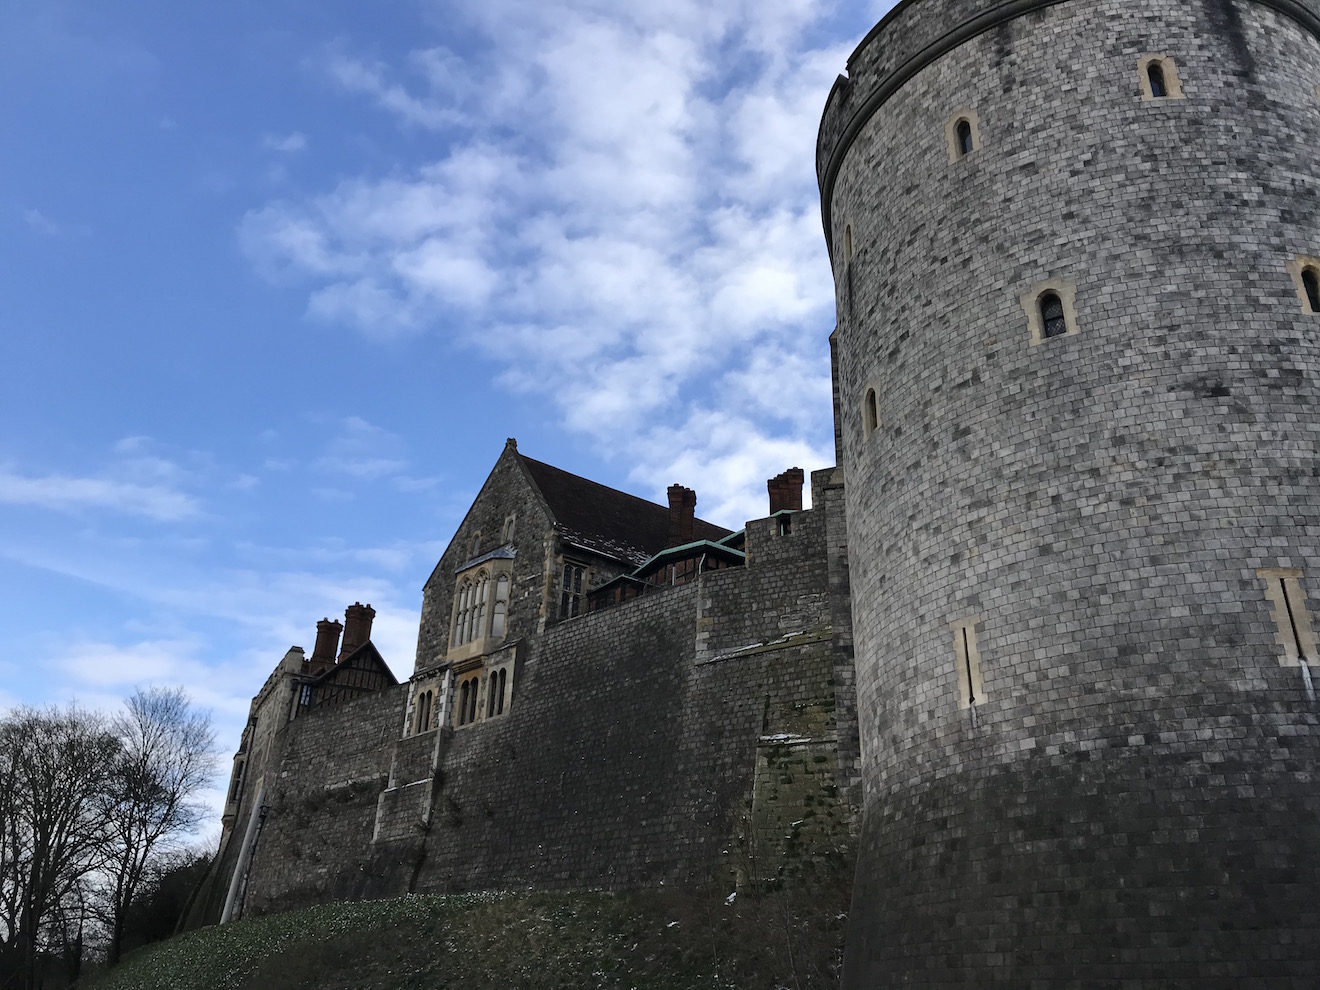
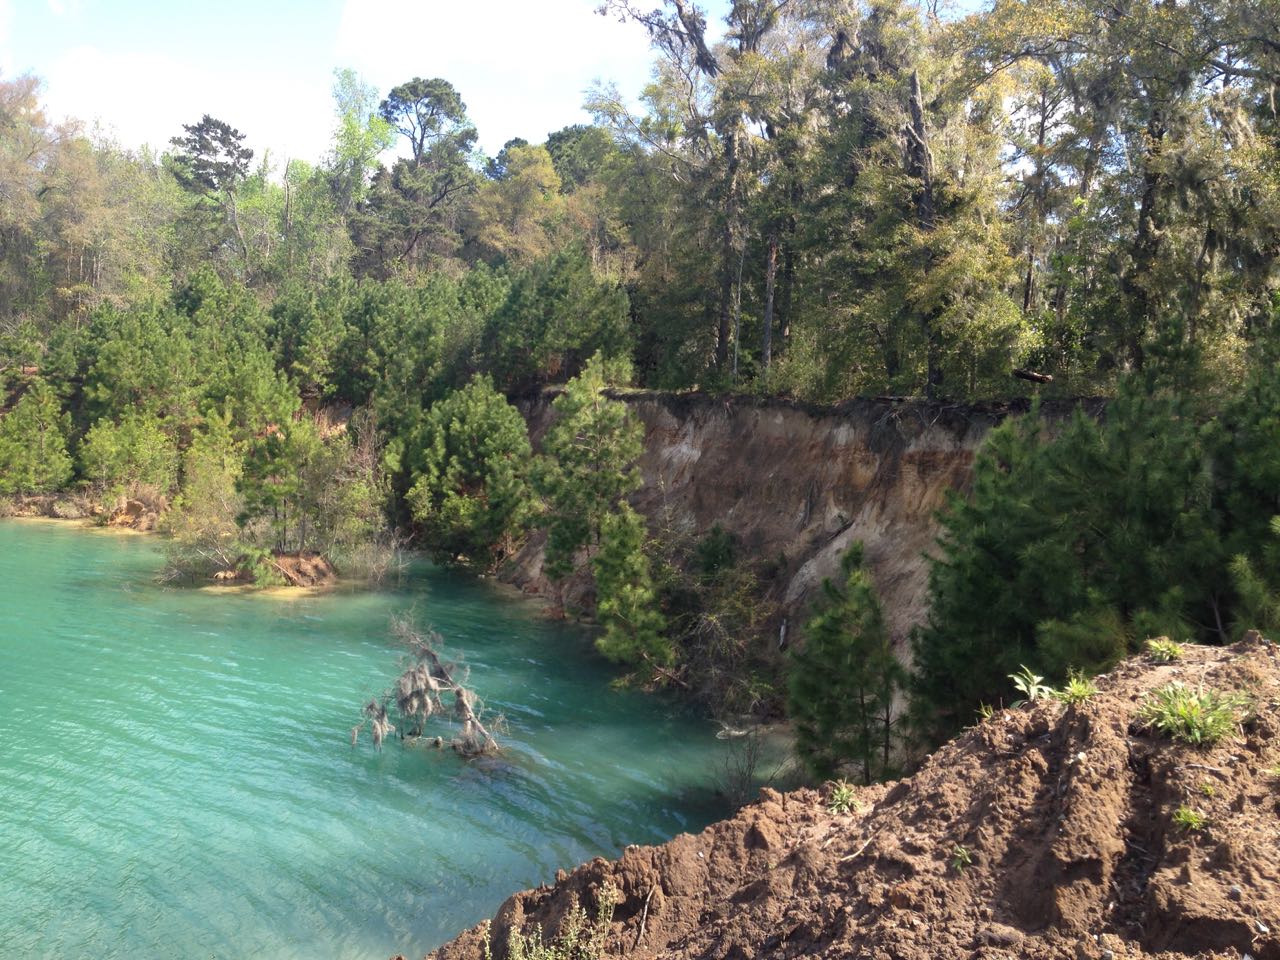
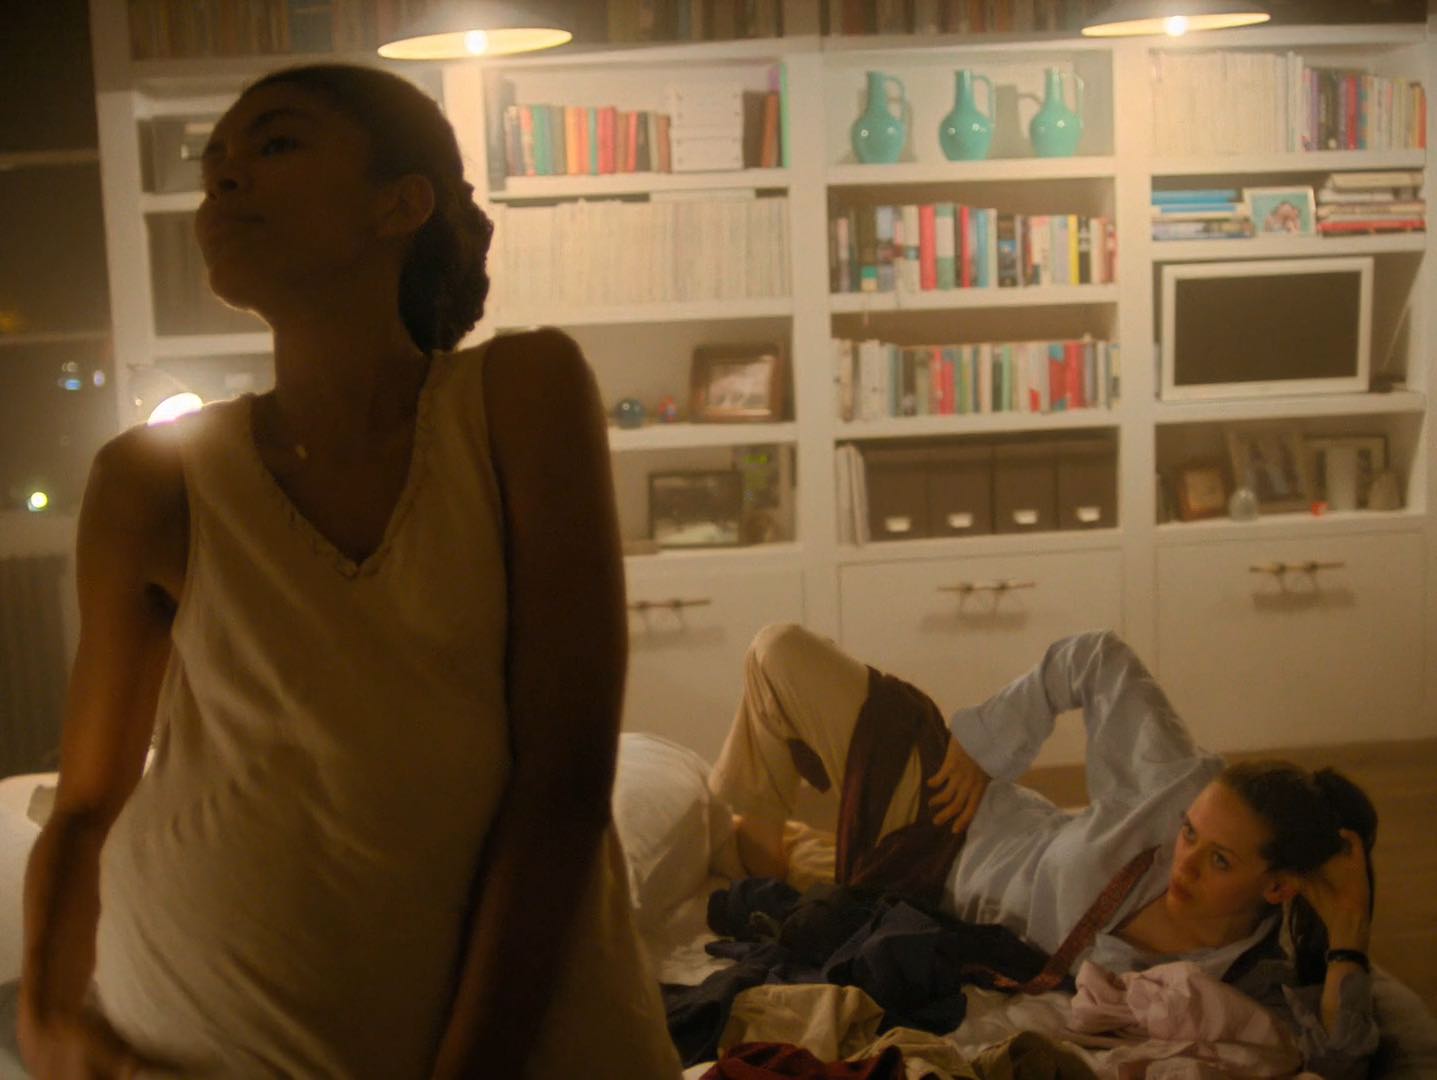
A little bit of location scouting takes place during the week. We check out a nice rustic field behind the studio where we’ll set up our circus, we visit a fort in the hope that it might work for a scene near the finale (it doesn’t) and I take a look around the beach house we’ll be shooting the film’s present-day book-ends in on March 20th and 21st. (Principal photography starts April 11th.)

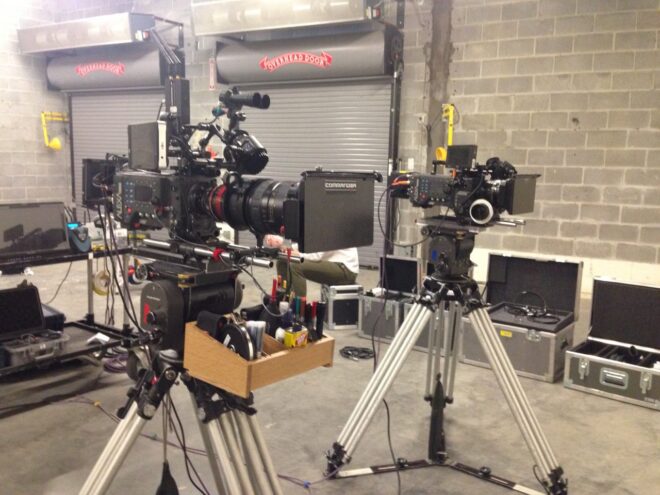
Another issue to be decided is which camera to shoot on. Initially we discussed having lots of cameras, which meant going with Reds for budgetary reasons. The Panasonic Varicam is suggested, and I’m almost flown to Atlanta to test it, but in the end we decide to go with Alexas, thank God. (With hindsight, I really should have gone and tested that Varicam. I was irrationally against all non-Alexa cameras at this time.) We’ll have two bodies, one for me and one for a B camera operator who will sometimes splinter off into a 2nd unit. The glass will be Cooke S4s with a half Soft FX filter, the exact same recipe as Heretiks. I know this will give me the organic, period feel that A Little Mermaid needs, as well as the magical quality. We’ll also have a couple of Optimo zooms in the kit, a luxury we couldn’t afford on Heretiks.

By the end of the week I’ve pretty much locked down the camera kit, finished the shot list for the whole movie, and hired 1st and 2nd ACs and a 2nd Unit DP. We still don’t have a gaffer, which is worrying. The crew pool in Savannah is not huge and we’re struggling to find people with enough experience.

On Saturday, aside from a couple of hours in the studio, I chill out. I’ve now moved to the same apartment complex as the rest of the crew, and I’ve just had a very nice dip in the pool. I think I might just have the best job in the world.


Week 2

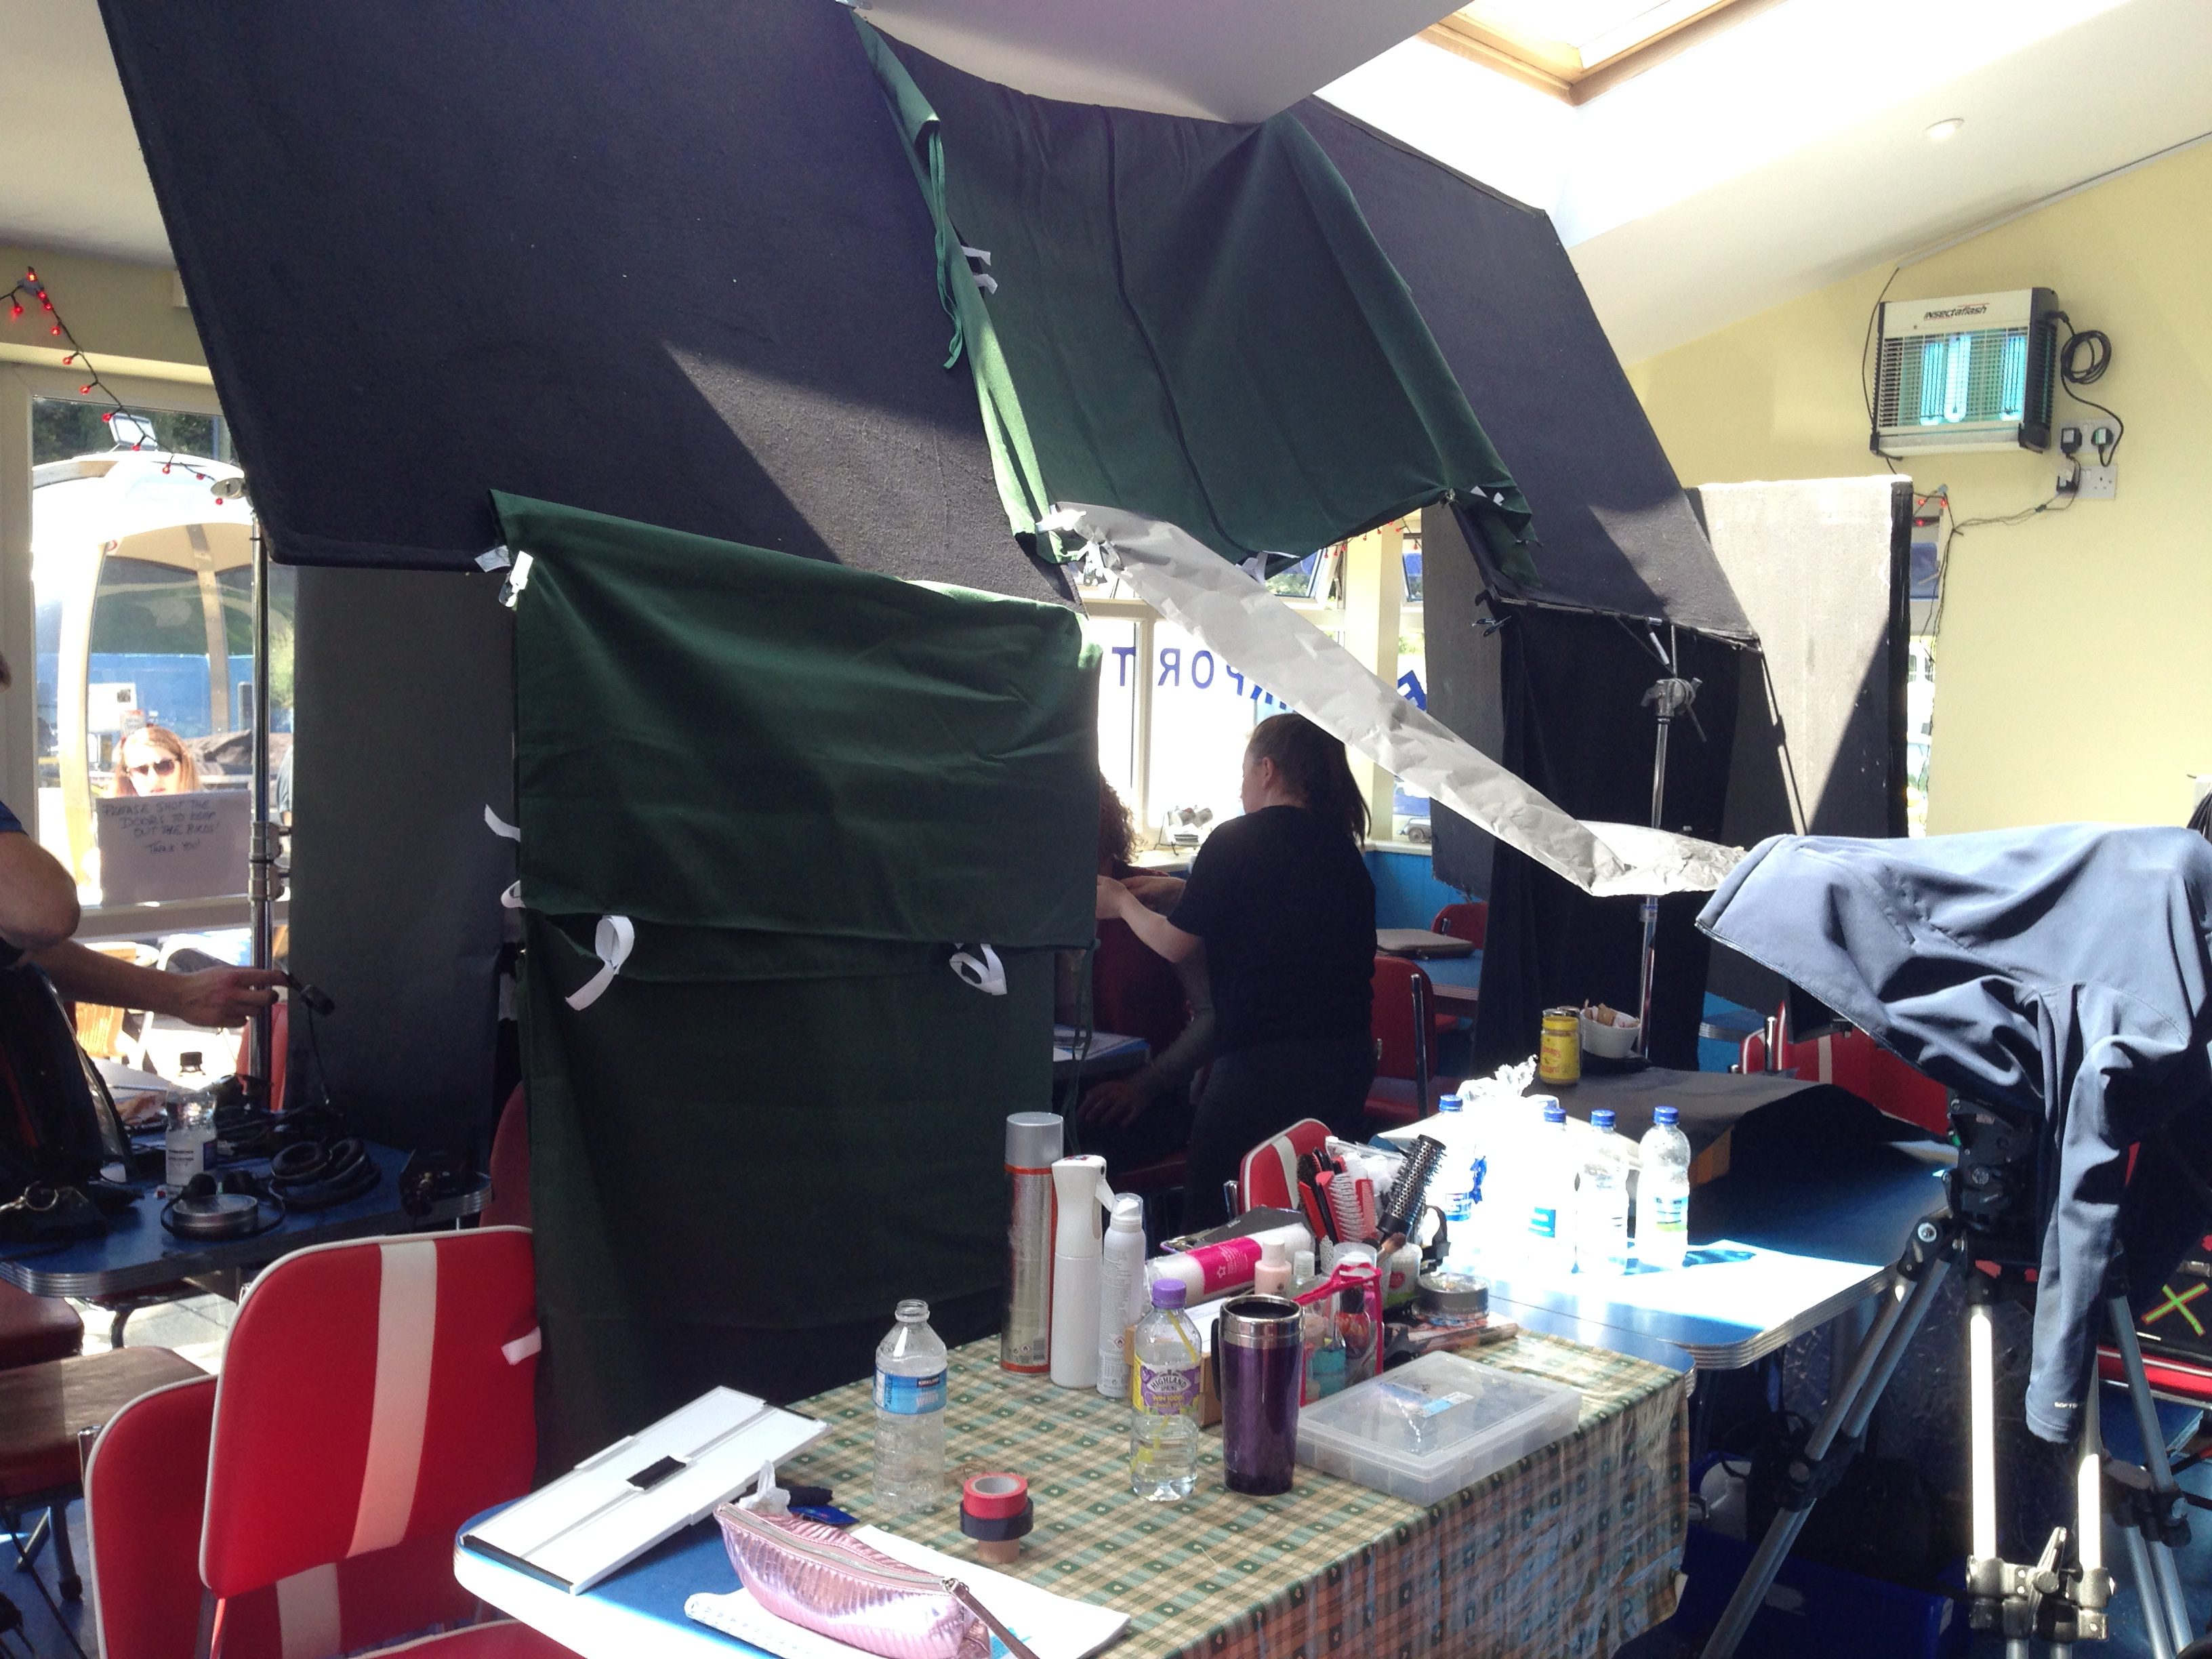
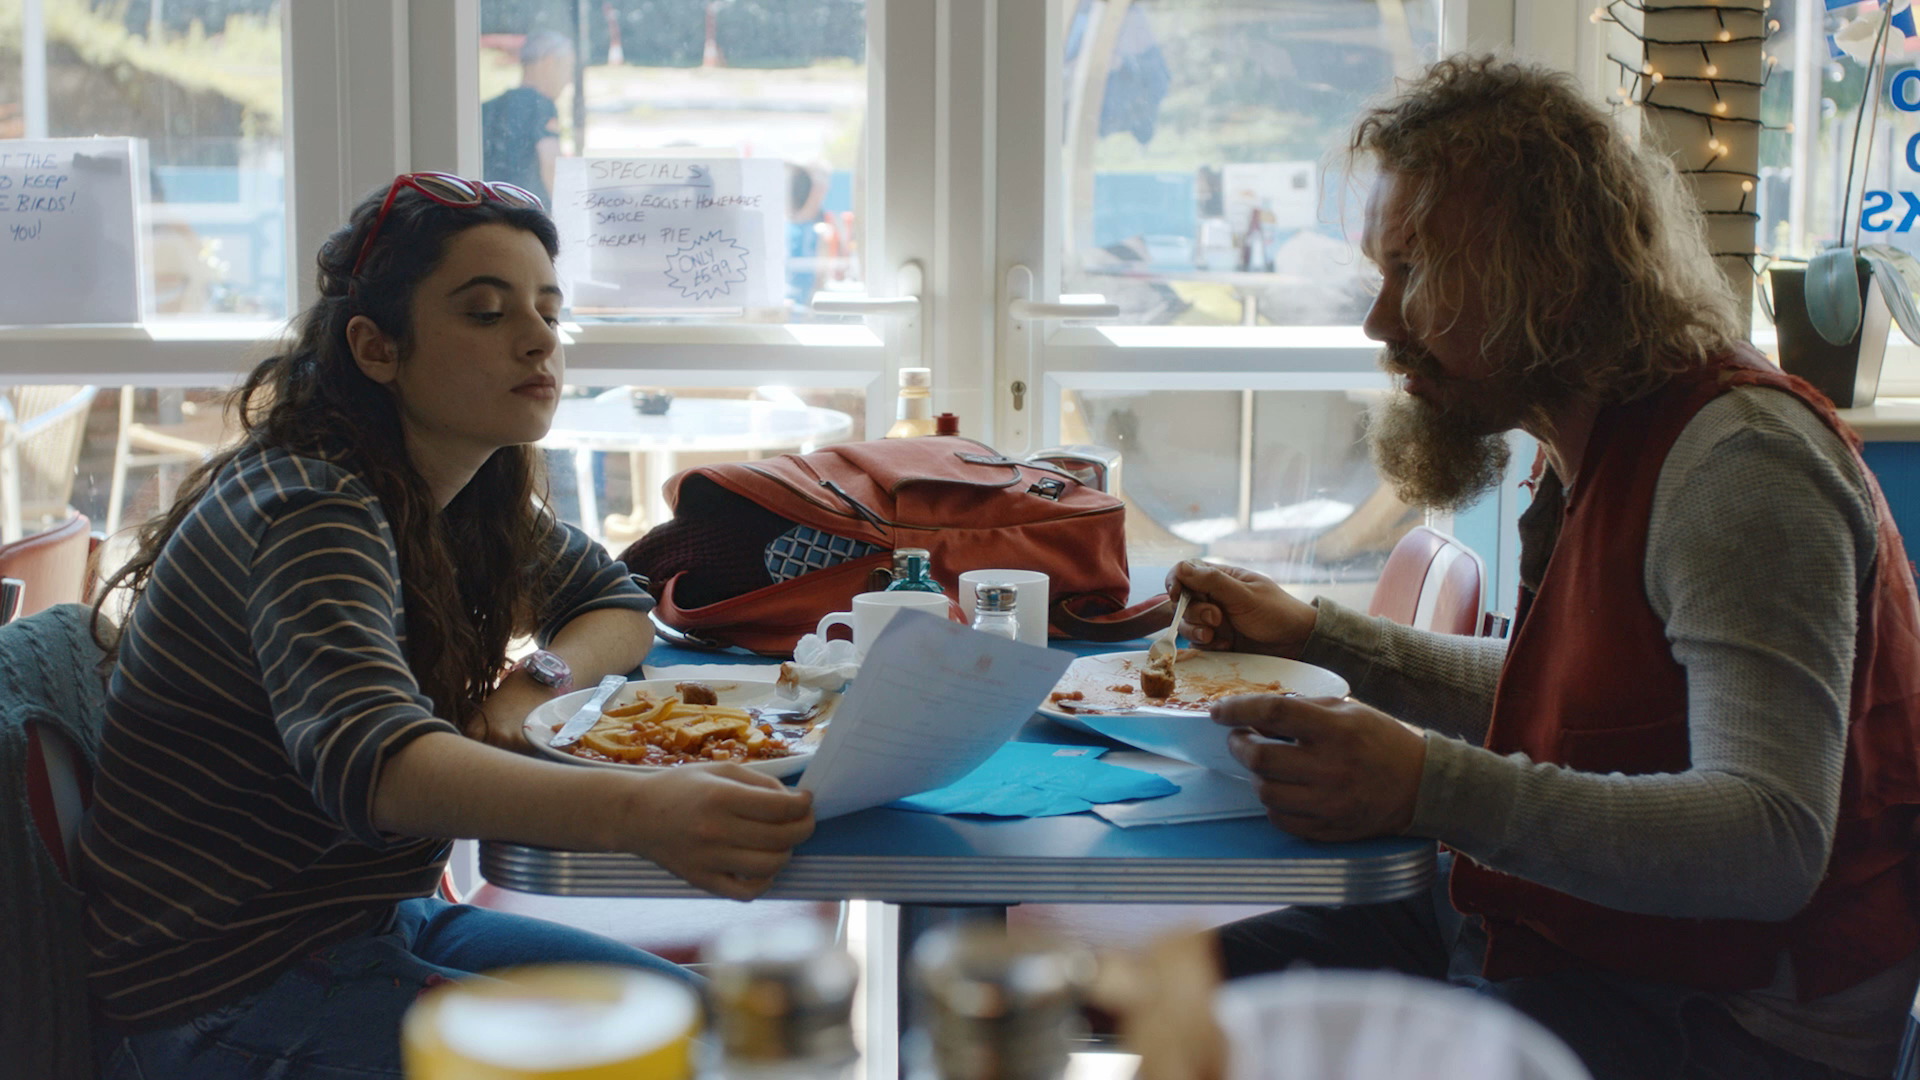
At the end of this week we have our two-day “pre-shoot” with Shirley MacLaine, to capture the contemporary bookends to what is otherwise a 1930s story. Peter Falk’s scenes in The Princess Bride are an inevitable reference for these.

Director Chris is still having visa issues, so writer Blake will be on helming duty for the pre-shoot. He gives me Maggie Smith’s storytelling scene in Hook as a reference. I haven’t seen the movie in ages, so I rent it and watch the whole thing, delighting in the beautiful cinematography. I love the candy blues and hot pinks of Wendy’s London home, and will aim to emulate them.

A lot of this week is taken up with locking down equipment and personnel for the pre-shoot. The biggest issue as the week opens is that I still don’t have a gaffer. With my options limited – and despite a brief panic during which flying my UK gaffer out here seems like a very real possibility – I pick someone on a trial basis. If they do a good job for the pre-shoot they’ll get hired for principal.

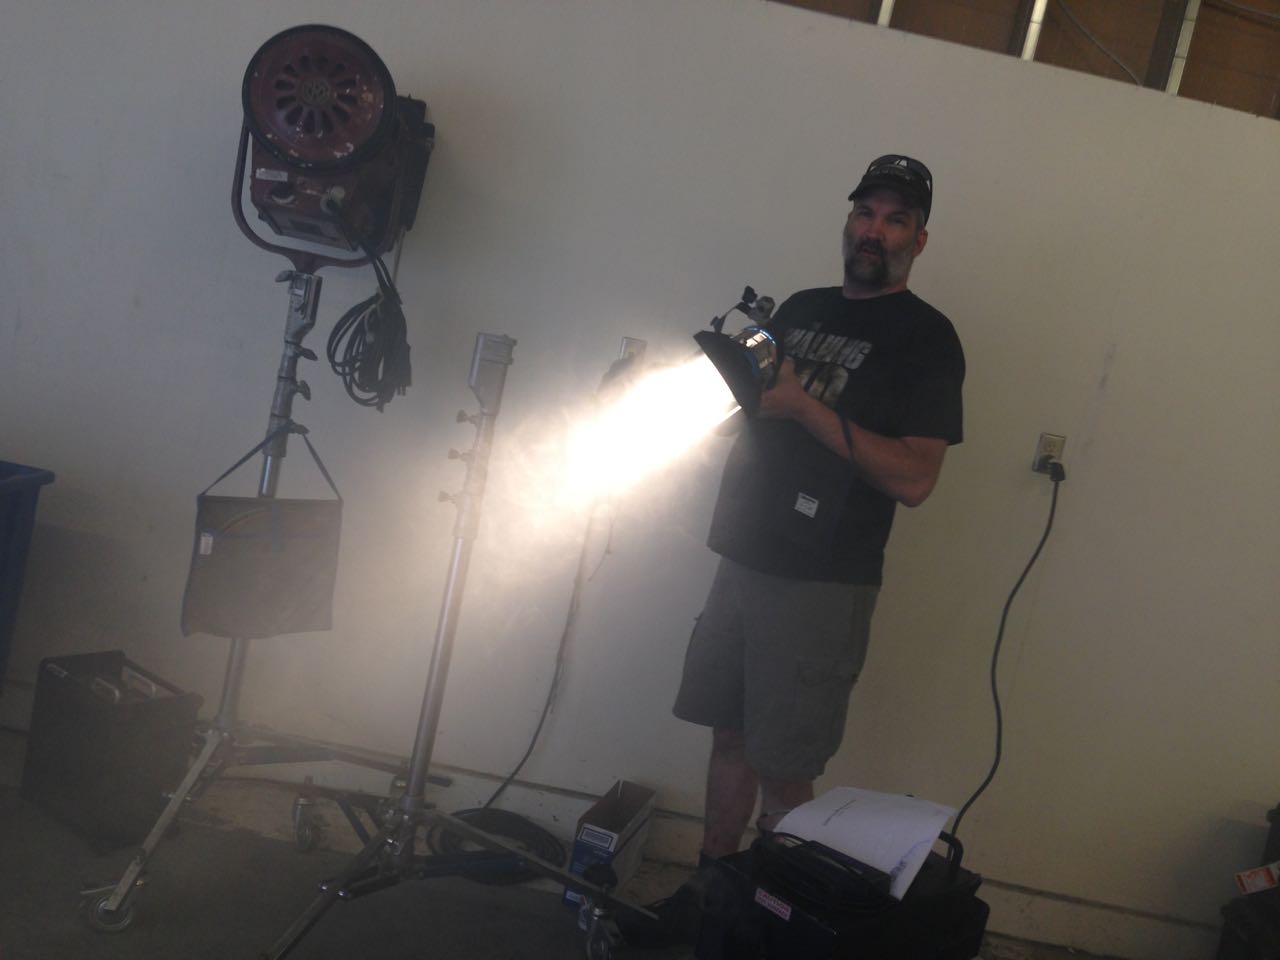
Because the gaffer is hired so late, putting together a lighting list is my responsibility. I hate doing this, because I always forget stuff and piss everyone off at the last minute by making additions or changes. Like forgetting to check whether the HMIs are pars or fresnels. (I always want fresnels because they produce better shafts of light.)

With equipment and crew in place, my attention turns towards principal for a little while. The VFX supervisor, Rich, has flown in from LA, and together we scout some locations. Unfortunately none of the locations are locked yet and the options we are given to look at are far from ideal. But we have a good session going through the shot list together, checking that there aren’t any VFX requirements that he missed in his breakdown.

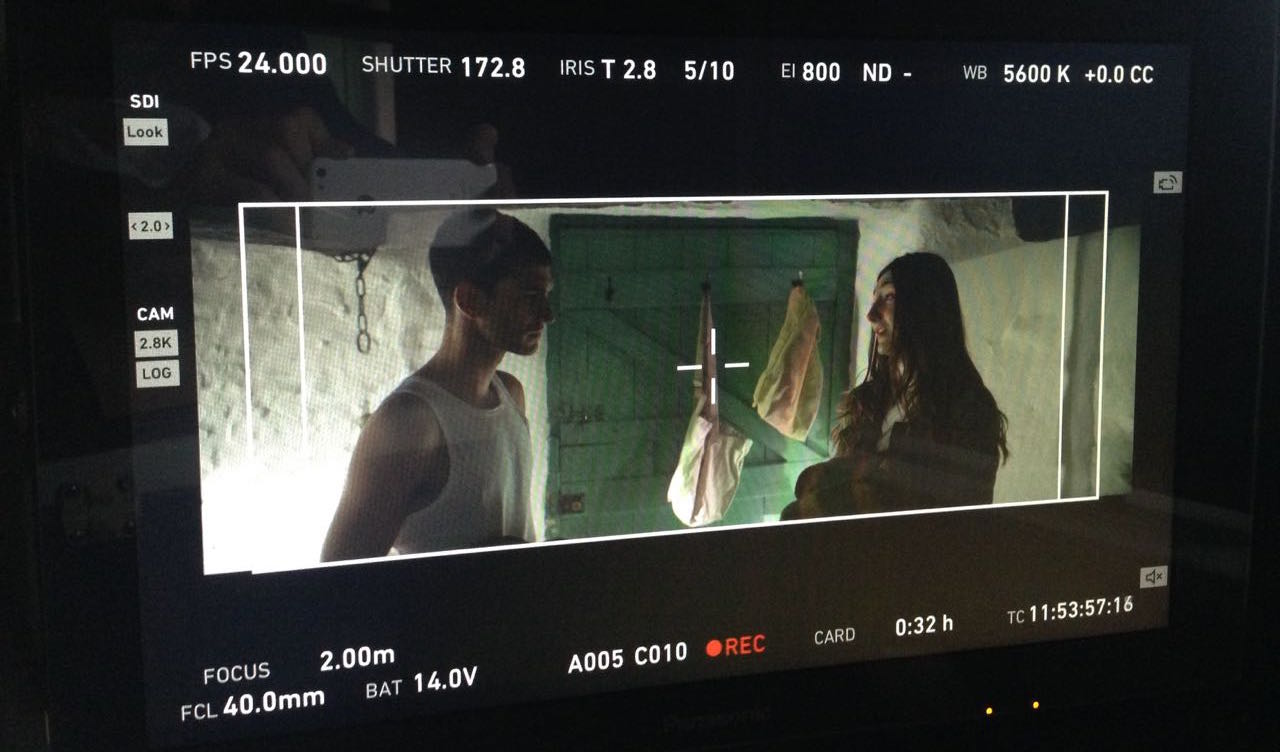
We also discuss shooting format, which is generally going to be 2K ProRes 4444. He wants me to shoot green-screen shots in Arri Raw, but after he’s gone I realise that we don’t have the right Codex on our cameras for that. 3.2K ProRes will have to do. Another good tip Rich gave me is to expose the green-screen at key (i.e. the same light reading on the green-screen as on the talent’s face) or up to half a stop over.

I’m glad I invested in a light meter, which arrived at the studio this week. It also comes in handy during another scout of the pre-shoot location. We have some night shots on the beach, which will have to be shot at dusk because it’s too big an area to light artificially. During the scout I take light readings on the beach at dusk, and determine that we have until 7:50pm, 20 minutes after sunset, before it is too dark to shoot.

If you want to follow the chronology, my diary entries about the “pre-shoot” are here.

Tune in next week for my diary entries from the remaining three weeks of prep. The Little Mermaid is still on Netflix if you fancy checking it out.

“The Little Mermaid”: Prep Diary Part 1

What is Negative Fill and How Do You Use It?

The 4×4 flags and matt silver bounce board used to shape the “Heretiks” shot later in the article.

If you’ve ever learnt anything about lighting, you’ll have heard of the Three Point System: key, backlight and fill. That last one is a soft light which raises the shadows and reduces contrast in the image.

As you might expect, negative fill is the exact opposite. It brings the shadows down, increasing contrast. It’s a big part of cinematography today because the dynamic range of digital cameras is so wide and their light sensitivity is so high that taking away light has become just as important as adding it.

Negative fill – neg fill or just neg for short – can be accomplished with anything black, most commonly a polystyrene board (American name: bead-board), blackout material (usually bolton in the UK or duvetyne in the US) or a flag. 5-in-1 reflectors have a black side that can be used for neg fill too. The term solids or black solids can be applied to any of these tools, indicating that they are completely opaque, as opposed to nets.

When DPs talk about neg fill you often hear the word “shape” come up in their reasoning. Neg fill is typically applied to the camera side (broad side) of the talent, allowing their other side (short side) to remain bright. This has the effect of making the face – or any other object – look more three-dimensional. Hence “shape”. (This is all part of the theory of short key lighting, which I’ve covered in detail before.)

Below is an example from my online course, Cinematic Lighting. In these before and after shots, I use the black side of a 5-in-1 reflector (though you see silver facing camera) to neg-fill Ivan’s short side, adding mood and contrast.

We made it more permanent by replacing the reflector with a 4×4′ floppy flag on a C-stand.

Here’s an example from Heretiks where I chose to put a glint of light back into the darkness created by the neg fill, by using a matt silver reflector to create a rim-light. (There are many more diagrams like this on my Instagram feed.)

Neg fill is most commonly used outdoors, but it can be desirable indoors too, for example when white walls are bouncing light around everywhere. For the shot below from Exit Eve, I had the white wall behind camera covered with bolton so that the light would all be coming from behind the talent. (See my article on lighting from the back.)

In the café scene from Above the Clouds we shot towards the windows, but there was still too much ambience (mainly from skylights in the roof) on the camera sides of the actors for my taste. We only had a limited supply of flags, so we pressed the sides of the Easy-Up tent into service too!

I’ll leave you with this extreme example of negative fill from Instagram.


View this post on Instagram


A post shared by Shane Ellis (@gameoverman47)

What is Negative Fill and How Do You Use It?

Luna 3: Photographing the Far Side of the Moon without Digital Technology

The far side of the moon (frame 29) as shot by Luna 3

It is 1959. Just two years have passed since the launch of the USSR’s Sputnik 1 satellite blew the starting whistle for the Space Race. Sputnik 2, carrying poor Laika the dog, and the American satellite Explorer 1 swiftly followed. Crewed spaceflight is still a couple of years away, but already the eyes of the world’s superpowers have turned to Earth’s nearest neighbour: the moon.

Early attempts at sending probes to the moon were disastrous, with the first three of America’s Pioneer craft crashing back to Earth, while a trio of Soviet attempts exploded on launch. Finally the USSR’s Luna 1 – intended to crash-land on the surface – at least managed a fly-by. Luna 2 reached its target, becoming the first man-made object on the moon in September 1959.

The stage is now set for Luna 3. Its mission: to photograph the far side of the moon.

Luna 3

Our planet and its natural satellite are in a state known as tidal locking, meaning that the moon takes the same length of time to circle the earth as it does to rotate around its own axis. The result is that the same side of the moon always faces us here on Earth. Throughout all of human history, the far side has been hidden to us.

But how do you take a photograph a quarter of a million miles away and return that image to Earth with 1950s technology?

At this point in time, television has been around for twenty years or so. But the images are transient, each frame dancing across the tube of a TV camera at, say, Alexandra Palace, oscillating through the air as VHF waves, zapping down a wire from an aerial, and ultimately driving the deflecting coils of a viewer’s cathode ray tube to paint that image on the phosphorescent screen for a 50th of a second. And then it’s gone forever.

For a probe on the far side of the moon, with 74 million million million tonnes of rock between it and the earthbound receiving station, live transmission is not an option. The image must somehow be captured and stored.

Video tape recorders have been invented by 1959, but the machines are enormous and expensive. At the BBC, most non-live programmes are still recorded by pointing a film camera at a live TV monitor.

And it is film that will make Luna 3’s mission possible. Enemy film in fact, which the USSR recovered, unexposed, from a CIA spy balloon. Resistant to radiation and extremes of temperature, the 35mm isochromatic stock is chosen by Soviet scientists to be loaded into Luna 3’s AFA-Ye1 camera, part of its Yenisey-2 imaging system.

Luna 3 launches on October 4th, 1959 from Baikonur Cosmodrome in what will one day be Kazakhstan. A modified R-7 rocket inserts the probe into a highly elliptical Earth orbit which, after some over-heating and communications issues are resolved, brings it within range of the moon three days later.

The mission has been timed so that the far side of the moon is in sunlight when Luna 3 reaches it. A pioneering three-axis stabilisation system points the craft (and thus the camera, which cannot pan independently) at the side of the moon which no-one has seen before. A photocell detects the bright surface and triggers the Yenisey-2 system. Alternating between 200mm f/5.6 and 500mm f/9.5 lenses, the camera exposes 29 photographs on the ex-CIA film.

The AFA-Ye1 camera

Next that film must be processed, and Luna 3 can’t exactly drop it off at Snappy Snaps. In fact, the Yenisey-2 system contains a fully automated photo lab which develops, fixes and dries the film, all inside a 1.3x1m cylinder tumbling through the vacuum of space at thousands of miles per hour.

Now what? Returning a spacecraft safely to Earth is beyond human ability in 1959, though the following year’s Vostok missions will change all that. Once Luna 3 has swung around the moon and has line of sight to the receiving stations on Earth, the photographic negatives must be converted to radio broadcasts.

To that end, Yenisey-2 incorporates a cathode ray tube which projects a beam of light through the negative, scanning it at a 1,000-line resolution. A photocell on the other side receives the beam, producing a voltage inversely proportional to the density of the negative. This voltage frequency-modulates a radio signal in the same way that fax machines use frequency-modulated audio to send images along phone lines.

Attempts to transmit the photographs begin on October 8th, and after several failures, 17 images are eventually reconstructed by the receiving stations in Crimea and Kamchatka. They are noisy, they are blocky, they are monochromatic, but they show a sight that has been hidden from human eyes since the dawn of time. Featuring many more craters and mountains and many fewer “seas” than the side we’re used to, Luna 3’s pictures prompt a complete rethink of the moon’s history.

Its mission accomplished, the probe spirals in a decaying orbit until it finally burns up in Earth’s atmosphere. In 1961, Yuri Gagarin’s historic flight will capture the public imagination, and unmanned space missions will suddenly seem much less interesting.

But next time you effortlessly WhatsApp a photo to a friend, spare a thought for the remarkable engineering that one day sent never-before-seen photographs across the gulf of space without the aid of digital imaging.

One of the 500mm exposures
Luna 3: Photographing the Far Side of the Moon without Digital Technology

24fps or 25fps, which is best?

The monitor overlays here show how “Annabel Lee” was shot at 24fps with a shutter angle of 172.8 to prevent flickering of non-incandescent light sources, a typical recipe for UK filmmakers today.

An article of mine from 2014 weighing the merits of shooting at 24 vs. 25 frames per second has recently been getting a lot of hits. I’m surprised that there’s still so much uncertainty around this issue, because for me it’s pretty clear-cut these days.

When I started out making films at the turn of the millennium, 25fps (or its interlaced variant, 50i) was the only option for video. The tapes ran at that speed and that was that. Cathode ray tube TVs were similarly inflexible, as was PAL DVD when it emerged.

Film could be shot at 24fps, and generally was for theatrical movies, since most cinema projectors only run at that speed, but film for television was shot at 25fps.

Three big technological shifts occurred in the late noughties: the delivery of video over the internet, flat-screen TVs and tapeless cameras. All of these support multiple frame rates, so gradually we found that we had a choice. At the start of a shoot, as a DP I would have to ask which frame rate to set.

The frame rate and resolution menu from my old Canon 600D, the first time I owned a camera that could shoot 24fps.

Americans and others in NTSC regions are in a different situation. Their TV standard of 30fps has a discernibly different look to the international movie standard of 24fps, so the choice of frame rate is as much creative as it is technical. I don’t think anyone can tell the difference between 24 and 25fps, even on a subconscious level, so in Europe it seems we must decide on a purely technical basis.

But in fact, the decision is as much about what people are used to as anything else. I shot a feature film pilot once on 35mm at 25fps and it really freaked out the lab simply because they weren’t used to it.

I shot the 35mm pilot for “The Dark Side of the Earth” (2008) at 25fps because tapes still played a part in postproduction at that time. Today I would not hesitate to shoot at 24.

And what people seem to be most used to and comfortable with in the UK today is 24fps. It offers the most compatibility with digital cinemas and Blu-ray without needing frame rate conversion. (Some cinemas can play 25fps DCPs, and Blu-rays support 25fps in a 50i wrapper which might not play in a lot of US machines, but 24 is always a safer bet for these formats.)

Historically, flickering of non-incandescent light sources and any TV screens in shot was a problem when shooting 24fps in the UK. These days it’s very easy to set your shutter to 172.8° (if your camera measures it as an angle) or 1/50th (if your camera measures it as an interval). This ensures that every frame – even though there are 24 of them per second – captures 1/50th of a second, in sync with the 50Hz mains supply.


The Times when 25fps is best

There are some situations in which 25fps is still the best or only option though, most notably when you’re shooting something intended primarily for broadcast on a traditional TV channel in the UK or Europe. The same goes if your primary distribution is on PAL DVD, which I know is still the case for certain types of corporate and educational videos.

Once I was puzzled by a director’s monitor not working on a short film shoot, and discovered that it didn’t support 24fps signals, so I had to choose 25 as my frame rate for that film. So it might be worth checking your monitors if you haven’t shot 24fps with them before.

“Finding Hope” was shot at 25fps simply because the director’s monitor wouldn’t accept 24fps signals.

Finally, if your film contains a lot of archive material or stock footage at 25fps, it makes sense to match that frame rate.

Whichever frame rate you ultimately choose, always discuss it with your postproduction team ahead of time to make sure that you’re all on the same page.

24fps or 25fps, which is best?