This post first appeared on Ren’s Patreon page.
This month’s blog entry is in video form!
This post first appeared on Ren’s Patreon page.
This month’s blog entry is in video form!
This post first appeared on Ren’s Patreon page.
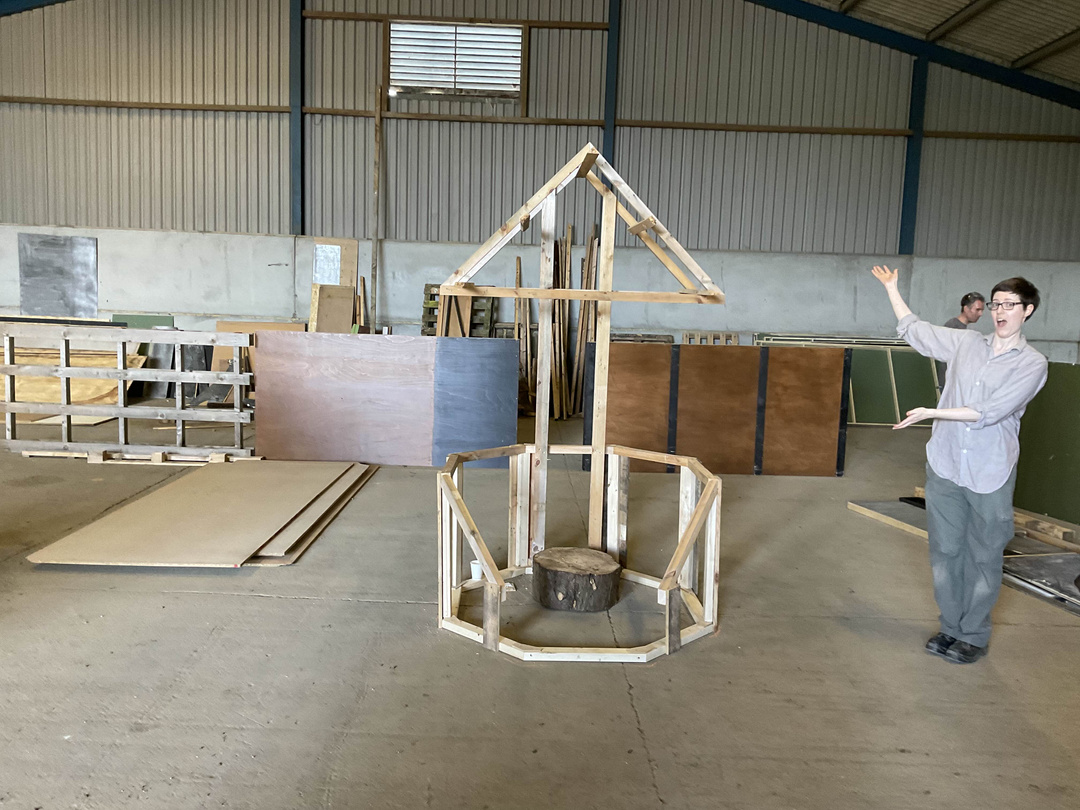
With a metallic clatter the shutter jerks into life and rolls upwards. When it shudders to a stop the loud quacks of Burleigh Hill Farm’s resident ducks can be heard approaching, come as usual in the hope that today the grain store will contain grain, and not the nascent set of a ruined town. Sorry Daffy, it’s the ruined town again. What are the chances?
They waddle noisily to the centre of the space, where Michael Hudson is constructing a well. It’s a ruined well, so some joker has modified the chalk marking on the floor from WELL to UNWELL. Health wise, it’s at least an improvement on last year’s DYING? which marked the corner of the Heretics’ Market where a bloody Hunter would collapse in Ren’s arms.
Still loudly discussing their disappointment, the ducks depart for their pond and the work of the Ren team continues.
As well as Michael I must give a huge shout out and thank you to Ross D’Souza, Dale Suttle and Ash Finn, who between them have done the lion’s share of the work so far. And not just the physical construction work but also the project management and materials acquisition (a fancy term for skip diving and heavy lifting in and out of vans).
At first we were worried about getting hold of enough wood, but after Dale found a sci-fi short getting rid of over 20 flats, plus a few freebies from Facebook Marketplace, the problem became one of the person-power needed to assemble it all. In the last few days we’ve made enough progress to alleviate that worry, only for it to be replaced by the not-so-trivial concern of how to surface all of this wood to look like stone. Methods including angle grinding, plastering, spraying expanding foam, polystyrene carving and moulding have all been tested and they are all likely to feature on the finished set to some degree.
Remember that you can drop by and help us out any Saturday or Sunday, 10:30am-6pm, at Burleigh Hill Farm, Somersham Road, St Ives, Cambridgeshire PE27 3LY. Please wear old clothes and bring your own tools if you can.
Away from the studio, preparation of other kinds ticks along. Hannah Young has finalised her designs and yesterday visited the garage where the Ren costumes are stored to select the existing pieces that will be reused or modified for the upcoming episodes. Crina Ciobanu, who steps up to head make-up artist following her brief stint on the pick-ups last September, has begun tests of the hair and make-up looks required. Locations are more or less locked, the last few crew positions have been advertised, and recently some of the returning cast were reunited with each other and with action designer Ronin Traynor to start choreographing a fight scene. Tavern Dwellers can look forward to an exclusive video blog about that last one very soon.
Finally, last Sunday saw the release of the latest episode of The Fantasy and Sci-fi Fanatic’s Podcast – an episode all about Ren. Chris Dane, Oriana Charles and Yours Truly discuss the challenges, triumphs and origins of the series with host Daniel Coolbaugh. My personal favourite bit of the interview is when Oriana reads out her list of what goes into making an episode. You can watch it on YouTube or find it wherever you get your podcasts.
This post first appeared on Ren’s Patreon page.
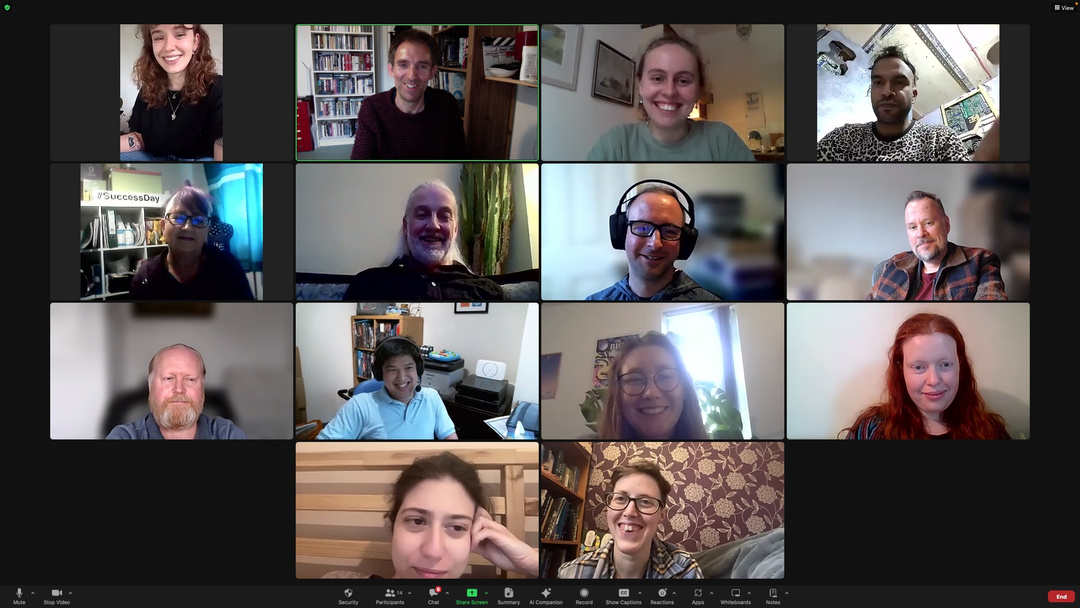
The nice thing about making an ongoing series, especially starting a new season so soon after the last, is that you accumulate both useful things – from medieval carts to pop-up tents – and enthusiastic people. There was almost no need to advertise for an art department this year, as so many lovely folks from Season Two and even Season One were keen to get involved again. Early this month they all assembled on a Zoom call to meet new production designer Kaja Jedrak (top left). I’m still overwhelmed by the team we’ve built up: sculptors, carpenters, designers, graphic artists and more.
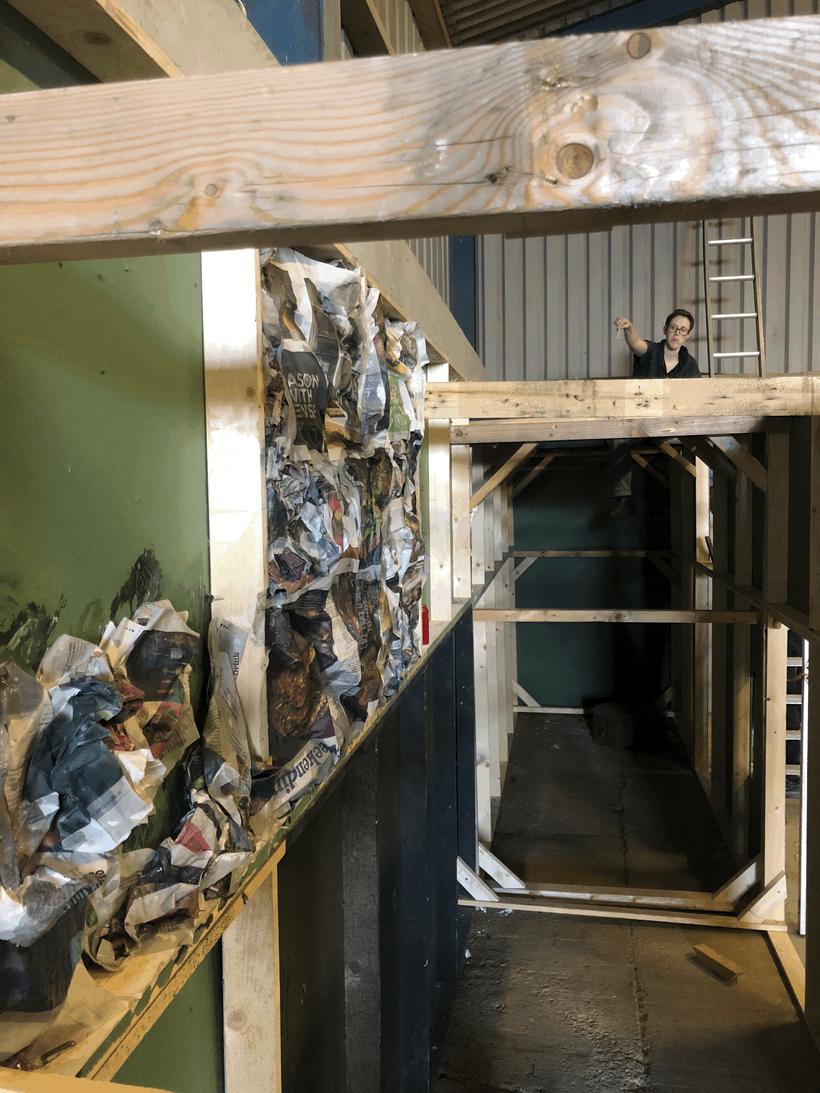
A few days later Kaja, Ross and I went back to the farm with 304 director Ash Maharaj to decide exactly where we’re going to film that episode. After a lot of location research, we had decided that weren’t going to find a location that looked right for the episode’s setting – none other than the infamous Helgoth. Instead we’re going to build it, because that’s the kind of silly thing we do on Ren.
302, on the other hand, looks like it will mostly be shot on location away from the farm. Here again the benefits of an ongoing series are felt. Currently there’s a good chance that 302’s main location will be one we considered last year but didn’t use, saving on research and recce time.
One thing I wish we had from previous seasons is the set. We have some of the pieces from around the staircase in the Heretics’ Market but nothing else structural, and the village set from Season One is of course long gone. So the other day Dale, Jeremy and I took a trip to South London in a van and collected some secondhand set flats and wooden pillars from a streaming series that’s just wrapped. We don’t have access to the farm buildings yet, so on returning to Cambridgeshire at 10pm we played an interesting game of Tetris and jammed them all into Ross’s garage while trying (unsuccessfully) not to wake his newborn. The poor man won’t be cutting his lawn, barbecuing or 3D printing any time soon. We did leave him access to the fridge though. We’re not monsters.
IDFight once again kindly lent us the use of their studio in East London to hold auditions. Block One has seven new featured and speaking roles, and we auditioned almost 30 people from over 100 submissions. Dan Edgar, a.k.a. Screed from 204, came along to read opposite the candidates (and incidentally received several compliments on his excellent beard).
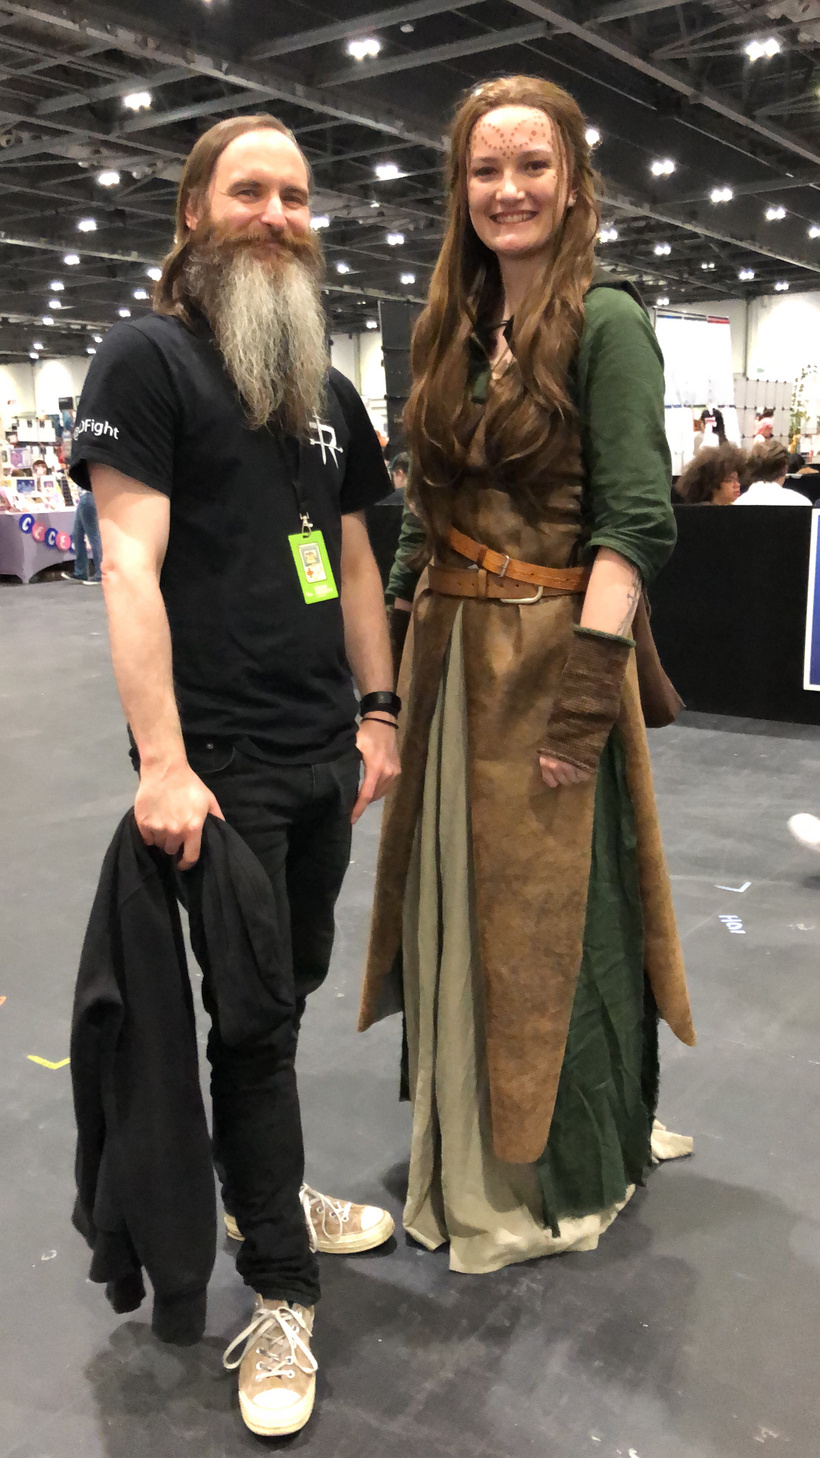
The following week a Ren contingent gathered at MCM Comic Con London to deliver a panel about how we make a fantasy show on a teeny tiny budget. The audience seemed genuinely interested and had some good questions for us at the end. We screened the trailer and a clip from 202, hopefully catching the eyes of the many people passing by the Live Stage. We also had our first Ren cosplayer — Eva Wörz — who had recreated in amazing detail Ren’s costume and the Mark makeup. So it was a really good con overall, but we should definitely stick to making web series; our team’s efforts in a Fall Guy tournament and in a “Dungeons & Dragons in real life” game were pretty abysmal. I spent all of the latter turning pointlessly invisible and getting dominated by a Beholder.
You’re up to date, but before I go – did you know there is a Ren Wikia? You can find it here.
This post first appeared on Ren’s Patreon page.
I’m pleased to have better news than last time. As I previously explained, low Patreon membership has scuppered my original plan to shoot the whole of Season Three this summer, but all is not lost.
The season has five episodes and two of those have entirely different locations and a mostly different cast from the other three. I’ve therefore decided to split the season into two production blocks: Block One, consisting of episodes 302 and 304, will shoot this July as planned; Block Two, comprised of episodes 301, 303 and 305, will film at a later date when funding permits.
Nothing will be released until the season is complete, but at least by filming Block One this summer, which we have just enough Patreon funding to do, we can get ahead on the post-production work for those two episodes.
I can now announce the directors for these episodes…
Award-winning writer-director Sherice Griffiths will helm 302. Sherice recently gained her first TV directing credit as 2nd Unit Director on the BBC series Miss Austen and has directed a number of successful short films which have been screened at BIFA-qualifying film festivals like The Sunderland Short Film Festival and Unrestricted View Film Festival. In 2023 she won The British Comedy Guide’s Production Award and the BAFTA Rocliffe New Writing Award.
304 will be directed by Ashram Maharaj, who worked in several capacities on Season One before joining our writing team in 2019. Ashram’s love of story and characters began at a young age after seeing Tim Burton’s Batman. He was involved in two high-profiled Lord of the Rings fan releases – The Hunt For Gollum and Born of Hope. He continued to work on features and on award-winning shorts in different roles and departments. In 2010, he directed his first short film, Diary, a drama about loneliness and rejection. He also co-wrote a feature, Red Mist, with Sabina Sattar, Producer of 2008 BAFTA Cymru-nominated feature Summer Scars.
Sherice, Ash and I visited Burleigh Hill Farm yesterday to assess which scenes can be filmed there. The next step is to find the actors who will play new roles, so look out for a casting notice soon.
This post first appeared on Ren’s Patreon page.
Well, quite a lot’s happened since my last blog post, hasn’t it?
Dale, Jesse and I finished the sound mix of Season Two at 6am on a Monday. I went home and started to marry up the sound and picture and export the DCPs (digital cinema packages) which are the files that were actually screened at the premiere. Unfortunately a test screening on the Tuesday revealed that – for reasons still inexplicable – the sound was much louder on the right channel than the left. This is exactly why we needed to finish the season a few days before the premiere, to give contingency time to fix such last-minute problems. I tinkered with a few settings, exported the DCPs again and the projectionist kindly came in late on Wednesday to re-ingest them onto the server. To my great relief, this time all was well.
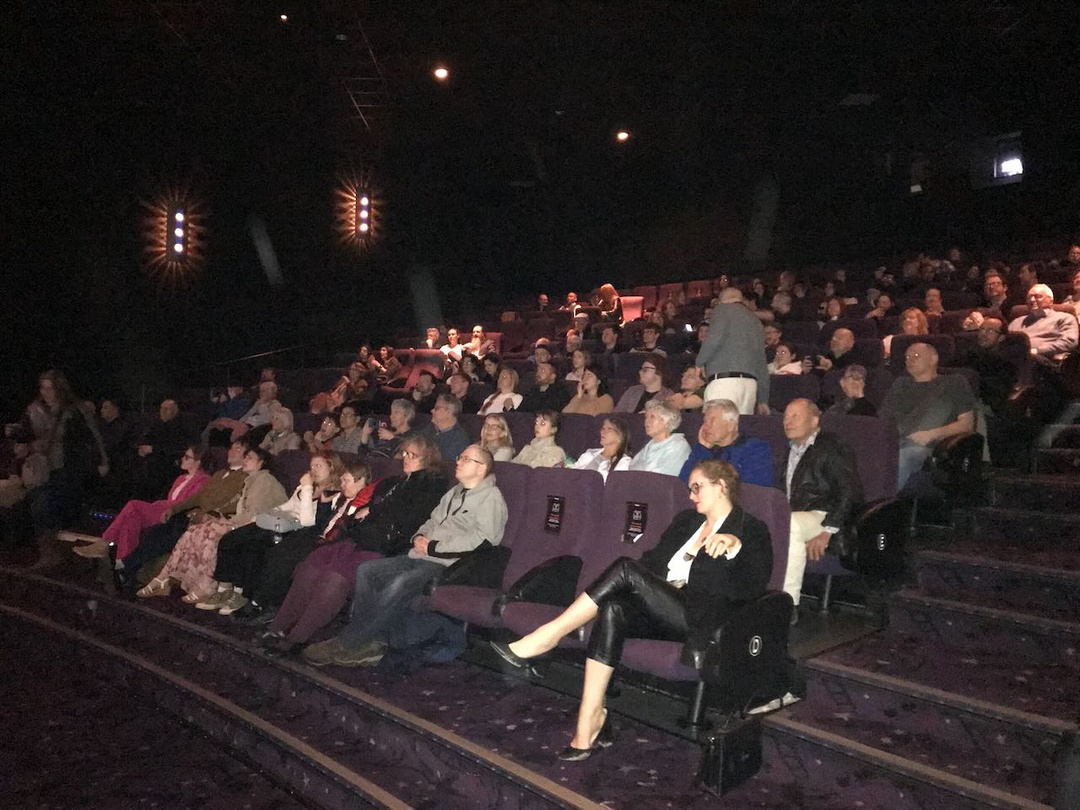
The premiere itself was a lovely evening with around 130 people in attendance. The Light’s bar was packed with familiar faces and I’m only sorry that I didn’t have time to properly catch up with every one of them. The screening was followed by a lively Q&A session, bits of which you can still catch in our Instagram highlights. The following morning, of course, saw the entire season drop here on Patreon.
You might think I relaxed the following week, and I did a bit… but only a bit. There was still, and is still, a lot of work to do to promote the series. Recently Kate, Chris Dane and I were interviewed for the podcast Making Movies is Hard, which you can listen to here. Some other coverage you can check out is this review on Temple of Geek, another one on the Eye on Sci-fi Podcast, and an interview with me about Ren’s cinematography on the Capturing Light Podcast.
Meanwhile preparation work continues on Season Three. This is slightly strange because we’re not sure if we’re just three months away from cameras rolling on the season, or if the whole thing is going to have to be delayed. We’re all super-keen to power ahead, keep the momentum going and not have another hiatus, but the fate of Ren rests in the hands of the fans. You Marked Ones are a wonderful bunch, but currently there just aren’t enough of you to fund Season Three. Unless a lot more people step up and join as paid members in the next couple of weeks, we won’t be able to shoot this year. Remember you can help by spreading the word and telling all your friends, family and followers why you want this series to continue and how they can get involved.
Either way, preparatory work for Season Three continues so that we’ll be ready if the Patreon membership does increase. Over the last couple of weeks I’ve interviewed and selected a new production designer for Season Three. Tomorrow we visit Burleigh Hill Farm so she can see the spaces for the first time and start thinking about what to build where.
Location research is ongoing. Two of the cast, Meg Birley (Tansy) and Rachel August (Captain Merluzzo) have kindly been taking the lead with this last task, hunting for castles, ruins and arenas.
After a series of mini writers’ meetings and some quite substantial changes to one or two of the episodes, Draft 9 of the script has just been completed. To borrow an idea from Russell T. Davies, here is a random word from each episode: whittled; frost; competence; swaddled; botany. In the comments you can make your predictions for the storyline based on these words!
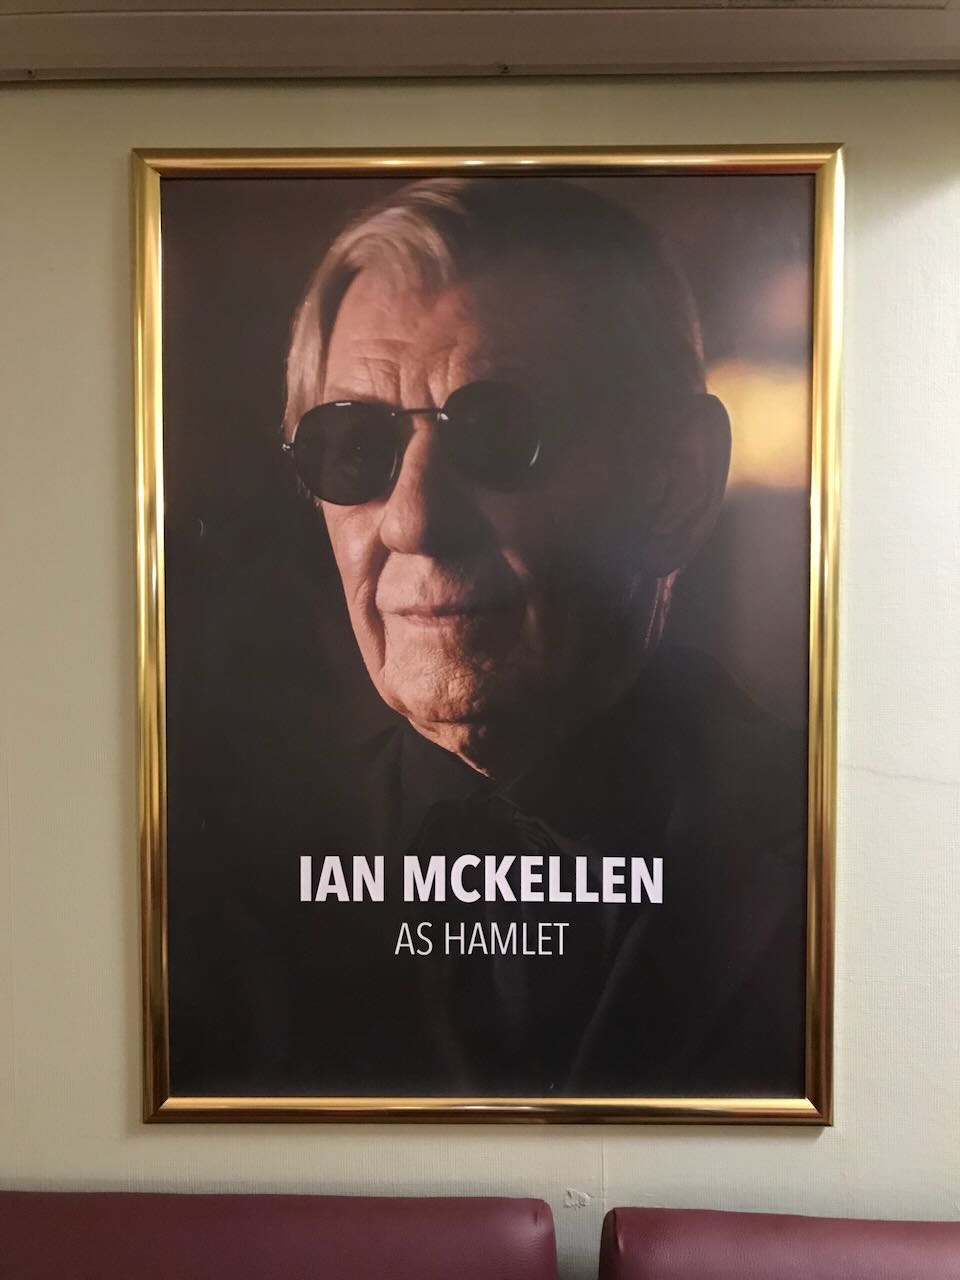
“Frailty thy name is woman” (the opinions of Shakespeare do not represent those of the blogger)

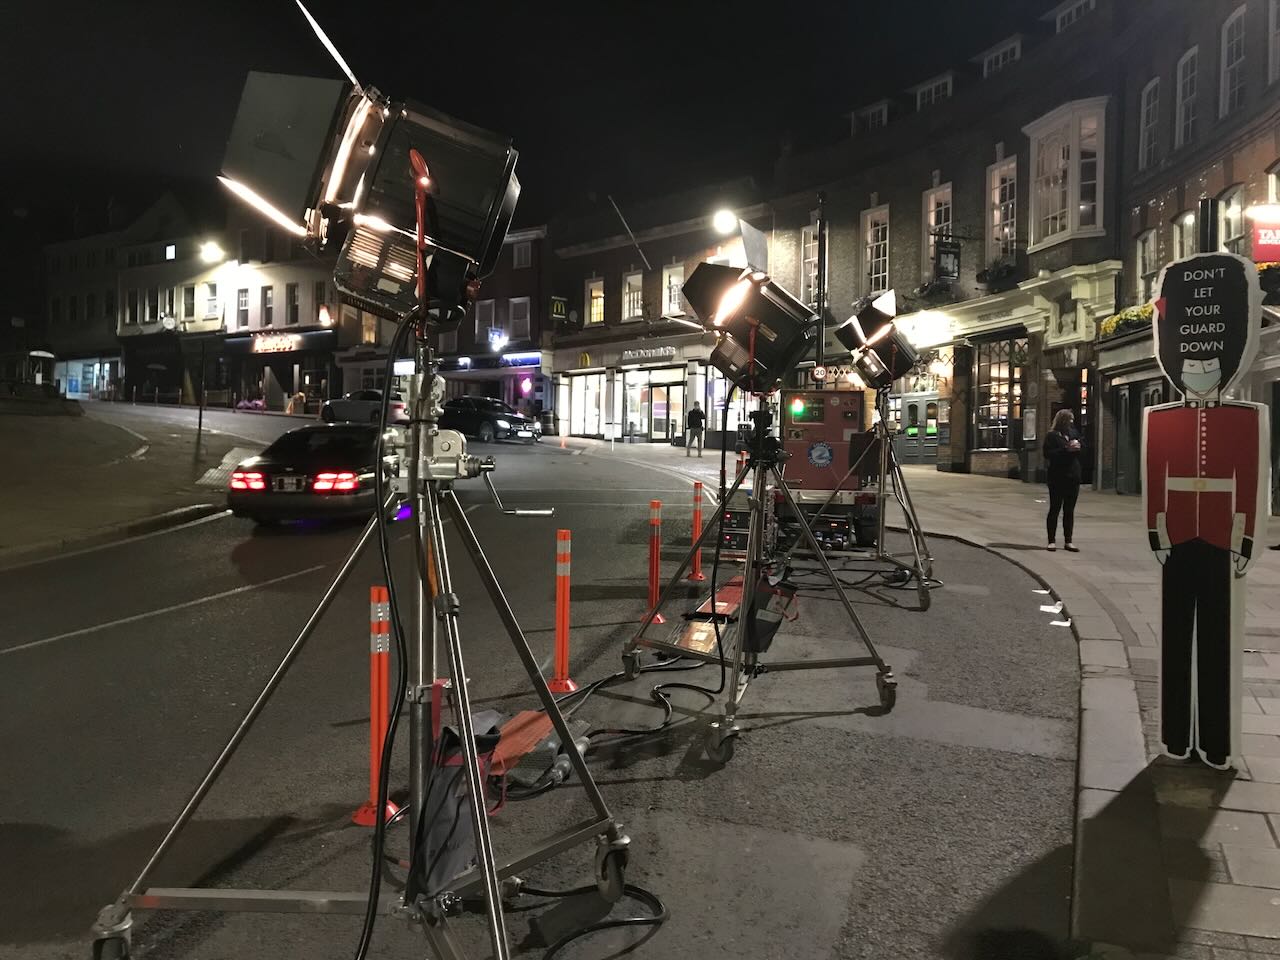
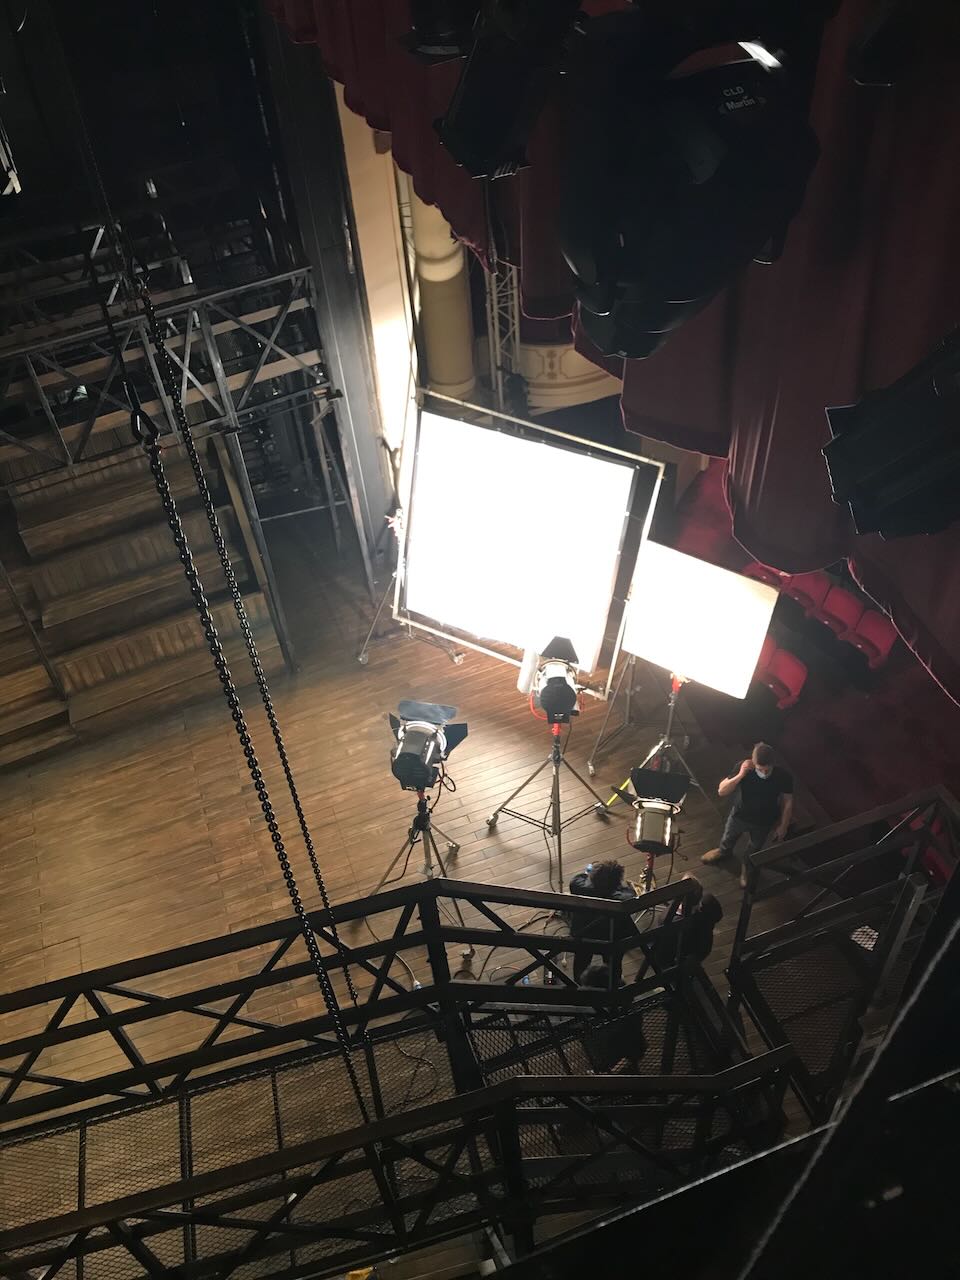
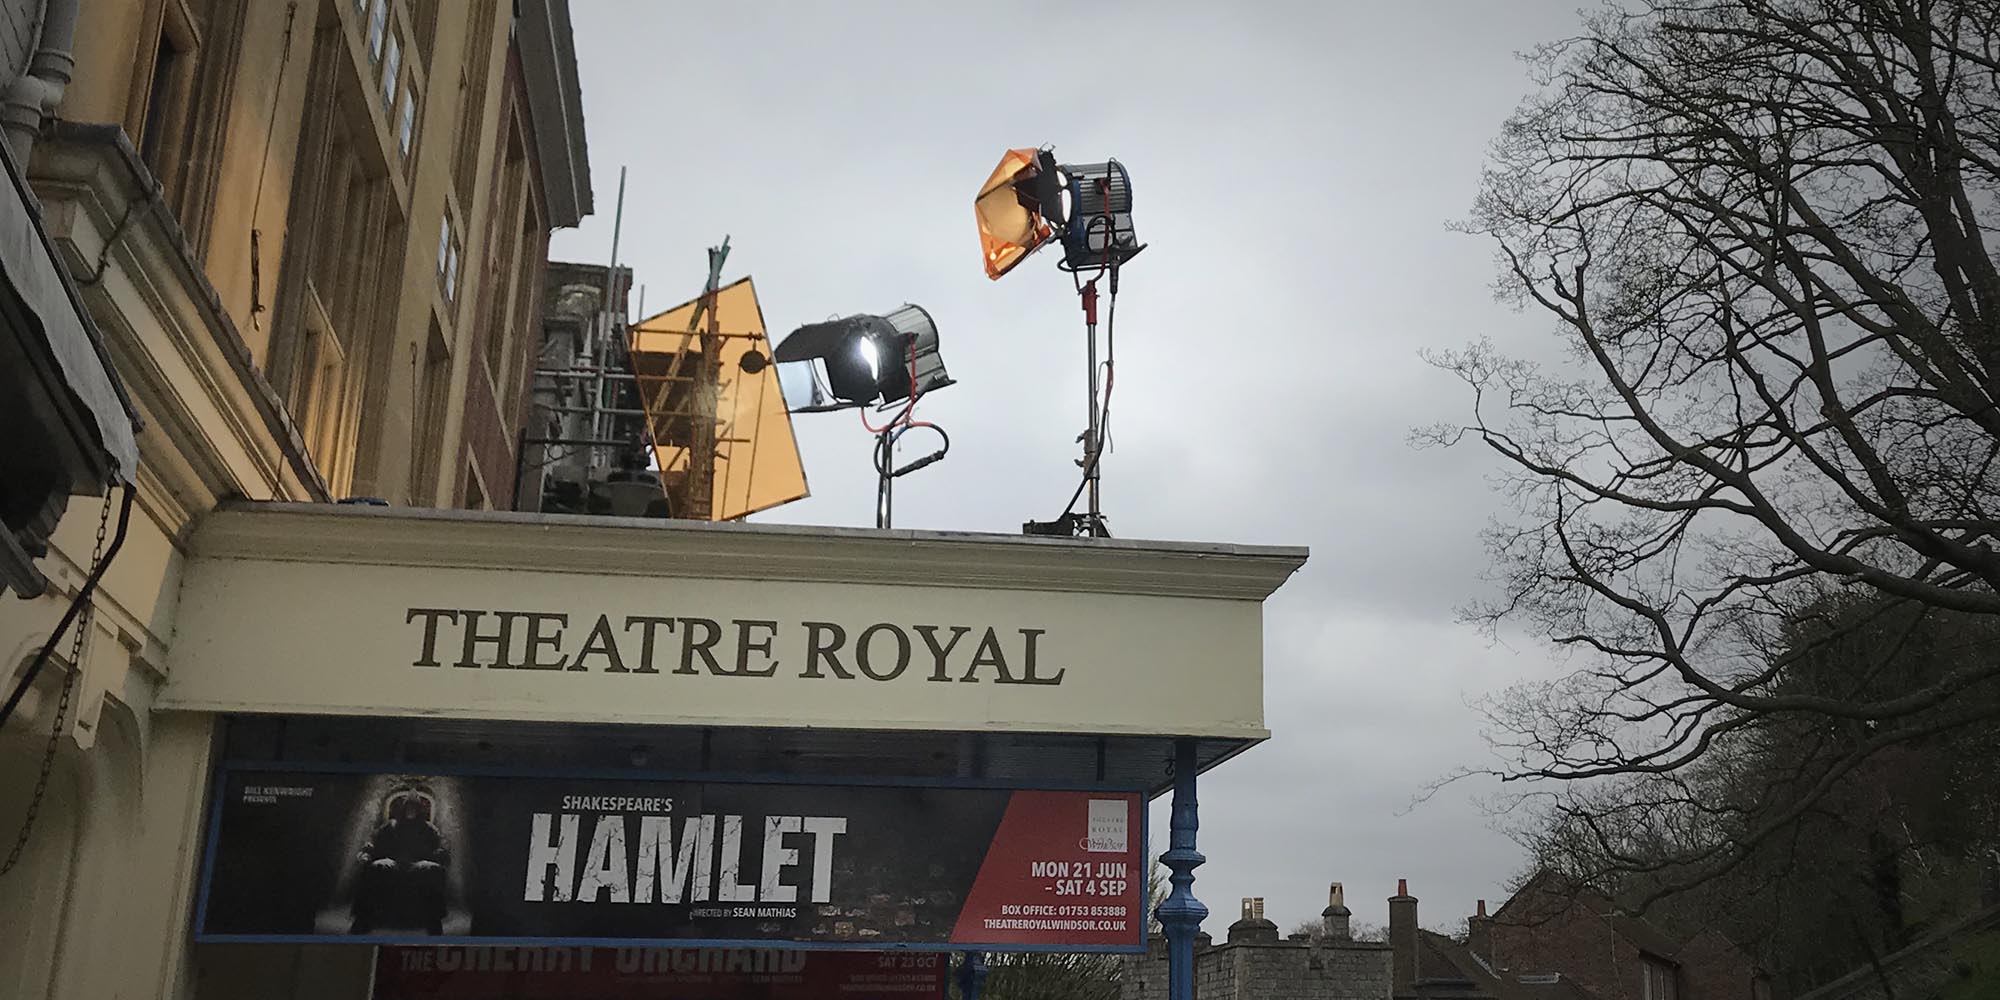
A bitty day, starting with our only day exteriors. Call time was 7am and it was a bank holiday, so that pedestrians and traffic were at a minimum on the street outside the theatre. We got through the shots pretty quickly as they were all handheld, mostly on the same lens and had no dialogue. To give the prologue a slightly different feel to the rest of the film, I’m trying to shoot it stopped down a little, generally T4 outside (though going as far as T11 when the sun came out and our combined .9 and .6 NDs weren’t enough), and using no haze inside. Max operated the camcorder to get a couple of POV shots from the oval office and the roof, and then switched to the second XT to capture a shot of Ben on the roof holding the camcorder.
Gaffer Ben and his team had all booked social events for today (as we had meant to wrap on Saturday) so we had a new gaffer for the day, Tristan Hutchinson, assisted by a spark daily called Nathan. They were faced with unfamiliar material and the kit being scattered all over the theatre, but they delivered the goods.
At the stage door we used a Fomex and a dodgy Litemat 2L to push extra daylight through the windows, having killed all the practicals. In Jonathan’s dressing room we used two Fomexes, one of them pushing through a 4×4 frame of half diffusion to simulate a window source.
Matching a scene on the stage to day 7 involved a Rifa and some theatrical lighting, while the reverse brought the kaleiodscope glasses into play for the first time in weeks, once again refracting the chandelier to beautiful effect. After a corridor shot we did a pick-up in Hamlet’s dressing room, matching the wide from the start of day 23 but now shooting away from the window. Tristan had the nice idea to bring in two floppy flags either side of camera to vignette the flat daylight and give the image some shape.
Finally we shot a dialogue scene in the goods lift. For this, as planned with Ben, we simply skirted the existing practical in the ceiling to keep it off the walls and give us a moody top-light. A small poly on the floor to give a hint of something in the eyes was the only thing keeping it from full-on Godfatherness. The scene dock – a small part of which was visible when the lift doors opened – was lit with a dimmed, bounced 5K and a 650W which was intended to rake the outside of the doors. However, we ran out of time and weren’t able to shoot the outside of the doors or any singles, wrapping with just the master shot in the can.
“To be or not to be”
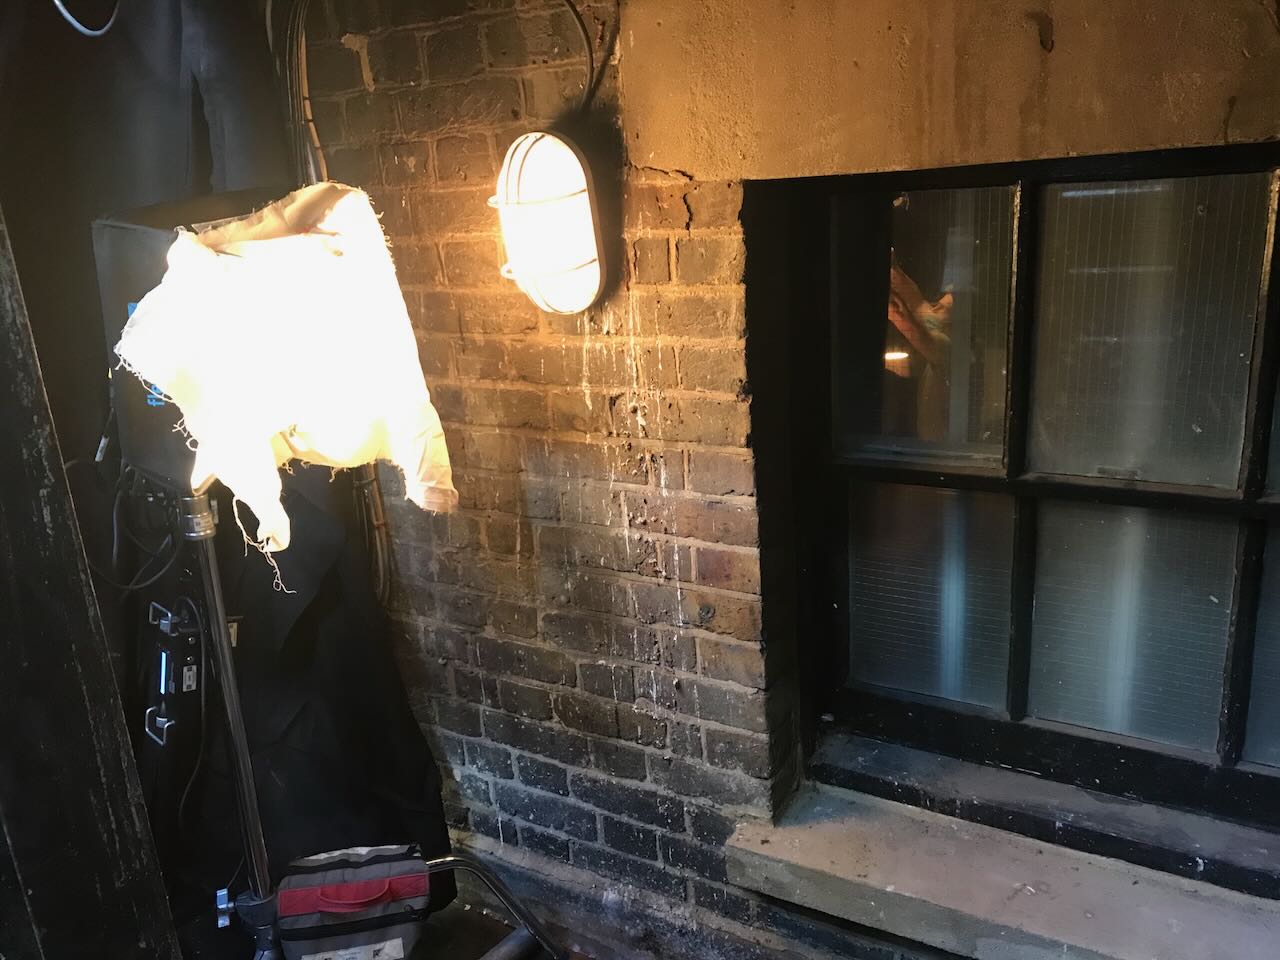
The morning’s work was a major scene in Claudius’s dressing room. It was set at night, so Ben and co tented the area outside the window, which was already partly enclosed by an external staircase. Poor Ian had an uncomfortable time sprawled on a crash mat outside the dressing room window as Hamlet spies on the king and considers murdering him. We first shot from outside, using another bulkhead to motivate the lighting, but in reality Ian’s key was a Fomex with unbleached muslin on it. Inside we had another Fomex above Claudius’s head in addition to two dim table lamps and two candles. When the camera came inside we added an Astera on the floor to give a little separation between Claudius and the background window where Hamlet is dimly visible. It was a very windy day and it was impossible to stop some daylight from creeping in around the black-out, but we got away with this as moonlight which played nicely on the diffused panes of the window. For Claudius’s single we got the most out of his dressing table’s triple mirror, surrounding him with his own reflections (and those of the candles) without getting the camera in!

Next we moved to an even smaller dressing room which is Ian McKellen’s in the prologue, before he transforms into Hamlet. With the help of the art department and I think some of the theatre crew too, Ben’s team had built a surround for the mirror containing about 12 tungsten bulbs, all hooked individually to dimmer racks under the table, which Ben and Bruce were then able to control via DMX from the next room. As Ian looks into the mirror, the lights flash in random patterns, faster and faster until they all come on in one dazzling climax. We shot a wide on the 25mm, then switched to the 100mm and the kaleidoscope glasses (as I knew from the waltz scene that this focal length worked well with the glasses). We also shot a clean pass, and one with the prism too. Both the prism and kaleidoscope were handheld. Since we had some significant scenes to shoot after lunch, I didn’t feel like I could take as long with this scene as I wanted. I would love to have tried other focal lengths, and worked harder to find angles of the prism and kaleidoscope that created multiple images of Ian, which is what the script really called for.
After lunch we shot the play’s most famous scene, something about swings and marrows I think? Ian and Sean had long decided that they wanted it to play like a conversation, not a soliloquy, with Hamlet pouring out his thoughts to Horatio before the latter shaves the former’s head. I decided in rehearsals to shoot it extremely simply, as two handheld over-the-shoulder shots. “Where’s the light?” asked Ian as we were about to shoot, looking around the empty room. Ben and co had once again set up the ultra-bounce outside the window, using the 2.5K HMI this time as the 6K had proven overkill last time. For Horatio’s reverse we added a matt silver bounce to wrap the window light slightly, but still left him mainly backlit.
Finally we shot the other side of Ian’s transition into Hamlet. Sean had come up with quite a different concept to what I had imagined, where Hamlet’s face isn’t properly seen, and instead of zooming out from his image in the mirror to reveal the room, we follow handheld behind him as he moves around the space. This gave us some fun and games with reflections in the room’s other mirrors, but after a few takes we got it in the can successfully. The sparks flickered the practicals for a couple of seconds at the top of the shot to provide a little bridge from the start of the transition. Other than that it was the same window light as the previous scene.
And then we were wrapped. Officially that is. In reality we have a couple of scenes and some odd pick-up shots still to shoot, which I believe we will do in June when the play has opened. I had a great time on this shoot. It was certainly stressful, and I struggled to sleep most nights worrying about the next day’s call sheet, but the cast and crew are the loveliest I’ve ever worked with on a paid gig. I learnt a lot and I made some fantastic memories.
And I confidently predict that no-one will be looking at the cheeseboard.
“Arm you, I pray you, to this speedy voyage.”
Over four months later and I was back in Windsor to shoot pick-ups. How strange it was to return to this town that was my home for several weeks, return to the theatre that I grew to know like the back of my hand, this time just for a flying visit. Lockdown was far behind us (until the next one); the theatre was a living building now. The play had been performed on stage 78 times, and they would perform it again that night when the pick-ups were wrapped and I could take my seat like any other punter.
But before then there were 12 set-ups to shoot, consisting of a short scene in Claudius’s dressing room that we ran out of time to do before, several extra close-ups for the King’s speech (originally shot on day 7), one extra close-up for another auditorium scene and a shot of Hamlet climbing the stairs to Gertrude’s closet.
It was largely a technical exercise, with my laptop and the principal photography footage never far away, and the camera logs on hand too. We had prepared well and all went smoothly.
I got to see most of the cast again, but so very briefly. There was barely enough time to ask them how the play was going before it was time to move onto another actor and another set-up. Both Ian McKellen and Jonathan Hyde told me how much better they knew the story and the characters than they did back in the spring. This led to a change of blocking in the dressing room scene. Gone was a shot-reverse with Rosencrantz and Guildenstern sitting comfortably on the sofa, as we had rehearsed it in March. Jonathan felt strongly that R&G needed to stand, so I composed a shot over him to his triple-paned mirror in which both he and R&G were reflected.
There had been some debate over which staircase to use for the final shot, but in the end we stuck to the one that’s genuinely outside the costume workshop, which has a slightly grungy, seedy feel to it. Ben rigged a skirted toplight overhead and little spill coming from around the corner, and a few takes later we were wrapped. Such an anticlimax!
And how was the play? Electrifying, utterly electrifying. If the film turns out half as well then we will have something very special on our hands.
A year after principal photography, I was surprised to get a call from Sean asking me to return to Windsor one more time for some more pick-ups, and of course I was very happy to oblige.
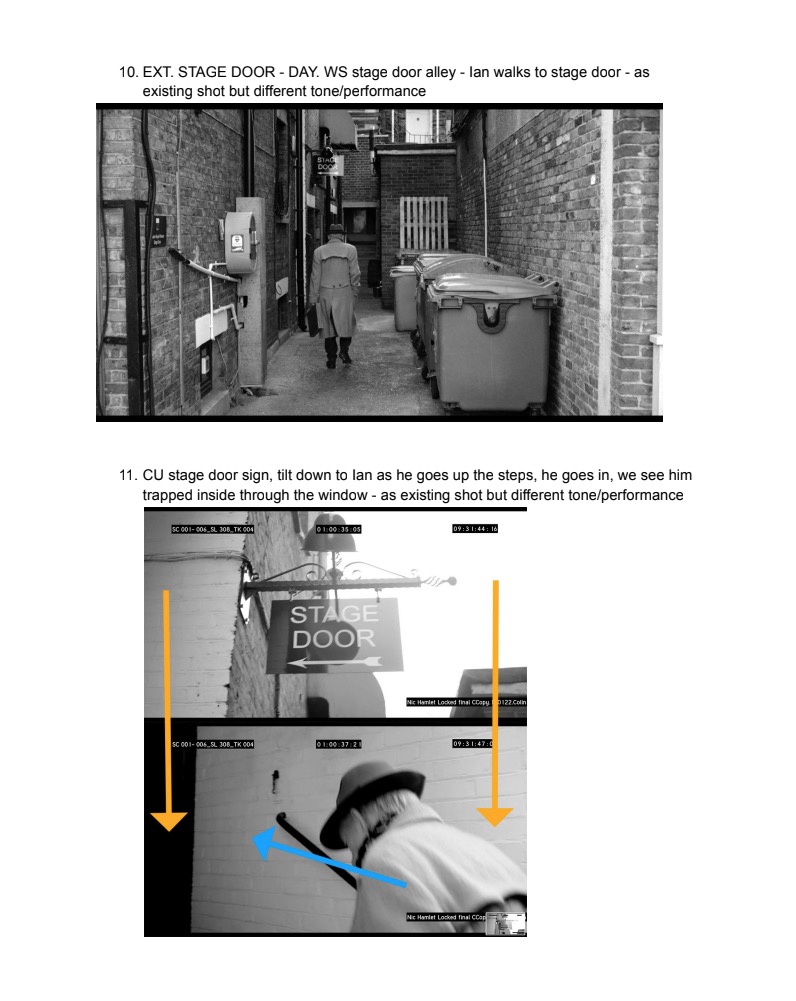
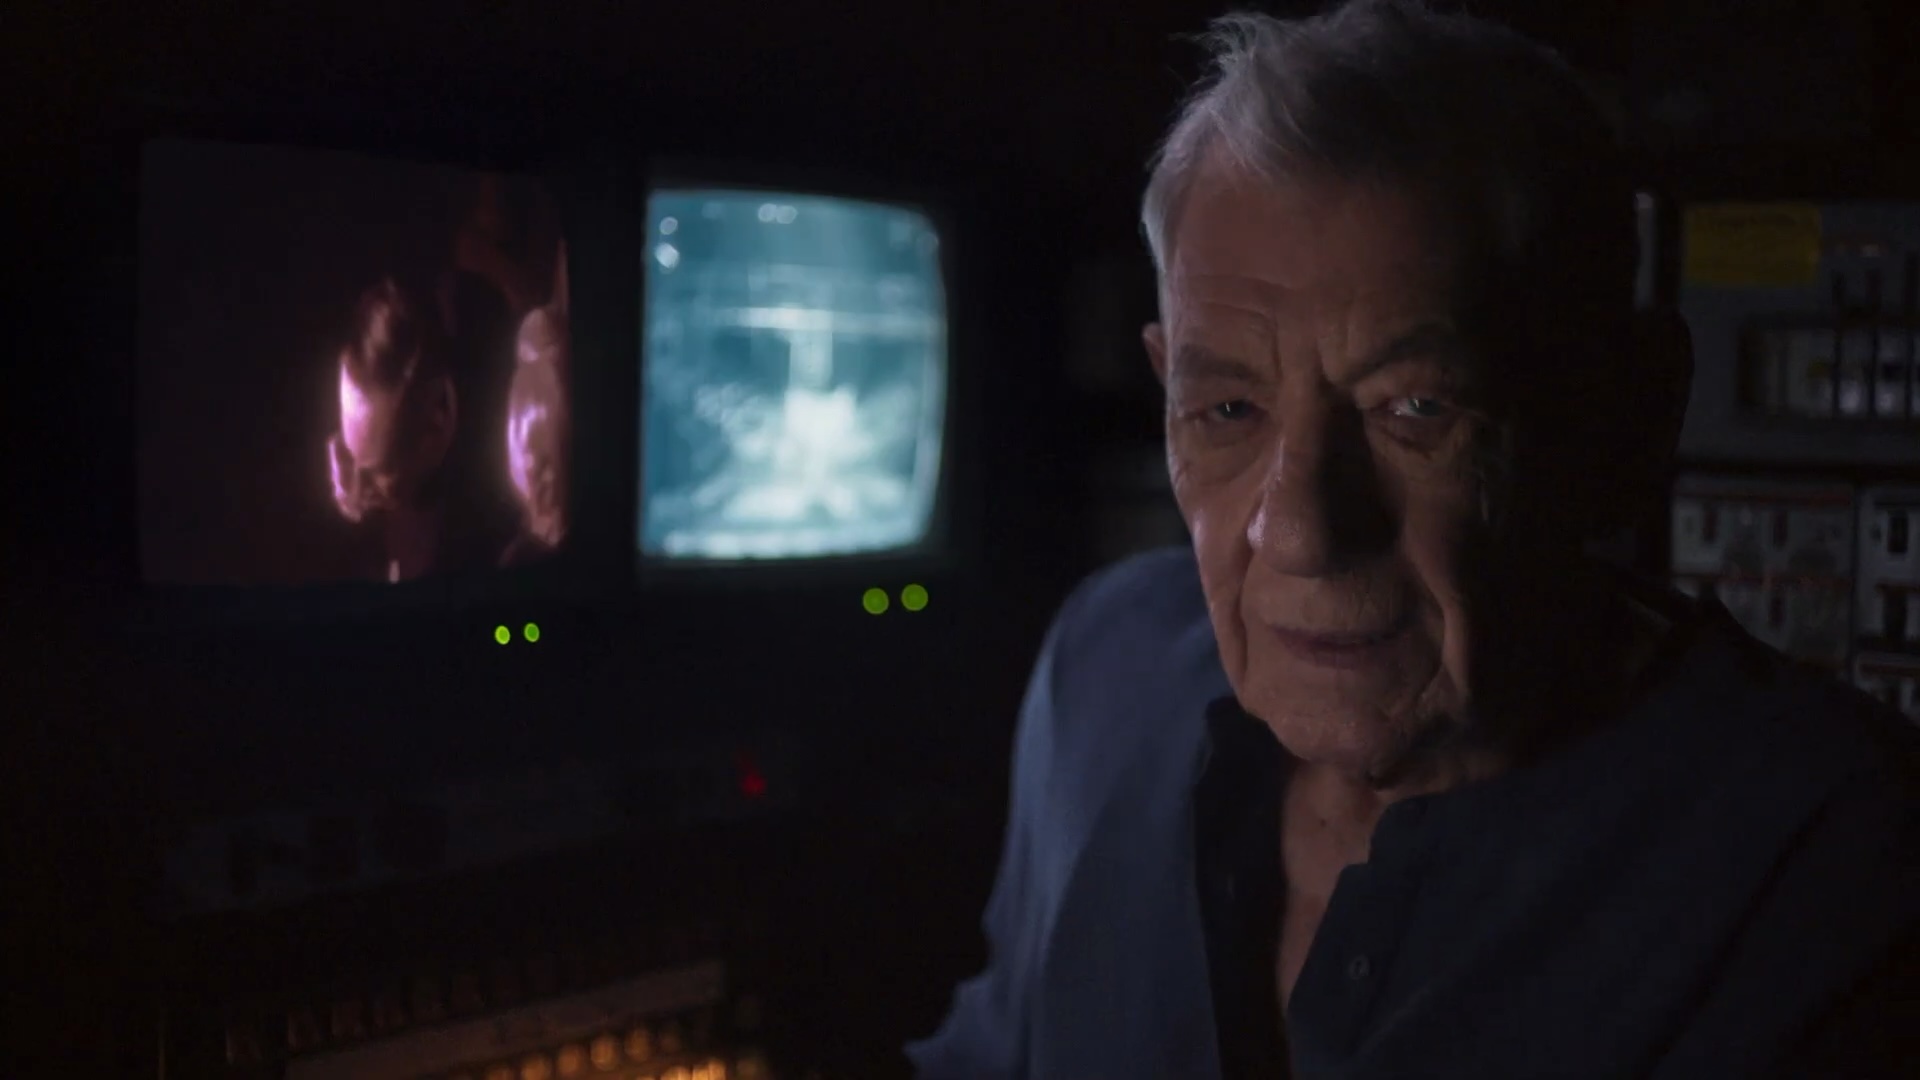
The edit is almost locked, but the tone of the prelude was wrong. So at 6 o’clock this morning we were on the street outside the Theatre Royal Windsor to shoot Ian’s arrival at the theatre again, this time with a much gloomier performance, and a new beat in which he peers into Hamlet’s dressing room and sees his alter-ego (using footage from principal photography). By the third set-up the streets were getting busy and we were shooting lots of takes in order to make sure we had every moment clean of unwanted background artists. There were a couple of camcorder shots to do from the roof and upper windows of the theatre, which involved contending with much chaos on the streets as people tried to walk or drive through frame or grab Ian’s autograph!
Sean and his editor, Nic, had completely desaturated the prologue, so I re-shot it with this in mind, going for a more sculpted and less naturalistic look than before. The weather was sunnier too, which will help give us the contrast that works so well in black and white.
When we moved the camera into the dressing room to shoot Ian looking in, Ben and spark Bruce bounced a 2.5K HMI into poly and then through a trace frame to produce a fill light that was soft enough to look natural against the bright daylight outside, but still had enough shape to look interesting. We shot a few variations including some with the prism gaffer-taped to the matte-box to add to the moment of magic.
The scene just outside and inside the stage door we recreated with exactly the same set-ups as day 24. This time Ben bounced the 2.5K into Celotex in the alleyway to push more light through the little windows of the stage door, as well as rigging a Fomex from the ceiling to give just enough top-light to lift the shadows when the door closed.
We dreamed up a couple of extra shots since we were ahead of schedule, including one of Ian peering through the letterbox in the theatre’s front door. Then, after a quick lunch break, we moved to Prompt Corner on the stage, the production that was rehearsing there having broken for their own lunch. We had to shoot a VFX plate of the monitor to drop the camcorder shots into (a lack of the correct cable preventing us from piping it in for real). I put a couple of tracking crosses on it, and we lit it with practicals and a bit of fill from the Fomex bounced into the black walls. Even more of an anticlimax than the previous pick-ups wrap!
“Alack and fie for shame”

Today’s material involved Ophelia seeking audience with Gertrude, then singing a risqué song to both her and the king. It sounds very simple when I type it out like that, but somehow it still took all day and wasn’t as well covered as I would have liked. (We did take a short break from the sequence, while waiting for hair and make-up, to grab a couple of actor-less shots of monitors playing the King’s speech from day 7.) There were a lot of big wides and very telephoto shots lensed on the zoom, due to Gertrude being in the circle and the others being in the stalls and on the stage for much of the sequence. Ben used a Source Four to key her, a very hard source but we got away with it by allowing it to mix with the existing house practicals. Zoe came up with some rock-’n’-roll lighting for the song, and Ben worked with her to tweak it for camera. This lighting was predominantly blue which was a colour I originally didn’t want in the film at all (at least not a colour of light), but it’s already crept in a couple of times, so I’ve given up fighting it! When the King and Queen stood in the stalls at the edge of the stage, Ben used a diffusion frame to bring down the intensity of the stage lighting and soften it off. When the pair sit down they were primarily lit by a 2K bounced off poly, with the house lights filling in. For the most aggressive part of the song I circled Ophelia, handheld and low, getting lots of flare off the backlights and the follow spot.
“Get thee to a nunnery”
We shot a sequence of three scenes on the stage and in the vomitorium where we’d shot Gertrude back on day 2. As we were working mostly with two cameras, Ben advised me against the hard, shadowy lighting through the metalwork of the set that I initially envisaged, and instead went for a soft source achieved by firing a 5K into an Ultrabounce up on the bridge. A Litemat armed out from the back of the bridge helped to wrap this source into a backlight for certain positions. We put on just one of the set’s florries, the bulkheads on the back wall and the odd other source from the grid, but Zoe had a pretty easy day!
When we got onto the material in the vom, Ben managed to bounce a tungsten fresnel (1K, I think) through unbleached muslin and mix it with Astera tubes to produce a soft light that would strike Hamlet from an edgy, “broken key” angle, motivated by the single ceiling bulb. On Ophelia’s reverse we went for a lower angle, as if it was floor bounce, because a more sidey look seemed too glamorous for the mood of the scene. For composition, heavy short-siding and occluding foreground objects were the orders of the day.
At the end of the day we picked up a dropped shot from day 3 before returning to the paint shop one last time to complete scene 18.
“Alas, poor Yorick”
First up was a scene in the foyer, a new space of us to film in, with Hamlet acting mad to Polonius. It was a scene whose storyboards I wasn’t very happy with, but I managed to find a new position for the wide – still starting with a zoom out from the convex mirror as planned – which made things a bit more interesting. On the spur of the moment I sent Max into the box office with B-cam, and he got a voyeuristic shot through the closed fretwork of the shutter, in which we captured Polonius’ asides. Reflections were a bit of a nightmare for the wide, not just because of the convex mirror but because of normal mirrors in the frame, glass in the doors and even a mirror behind camera (as seen in the doors). Lighting was pretty simple, just a Jem ball boomed overhead, the windows above the outer doors blacked out to suggest night, and a couple of Asteras between the inner and outer doors producing Urban Sodium spill. A couple of handheld set-ups were all that were necessary to complete the scene.

The next scene – featuring the famous Yorick skull – was a very different set-up. Hamlet and Horatio were in an upper box talking to the gravedigger (Llinos) on the stage below. Trying to communicate with other cast and crew on different levels of the building always slows things down, as did attempting to make things work for two cameras. (After struggling for quite a while to make the lighting work for both a wide and a 2-shot, it turned out that we couldn’t roll them both together anyway because of sound issues.) To match with the gravedigger material from day 6, we needed a soft, blue-ish three-quarter backlight, which was a 5K tungsten bounce again up on the bridge of the set. The usual Asteras behind the bleachers were set to a cool temperature too. Hamlet and Horatio in the box were lit by two more Asteras and a Fomex, all motivated by a practical table lamp. To key them from the front, a Source Four was aimed at them from beside the 5K, and cut and dimmed to make it as subtle as possible. Eliminating shadows from a theatre speaker rigged near the box was somewhat time-consuming. Next we shot Llinos, both from the box and from stage level simultaneously, and as on day 6 we beefed up her practical worklight with a Rifa. We also hid another Astera inside the grave, and turned on the footlights to help her too.
“I pray you, be round with him!”
A big scene today in the costume workshop at the very top of the theatre, beautifully dressed as always by Lee’s team. The room has a lovely skylight which sadly we had to black out because it’s a night scene. Ben put up a polecat across it and rigged a Litemat 2L to it, with another one attached to an existing hanging fluorescent above a sitting area. (We didn’t use any of the fluorescents.) On the other side of the room Ben rigged more polecats with a series of three Astera tubes set to 4000K for a slightly cooler look than the tungsten we were going for in the rest of the space. Then it was just a case of dimming the various practical table lamps and lighting the candles! Some key parts of the action take place around and behind a rack of costumes where Polonius hides to spy on Hamlet, and ultimately meets his death at the prince’s hands. We made sure to establish a practical behind there, then used a Fomex and another Astera covered in muslin to wrap and “floor bounce” this where necessary. Unfortunately, to few people’s surprise, we didn’t finish the scene.
“There is a divinity that shapes our ends, rough hew them as we will”
We spent most of the day completing the costume workshop scene, bringing in Francesca Annis late morning for her ghost shots. We repeated the green Northern Lights effect from the roof in the side room where the ghost appears, and took care not to fill the room with too much “ordinary light”. Another Astera was mounted above the door which Francesca looked through, top-lighting her, but we had to flag it to stop it spilling into the room.
With only about an hour and a half left of our day, we moved to the follow-spot booth to shoot a small scene which we had dropped on Wednesday. We had to make this pretty basic, two shot sizes from one direction and one size from the other. The existing florry was used as motivation, with Asteras enhancing.
“Do you know this waterfly?”
A big day in Hamlet’s dressing room, a club room on the ground floor of the theatre that the art department had dressed to look like a seventies teenager had taken over his grandad’s bedroom! Very appropriate for an age-blind Hamlet. The first scene was broad daylight, and Ben rigged a 12×12 Ultrabounce outside which served to block traffic and pedestrians from the camera’s view and to flag the real sun, and of course as a medium to bounce artificial light into, specifically a 6K HMI fresnel. With the net curtains on the window, we had a lovely big, soft source to backlight our wide shot from the opposite end of the room. We turned off the wall sconces – I wasn’t sure, but Ben talked me into it, and he was right! – but had a few practical table lamps on, one of which served perfectly to give a side-light on Ian. The only things we added to the wide were an Astera on the floor for eye-light, and another tucked outside the door to ensure that Horatio and Marcellus were sufficiently lit when Hamlet lets them in. For Ian’s close-up we used a tungsten fresnel through a muslin frame to replace the practical, and turned down the 6K to reduce the veiling lens flare from the window. (The anti-flare coatings on the Cooke Panchros is poor by modern standards, but that’s one of the things I love about them.) For Ben and Ashleigh’s singles the window was a beautiful key and needed only a little bounce to augment it.
 After lunch we moved onto a scene much, much later in the story, in which Hamlet and Horatio discuss the morality of killing Claudius, then Osric arrives to tell them of the proposed duel. Sean and I had agreed in rehearsals that the outer curtains should be closed for this scene, giving the room a beautiful yellow glow. Just before we rolled on the first set-up, however, Sean expressed concern about how bright the window looked, preferring to give more of an evening feel to the scene. We wasted off the 6K, leaving mostly just natural light to backlight the curtains, making the wall scones and practicals feel like the main sources. Ben bounced a small fresnel off the ceiling to fill in the faces. I shot the whole scene on the Cinetal, thinking I might add in an unplanned zoom to one or more of the set-ups, but in the end I didn’t. When we moved to Hamlet’s close-up, and needed to pull focus from a foreground letter in Horatio’s hands, we broke out the dioptres for the first time in order to focus close enough. This meant we had to cheat Hamlet slightly closer to the lens so that we wasn’t beyond the new maximum focal distance. Our final set-ups of the scene were POVs through the door’s spy-hole when Hamlet first sees Osric at the door. I thought there might be some experimentation involved to find a lens that allowed us to get close enough for the spy-hole to be large enough in frame, but still to focus on someone fairly close on the other side. I decided to try the 50mm first – they’re usually best for close focus and versatility – and it worked out perfectly. We took off the matte box and pushed the lens right up to the spy-hole, with just enough room for me to squeeze in my finger and open the spy-hole’s cover on cue.
During the afternoon, Max and the lighting crew had been setting up B-cam ready for a pick-up shot of Horatio reacting to the “Alas, poor Yorick” speech, something we dropped on Wednesday, but we ended up shooting it on A-cam instead.
“More matter with less art”
The two-day weekend allowed us all a much-needed recharge. A few of us hired bikes on Sunday and cycled up the river to Maidenhead, where we found an idyllic field to have a picnic in. Bliss.
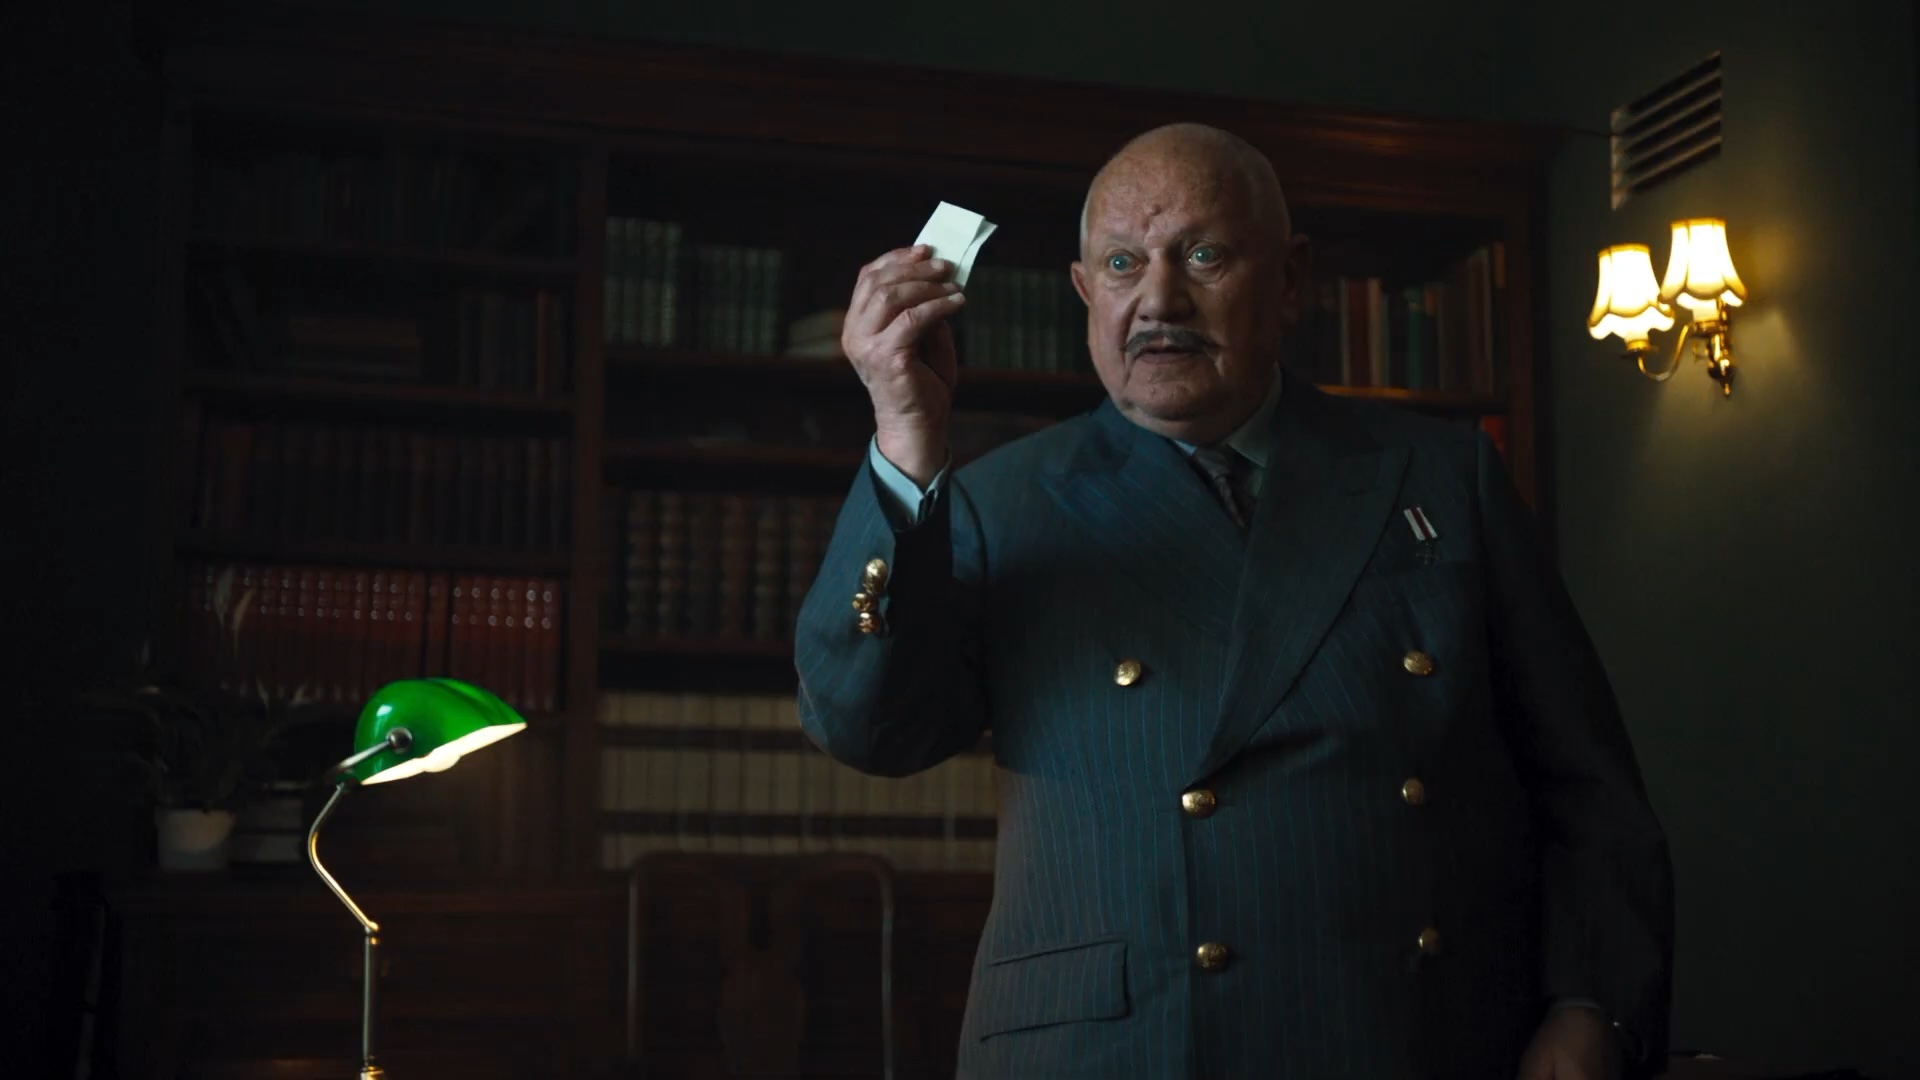
Monday saw us tackling all of the scenes in what Sean dubbed “the Oval Office” – the office of Claudius the king. First up was a big day scene with a few pages of text and multiple characters coming in and out. One of my references for this scene was The Man in the High Castle, specifically a scene in Hitler’s office where the sunlight smashes into the floor and bounces back up to light Rufus Sewell. The real sun was indeed pounding through the window of the Oval Office, but not from a high enough angle to produce much floor bounce. Since we were on the third floor and we didn’t have the budget for a scissor lift or cherry-picker, we had to live with what the natural light was doing. I set my ISO to 1600 to hold more highlight detail outside, then stacked .9 and .3 NDs so that I could keep the lenses wide open as usual. Ben wanted to keep the room’s many practicals (desk lamps, table lamps and wall sconces) off for this scene, but it looked a little too flat without them – a little too much like we hadn’t done anything! Apart from a Litemat sneaked into a corner to extend the daylight, and a Fomex in another corner to extend one of the practicals, we really hadn’t done anything else on the master shot! For the coverage we brought the Litemat in closer. At lunch we were forced to wrap the scene, despite having only the bare minimum of coverage in the can. I wasn’t very happy about it, but we could not afford to fall any further behind schedule.
After lunch we shot an evening scene, with just a little natural light playing and our main source being an Aladdin with unbleached muslin boomed over the centre of the room. Being only half a page, we were able to knock the scene off very quickly, to everyone’s surprise!
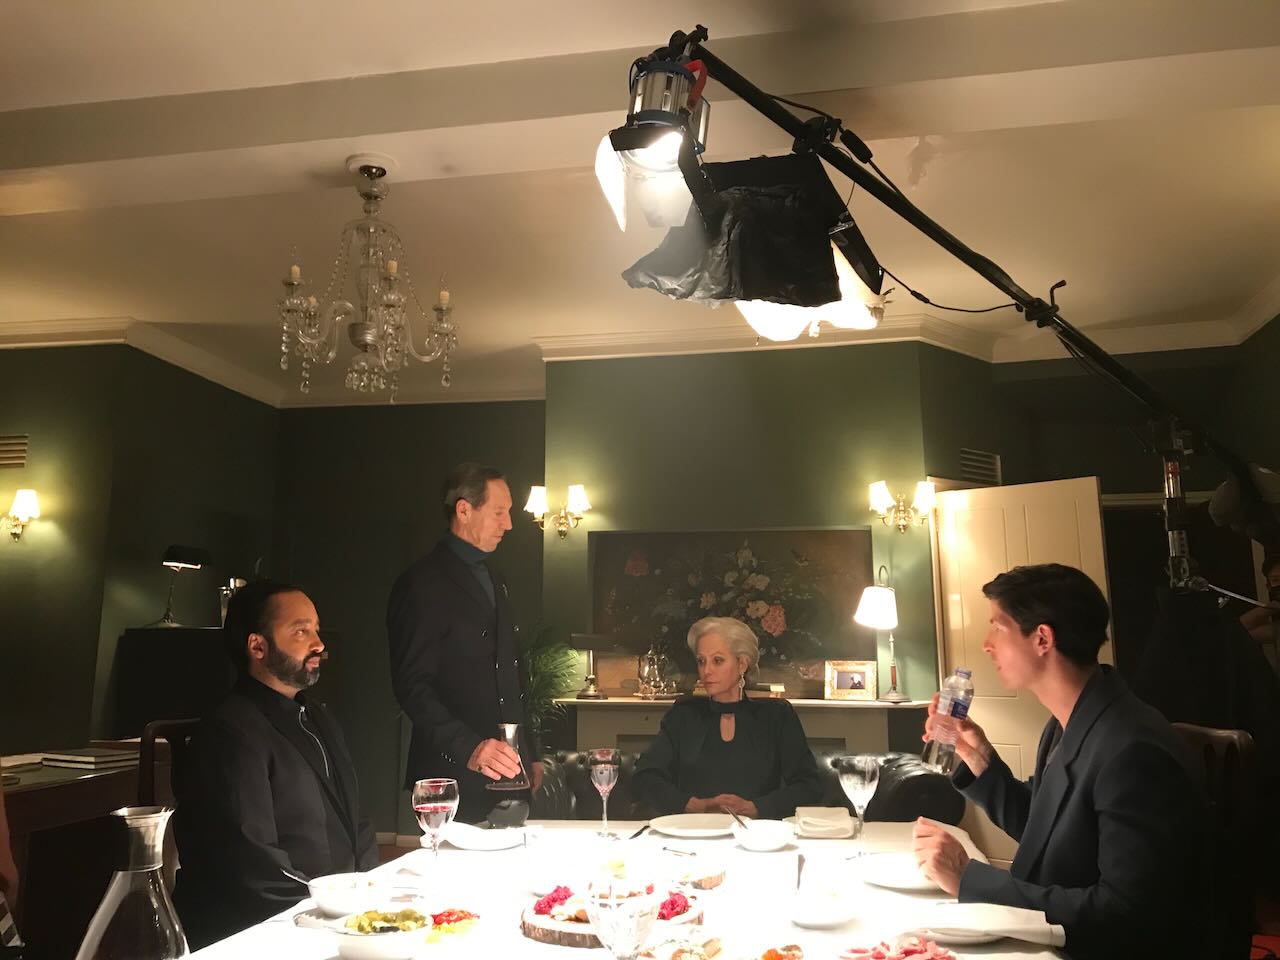
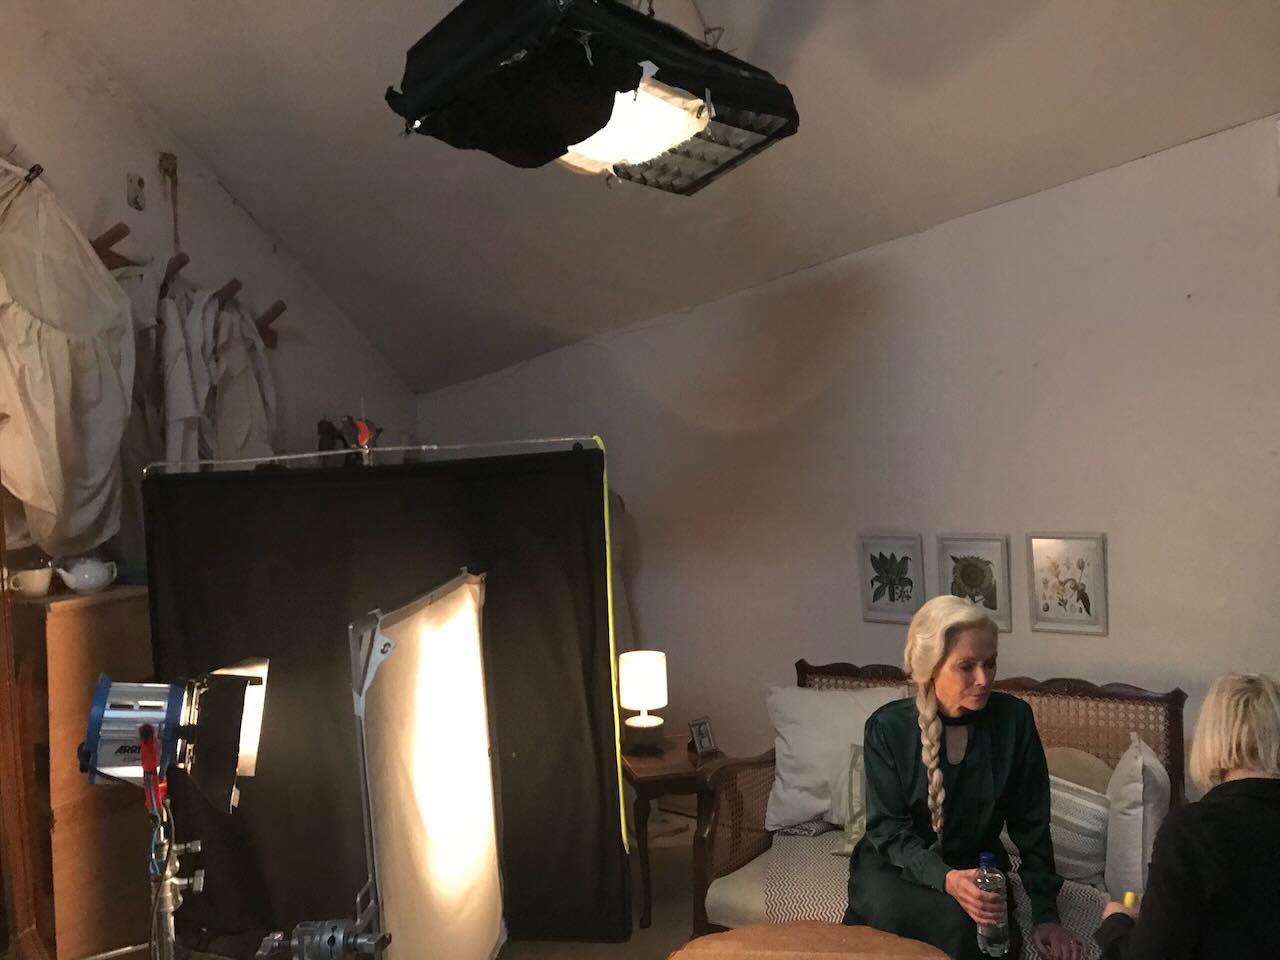
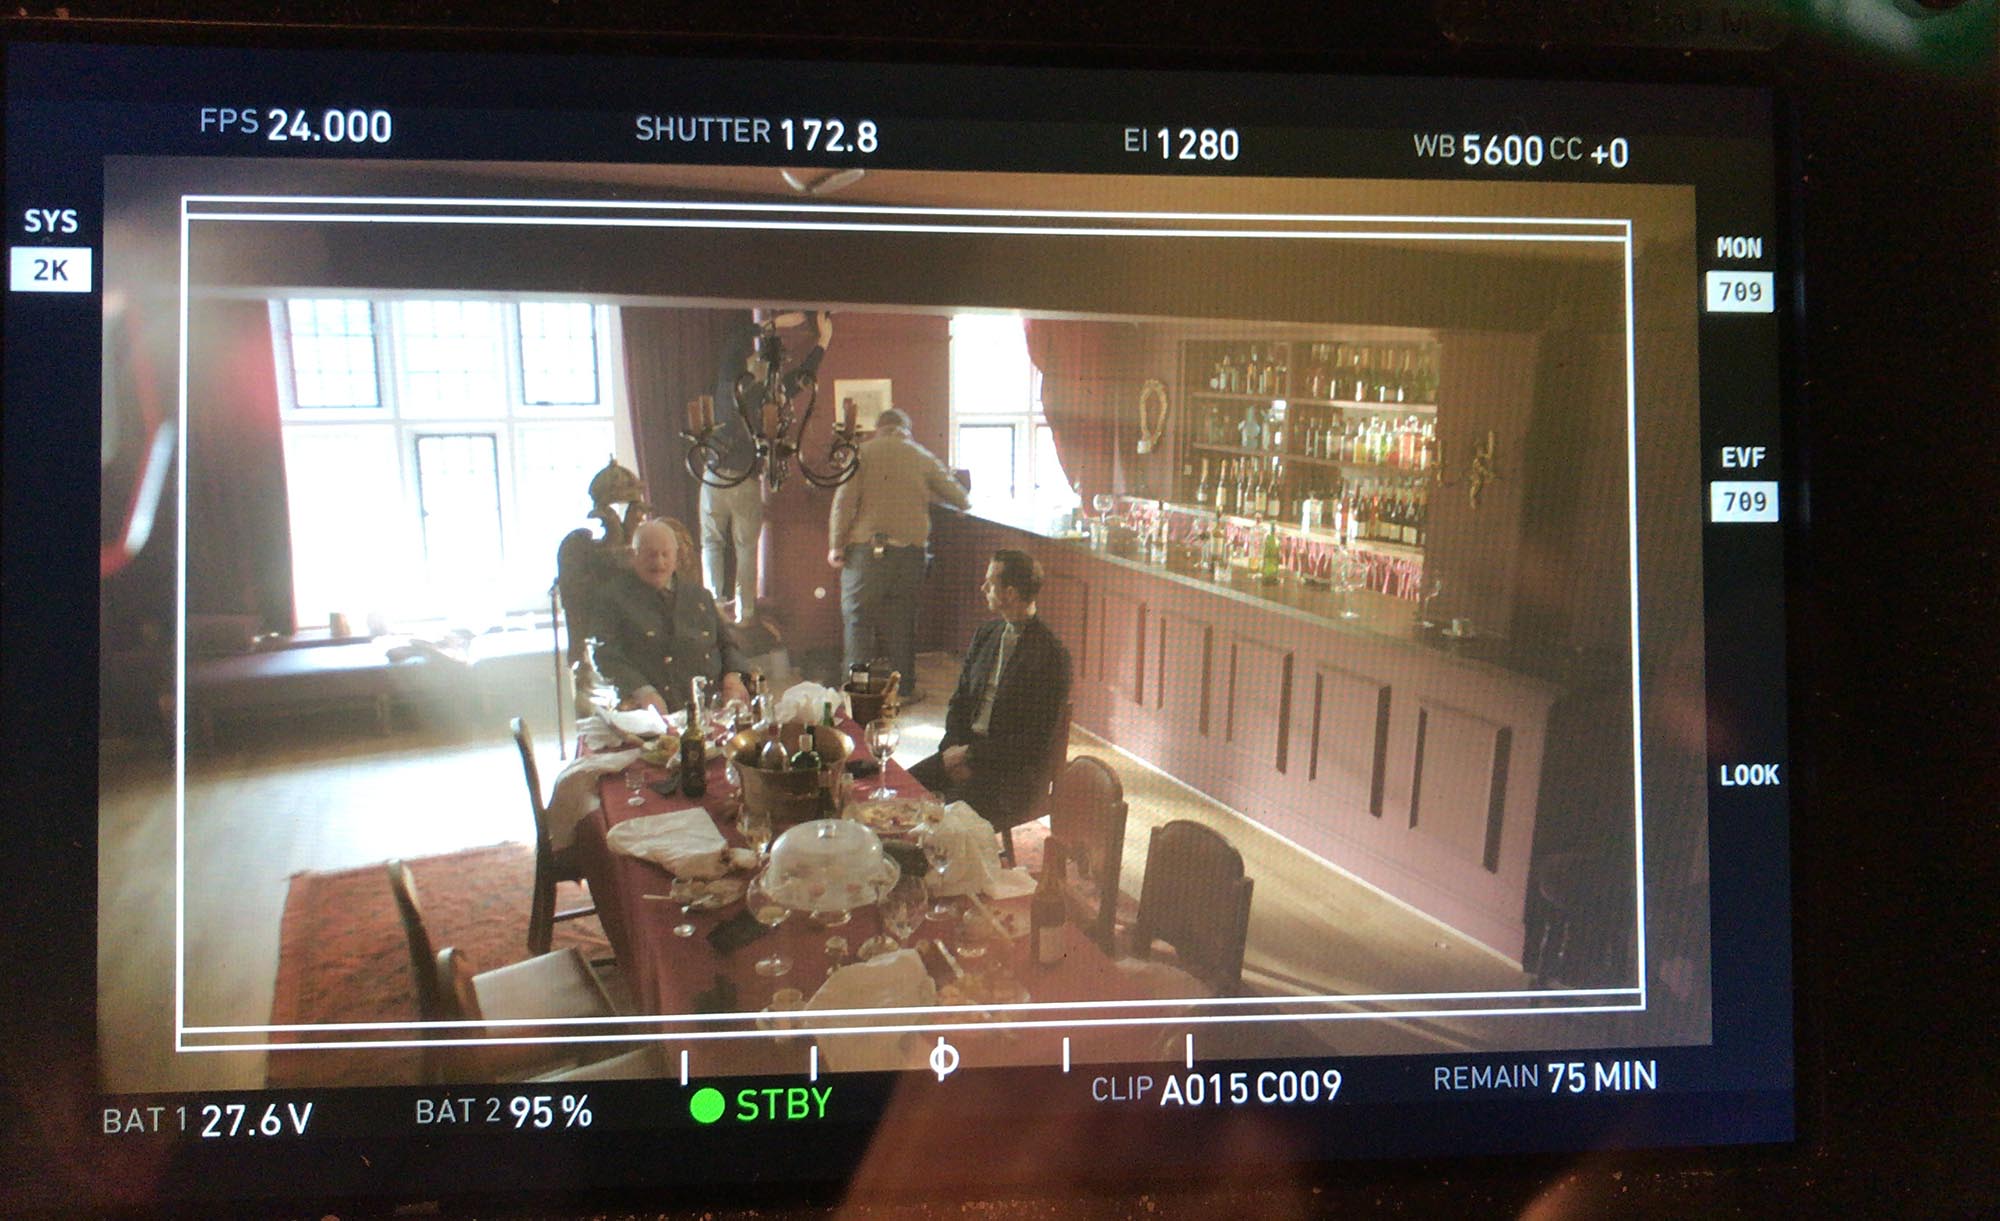
Finally we had a supper party scene set at night. The art department put a white cloth on the table, and Ben suggested firing a 650W fresnel down into it as well as the Aladdin, so that most of the light on the four characters would come up from below, and the Aladdin would just serve as fill. The result was absolutely beautiful. All the practicals gave us lovely backgrounds, and we brought up a dark corner by placing a warm Astera tube on the floor behind a pot plant. When we faced towards the window for the reverses, the castle was now visible across the road, thanks to a 2.5K HMI stationed on the theatre’s first floor canopy, firing through a frame of muslin. (We’re really using the muslin on this job!) The castle wall reflected about two and a half stops under key according to my spot meter, which looked pretty realistic on camera. (Key was T3.7 at ISO 800-1280 for this scene; I shot it all on the zoom. I would have stuck at 1600 ISO but the backgrounds in the room were looking a bit bright and the wall sconces weren’t dimmable, so Ben suggested stopping down and bringing up the Aladdin and 650. Rather than stopping down I stayed wide open and reduced the ISO from 1600 to 800. Then when we reversed to see the window I went back up to 1280 to get a bit more from the castle.)
“The time is out of joint”
This was one of the biggest days in the schedule for logistics, safety, and lighting, as well as a crucial part of the story: Hamlet meeting the ghost of his murdered father on the battlements of Elsinore – or, in our version, on the rooftop of the theatre with the battlements of Windsor Castle looming in the background. It was our first and only night exterior shoot.
There were three consecutive scenes to shoot, which we did in reverse order. The first to go before the camera was set just before sunrise, so we shot it day-for-dusk, completing the last set-up just after sunset at 8:15pm. I used the Easy Rig to allow me to look straight down on part of the spiral staircase fire escape where we were shooting, then pan with Horatio and Marcellus as they ran up the stairs and into a 2-shot. This was natural light only, with a .9 and .6 ND in the matte box, and a white balance of 4500K to give that cool, dawn feel. Next we shot Hamlet’s reverse, and here we added a 2K inside the building for his exit into it, and turned on an existing practical emergency light which helped to give the feeling of the daylight being dim. As the spiral staircase was sandwiched between two buildings the characters were naturally shadowed, which helped a lot. After an insert on their hands as they took a blood oath, we ran the camera four storeys down to the street to get a dramatic low angle wide of the staircase and Horatio and Marcellus running up it. By this time the sky was starting to darken and the emergency lights were at a nice level compared with the remaining daylight.
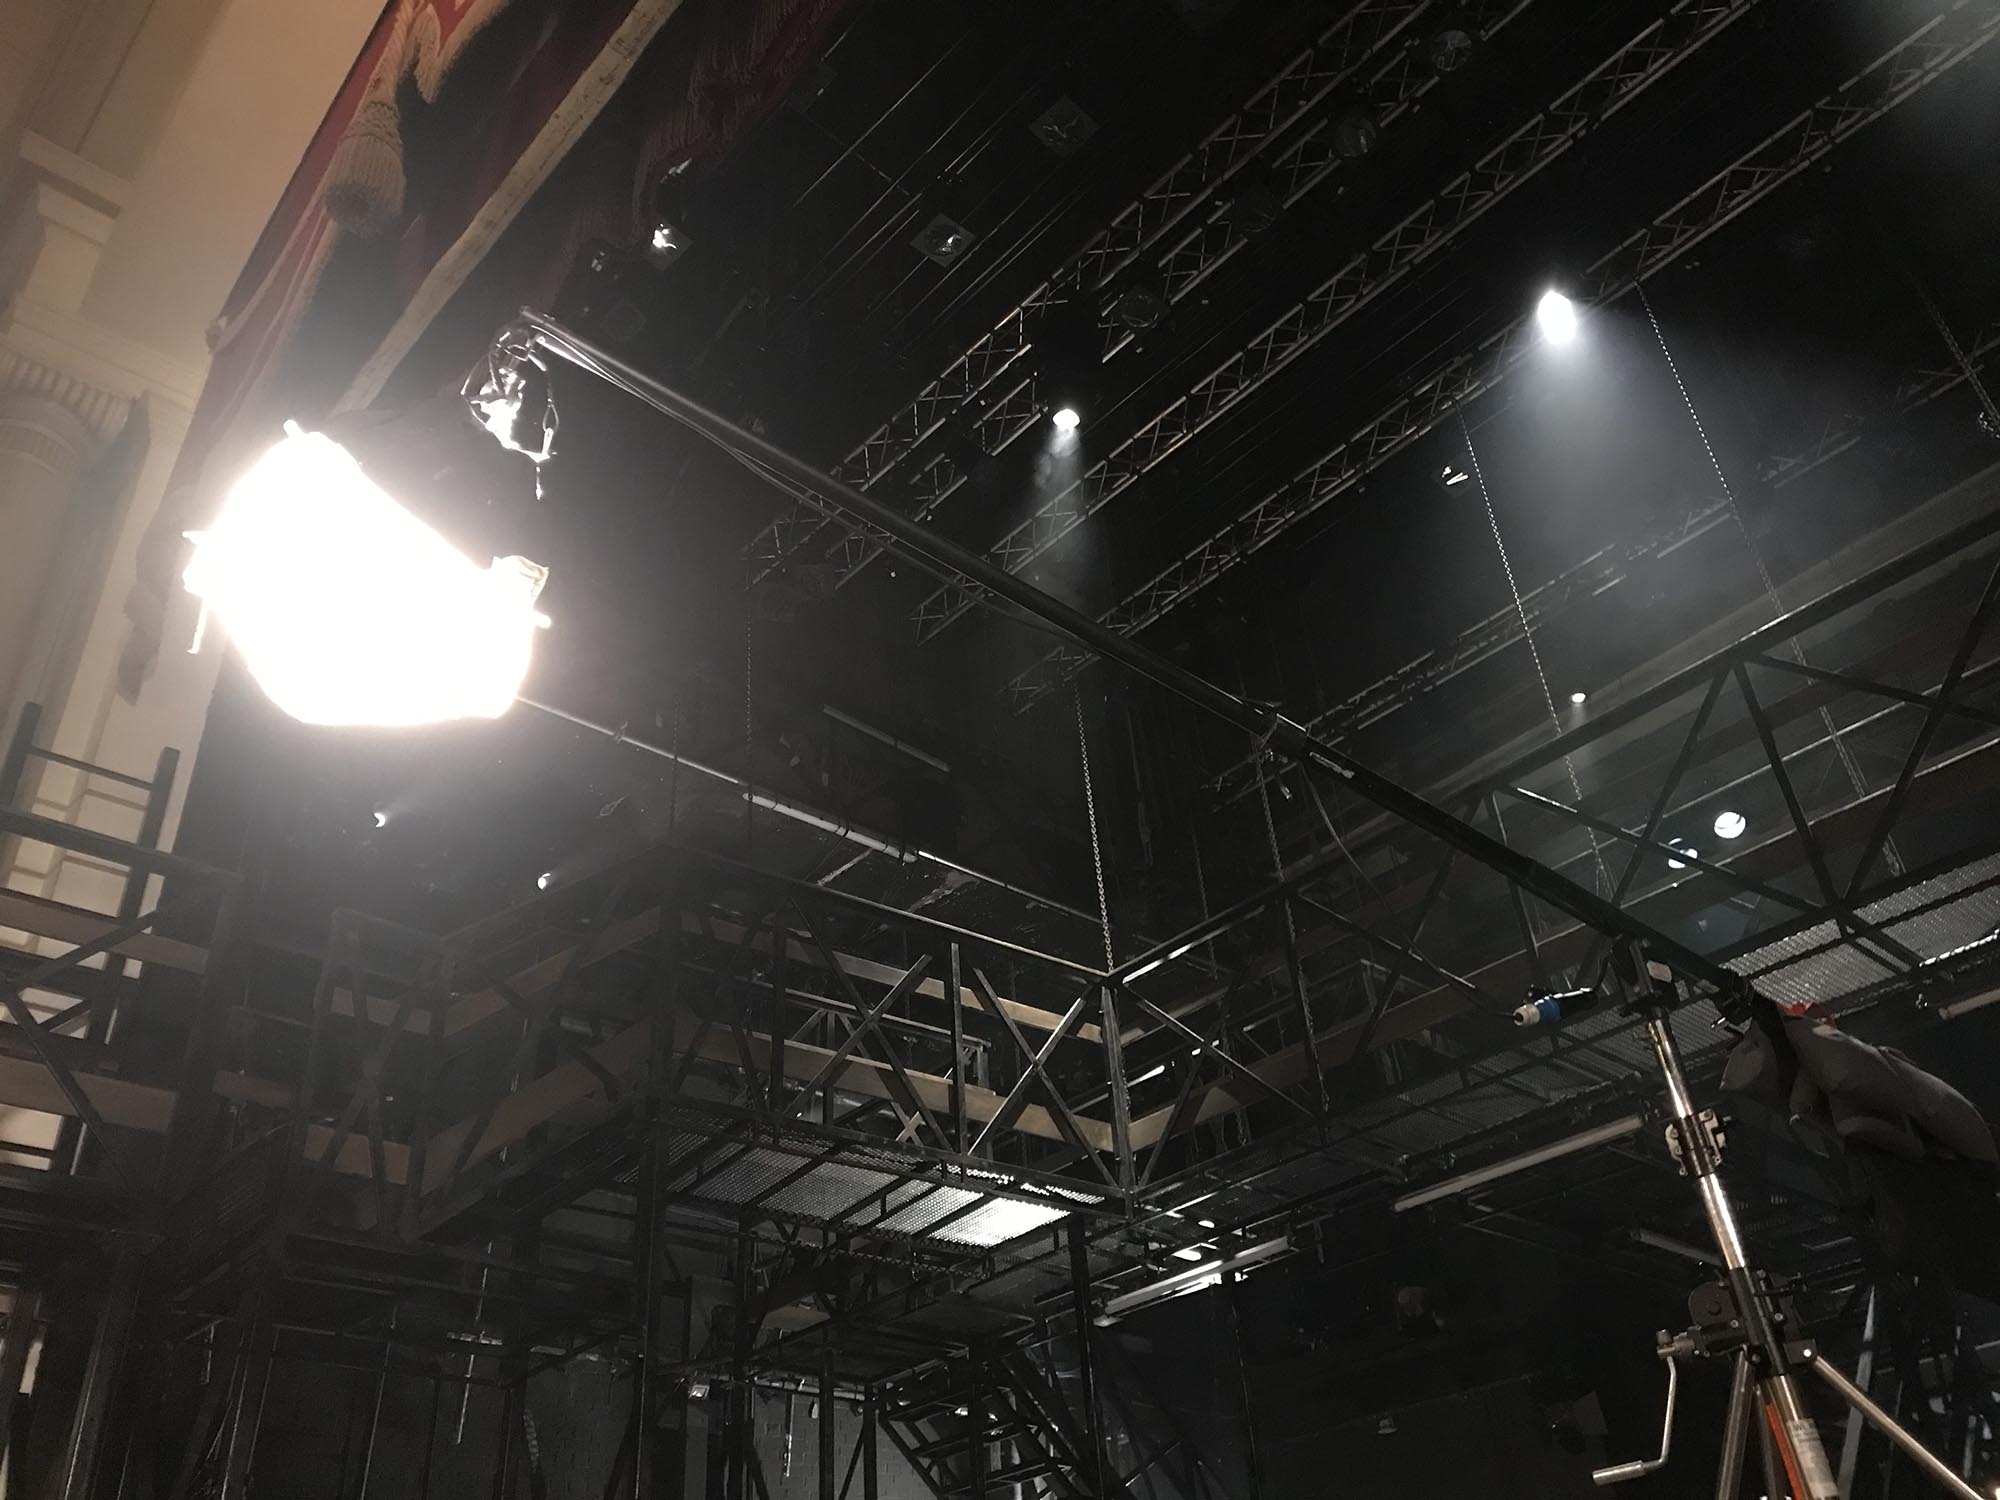
Then it was up to the rooftop for Hamlet’s encounter with the Ghost (played by Francesca Annis). Health and safety concerns had led the producers to have a scaffolding staircase built over the narrow ladder which had been the only access during our recces. This made it much easier to get equipment and people up there! Ben, Connor, Bruce, the spark dailies Nathan and Joey and the two members of the theatre’s LX staff who were helping them had spent several hours and most of the previous day pre-lighting the scene. Six 10K tungsten fresnels were set up in the street (requiring two gennies) to light Windsor Castle, while a Litemat 8 was rigged from scaffolding to top-light the main area of action on the roof. Next to it were two Astera tubes which Connor had programmed to produce interactive light for an Aurora Borealis effect that will be added in post. Underneath the roof’s four skylights were Geminis with a warm, dynamic program to suggest a raucous party happening inside the building. There was also a 2K on a walkway lighting a neighbouring building site. The art department had built a sort of chimney or air conditioning vent which concealed a smoke machine, motivating a supernatural mist. We kept the Ghost just in front of the top-light so that it would become backlight, but Hamlet was then quite flatly and frontally lit by it – not ideal, but there was little else we could do.
The first scene of the roof sequence, but the last to be filmed, took place mainly at the foot of the scaffolding staircase, which looked amazing with the illuminated castle behind it and the Ghost standing at the top against billows of backlit smoke. We’d had bulkheads installed on the wall next to the staircase, and a Gemini was placed behind a pair of doors cracked open, again suggesting the party going on inside. The final source was a Litemat on another part of the roof (accessible only by Will from the theatre in a safety harness!) which provided ambience in one direction and backlight in the other. I came up with a clever shot to show off the scale and slowly walk down some steps to push in on Hamlet, Horatio and Marcellus and then tilt up to show the Ghost, but it never quite worked as well as I wanted to because the tilt was so extreme and the weight of the camera made it very hard to balance at that angle. It didn’t help that I was pretty tired by that point! Anyway, we picked up the moments that didn’t work in other angles, then shot the reverse and wrapped comfortably on time, which made everyone very happy!
“Now is the very witching hour of night”
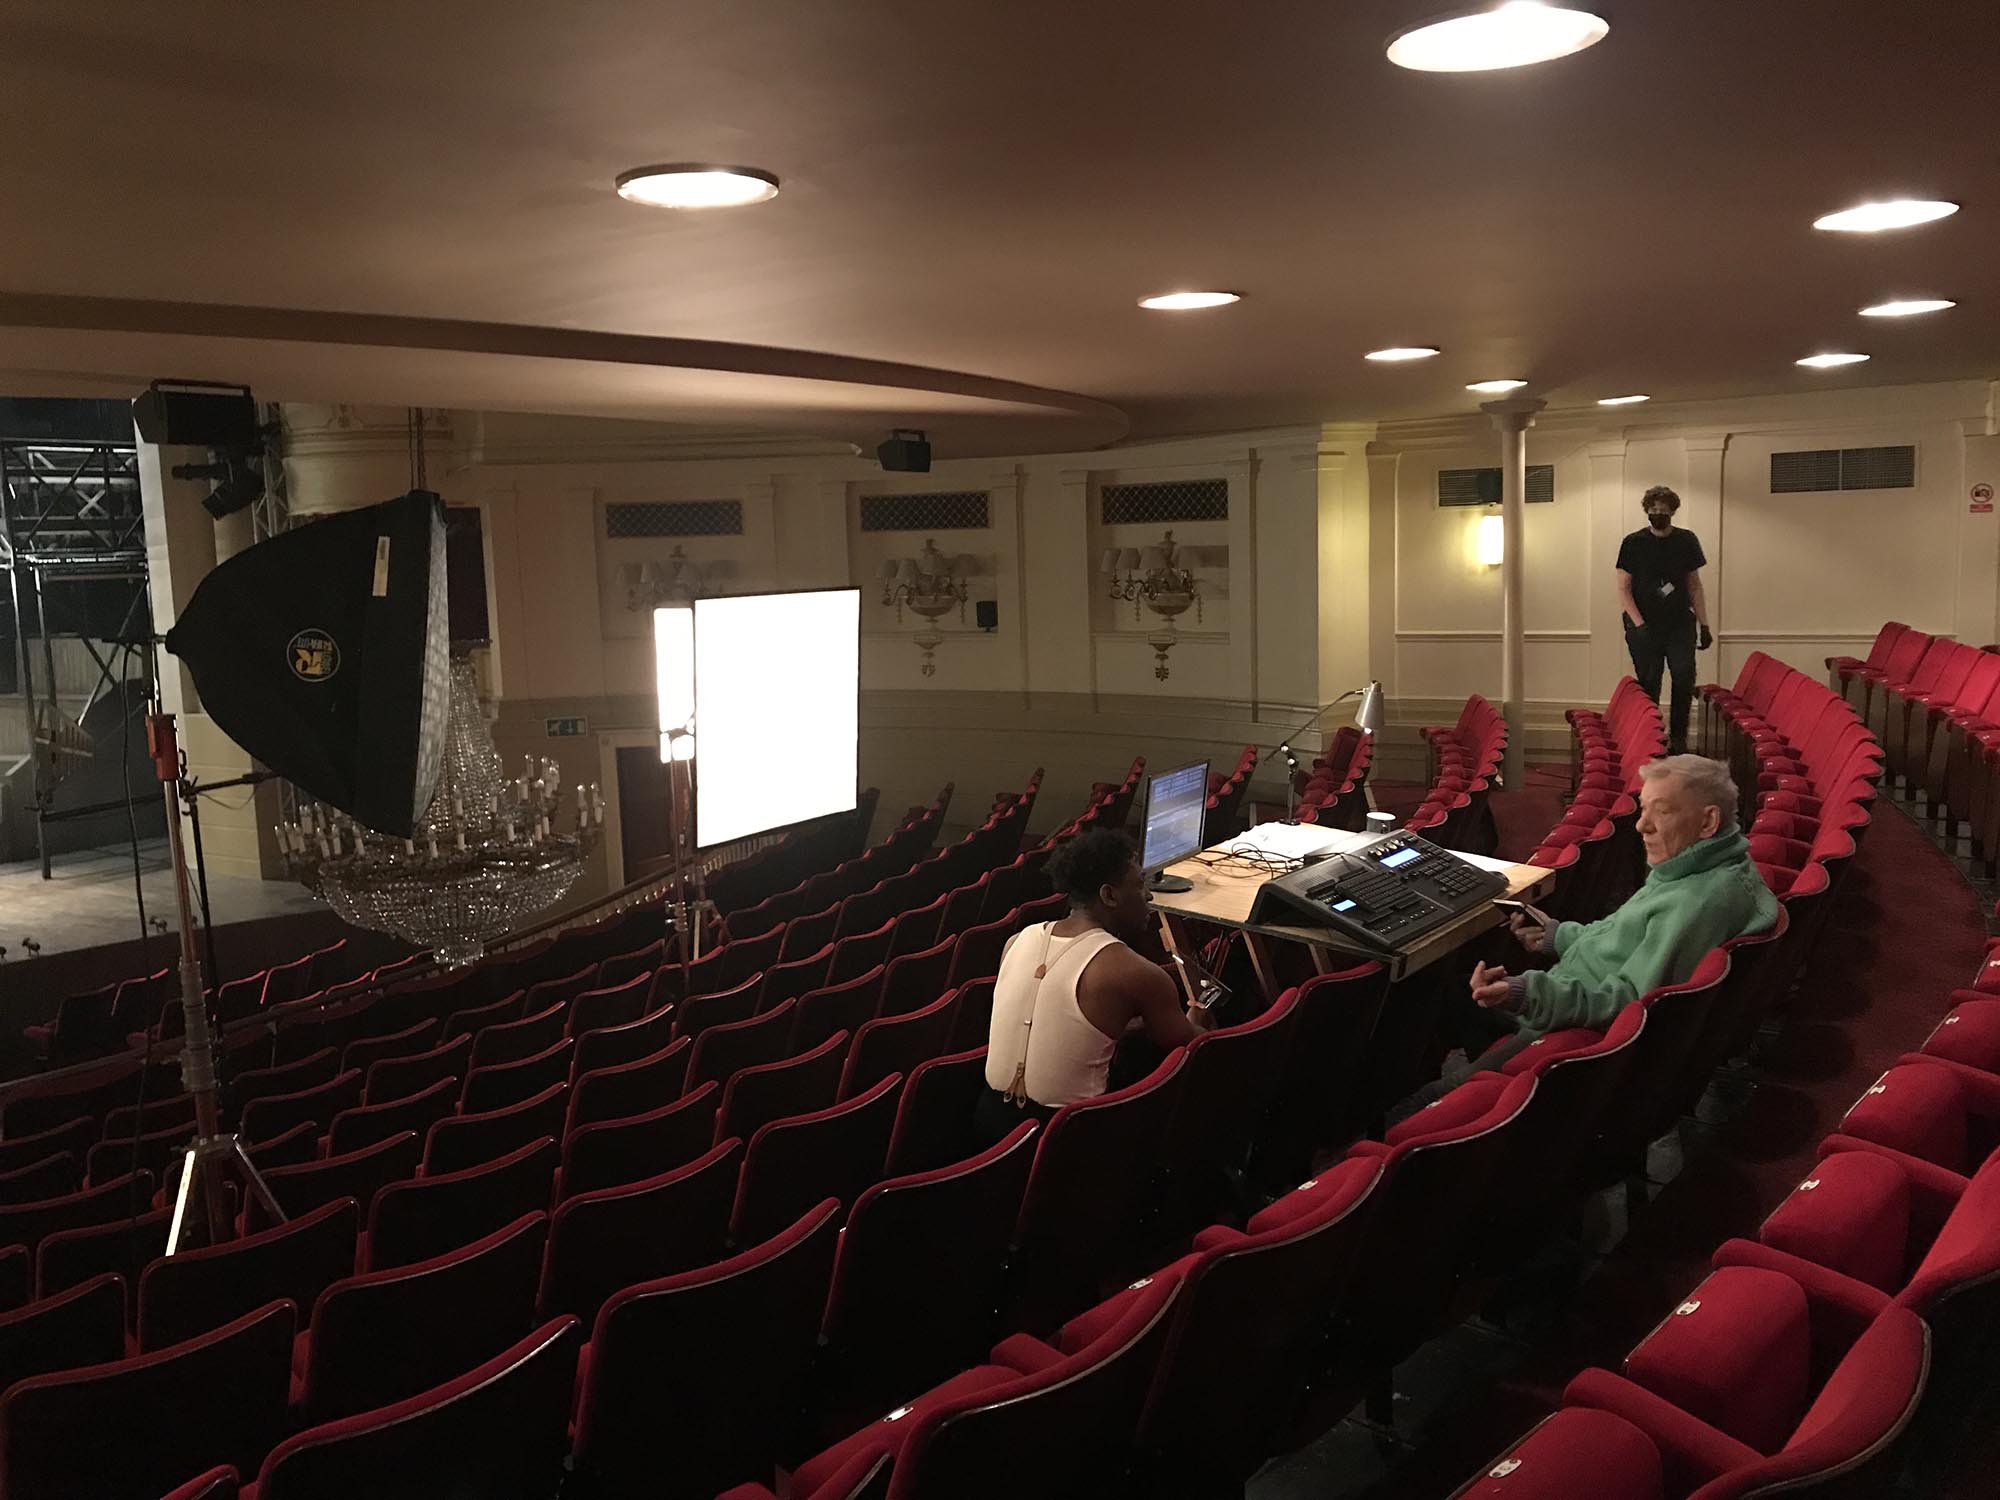
Back in the auditorium (it seems so long since we were last there!) we shot the aftermath of the play within the play. It needed to be bright because it follows on directly from the conscience-pricked king calling for “Lights, lights!” We used the chandelier as a key for some shots, adding a Litemat or a Rifa for others.
After lunch we shot a oner in which Hamlet soliloquizes while shutting down the lights on the stage and in the auditorium. This took a bit of rehearsal and cueing with Zoe and with Tilly who was operating the lighting desk. We added some Astera tubes and a small LED to make sure Hamlet was still dimly visible when everything went out.
That completed our call sheet for the day, and we spent the last few hours on reshoots and pick-ups. We revisited day 3’s first scene, changing up the blocking a little and using the wheelchair dolly and handheld shots to increase the energy, then we grabbed a missing shot from the next scene.
“My thoughts be bloody, or nothing worth”
We started on and near the stage, with a scene in which Gertrude – having run all the way down the back staircase from her room at the top of the theatre – finds Claudius in conference with Guildenstern in a box. I decided to turn all the house lights off to give it the mood of secrecy required, motivating most of the light from the fluorescents on the stage (but beefing it up with a Litemat and an Astera for eye-light). Inside the box were another couple of tubes to provide backlight and fill, motivated by a practical table lamp. As usual we stuck closely to the storyboards, shooting steep angles up to the box and down from it onto Gertrude, a focus pull from Gertrude to Claudius and Guildenstern in the foreground, then a shot-reverse through the doorway as Claudius issues orders to Rosencrantz and Guildenstern.
We continued into the next scene, where Claudius walks briskly down the corridor from the box with Voltemand. This was shot on the wheelchair dolly, both leading and following the characters. Ben added a Fomex wrapped in muslin for the final position, but otherwise we relied on the existing overhead practicals and emergency-light practicals, the former re-globed and diffused, the latter gelled with Straw and ND.
After lunch we shot Gertrude’s actual run down the staircase, a fun (if somewhat strenuous) scene which quite simply involved me running down three or four storeys with the Alexa XT after Jenny Seagrove. I stopped down to T4 and a third, the smallest aperture of the shoot so far, in order that the existing florries she ran past wouldn’t be too bright. This meant pounding a couple of 5Ks into a bounce board on the stage so that Claudius and the box would be sufficiently lit when I emerged into the auditorium. The only other lighting was the straight blacking out of a fire escape window (as the scene was meant to be night), black-wrapping part of one florry that was making the start of the run super bright, and turning off one florry to create a patch of darkness. I used the 18mm and didn’t look in the viewfinder much, instead concentrating on where I was going and guessing the framing. My experiences in Exit Eve (which had a lot of staircase scenes) reminded me to pan in advance of going around corners to keep Gertrude in shot. The result was very cool, especially the dark section which was lightly hazed and featured a distant florry reflecting off the floor.
Finally we moved up to the flies, shooting first from a small platform accessible only by ladder, which required getting the camera up to it on a rope. We motivated the lighting from the stage, firing two or three 5Ks into ultrabounce, which resulted in the cast moving through soft shadows of the fly-ropes. Back in the prep the theatre LX team had installed extra florries on the fly floor in addition to the two extant ones, especially for this scene, but we ended up taking out the tubes and cable-tying Asteras in their place, which we set to a low level with Quarter Plus Green virtual gel. I deviated from the shot-list for the coverage, finding a new and interesting shot where – using the Easy Rig – I crabbed the camera from one side of the ropes to the other. On one set-up we rolled Horatio’s camcorder, getting his POV of Hamlet, Rosencrantz, Guildenstern and the Captain from the stage.
“Lights, lights!”
A complicated shot to start with, winching up the chandelier as I zoomed through it to Hamlet and Horatio at the lighting desk beyond. Ben placed an Astera on the desk to beef up the monitor light, and a Fomex to beef up the tungsten practical lamp. Other than a couple of 2Ks bouncing through doorways, we relied on existing wall sconces and down-lighters for the zoom shot. For closer coverage we added a Rifa as a key for the two Hs, but when the action moved over next to the wall the sconces did all the work for us, though Ben did add some tungsten bounce from the stage to give a touch of backlight.
After lunch a second camera came into play. The producers had requested this after becoming concerned about the schedule slipping. Using two cameras is not a magic wand to double your coverage; it doubles your sound problems and your lighting problems and makes every lens choice and lamp position a compromise to keep things out of the other camera’s frame. I decided that today was one of a very small number of the remaining days on which it could be used successfully. I asked Max to operate it, as he’d been watching all the footage as he wrangled it, so he was familiar with the style. A new B-camera 1st AC and trainee were brought in for the day, while trainee Lulu stepped up to 2nd the B-camera.

Our first dual camera set-up – to which we added Horatio’s camcorder rolling, for extra shits and giggles – was reactions of Claudius and Gertrude to the play within the play, with Max getting a single on the latter while I started on a two-shot and zoomed in to an ECU of the former. But first the dance part of the play had to be rehearsed so that Zoe could plan the theatrical lighting for it; then Ben and Connor were able to programme the same colours into two Astera tubes that were bounced onto Claudius and Gertrude. A dim Gem ball and a couple of 300W kickers were added, while the house down-lighters were turned on at about 10% to look like emergency lights in the background.
Later we flipped around to shoot the dance itself, at 18mm and 75mm simultaneously, before cross-shooting Hamlet and Ophelia through the dancers and over their shoulders to the dancers. Finally we captured a pick-up of the glaring lights coming up on Hamlet, for which we ensured that one of Zoe’s lights was pointed right down the lens to flare it. After wrapping most of the crew we grabbed a GV on B-camera of the curtains lowering in preparation for the play.
“Now cracks a noble heart”
The morning was spent finishing scene 79, capturing reactions to the duel and re-shooting Hamlet’s death. Then we set up for the film’s final scene, 80, in which Norway’s impressive prince Fortinbras arrives in the blood-soaked Danish court. This involved the street door in the scene dock opening, dazzling light flooding in, and Fortinbras emerging from it. To achieve this effect we dimmed all the lighting in the dock, stage and auditorium so that we were wide open (T2.2) and at ISO 1600 to correctly expose it. The daylight outside was then 11 or 12 stops over (fortunately it was a sunny day) and most detail was eradicated, though passing cars and pedestrians were still discernible and will have to be removed in post. Ben enhanced the daylight effect by clamping a matt silver bounce board above the door and firing a 2.5K HMI into it, and I made the light glow a bit by shooting with a 1/2 Soft FX filter. When Fortinbras and Horatio sat down on the edge of the stage to talk, we closed the street door for sound and relied solely on the HMI to create the effect. As there was almost no light coming from the auditorium, Ben set up an Ultrabounce in front of the men and the theatre crew fired one of their spotlights into it, filling in the faces.

Our last task for the week was to return to the paint shop to pick up what we had missed on day 11. The flashbacks were quick and fun to shoot. We reduced the par cans and changed the colour of the Asteras uplighting the paint-splattered wall to give a different feel. I shot with the prism across the bottom left corner of the frame, which helped to keep Hamlet looking mad and mysterious, and a beautiful effect was created when Ophelia was composing her song, whereby both her face and her hand making notations on the music score were visible simultaneously. Unfortunately we were forced to wrap before getting everything we needed to complete the main paint shop scene, so we will be going back there at some point.
“Contracted as it were in one brow of woe”
Not sure how to feel about today. On the one hand we got some great shots, including our first one on the Technocrane. On the other hand, we spectacularly failed to make the call sheet.
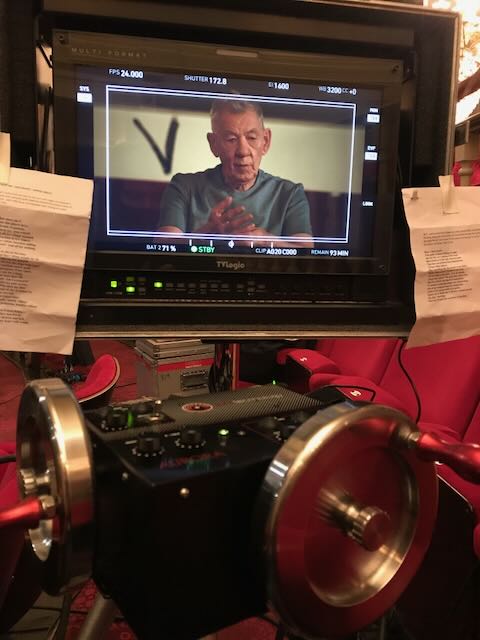
Due to the workload on costume and make-up, we generally do not start our days with master shots because not all the cast are ready. Instead we start with singles and 2-shots which is always a bit confusing and inefficient, and the wide shot is done last. Not ideal, but I’m sure it’s the lesser of at least two evils. So we started scene 14 – the first proper Hamlet scene – with Ian’s single, on which I did some of my wackiest framing yet, giving him loads of headroom (even accounting for his Tim-Burton-esque top hat!) and letting the chandelier take up a lot of the frame. Sean loved it and went even further, having half of Ian’s face hidden behind Jonny.

A couple of set-ups later it was time for lunch and for the three-person grip team to bring in the Technocrane. This then sat idle while we picked off a number of other singles, followed by a shot which pulled focus between Claudius and Gertrude and their images on the CRT monitor at prompt corner. The original plan had been to use the theatre’s existing relay camera – mounted to the front of the circle – to provide the image on the screen, but when the chandelier was winched down into position its cable blocked half of the relay camera’s frame. The solution was to borrow the stills photographer’s tripod, mount Horatio’s camcorder on it and run a feed from there to the monitor.
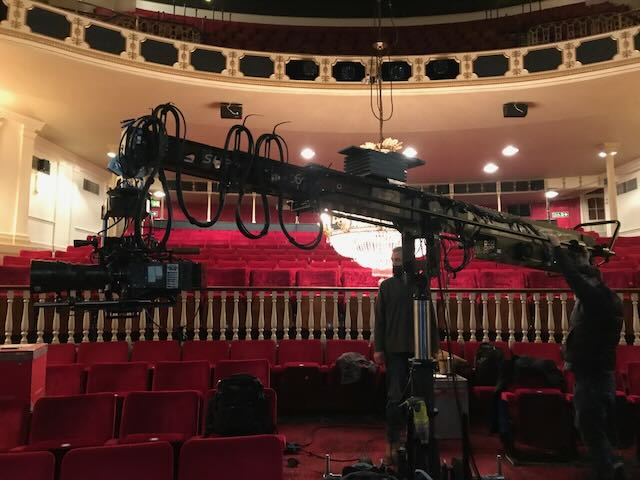
At last it was time to put the zoom on the Alexa XT and mount the package on the crane. Turns out that it was a bit too heavy for the remote head we’d been given, and it struggled to keep the camera bubbled. The remote head was operated by me via a monitor and hot-wheels, which I’ve never used before. I found them surprisingly intuitive.
The scene’s lighting was inspired by a tribunal scene from The Handmaid’s Tale which had warm practical desk lamps and hard, cold beams of light on the accused. The beams were easy to create with the theatre rig, today operated by Will and Tilly from the theatre’s permanent staff, while the half-CTO-gelled fluorescents weren’t exactly warm (our white balance was 3200K) but at least neutral-ish. Additional theatrical lights picked out parts of the architecture, while Astera tubes supplemented the stage set’s florries for CUs. Characters at the edge of the stage were keyed either with Rifas or a 2K through a frame located in one of the boxes.
“Now I am alone”
Yesterday we should have filmed our first soliloquy, “the play’s the thing wherein to catch the conscience of the king”. The only specific shot to be described in Sean’s treatment, it was the whole reason we hired a crane, and therefore had to be picked up today, our second and final crane day. It’s the most complex shot in the film, covering three minutes of monologue in a single developing shot, and unsurprisingly took most of the morning. It begins in CU on Hamlet, shot at the 250mm end of the Cooke Varotal, then zooms out. As the zoom is reaching its 25mm end the crane begins to move back, swinging, booming and contracting to pull back as far from Hamlet as possible, revealing almost all of the circle in which he is sitting alone. Halfway through the soliloquy, when the character has his big idea which will be the turning point of the entire film, he stands up and walks to the front of the circle, while the crane pushes back in towards him, with a slight zoom in too, to end on a low angle MS.
I operated the pan and tilt again, 2nd AC Ashton did the zoom, Aris was of course pulling focus, and the two grips and the crane tech manoeuvred the crane. And we weren’t the only ones doing a dance. Because the circle was only lit by four wall sconces (which were installed especially) and we had to reach an exposure of T3.7 for the Varotal, the sparks had to boom an LED Flyer and clear backwards as the camera pulled out. God only knows what the boom ops were doing! I think it took nine takes to get the shot in the bag; not bad going really.
Next we rehearsed Ophelia’s funeral, which included the final crane shot, a much simpler boom up and push in with a bit of a zoom from 25-60mm as well. We lit the scene with one of Zoe’s backlights streaming through the dock doors, gelled a golden yellow, plus some architectural spots on the set and a Jem ball as a key. When we moved into the coverage after lunch, we tried to keep the scene looking like it was all lit by that one yellow light, even though a few other sources were actually employed, including one skipped off the floor.
“A touch, I do confess”
We were scheduled to film all of scene 79 – the duel – today. That’s a nine-minute scene with half a dozen speaking characters and a swordfight!
We started with the fight coverage while everyone had plenty of energy, breaking the fight into chunks. My angles were stolen wholesale from our two key references: the first fight in Ridley Scott’s The Duellists, and 2012 TV coverage of Olympic fencing. From the former I took handheld shots over Hamlet’s then Laertes’ shoulders (we tried using a double for Ian initially, but Sean wasn’t convinced and we quickly sacked him off) and long lens CUs to show the tension between bouts. From the latter I took a side-on wide shot of the duelling “runway”, zooming in manually as the combatants got closer together and zooming out again as they separated.

We punched hard light from the theatre rig through the metalwork and grills of the set, which enhanced every movement the duellists made as they passed through shadows and highlights. The set’s florries provided fill, a Jem ball over the king and queen gave them suitably regal illumination, and a Rifa was brought in for close-ups when we needed more shape. In the scene dock, visible through the open doors at the back of the stage, we relied on a truss of par cans which the theatre crew had kindly rigged to the ceiling for us a few weeks ago.
It’s going to be another busy day tomorrow picking up everything still left, including a couple of shots at the top of the scene and all the woundings and deaths!
“The rest is silence”
Little to report today. We continued shooting the duel, and still didn’t quite finish. About mid-afternoon Ian finally realised that I was wearing a “What would Gandalf do?” t-shirt. He was very amused. “Keep it until tomorrow,” was his initial response to the sartorially posed conundrum, quickly followed by: “Fix it in post.”
“The apparel oft proclaims the man”
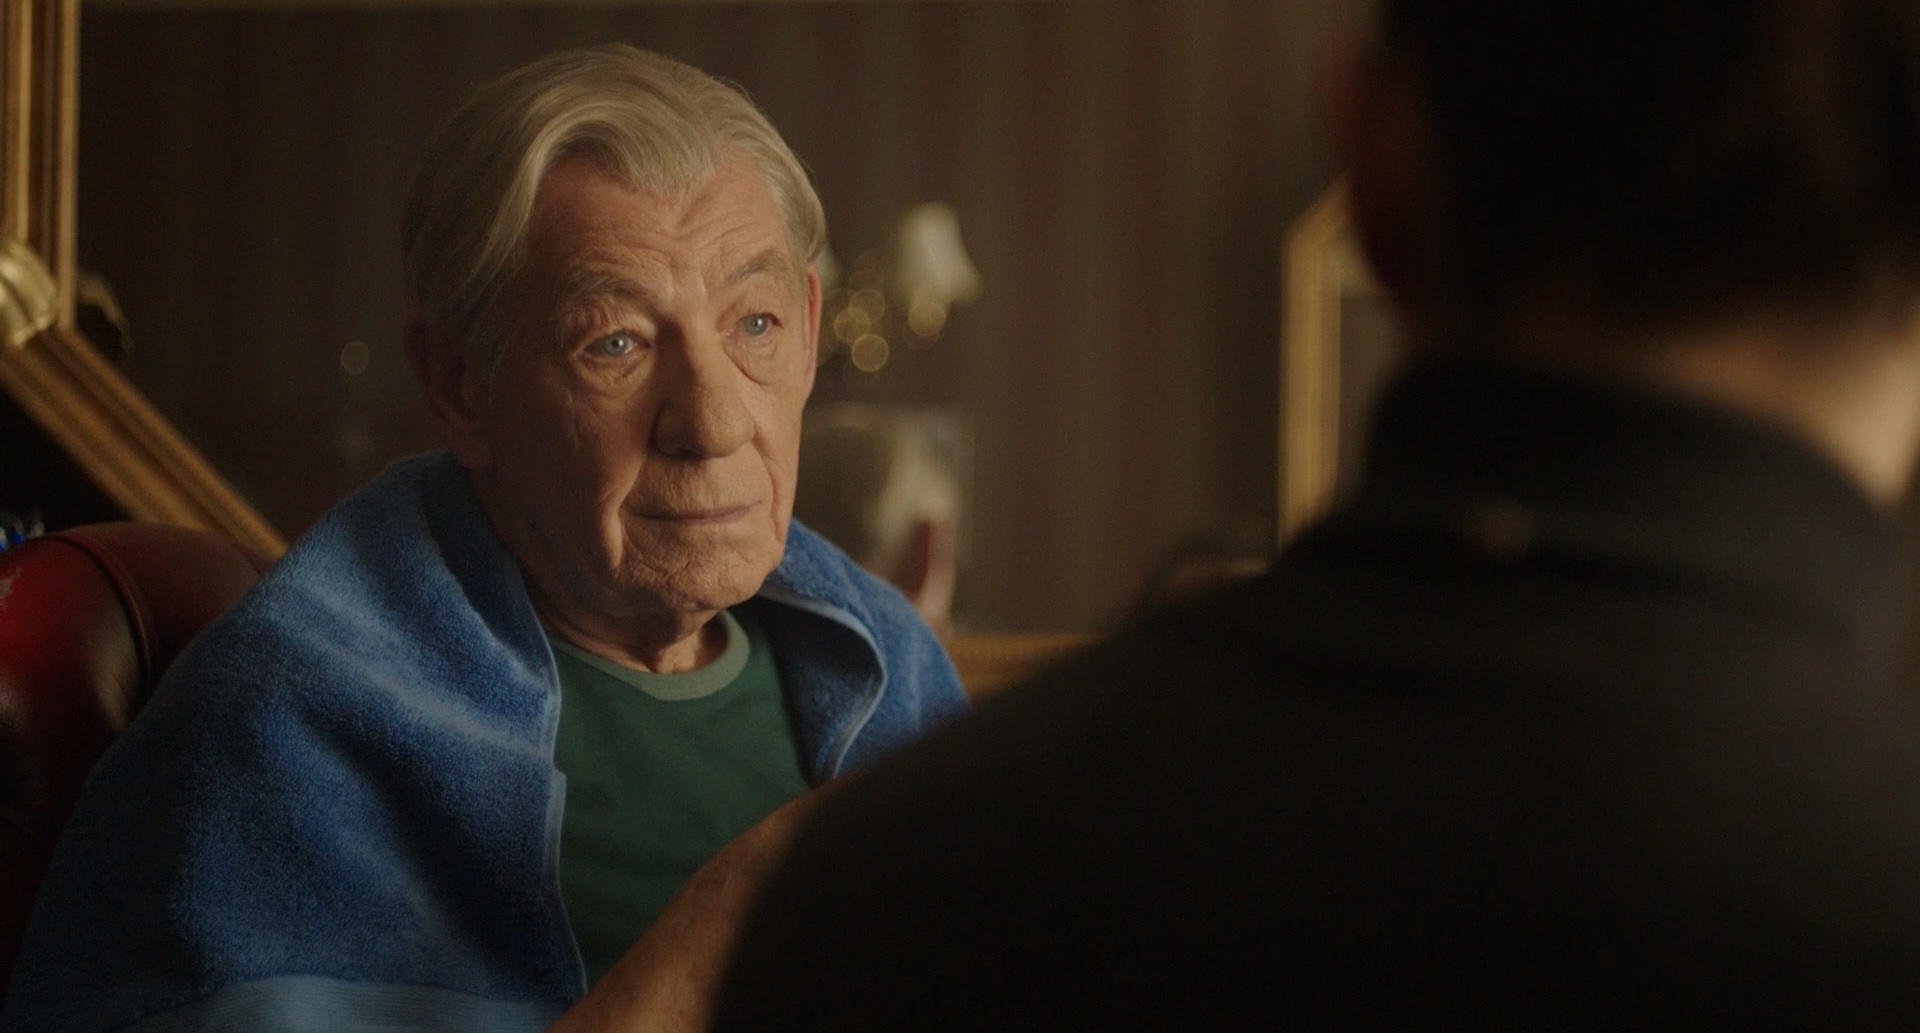
We spent the morning in Claudius’s dressing room, the most cramped of all our locations. We used a 2.5K HMI bounced off a matt silver board to push more daylight in through the window, with two practical table lamps providing additional sources. The scene was fairly simple, with two characters conversing first with one of them on a sofa under the window and the other in a chair opposite, then later with both of them on the sofa. Coverage was conventional too, consisting of a wide (from a high angle, maintaining my CCTV theme), a 2-shot on the sofa, a shot-reverse for each half of the scene, and a couple of inserts. For the first half of the scene, one of the practicals served as our key-light motivation, and we added a small LED hidden behind a desk and a Fomex just out of frame. For the second half, the window was our key-light, so we stopped supplementing the practicals and instead put a Litemat on the window-ledge.

In the afternoon we moved into the paint shop, a space which Ophelia’s character has made her own, adding plants, guitars and various hippy accoutrements. The scene ran for about five minutes, and we managed to come up with a developing master shot that got us a lot of useful material, though it was physically demanding for me and the boom op, and also for the octogenarian Steven Berkov (playing Polonius). It was mentally taxing too, trying to remember all the various positions the characters stood or sat in throughout the scene, and then figure out what other angles were required to finish covering it. After some sticks coverage we were forced to wrap without having completed the scene. (We had originally been scheduled an entire day for it, but overrunning on the duel had a knock-on effect.)

I’m not entirely sure I liked the way the lighting turned out. I pushed for a Jem ball suspended over the main area of the set, which worked out pretty well even though it became a broad key sometimes; bouncing it back into people’s eyes gave an unpolished but still attractive look. Ben had rigged a series of par cans along the paint-splattered wall which picked out the set dressing nicely, but I can’t help wondering if the scene wouldn’t have had more mood and shape without them. What I did like was the three Astera tubes uplighting that same wall (which was mainly blue/violet), providing a nice colour separation from the warmly-lit aforementioned hippy accoutrements. Almost the only other source was our old friend the bulkhead practical, which was installed in an ante-room seen at the beginning and end of the developing master.
“If the audience starts looking at the cheeseboard, we’ve had it.”
– Sir Ian McKellen
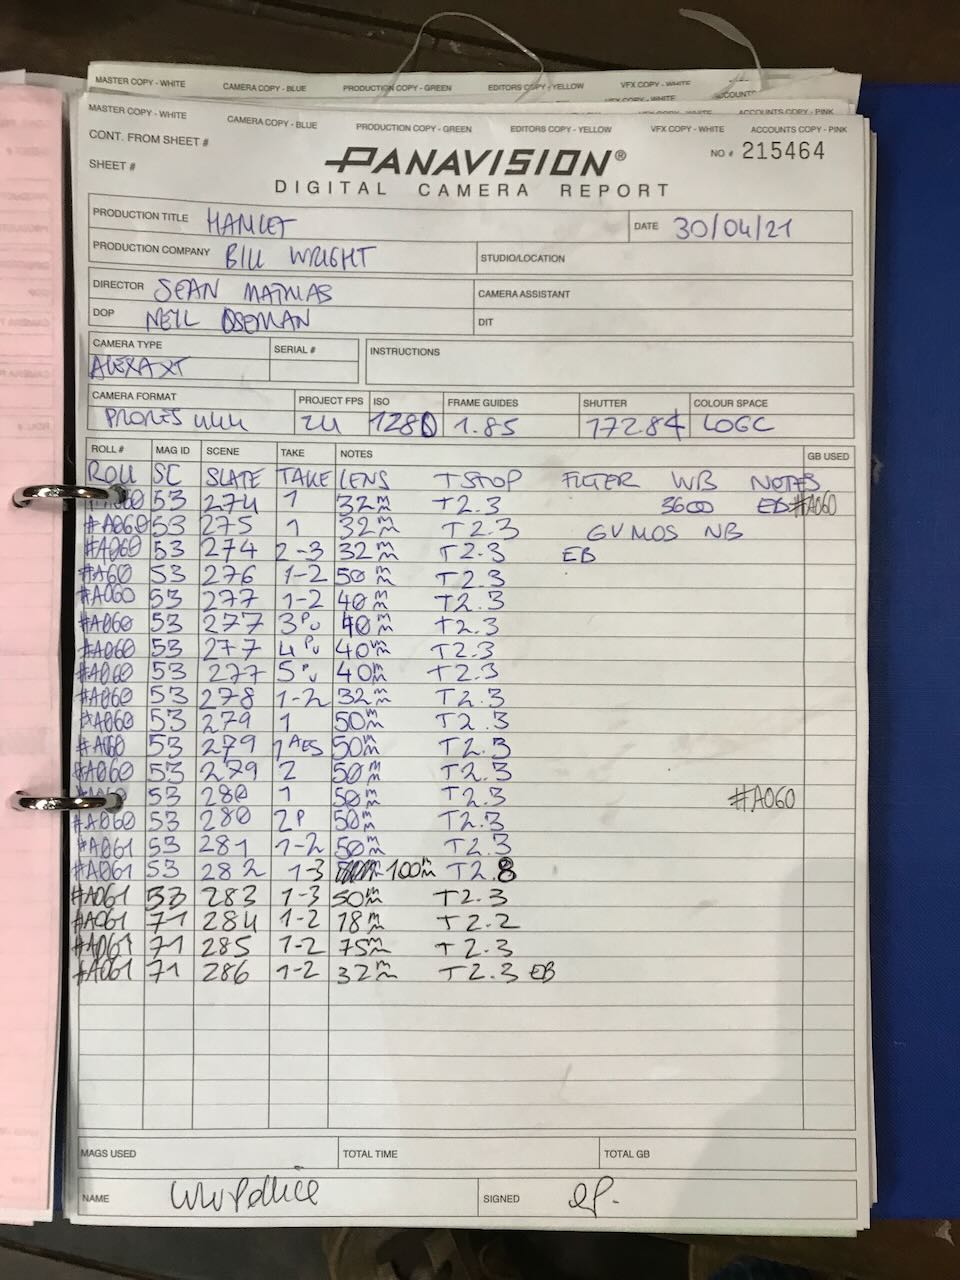
Following the well-reviewed recent cinema release of Hamlet, which I shot for director Sean Mathias in 2021, here is the diary I kept during filming. You can also go back and read my blogs from prep if you’re interested.
“A king may go a progress through the guts of a beggar”
Our progress began with scenes at the stage door, one of the few spaces in the theatre that has natural light coming in. Gaffer Ben Millar and I considered trying to add artificial light outside to the main window which was backlighting the scene, but instead we opted to light through a little side window with a Fomex wrapped in unbleached muslin. After a minor hiccup about blocking and crew shows, which hadn’t been planned for because we spent the last two weeks rehearsing, we bashed through three set-ups including two using Wes Anderson-esque central framing and eye-lines very close to camera.
Next up was a scene in the substage, next to the boiler room. Here we installed a practical tungsten bulkhead light on the wall as our key, adding to the extant yellowy-green fluorescents that illuminated parts of the background, and the Fomex spilling down a staircase. Lots of black negative space in the frame added to the moody look.
After lunch – during which I sorted out the footage transcoding plan with line producer Stephen Cranny and data wrangler Max Quinton – we moved to the glamorous location of the gents’ toilets for Ian McKellen’s first scene. The location had been very flat and white originally, but Ben’s crew rigged three Astera tubes to the tops of two walls – the two walls that we were mainly shooting towards – and that created a nice wrappy backlit look. Director Sean Matthias embraced the weirder shots I had storyboarded, which I was very happy about!

We also had a brief scene in a corridor outside the toilets, for which we relied largely on the existing practicals. Ben had already gelled the fluorescent emergency lights, and for the ceiling lights we turned off the one closest to camera, left the one in the midground with its pre-existing 25W bulb, and put a 60W bulb in the background one to create classic dark-to-light depth.
After wrap Ben and I had a meeting with Zoe Spurr, the theatrical lighting designer, to work out a plan for the upcoming stage scenes. By that time my brain had clocked off for the day, but Ben did his usual trick of identifying the right solution that I was too tired to see. That solution is to use less of the theatrical lighting than previously planned, which I think is what most people on the production want. We’ll see how it goes tomorrow, with our first auditorium and stage scenes!
“The woman will be out”
Both of today’s scenes required wrenching emotional performances from the cast, who delivered in spades. We began with a well-planned scene in the SL vom. This, I have learnt from a fortnight working in a theatre, is short for “stage left vomitorium”. I’m not entirely sure the theatre crew weren’t winding me up when they told me this. Anyway, it’s an enclosed little space opening onto a short flight of steps up to the stage. The walls are deep red and Lee had stuffed it full of booster seats in the same colour, giving it a rich and striking look. We used the Cooke Varotal 25-250mm zoom for the first time, which is an absolute beast, but enabled us to get a lovely slow push-in to Gertrude during a long speech. I stayed on the zoom for the rest of the scene for speed. The lighting was nearly all motivated by a practical in the ceiling, but we ended up adding quite a few other sources to make the look more flattering, including a Fomex on the ceiling wrapping the practical light, a 1K into poly as fill and tiny little LED for eye-light.
This little LED came in handy again for the second scene, giving a beautiful glint in the characters’ eyes. Here the main source was a Jem ball wrapped in unbleached muslin, which Sean particularly liked as a source. A 2K through diffusion in one of the boxes provided a second key for certain people. We saw a lot of the stage for the first time, and we used Zoe’s theatre lights to illuminate the metalwork of the set and give us a strong, graphical backlight. Ben added Astera tubes and Rifas to softly light the woodwork and separate it from the black walls. The hilariously low-tech wheelchair dolly was broken out for the first time, but the bazooka mount proved too wobbly so I ended up keeping the camera on my shoulder. The prism saw its first use too, mounted to a noga arm in front of the matte box to give us some weird blur and a slight kaleidoscope effect for a handheld shot of the mentally-ill Ophelia. One problem was that it kept reflecting the crew, the equipment and the boom, so that will have to be cut around.
“Denmark’s a prison”
Today’s work was all in the auditorium and covered many pages of dialogue. We began at the back of the stalls, where the existing down-lighters (previously re-bubbled) and emergency lights (gelled with straw and ND) motivated all the lighting and genuinely provided a fair bit of it too. We used Rifas and Litemats wrapped in unbleached muslin to key the close-ups, and added some poly bounce after hearing via Susannah in make-up that Ian wanted a more flattering look!

In the afternoon we moved down into the stalls, where we had lots more text and twelve characters to cover! Needless to say, we went into overtime and still owed a couple of set-ups, despite covering large swathes with a few carefully-chosen handheld shots. By this point I was leaving the lighting almost entirely to Ben, as Sean was relying on me (with help from 1st AD Top Tarasin and script supervisor Jodie Woodall) to work out the coverage. Ben used several soft sources in combination with the auditorium’s existing practicals, which looked lovely but did give the soundies a few boom-shadow headaches!
“The purpose of playing”
We began in the rear stalls again, this time introducing the tiny lighting box too, from which Claudius and Polonius spy on Hamlet as he asks one of the acting troupe to add a speech into the evening’s play. We turned out the house lights and motivated everything from two desk lamps and the stage itself, on which Hamlet was supposedly in the process of designing the play’s lighting. We used two Rifas (one through a frame) for the stage light, plus a 5K to give an edge on the seats. A small LED provided eye-light supposedly bounced up from one of the desk lamps. The other desk lamp, the one in the box, was genuinely bounced off white show card on the table to provide a sinister up-light on Claudius. An existing fluorescent tube behind him served as backlight after being gelled with .3 ND, while we brought Polonius up by hiding the little LED again.
We managed to cram the camera package – complete with zoom – into the back corner of the lighting box to do a lovely shot over Claudius through the lighting-box window to Hamlet and the player beyond. For the shots closer to these latter two characters, I switched to handheld shooting, having learnt the previous day that trying to set up sticks amongst the auditorium seating is a bit of a nightmare. Fortunately the handheld look worked well for this scene.
For the rest of the day we tackled part of the prologue for the first time. In this prologue, the cast are trapped inside the theatre without an audience and decide to put on Hamlet for themselves. I set the white balance right down to 2500K so that the stage set’s fluorescent tubes (which were daylight, but gelled with half CTO by us earlier in the week) went white with a touch of green, and kept the lighting fairly flat and uninviting. We used no haze and kept the theatrical lighting to an absolute minimum. I tried to pick up the pace and power through the shots so we could fit in the dropped material from yesterday – keeping the camera on my shoulder and encouraging simple lighting set-ups – but there were simply too many other elements to juggle, and though we made the day’s call sheet we did not repair yesterday’s damage.
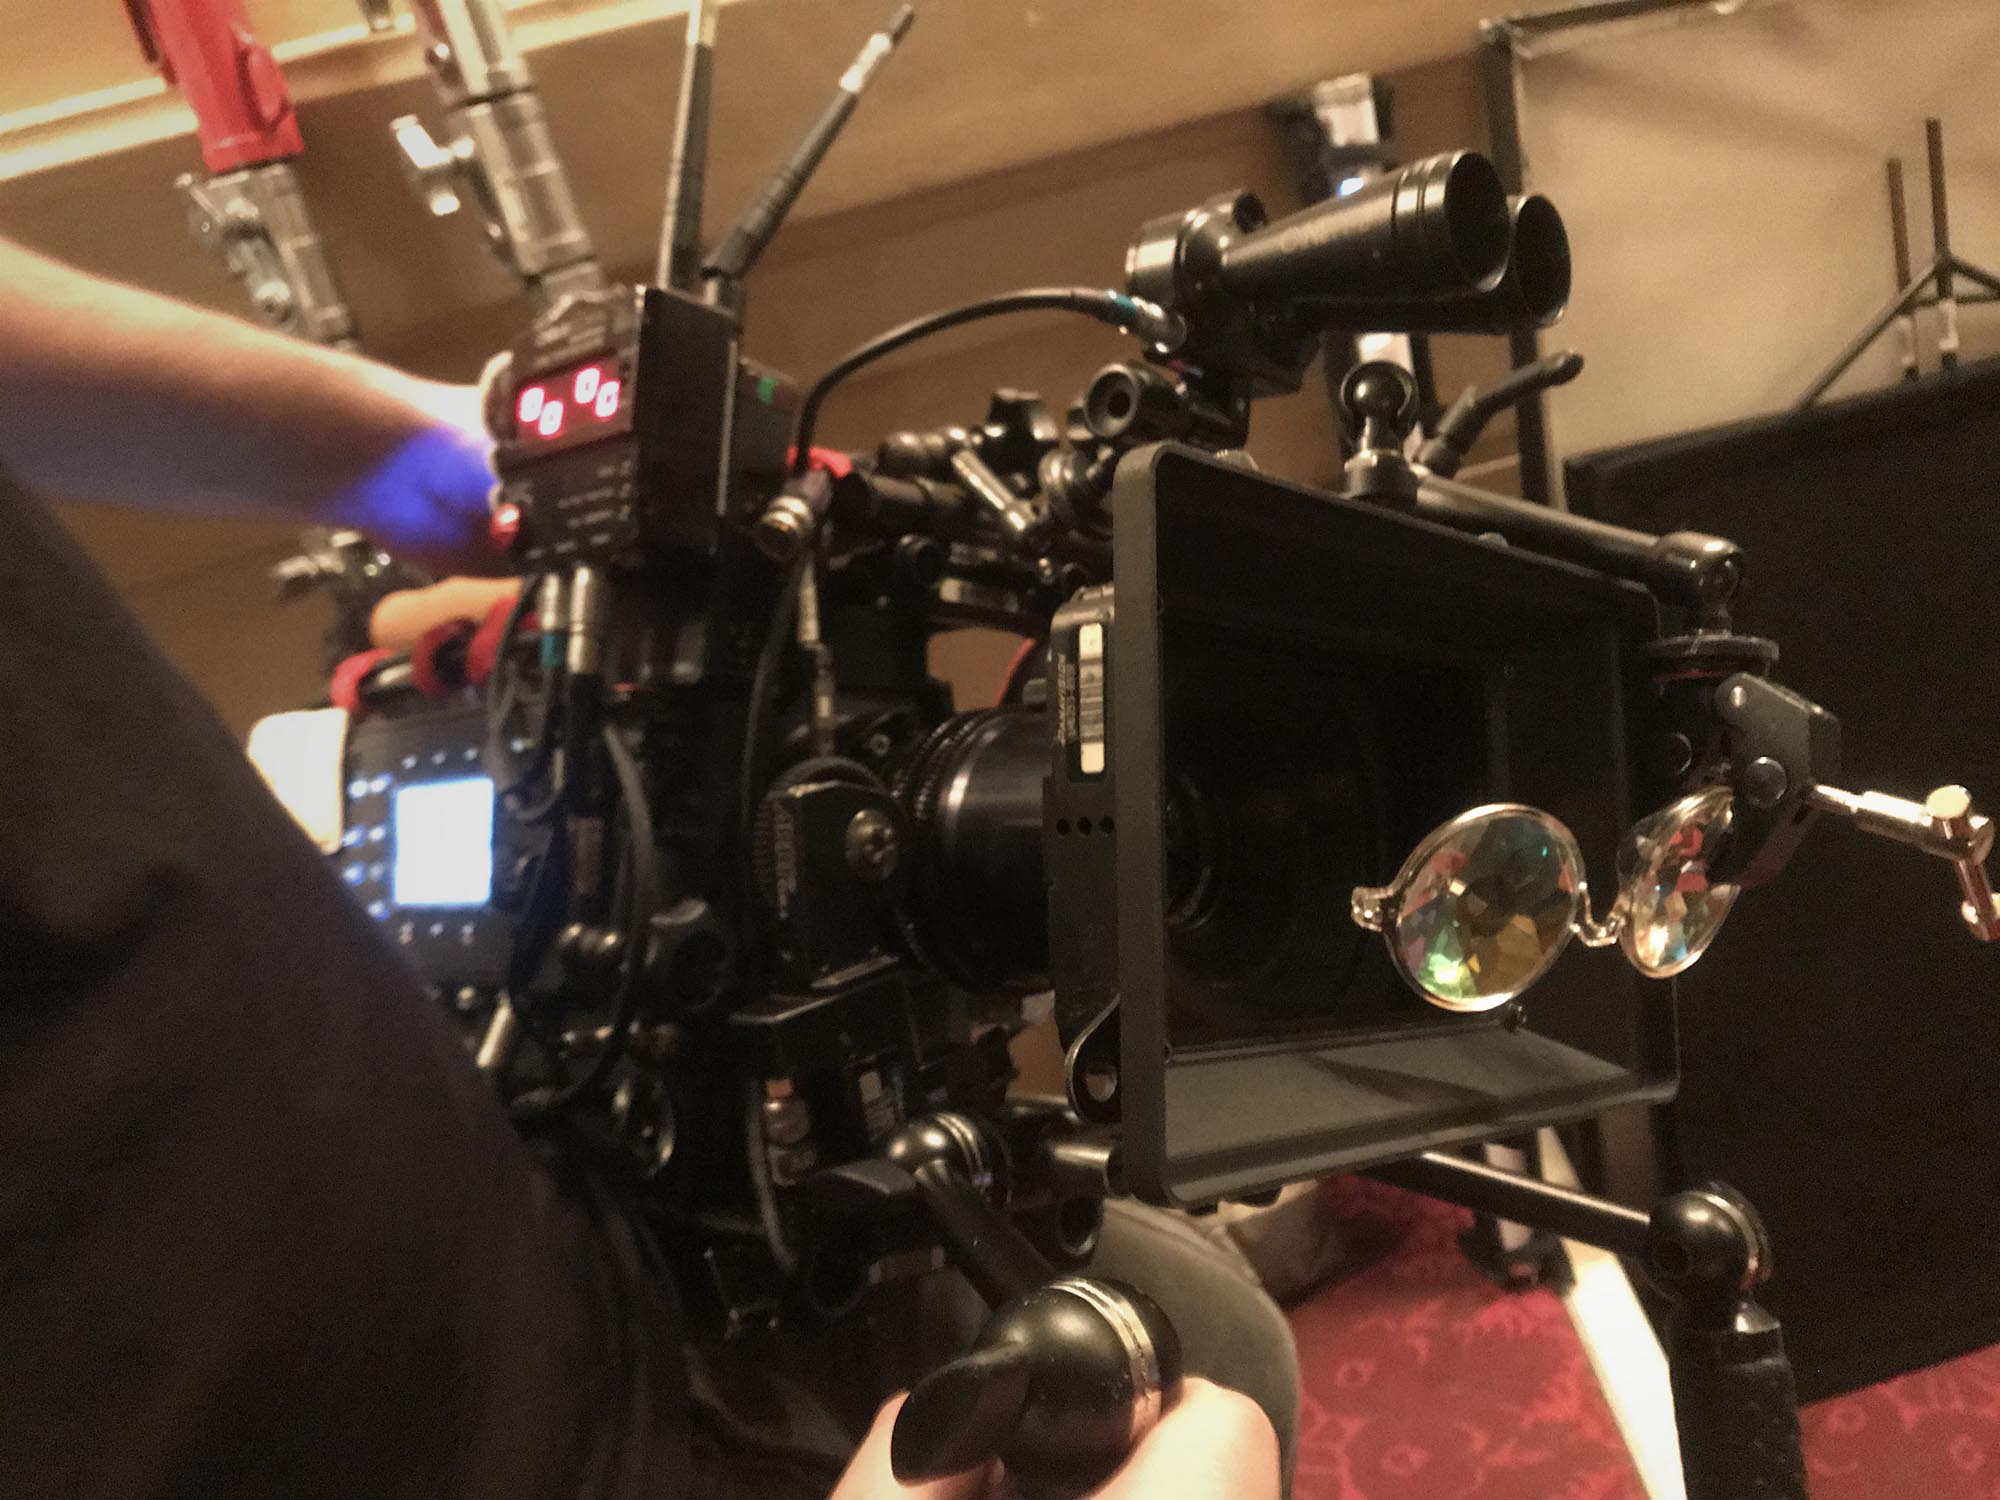
My favourite shot of the day, and of the whole shoot so far, was done before lunch. It was part of the prologue, but a dreamy foreshadowing of Hamlet coming to life. I shot Claudius and Gertrude waltzing on stage with the blurry chandelier glowing in the foreground. All the lighting came from Zoe’s theatrical rig, there was haze aplenty, and most importantly we clamped a £4.99 pair of kaleidoscope glasses to the front of the matte box. On a 100mm lens, this had little effect on the actors but it splintered and repeated the chandelier lights in an utterly entrancing way. Combined with shooting at 48fps the shot was absolutely beautiful.
“Poison in jest”
News of the death of Prince Phillip at Windsor Castle, literally across the road from both the theatre and our hotel, trickled through the crew this morning. This will likely affect production in several ways, the most immediate of which is that we have to move rooms within the hotel, the ones that look out onto the high-street being highly coveted by paparazzi with their long lenses and ghoulish ambitions. It was a day of ill health amongst the cast and crew too, and data wrangler Max had to step in to help out the reduced camera department.
Our first scene was behind the closed “tabs” (curtains) on the stage; we relied mostly on the set’s fluorescents for this, turning off foreground ones to give us more shape. Zoe provided a hard raking light on the back of the curtain. Outside in the auditorium, Ben used two Jem balls (one as hairlight, one as a key) plus 300W kickers from each side to illuminate Claudius and Gertrude.
The next scene was the play within the play, “The Murder of Gonzago”, or, as Hamlet dubs it, “Mousetrap”. Zoe of course took the lead in lighting this, making adjustments primarily to avoid casting nasty shadows on the leads. Ben again added a Rifa to key the close-ups.
We continue to stick very closely to my storyboards, which I have mixed feelings about. On the one hand, we know exactly what we’re doing in advance, and I’ve given a fair bit of thought to the shots throughout prep, but on the other hand I sometimes wonder if there wasn’t a better shot that I failed to spot because I was following the boards by rote. I try to look at my spreadsheet and mood-board at least once a day to remind myself of my original intentions and keep myself on track.
“This is the very ecstasy of love”
First up was a short scene on and under the stage; two traps were being used as the graves dug by Shakespeare’s pair of “clowns”. Coverage included a shot looking through a hole inside one trap to Llinos underneath the other, then rising up as she climbed a ladder onto stage level. For this we broke out the Easy Rig for the first time, to take the camera’s weight. Lighting below the stage was motivated by a bulkhead (the same one used on day one) with a warm Astera tube cheated in too, while on the stage a wonderful sixties handheld floodlight was sitting beside the clowns. Ben used a Rifa gelled with (I think) half CTB to enhance the slightly cold light from this practical, while a couple more Astera tubes and some low-level house lights prevented the backgrounds from going completely black.
Next we moved up to the circle bar, which Lee had so beautifully transformed from the ugly, white room of our first recce to a decadent gentleman’s club strewn with the refuse of an indulgent party. I had always known that I wanted low morning sun glaring in through the window, and Ben accomplished this using a 6K par for the larger window and a 2.5K for the smaller one, both gelled with Full Straw. The curtains, bolton and some diff on the window helped to shape this and ensure that camera shadows were not an issue even when I was shooting with my back to the light. Deeper into the room, an Astera tube on a DJ’s desk and a few floor lamps added to the light. Most of the nasty ceiling lights were turned off, but two or three were snooted with black wrap and allowed to spill a little onto the scene. Reverses were fairly simple, shooting into the window which threw beams of light into the smoke (pretty much the only time I’ll be doing that on this movie!) and using a Rifa or bounce boards to fill in faces. For a later part of the scene we added diff to the Straw frame and an additional diff frame inside the room to create a beautiful, creamy light on Alice’s face.
One week down, three to go!