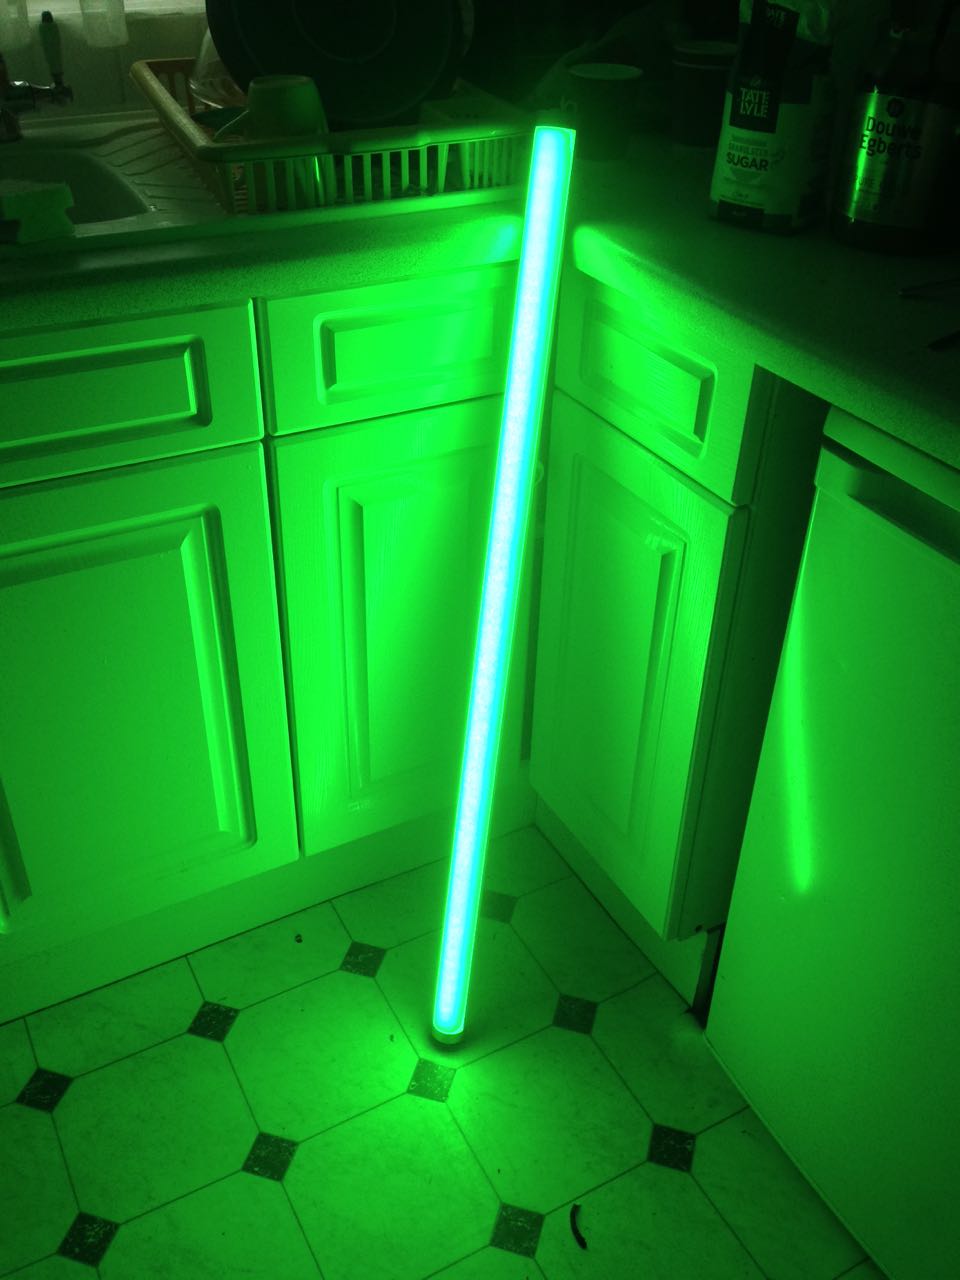
Astera Titan Tubes seem to be everywhere at the moment, every gaffer and DP’s favourite tool. Resembling fluorescent tubes, Asteras are wireless, flicker-free LED batons comprised of 16 pixels which can be individually coloured, flashed and programmed from an app to produce a range of effects.
Here are five ways in which I used Titan Tubes on my most recent feature, Hamlet. I’m not being sponsored by Astera to write this. I just know that loads of people out there are using them and I thought it would be interesting to share my own experiences.
1. Substitute fluorescents
We had a lot of scenes with pre-existing practical fluorescents in them. Sometimes we gelled these with ND or a colour to get the look we wanted, but other times it was easier to remove the fluorescent tube and cable-tie an Astera into the housing. As long as the camera didn’t get too close you were never going to see the ties, and the light could now be altered with the tap of an app.
On other occasions, when we moved in for close-ups, the real fluorescents weren’t in an ideal position, so we would supplement or replace them with an Astera on a stand and match the colour.
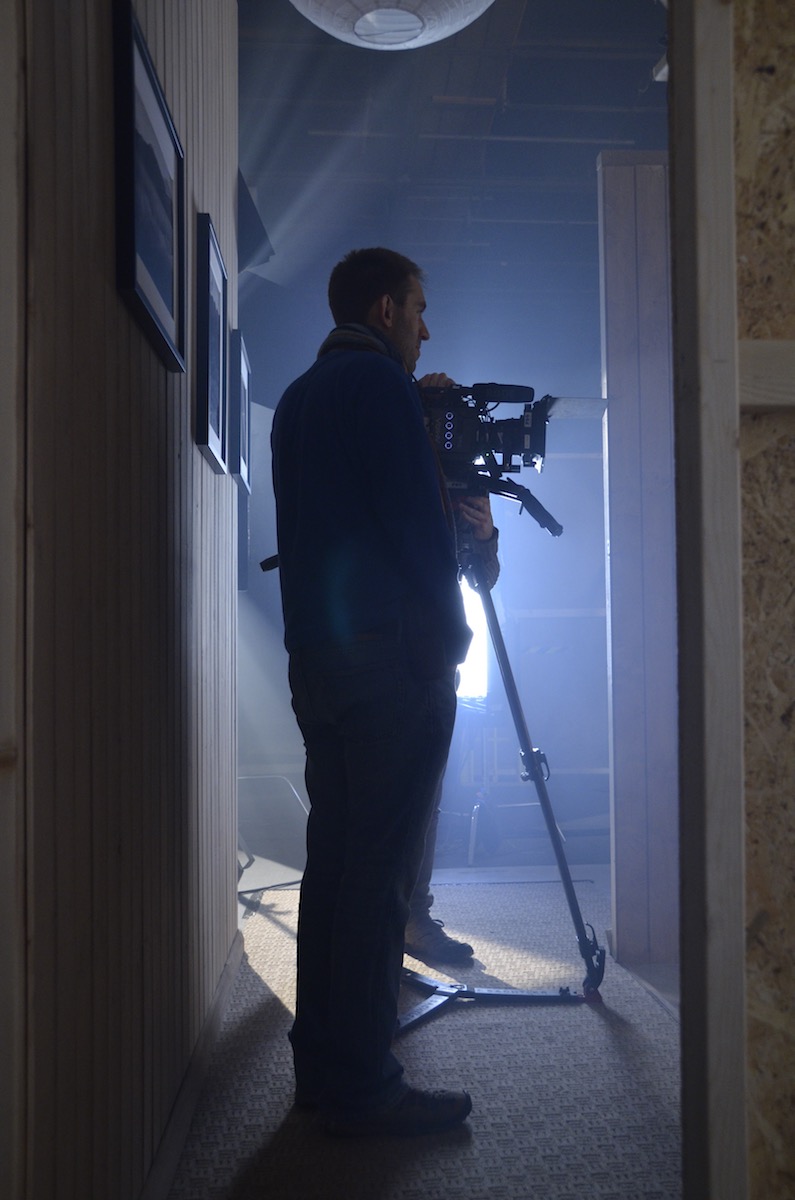
2. Hidden behind corners
Orientated vertically, Asteras are easy to hide behind pillars and doorways. One of the rooms we shot in had quite a dark doorway into a narrow corridor. There was just enough space to put in a vertical pole-cat with a tube on it which would light up characters standing in the doorway without it being seen by the camera.
3. Eye light
Ben Millar, Hamlet‘s gaffer, frequently lay an Astera on the floor to simulate a bit of floor bounce and put a sparkle in the talent’s eye. On other occasions when our key light was coming in at a very sidey angle, we would put an Astera in a more frontal position, to ping the eyes again and to wrap the side light very slightly.
4. rigged to the ceiling
We had a scene in a bathroom that was all white tiles. It looked very flat with the extant overhead light on. Our solution was to put up a couple of pole-cats, at the tops of the two walls that the camera would be facing most, and hang Asteras horizontally from them. Being tubes they have a low profile so it wasn’t hard to keep them out of the top of frame. We put honeycombs on them and the result was that we always had soft, wrappy backlight with minimal illumination of the bright white tiles.
5. Special effects
One of the most powerful things about Titan Tubes is that you can programme them with your own special effects. When we needed a Northern Lights effect, best boy Connor Adams researched the phenomenon and programmed a pattern of shifting greens into two tubes rigged above the set.
On War of the Worlds in 2019 we used the Asteras’ emergency lights preset to pick up some close-ups which were meant to have a police car just out of shot.
In the first two parts of this series we saw how exposure can be controlled using the lens aperture – with side effects including changes to the depth of field – and neutral density (ND) filters. Today we will look at another means of exposure control: shutter angle.
The Physical Shutters of Film Cameras
As with aperture, an understanding of what’s going on under the hood is useful, and that begins with celluloid. Let’s imagine we’re shooting on film at 24fps, the most common frame rate. The film can’t move continuously through the gate (the opening behind the lens where the focused light strikes the film) or we would end up recording just a long vertical streak of light. The film must remain stationary long enough to expose an image, before being moved on by a distance of four perforations (the standard height of a 35mm film frame) so that the next frame can be exposed. Crucially, light must not hit the film while it is being moved, or vertical streaking will occur.
Joram van Hartingsveldt, CC BY-SA 3.0
This is where the shutter comes in. The shutter is a portion of a disc that spins in front of the gate. The standard shutter angle is 180°, meaning that the shutter is a semi-circle. We always describe shutter angles by the portion of the disc which is missing, so a 270° shutter (admitting 1.5x the light of a 180° shutter) is a quarter of a circle, and a 90° shutter (admitting half the light of a 180° shutter) is three-quarters.
The shutter spins continuously at the same speed as the frame rate – so at 24fps the shutter makes 24 revolutions per second. So with a 180° shutter, each 24th of a second is divided into two halves, i.e. 48ths of a second:
During one 48th of a second, the missing part of the shutter is over the gate, allowing the light to pass through and the stationary film to be exposed.
During the other 48th of a second, the shutter blocks the gate to prevent light hitting the film as it is advanced. The shutter has a mirrored surface so that light from the lens is reflected up the viewfinder, allowing the camera operator to see what they’re shooting.
Intervals vs. Angles
If you come from a stills or ENG background, you may be more used to talking about shutter intervals rather than angles. The two things are related as follows:
For example, 24 x (360 ÷ 180) = 48 so a film running at 24fps, shot with a 180° shutter, shows us only a 48th of a second’s worth of light on each frame. This has been the standard frame rate and shutter angle in cinema since the introduction of sound in the late 1920s. The amount of motion blur captured in a 48th of a second is the amount that we as an audience have been trained to expect from motion pictures all our lives.
A greater (larger shutter angle, longer shutter interval) or lesser (smaller shutter angle, shorter shutter interval) amount of motion blur looks unusual to us and thus can be used to creative effect. Saving Private Ryan features one of the best-known examples of a small shutter angle in its D-day landing sequence, where the lack of motion blur creates a crisp, hyper-real effect that draws you into the horror of the battle. The effect has been endlessly copied since then, to the point that it now feels almost mandatory to shoot action scenes with a small shutter angle.
Large shutter angles are less common, but the extra motion blur can imply a drugged, fatigued or dream-like state.
In today’s digital environment, only the Arri Alexa Studio has a physical shutter. In other cameras, the sensor’s photo-sites are allowed to charge with light over a certain period of time – still referred to as the shutter interval, even though no actual shutter is involved. The same principles apply and the same 180° angle of the virtual shutter is standard. The camera will allow you to select a shutter angle/interval from a number of options, and on some models like the Canon C300 there is a menu setting to switch between displaying the shutter setting as an angle or an interval.
When to Change the Shutter Angle
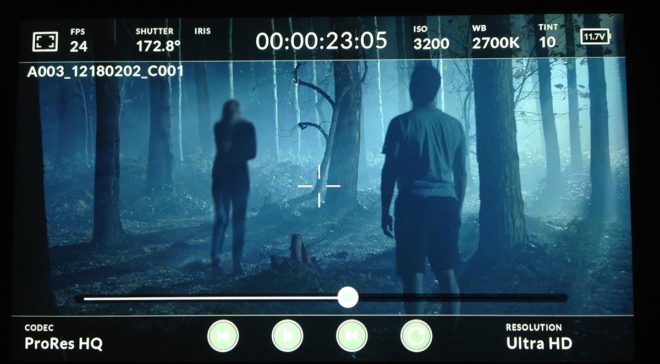
Sometimes it is necessary to change the shutter angle to avoid flickering. Some luminous devices, such as TV screens and monitors, or HMI lighting not set to flicker-free mode, will appear to strobe, pulse or roll on camera. This is due to them turning on and off multiple times per second, in sync with the alternating current of the mains power supply, but not necessarily in sync with the shutter. For example, if you shoot a domestic fluorescent lamp in the UK, where the mains AC cycles at 50Hz, your 1/48th (180° at 24fps) shutter will be out of sync and the lamp will appear to throb or flicker on camera. The solution is to set the shutter to 172.8° (1/50th), which is indeed what most DPs do when shooting features in the UK. Round multiples of the AC frequency like 1/100th will also work.
You may notice that I have barely mentioned exposure so far in this article. This is because, unlike stills photographers, DPs rarely use the shutter as a means of adjusting exposure. An exception is that we may increase the shutter angle when the daylight is fading, to grab an extra shot. By doubling the shutter angle from 172.8° to 345.6° we double the light admitted, i.e. we gain one stop. As long as there isn’t any fast movement, the extra motion blur is likely to go unnoticed by the audience.
One of the hallmarks of amateur cinematography is that sunny scenes have no motion blur, due to the operator (or the camera’s auto mode) decreasing the shutter interval to avoid over-exposure. It is preferable to use ND filters to cut light on bright days, as covered in part two of this series.
For the best results, the 180° (or thereabouts) shutter angle should be retained when shooting slow motion as well. If your camera displays intervals rather than angles, ideally your interval denominator should be double the frame rate. So if you want to shoot at 50fps, set the shutter interval to 1/100th. For 100fps, set the shutter to 1/200th, and so on.
If you do need to change the shutter angle for creative or technical reasons, you will usually want to compensate with the aperture. If you halve the time the shutter is open for, you must double the area of the aperture to maintain the same exposure, and vice versa. For example, if your iris was set to T4 and you change the shutter from 180° to 90° you will need to stop up to T2.8. (Refer back to my article on aperture if you need to refresh your memory about T-stops.)
In the final part of this series we’ll get to grips with ISO.
Learn more about exposure in my online course, Cinematic Lighting. Until this Thursday (19/11/20) you can get it for the special price of £15.99 by using the voucher code INSTA90.
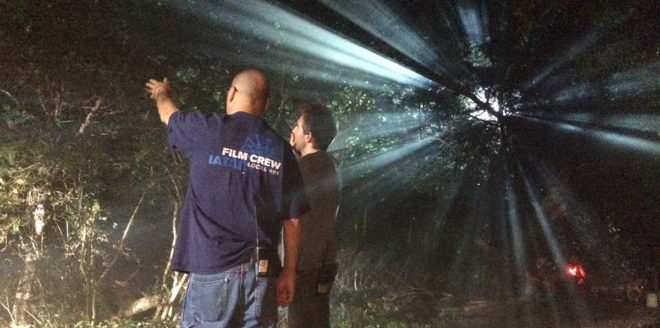
A simple enough slug line, and fairly common, but amongst the most challenging for a cinematographer. In this article I’ll break down into five manageable steps my process of lighting woodlands at night.
1. Set up the moon.
Forests typically have no artificial illumination, except perhaps practical torches carried by the cast. This means that the DP will primarily be simulating moonlight.
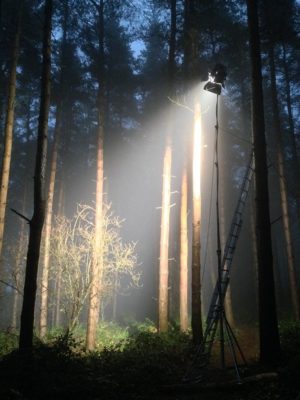
Your “moon” should usually be the largest HMI that your production can afford, as high up and far away as you can get it. (If your production can’t afford an HMI, I would advise against attempting night exteriors in a forest.) Ideally this would be a 12K or 18K on a cherry-picker, but in low-budget land you’re more likely to be dealing with a 2.5K on a triple wind-up stand.
Why is height important? Firstly, it’s more realistic. Real moonlight rarely comes from 15ft off the ground! Secondly, it’s hard to keep the lamp out of shot when you’re shooting towards it. A stand might seem quite tall when you’re right next to it, but as soon as you put it far away, it comes into shot quite easily. If you can use the terrain to give your HMI extra height, or acquire scaffolding or some other means of safely raising your light up, you’ll save yourself a lot of headaches.
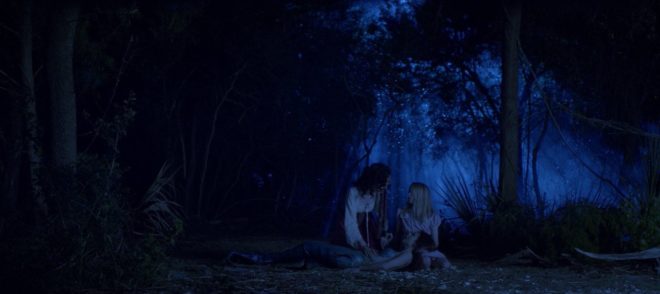
In this shot from “The Little Mermaid” (dir. Blake Harris), a 12K HMI on a cherry-picker creates the shafts of moonlight, while another HMI through diffusion provides the frontlight. (This frontlight was orange to represent sunrise, but the scene was altered in the grade to be pure night.)
The size of the HMI is of course going to determine how large an area you can light to a sufficient exposure to record a noise-free image. Using a good low-light camera is going to help you out here. I shot a couple of recent forest night scenes on a Blackmagic Pocket Cinema Camera, which has dual native ISOs, the higher being 3200. Combined with a Speedbooster, this camera required only 1 or 2 foot-candles of illuminance, meaning that our 2.5K HMI could be a good 150 feet away from the action. (See also: “How Big a Light do I Need?”)
2. Plan for the reverse.
A fake moon looks great as a backlight, but what happens when it comes time to shoot the reverse? Often the schedule is too tight to move the HMI all the way around to the other side, particularly if it’s rigged up high, so you may need to embrace it as frontlight.
Frontlight is generally flat and undesirable, but it can be interesting when it’s broken up with shadows, and that’s exactly what the trees of a forest will do. Sometimes the pattern of light and dark is so strong and camouflaging that it can be hard to pick out your subject until they move. One day I intend to try this effect in a horror film as a way of concealing a monster.
One thing to look out for with frontlight is unwanted shadows, i.e. those of the camera and boom. Again, the higher up your HMI is, the less of an issue this will be.
If you can afford it, a second HMI set up in the opposite direction is an ideal way to maintain backlight; just pan one off and strike up the other. I’ve known directors to complain that this breaks continuity, but arguably it does the opposite. Frontlight and backlight look very different, especially when smoke is involved (and I’ll come to that in a minute). Isn’t it smoother to intercut two backlit shots than a backlit one and frontlit one? Ultimately it’s a matter of opinion.
An example of cheated moonlight directions in “His Dark Materials” – DP: David Luther
3. Consider Ground lights.
One thing I’ve been experimenting with lately is ground lights. For this you need a forest that has at least a little undulation in its terrain. You set up lights directly on the ground, pointed towards camera but hidden from it behind mounds or ridges in the deep background.
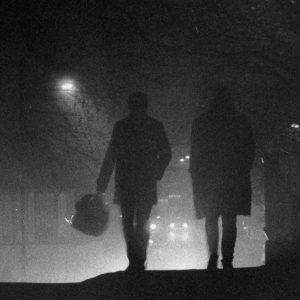
Detail from one of my 35mm stills: pedestrians backlit by car headlights in mist. Shot on Ilford Delta 3200
I once tried this with an HMI and it just looked weird, like there was a rave going on in the next field, but with soft lights it is much more effective. Try fluorescent tubes, long LED panels or even rows of festoon lights. When smoke catches them they create a beautiful glow in the background. Use a warm colour to suggest urban lighting in the distance, or leave it cold and it will pass unquestioned as ambience.
Put your cast in front of this ground glow and you will get some lovely silhouettes. Very effective silhouettes can also be captured in front of smoky shafts of hard light from your “moon”.
4. Fill in the faces.
All of the above looks great, but sooner or later the director is going to want to see the actors’ faces. Such is the cross a DP must bear.
On one recent project I relied on practical torches – sometimes bounced back to the cast with silver reflectors – or a soft LED ball on a boom pole, following the cast around.
Big-budget movies often rig some kind of soft toplight over the entire area they’re shooting in, but this requires a lot of prep time and money, and I expect it’s quite vulnerable to wind.
A recipe that I use a lot for all kinds of night exteriors is a hard backlight and a soft sidelight, both from the same side of camera. You don’t question where the sidelight is coming from when it’s from the same general direction as the “moon” backlight. In a forest you just have to be careful not to end up with very hot, bright trees near the sidelight, so have flags and nets at the ready.
This shot (from a film not yet released, hence the blurring) is backlit by a 2.5K HMI and side-lit by a 1×1 Aladdin LED with a softbox, both from camera right.
5. Don’t forget the Smoke.
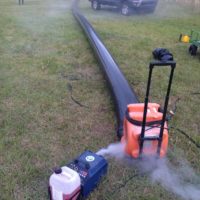
Finally, as I’ve already hinted, smoke is very important for a cinematic forest scene. The best options are a gas-powered smoke gun called an Artem or a “Tube of Death”. This latter is a plastic tube connected to a fan and an electric smoke machine. The fan forces smoke into the tube and out of little holes along its length, creating an even spread of smoke.
A Tube of Death in action on the set of “The Little Mermaid”
All smoke is highly suspectible to changes in the wind. An Artem is easier to pick up and move around when the wind changes, and it doesn’t require a power supply, but you will lose time waiting for it to heat up and for the smoke and gas canisters to be changed. Whichever one you pick though, the smoke will add a tremendous amount of depth and texture to the image.
Overall, nighttime forest work scenes may be challenging, but they offer some of the greatest opportunities for moody and creative lighting. Just don’t forget your thermals and your waterproofs!
So far, this blog series about my cinematography of The Little Mermaid has covered the biggest and most complex scenes in the movie. Today I’m going to look at some smaller scenes, and how I employed the cinematography tenet of lighting from the back to quickly build a look for these which has depth, mood and drama.
Many of these examples are specifically cross-backlighting, something I covered in my Lighting Techniques series, but I’ll quickly recap since it has so much relevance here. It involves lighting two characters facing each other with two sources, on the far side of the eye-line (short key), crossed so that each source keys one character and often backlights the other too.
So with that in mind, let’s proceed to the examples from my shooting diary.
Day 1
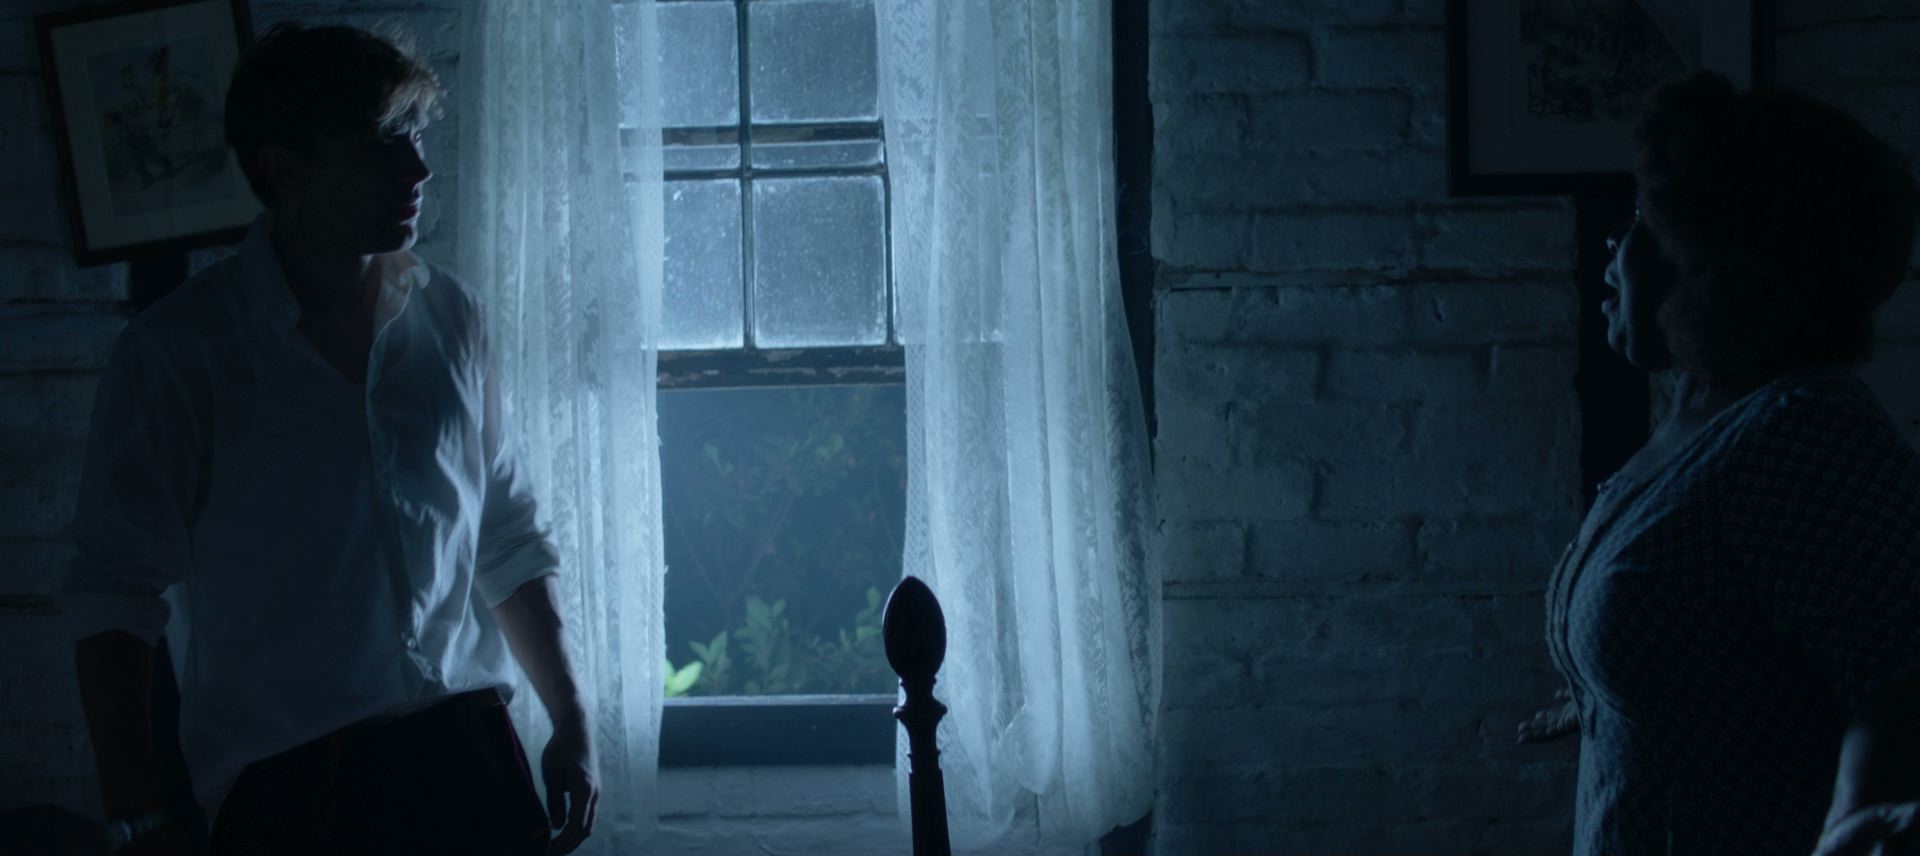
The first week is pretty much all in houses with just a few principals, so an easy start. Day 1’s schedule is tight though. We start in a third floor bedroom – no way lamps are getting up to those windows from outside, so I’m relying on natural light augmented with a bit of cross-backlight cheated inside the room. (There’s a Kino Flo shining at Elle over Cam’s right shoulder, for example.) Once the haze is in it looks great. After we get the main coverage, we head out to the garden for the next scene, while the ‘B’ camera team steps in to pick up a couple of inserts…
Day 3
…It’s a night scene and the grips have tented the window. To get a nice blue glow coming in, I have two 4×4 Kino Flos set either side of the window (outside), and they give a great wrapping backlight to the actors and the set dressing. Smoke and a cool white balance of 3,200K (the Kinos are tubed for 5,600K) complete the look. It owes a lot to a scene from Hook, one of Blake’s (director Blake Harris) reference movies which I watched during preprod. This stuff definitely filters in and inspires things!
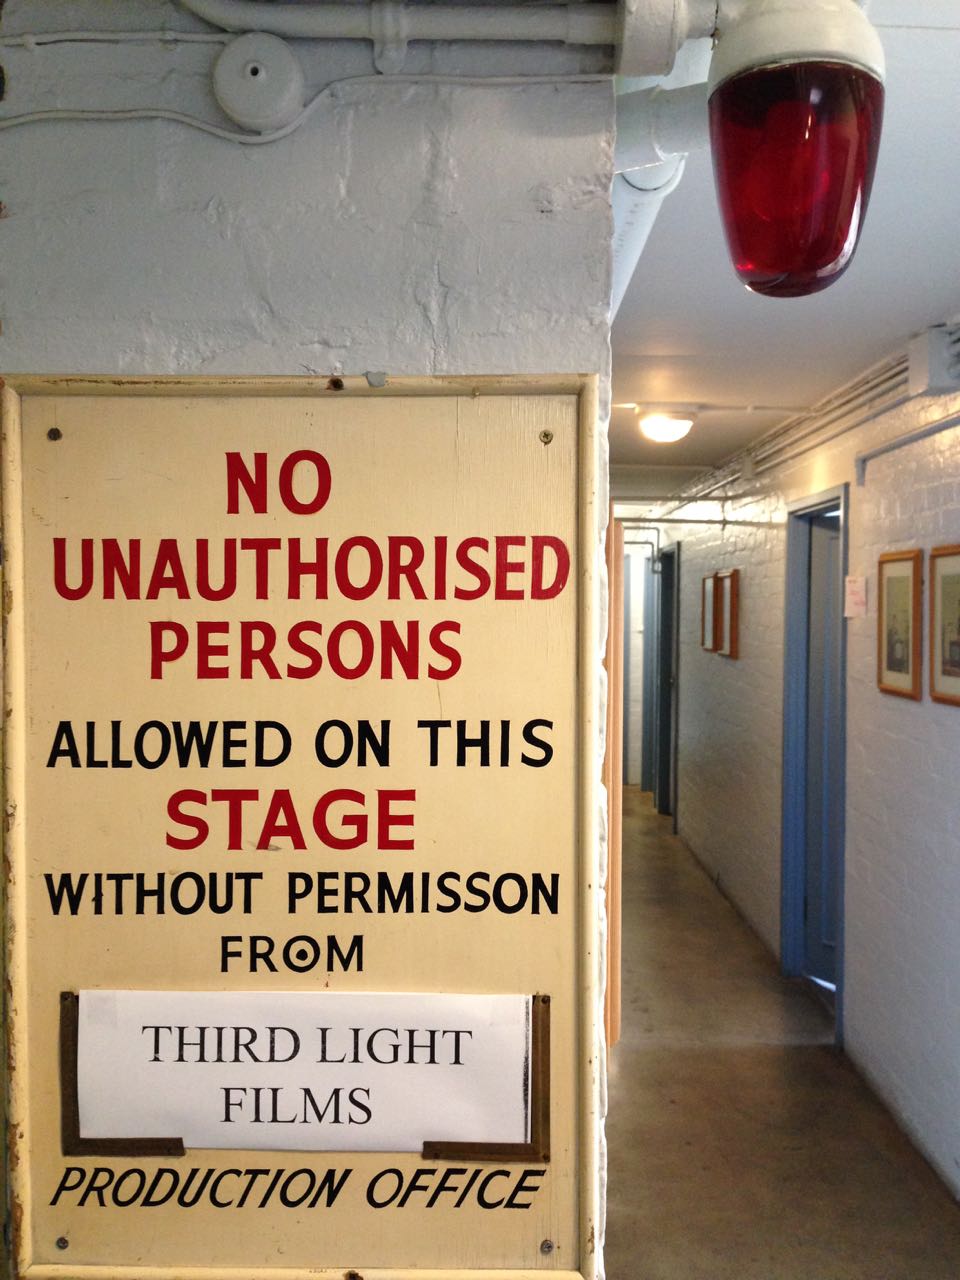
Day 13
Our first day on stage. It’s weird to be back at the former supermarket I spent five weeks of preproduction in. The first set, Locke’s chamber, is very confined and the walls don’t wild, so it’s quite slow-going to work in there. We fire a 5K fresnel through the stained glass window at the back of the set. Then I fall back on the tried and tested method of cross-backlighting even though I know that it will be hard to hide the lamps (a 650W fresnel in both of the upper rear corners of the set) from camera. In the end I have the art department dress drapes in front of them. For the villain’s single I leave the light hard, but for the hero’s single we use bounce boards to wrap the light around his face more…
Day 28
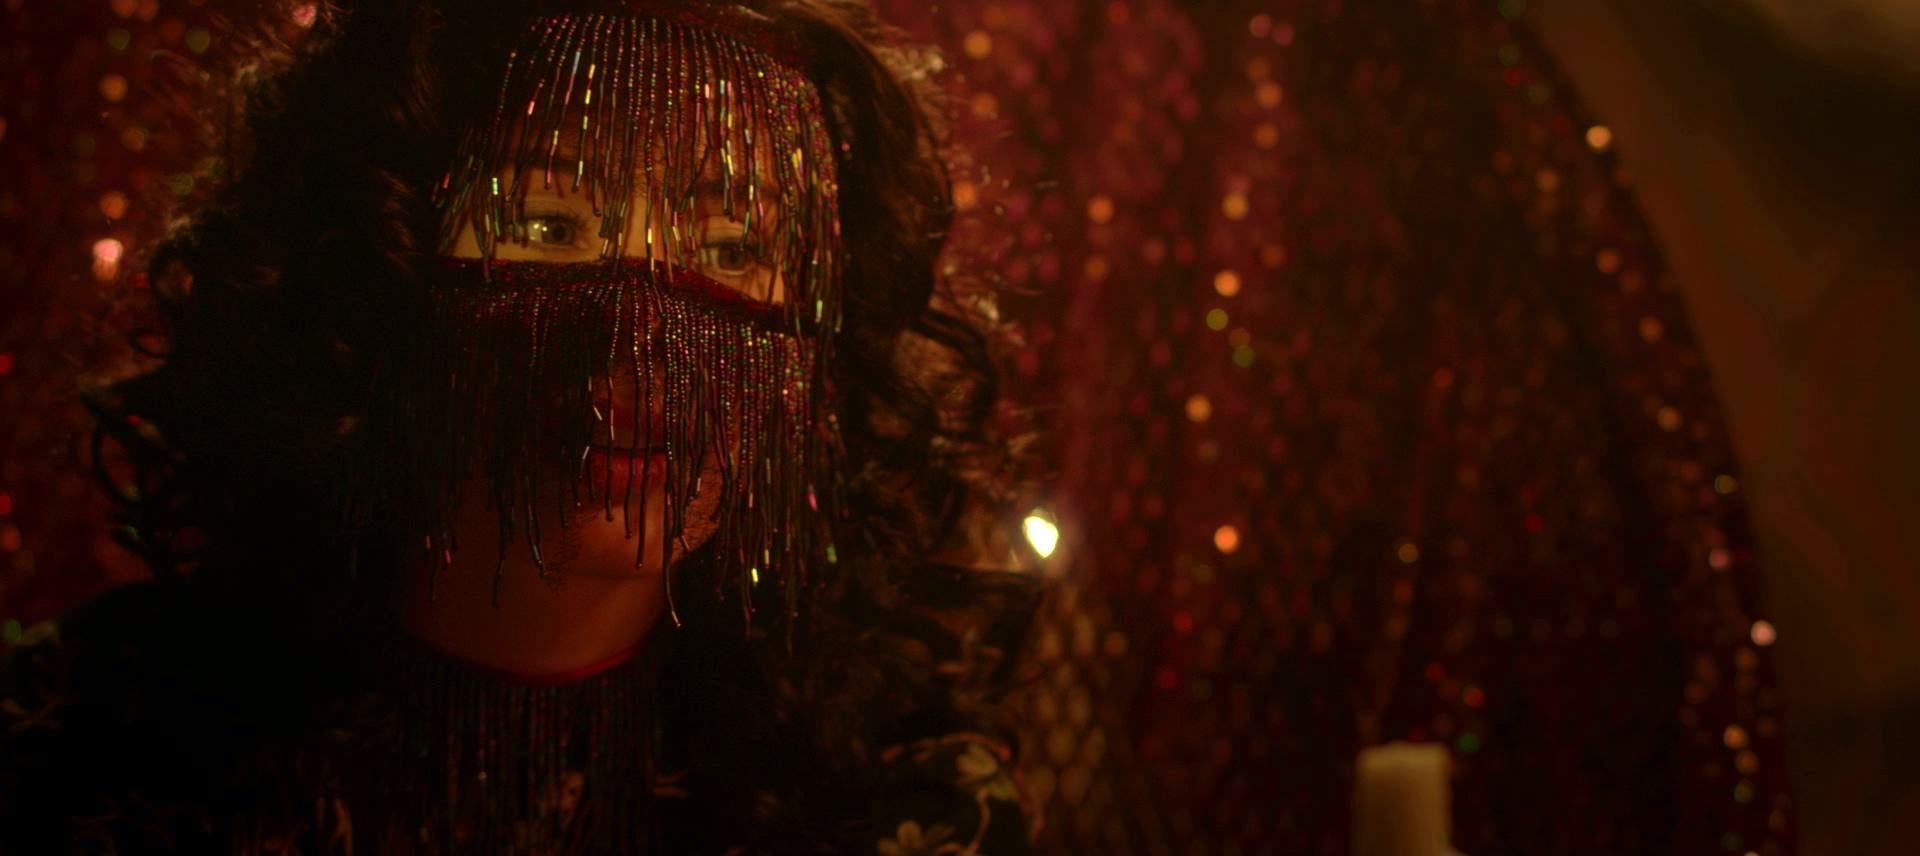
We start with the fortune-teller’s tent, another small set constructed on stage. In fact, it’s just an Easy-Up artfully draped with fabrics. Initially there’s nowhere to get light in from except the front, but I know that this will leave the scene looking flat and fake, so I work with the art department again to make holes in the top rear corners. Through those we shine tungsten-bubbled “Fat Boy” Kino Flos. (These 2ft 4-bank units are giving the dual kickers on Cam in the centre, and the beautiful down-light on the background fabrics, bringing out the ruching. Each one also provides a little key-light on the two ladies.) The other sources are “moonlight” coming in through the entrance, linking us to the circus exteriors, and a stylised slash of light across Thora’s eyes from a Source Four, suggested by Jason (key grip Jason Batey). Adding foreground practicals is an important final touch to expand the depth and scale of the set…
Day 31
It’s the last day of principal photography. Our big scene of the day is the newspaper office where Cam works, which is a set in the front of the studio, using the building’s real windows. We fire the 12K in and gel it with half CTS for a nice morning sunlight effect. We’re shooting towards the windows, which have blinds, so we get some nice shafts of light, though sometimes it’s a little too smokey. Running haze is a pretty skilled and tricky job, and involves considering the lens length and backlight, which both affect how much the smoke shows up on camera. When we get it right, combined with the dark wood period furniture, it totally sells the 1937 setting. Apparently people at video village are loving it, saying it looks like Mad Men….
Next week, in the final part of my blog series on The Little Mermaid, I’ll share my experiences of shooting the sunset denouement while up to my waist in the Atlantic Ocean.
Many light sources we come across today have a CRI rating. Most of us realise that the higher the number, the better the quality of light, but is it really that simple? What exactly is Colour Rendering Index, how is it measured and can we trust it as cinematographers? Let’s find out.
What is C.R.I.?
CRI was created in 1965 by the CIE – Commission Internationale de l’Eclairage – the same body responsible for the colour-space diagram we met in my post about How Colour Works. The CIE wanted to define a standard method of measuring and rating the colour-rendering properties of light sources, particularly those which don’t emit a full spectrum of light, like fluorescent tubes which were becoming popular in the sixties. The aim was to meet the needs of architects deciding what kind of lighting to install in factories, supermarkets and the like, with little or no thought given to cinematography.
As we saw in How Colour Works, colour is caused by the absorption of certain wavelengths of light by a surface, and the reflection of others. For this to work properly, the light shining on the surface in the first place needs to consist of all the visible wavelengths. The graphs below show that daylight indeed consists of a full spectrum, as does incandescent lighting (e.g. tungsten), although its skew to the red end means that white-balancing is necessary to restore the correct proportions of colours to a photographed image. (See my article on Understanding Colour Temperature.)
Fluorescent and LED sources, however, have huge peaks and troughs in their spectral output, with some wavelengths missing completely. If the wavelengths aren’t there to begin with, they can’t reflect off the subject, so the colour of the subject will look wrong.
Analysing the spectrum of a light source to produce graphs like this required expensive equipment, so the CIE devised a simpler method of determining CRI, based on how the source reflected off a set of eight colour patches. These patches were murky pastel shades taken from the Munsell colour wheel (see my Colour Schemes post for more on colour wheels). In 2004, six more-saturated patches were added.
The maths which is used to arrive at a CRI value goes right over my head, but the testing process boils down to this:
Illuminate a patch with daylight (if the source being tested has a correlated colour temperature of 5,000K or above) or incandescent light (if below 5,000K).
Compare the colour of the patch to a colour-space CIE diagram and note the coordinates of the corresponding colour on the diagram.
Now illuminate the patch with the source being tested.
Compare the new colour of the patch to the CIE diagram and note the coordinates of the corresponding colour.
Calculate the distance between the two sets of coordinates, i.e. the difference in colour under the two light sources.
Repeat with the remaining patches and calculate the average difference.
Here are a few CRI ratings gleaned from around the web:
Source
CRI
Sodium streetlight
-44
Standard fluorescent
50-75
Standard LED
83
LitePanels 1×1 LED
90
Arri HMI
90+
Kino Flo
95
Tungsten
100 (maximum)
Problems with C.R.I.
There have been many criticisms of the CRI system. One is that the use of mean averaging results in a lamp with mediocre performance across all the patches scoring the same CRI as a lamp that does terrible rendering of one colour but good rendering of all the others.
Demonstrating the non-continuous spectrum of a fluorescent lamp, versus the continuous spectrum of incandescent, using a prism.
Further criticisms relate to the colour patches themselves. The eight standard patches are low in saturation, making them easier to render accurately than bright colours. An unscrupulous manufacturer could design their lamp to render the test colours well without worrying about the rest of the spectrum.
In practice this all means that CRI ratings sometimes don’t correspond to the evidence of your own eyes. For example, I’d wager that an HMI with a quoted CRI in the low nineties is going to render more natural skin-tones than an LED panel with the same rating.
I prefer to assess the quality of a light source by eye rather than relying on any quoted CRI value. Holding my hand up in front of an LED fixture, I can quickly tell whether the skin tones looks right or not. Unfortunately even this system is flawed.
The fundamental issue is the trichromatic nature of our eyes and of cameras: both work out what colour things are based on sensory input of only red, green and blue. As an analogy, imagine a wall with a number of cracks in it. Imagine that you can only inspect it through an opaque barrier with three slits in it. Through those three slits, the wall may look completely unblemished. The cracks are there, but since they’re not aligned with the slits, you’re not aware of them. And the “slits” of the human eye are not in the same place as the slits of a camera’s sensor, i.e. the respective sensitivities of our long, medium and short cones do not quite match the red, green and blue dyes in the Bayer filters of cameras. Under continuous-spectrum lighting (“smooth wall”) this doesn’t matter, but with non-continuous-spectrum sources (“cracked wall”) it can lead to something looking right to the eye but not on camera, or vice-versa.
Conclusion
Given its age and its intended use, it’s not surprising that CRI is a pretty poor indicator of light quality for a modern DP or gaffer. Various alternative systems exist, including GAI (Gamut Area Index) and TLCI (Television Lighting Consistency Index), the latter similar to CRI but introducing a camera into the process rather than relying solely on human observation. The Academy of Motion Picture Arts and Sciences recently invented a system, Spectral Similarity Index (SSI), which involves measuring the source itself with a spectrometer, rather than reflected light. At the time of writing, however, we are still stuck with CRI as the dominant quantitative measure.
So what is the solution? Test, test, test. Take your chosen camera and lens system and shoot some footage with the fixtures in question. For the moment at least, that is the only way to really know what kind of light you’re getting.
Last weekend saw many of the crew of Above the Clouds reunite to shoot the remaining scenes of this comedy road movie. Principal photography was captured on an Alexa Mini during summer 2016 on location in Kent, on the Isle of Skye, and at Longcross Studio in Buckinghamshire, with additional location shooting on a Blackmagic Micro Cinema Camera in October.
The outstanding scenes were to be photographed on stage, at Halliford Studio in Shepperton, this time on an Arri Amira. The Amira uses the same sensor as the Alexas, allowing us to match the look from principal photography in the most cost-effective way. With the addition of a Premium license, the camera is capable of the same ProRes 4444 recording codec as the Alexas too. As per last summer, our glass was a set of Arri/Zeiss Ultra Primes, with a half Soft FX filter to take the digital edge off.
Director Leon Chambers designed and built the set himself, sending me photos of a scale model well in advance. He was also specific about certain lighting cues and states that were required across the two sets and six scenes we would be recording to complete the movie. Based on this information, I concocted a lighting plan, which I communicated to Halliford’s in-house gaffer Micky Reeves by Photoshopping stock images of lamps onto Leon’s set model photos.
Last Saturday was devoted to pre-lighting the sets, mainly the kitchen, while construction work continued on the second set.
Day 24 / Sunday
We begin with a morning scene. A 5K fresnel serves as a low sun, streaking across the back wall of the set (see my post about lighting through windows). Even with this direct light four stops over, the natural bounce off the set isn’t enough to bring actor Philip Jackson – with his back to the window – up to key. Micky rigs a Dedo firing into a soft silver bounce just out of frame to solve the problem.
Also coming through the window are two 4×4 kinos, rigged on goalposts above the window. Their daylight tubes reflect off the blinds, serendipitously creating the illusion of a blue sky “outdoors”, where in fact there is only a wall and a white backdrop.
Philip exits into the hallway and disappears from view, supposedly to go out through the front door. No door exists. Instead there is a flag which spark Amir Moulfi rotates in front of a 2K, creating a momentary oblong of light in which Philip’s shadow appears.
The next scene follows on from an exterior captured last October at dusk, when the natural light was soft, flat and cool in colour, cheated even cooler with the white balance. This failing daylight is to be the only source of illumination now in the kitchen set, until Philip enters and turns on the lights. This is the main reason that the daylight 4×4 kinos outside the window were rigged. A third kino from the direction of the front door is added, plus a small LED reporter light to pick an important prop out of the shadows.
Lead actress Naomi Morris enters, silhouetted against the windows. Then Philip enters and hits the lights. Simultaneously, Amir flips a breaker on a lunchbox, activating a hanging practical fixture above the breakfast bar and the 5K which that practical motivates.
Generally I don’t like toplight. It throws the eyes – those windows to the soul… or windows to the performance – into shadow. But with the hanging practical in shot, whatever I was going to use to beef it up had to be somewhat toppy or it wouldn’t make sense. I considered space-lights and Jem balls, but in consultation with Micky I ultimately picked a 5K with a chimera, coming in at a 45 degree back/toplight angle. As you can see from the photos, this looks almost comically large. But large and close means soft, which is what I want. It had to be soft enough to wrap both actors when they faced each other across the bar.
But why such a large lamp? Why not use a 2K, like Micky suggested yesterday? Bitter experience has always taught me to go with a bigger unit than you think you need, particularly if you’re softening it, and particularly if it’s going to take a while to rig. (The 5K was hung from another goalposts set-up.) We ended up dimming the 5K to 50% and scrimming it down a stop and a half. But having too much light like that is easy to deal with. If we had put up a 2K and it wasn’t bright enough, we would have to have taken the whole thing down and re-rigged with a 5K. And even if the 2K had seemed sufficient to begin with, blocking can often take actors into unexpected, dark corners of the set. Being able to turn up a dimmer a couple of notches to handle that kind of situation is very useful.
Besides the 5K, there are a few other sources playing: some 300W hairlights, a pup bouncing off the side of a cupboard to bring up the area around the cooker, a China ball in the hallway, and Leon’s Rosco LitePads serving as practical under-cabinet down-lighters.
Day 25 / Monday
I probably shouldn’t say what today’s set is, because it’s a little bit of a spoiler. There are some lighting similarities to the kitchen: again we have a character flicking a light switch, bringing on two hanging overhead practicals and a 2K with a chimera to beef them up.
A practical lamp on a desk was supposed to be turned on during the scene as well, but we all forget until it’s too late. It would have bounced off the desk and given Philip a little eye-light, and at first I regret losing this. But soon I realise that it is more appropriate for the scene not to have that level of refinement, for the lighting to be a little raw. The toppy, “broken key” angle of the chimera’s light works well for this tone too.
We wrap just before noon, releasing Naomi to high-tail it to Oxford to appear on stage in a musical this evening. Eventually there will be second-unit-style GVs and establishing shots to do, but there will only be three or four of us for that. For the cast and most of the crew, today brings Above the Clouds to an end, eight months after the camera first rolled.
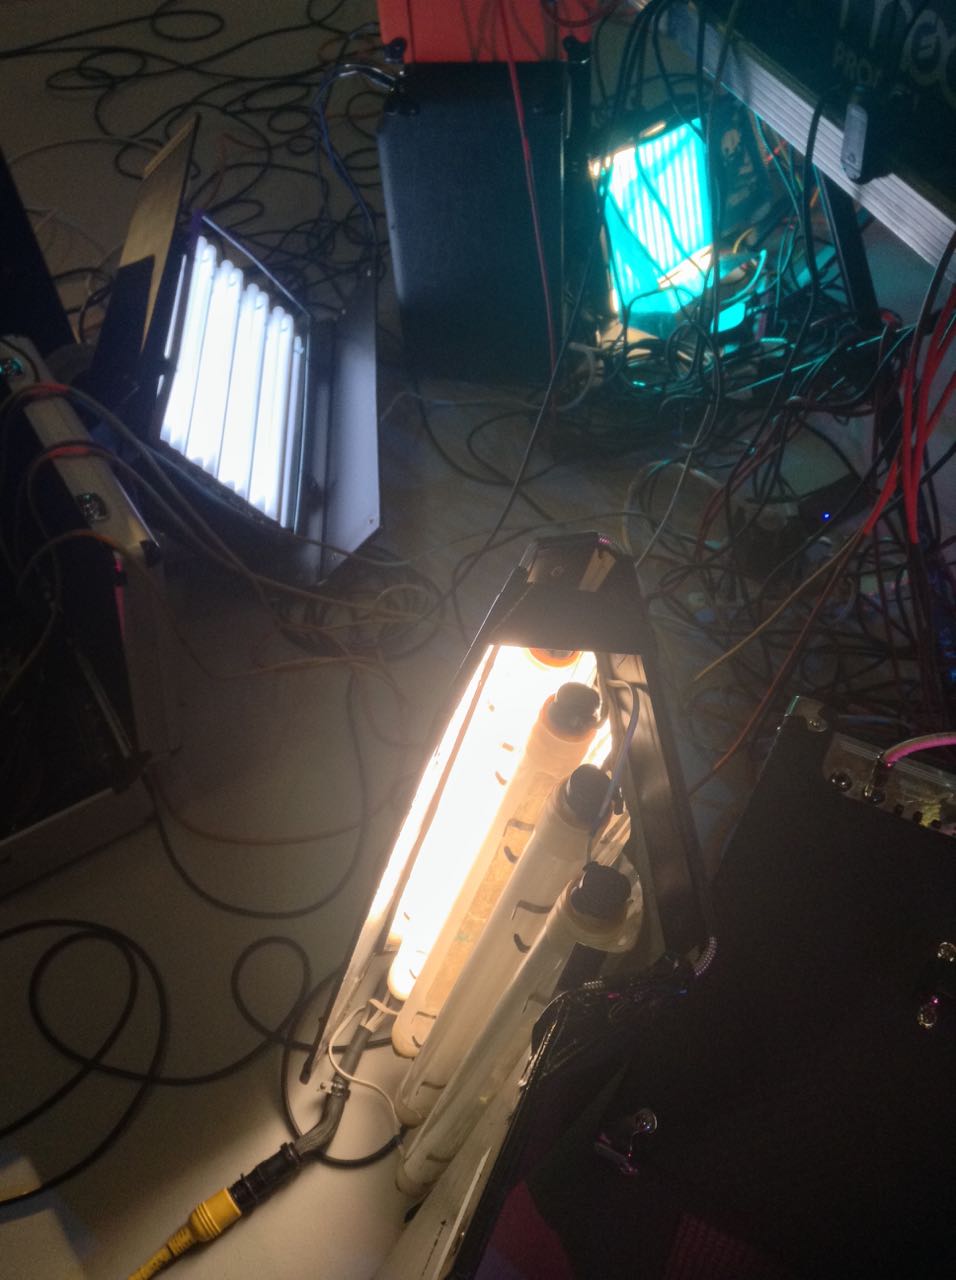
Unusually being used as practicals, in a music promo, are a 2’x4 Kino Flo (foreground, with 3200K tubes) and a Kino Flo Diva-Lite (top left, with 5500K tubes).
Tungsten and/or HMI lamps are usually the workhorse units of a lighting package, providing the power that is needed to key-light all but the smallest of set-ups. But they’re not right for every situation. If you don’t need the punch of a point source, and you want something a little softer, fluorescents might be the answer.
This is the third category of lighting units I’m covering in my Know Your Lights series; back up to the overview if you want to start from the beginning.
Fluorescent units use very similar technology to HMIs, with electrodes exciting a gas so that it gives off UV light. The phosphor coating on the tube absorbs the UV light and fluoresces, i.e. re-emits the light in the visible spectrum. Like HMIs, fluorescent units require a ballast to regulate the current.
One of the most notable early uses of fluorescents was in Robocop (1987). Jost Vocano, ASC chose the fixtures because the long, thin reflections looked great on Robocop’s suit. The flip side of that coin is that under certain circumstances fluorescents can make actors’ skin unpleasantly shiny. There was a scene in Ren: The Girl with the Mark where the poor make-up artist had to cake layers of powder onto Sophie Skelton to combat the shine of a Kino Flo I had set up.
Robocop (1987, dir. Paul Verhoeven) – note the fluorescent strips reflected in the suit.
One way I often use fluorescents is as a “Window Wrap”, a soft source that augments a hard HMI coming in through a window to wrap the light more pleasingly around the talent’s face. Or I’ll place a fluorescent outside the room, to represent or enhance indirect daylight spilling through a doorway.
Being soft sources, the light rays which fluorescents emit spread out widely, meaning the intensity drops off quickly as you move away from the lamp. (We refer to this as “throw”: fluorescents have little throw, whereas spotlights have a lot of throw.) For this reason they start to become pretty ineffective once you get more than about 6ft away from them, depending on the model.
Kino Flo is far and away the most common brand of fluorescent lighting used in the film and TV industry today, so apologies if the rest of this post reads a little like an advert for them. They’re not paying me, honestly!
The company was started by gaffer Frieder Hochheim and best boy Gary Swink after inventing the units for the 1987 comedy-drama Barfly (DP: Robby Müller, BVK). They required a fixture small enough to tuck into little alcoves in a bar location, without getting hot and causing damage.
Kino Flos come in two different kinds:
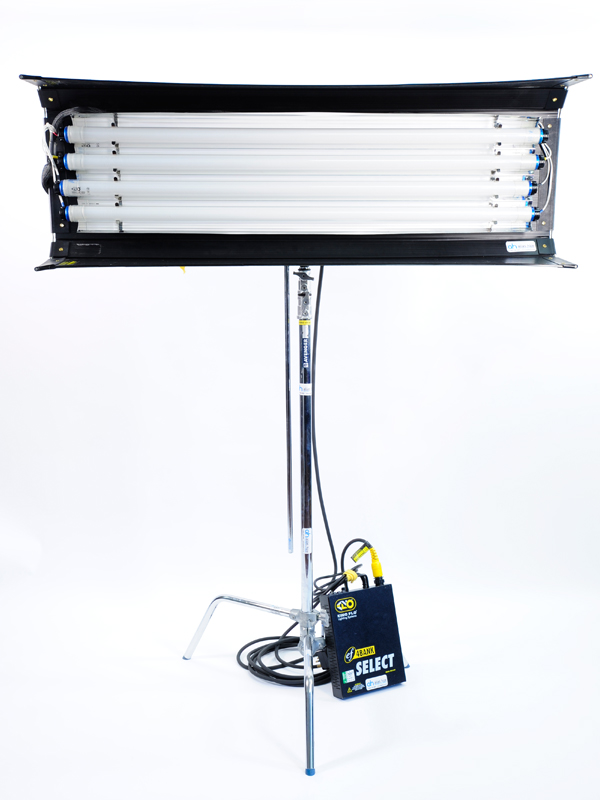
4’x4 Kino Flo with remote ballast leaning against the base of the C-stand4-bank Kino Flo ballast
Remote Ballast
With these units, the lighting fixture is separate to the ballast, and they are connected by a header cable, just like HMIs. Remote units are usually referred to by two numbers, the first representing the length of the tubes in feet, and the second representing the number of tubes. So a unit with two tubes, four feet in length, is called a “4ft 2-bank”, often written as: 4’x2 (pronounced “four by two”).
The most common units are 2’x4 (a.k.a. “fat boy”), 4’x4 and 4’x2, but others are available, including “Single Flo” units and 6ft/8ft “Mega” units.
The ballasts allow you to turn individual tubes on and off as required, and also feature a switch marked either Hi/Lo or 4ft/2ft, which reduces the light output by adjusting the current waveform.
Kino Flo Tegra. You can see the integrated ballast on the back.
Built-in Ballast
As you might expected, these models combine the fixture and ballast into a single unit. They are designed primarily for interview/ENG applications where it is more convenient to have everything in one. On drama productions it is generally preferable to have a remote fixture, which will be lighter, and a header cable running to an easily accessible ballast.
One advantage of built-in models over their remote cousins is that they are smoothly dimmable down to 5%.
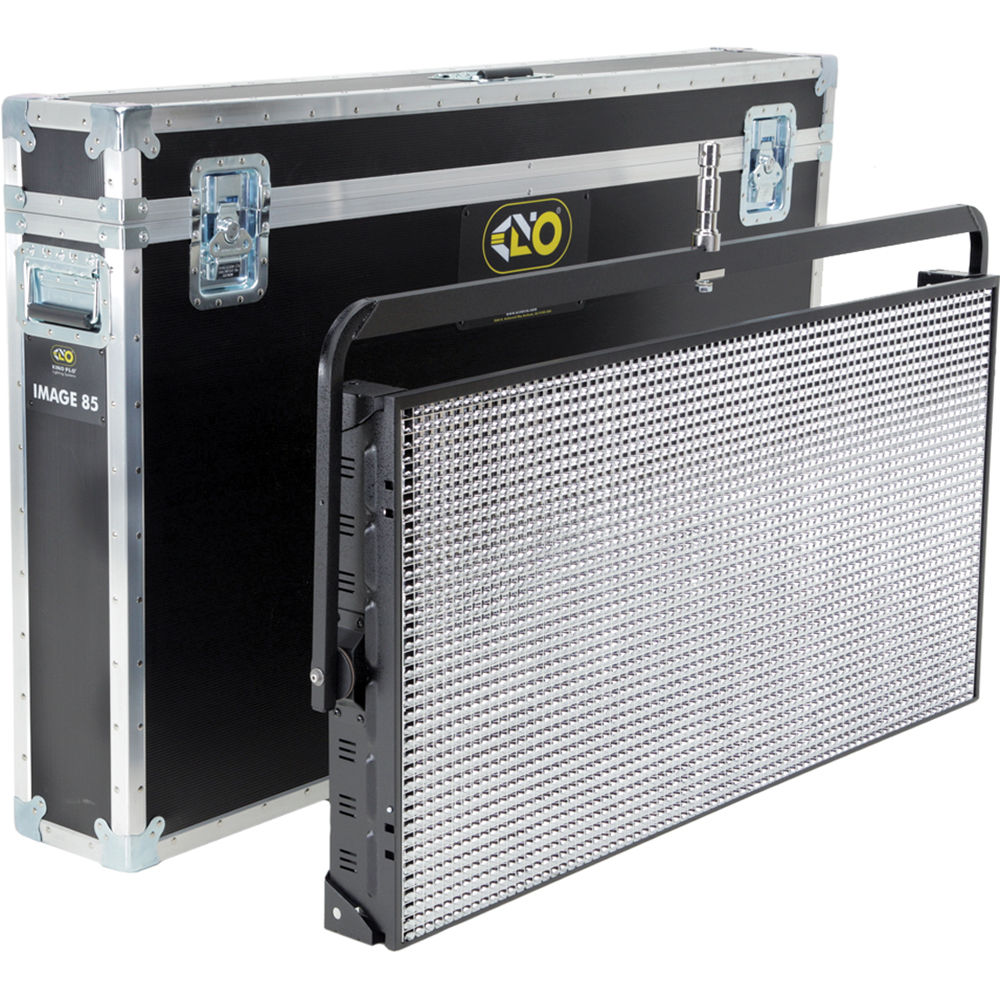
Built-in units are known by names rather than numbers: “Diva-Lite” (2’x4), “Tegra” (4’x4) and “BarFly”, which resembles a swollen 1’x1′ LED panel. There is also the large “Image 87”, a 4’x8 fixture with a built-in ballast. It’s great for lighting green and blue screens because it puts out so much soft light.
Kino Flo Image 87 with a silver egg crate fittedTop to bottom: 2900K, 3200K and 5500K tubes
Kino Flo tubes are available in five colours:
KF55 – 5500K – i.e. daylight – identified by blue end caps on the tubes
KF32 – 3200K – standard tungsten – gold end caps
KF29 – 2900K – warm tungsten – red end caps
420nm blue – an extra-saturated blue for lighting blue screens
525nm green – for lighting green screens
Kino Flos often come with plastic grids known as “egg crates” or “louvres”. Their purpose is to make the light more directional, effectively polarising it on a macro scale. They come in black, silver and “honeycomb” varieties, the latter available in 45º, 60º and 90º angles so you can choose how directional the light becomes – and, as a side effect, how much intensity you lose.
It is possible to remove the tubes and wiring from a Kino Flo housing so that the lamps can be squeezed into a tight space. For example, on The Little Mermaid we needed to see a soft blue glow emanating from a small translucent compartment in an organ. Best boy “Captain” Dan Xeller removed a 2ft Kino tube from its housing and placed it inside the compartment, running the wires out the back to the ballast.
Pampa Light in action behind the scenes of Ren: The Girl with the Mark. You can see I’ve gelled it with Quarter Minus Green in an attempt to correct the CRI.
Other than Kino Flo, another brand of fluorescent lights you may come across is Pampa Lights. They come in rugged boxes which can be interlinked to create larger banks of illumination. Unfortunately, in my experience the CRI (see overview) is not good, and they are best avoided.
The same goes even more so for the many fluorescent softbox kits available on Ebay from Hong Kong sellers. Not only are they flimsy in construction and questionable in terms of electrical safety, but the CRI of the lamps is very, very poor. If you need a cheap soft source, you would be much better off bouncing a halogen work light off a white card.
Indeed, firing an incandescent source into a bounce board will give you a better quality of light than even a Kino Flo. But a fluorescent fixture won’t make the room unbearably warm, it can emit daylight-balanced light, and it’s quicker to set up than a bounce board and the attendant flags. In a nutshell, it’s more convenient.
Next week, the Know Your Lights series concludes with a look at the fast-evolving world of LED illumination.
 Astera Titan Tubes seem to be everywhere at the moment, every gaffer and DP’s favourite tool. Resembling fluorescent tubes, Asteras are wireless, flicker-free LED batons comprised of 16 pixels which can be individually coloured, flashed and programmed from an app to produce a range of effects.

 Forests typically have no artificial illumination, except perhaps practical torches carried by the cast. This means that the DP will primarily be simulating moonlight.