How to Shoot Drama with Two Cameras

Shooting on one camera, getting the lighting and framing perfect for just one angle at a time, used to be a hallmark of quality in film and television. Nowadays many drama DPs are expected to achieve comparable quality while photographing two or more angles simultaneously, with all the attendant problems of framing out booms, lights and other cameras.

So what is the best way to tackle multi-camera shooting? Let’s consider a few approaches.
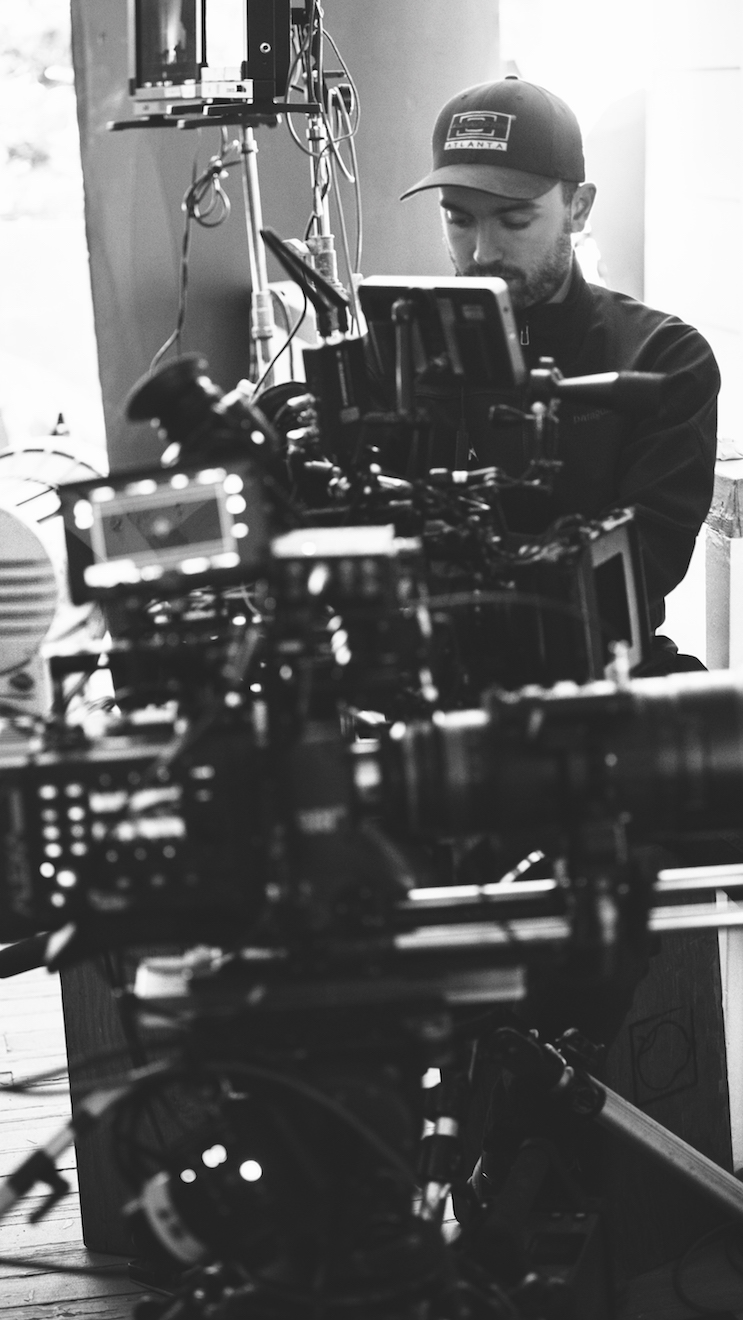
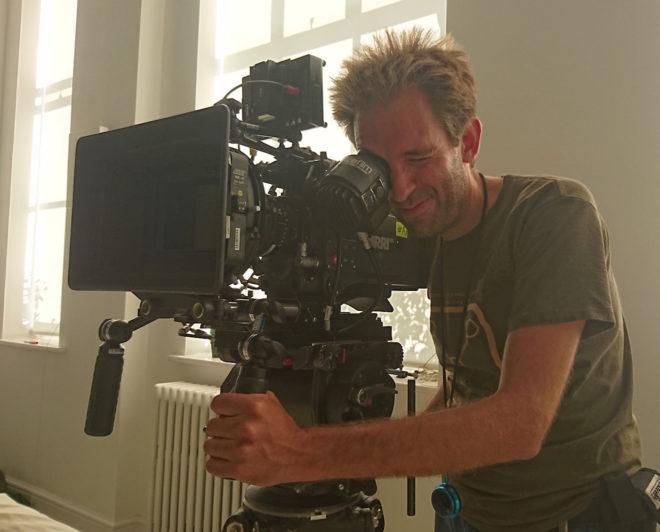
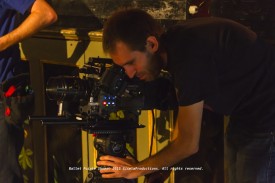
Photo: Brooks Patrick Allen


1. Two sizes

The most straightforward use of a B camera is to put it close to the A camera and point it in the same direction, just with a different lens. One disadvantage is that you’re sacrificing the ability to massage the lighting for the closer shot, perhaps bringing in a bounce board or diffusion frame that would flatter the actor a little more, but which would encroach on the wider frame.

Another limitation is that the talent’s eye-line will necessarily be further off axis on one of the shots. Typically this will be the wider camera, perhaps on a mid-shot including the shoulder of the foreground actor, while the other camera is tighter in terms of both framing and eye-line, lensing a close-up through the gap between the shoulder and the first camera.

The sound department must also be considered, especially if one camera is very wide and another is tight. Can the boom get close enough to capture the kind of close-miked audio required for the tight shot without entering the wide frame?

Some TV series are solving this problem by routinely painting out the boom in the wider shots. This is usually easy enough in a lock-off, but camera movement will complicate things. It’s an approach that needs to be signed off by all the major players beforehand, otherwise you’re going to get some panicked calls from a producer viewing the dailies.


2. Cross-shooting

This means filming a shot-reverse simultaneously: over character A’s shoulder onto character B, and over character B’s shoulder onto character A. This approach is an editor’s delight because there is no danger that the performance energies will be different when they cut from one person to the other, nor that arm or head positions will throw up continuity errors.

Keeping the cameras out of each other’s frames is of course an issue, one usually handled by backing them off and choosing tighter lenses. (Long lenses are an unavoidable side effect of multi-camera cinematography.) Two booms are required, and keeping their shadows out is four times as difficult.

Lighting can take twice as long too, since you now have two cast members who need to look their best, and you need to maintain mood, shape and contrast in the light in both directions simultaneously. Softer and toppier light is usually called for.

The performances in certain types of scene – comedy with a degree of improvisation, for example – really benefit from cross-shooting, but it’s by far the most technically challenging approach.


3. Inserts

Grabbing inserts, like close-ups of people’s hands dealing with props, is a quick and simple way of getting some use out of a second camera. Lighting on such shots is often not so critical, they don’t need to be close-miked, and it’s no hassle to shoot them at the same time as a two-shot or single.

There is a limit to how many inserts a scene needs though, so sooner or later you’ll have to find something else to do with the camera before the producer starts wondering what they’re paying all that extra money for.


4. Splinter unit

The idea of sending B camera off to get something completely separate from what A camera is doing can often appeal. This is fine for GVs (general views), establishing shots of the outside of buildings, cutaways of sunsets and so on, but anything much more complicated is really getting into the realm of a second unit.

Does the set or location in front of camera need to be dressed? Then someone from the art department needs to be present. Is it a pick-up of an actor? Well, then you’re talking about hair, make-up, costume, continuity, sound…

Photo: Brooks Patrick Allen

With the extra problems that a second camera throws up, it’s a fallacy to think it will always speed up your shoot; the opposite can easily happen. An experienced crew and a clear plan worked out by the director, DP, operators and gaffer is definitely required. However, when it’s done well, it’s a great way to increase your coverage and give your editor more options.

How to Shoot Drama with Two Cameras

How to Make a Living from Cinematography

Seven years ago, I transitioned to making a living purely as a director of photography on drama. I’ve since added writing and making an online course to my repertoire, but drama is still paying most of the bills. If you’re doing bits of what you love around a day job in an office, or freelance corporate videos, being able to leave those things behind you and pay the rent with stuff you enjoy doing can seem like the Holy Grail. So below I’m going to list the three things which I think, in combination, allowed me to make that transition.


1. Quantity of experience: putting in the hard graft

When I stopped doing corporates in 2014, I had been in the industry for a decade and a half. I had made two no-budget features off my own back, and photographed half a dozen other no-budget features and countless shorts, as well as the rent-paying work on participatory films, training videos and web video content. (Whether this kind of stuff really counts as being in “the industry” is debatable, but that’s a subject for another post.)

When I apply for a job I always start by introducing myself as a DP with x years of experience, because I think it speaks volumes about my passion and commitment, and proves that I must have talent and be pleasant to work with, if I’ve been able to keep doing it for so long.

The number of IMDb credits I had is also important. I had almost 50 at the time I made the jump, over half of those as a cinematographer.

How many years of experience and how many IMDb credits you need before you can make the jump could be more or fewer than I needed, depending on the other two factors on this list and the quality of the contacts you make. (I haven’t included contacts as a separate item on this list because it comes naturally out of the jobs you do. Artificially generating contacts, for example by attending networking events, does not lead to jobs or career progression, at least not in my experience.)


2. Quality of experience: getting that killer production on your reel

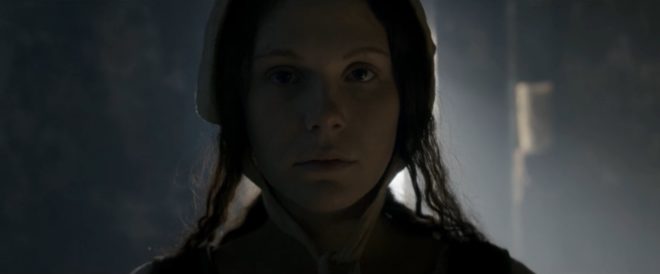
I first noticed a change occurring in my career when I added material from Ren: The Girl with the Mark to my showreel. There was a noticeable increase in how often I was getting short-listed and selected for jobs. And The First Musketeer, in conjunction with Ren, led directly to my first paid feature film DP gig.

What was it about these two projects which enabled them to do for my career what fifteen years’ worth of other no-budget projects couldn’t? Production value. Simple as that. They looked like “real” TV or film, and not in the way that your friends and family will look at anything you shot and go, “Wow, that looks like a real film!” They looked – even to people in the industry – like productions that had serious money behind them. And people are lazy when they’re looking at showreels. If they’re hiring for a job that has serious money behind it, they want to see material on your showreel that appears to have serious money behind it.

Most scripts that you will read for shorts or no-budget features will be written to make them achievable with little or no money. Often they will be set mainly in one house (the director’s, or a bland-looking Airbnb) in the present day, with no production design and only three or four characters. If the script is well written, and you’re an actor, then working on such a project could be great for your career. For most crew members, it’s a waste of time.

For DPs in particular, quality production design is incredibly important on your showreel. Most people who watch your reel won’t really be able to separate the cinematography from the overall look of the piece – the art, the costumes, the make-up, the locations – so getting showreel material that is visually stunning from all departments is the only way to kick your career up to the next level.


3. The Fear: making a living at it because you have to

Before I stopped doing corporates, I thought I was making every effort to get work as a drama DP. But I was wrong. As soon as I gave up the safety net of corporates, my whole attitude to drama work changed. Suddenly I had to do it, and I had to get paid reasonably well for it, otherwise I wouldn’t be able to pay my rent. It made me drive a harder bargain when negotiating my fee, it made me turn down unpaid projects and as a consequence it changed the way producers and directors saw me, and the kinds of projects they would consider me for.

Do not underestimate the value of The Fear. It’s not a magic wand, and you do need to have the experience and the killer production(s) on your reel before you make the jump, but The Fear will give you wings and help you get to the other side.

How to Make a Living from Cinematography

5 Things Bob Ross Can Teach Us About Cinematography

I’m certainly glad you could join me today. It’s a fantastic day here and I hope it is wherever you’re at. Are you ready to read a fantastic little blog post? Good, then let’s get started.

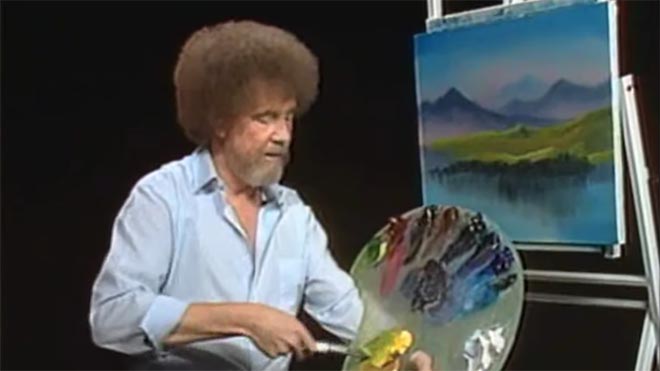
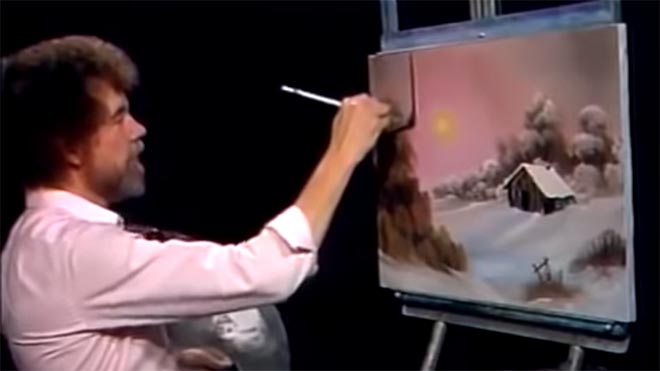
For twelve years, across 400 episodes, Bob Ross entertained all generations of Americans with his public access TV series, The Joy of Painting. Although he floated up to join the happy little clouds in 1995, in recent years YouTube and Twitch have brought his shows to a new audience, of which I am a humble member. Bob’s hypnotic, soft-spoken voice, his unfailingly positive attitude, and the magical effects of his wet-on-wet oil-painting technique make his series calming, comforting and captivating in equal measure.

Having watched every episode at least twice now, I’ve noticed several nuggets of Bob Ross wisdom that apply just as well to cinematography as they do to painting.


1. “The more plains you have in your painting, the more depth it has… and that’s what brings the happy buck.”

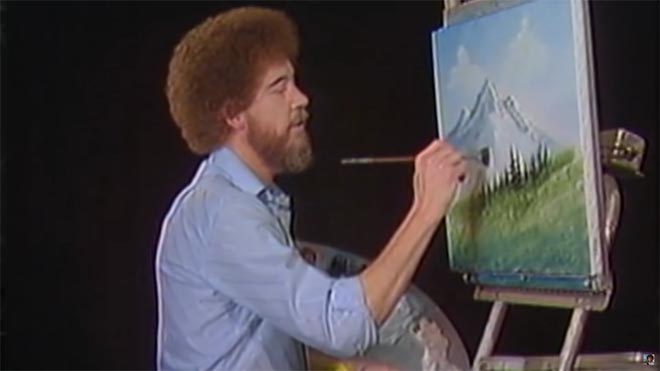
Bob always starts with the background of his scene and paints forward: first the sky with its happy little clouds; then often some almighty mountains; then the little footy hills; some trees way in the distance, barely more than scratches on the canvas; then perhaps a lake, its reflections springing forth impossibly from Bob’s brush; the near bank; and some detailed trees and bushes in the foreground, with a little path winding through them.

“Exile Incessant” (dir. James Reynolds)

Just as with landscape painting, depth is tremendously important in cinematography. Creating a three-dimensional world with a monoscopic camera is a big part of a DP’s job, which starts with composition – shooting towards a window, for example, rather than a wall – and continues with lighting. Depth increases production value, which makes for a happy producer and a happy buck for you when you get hired again.


2. “As things get further away from you in a landscape, they get lighter in value.”

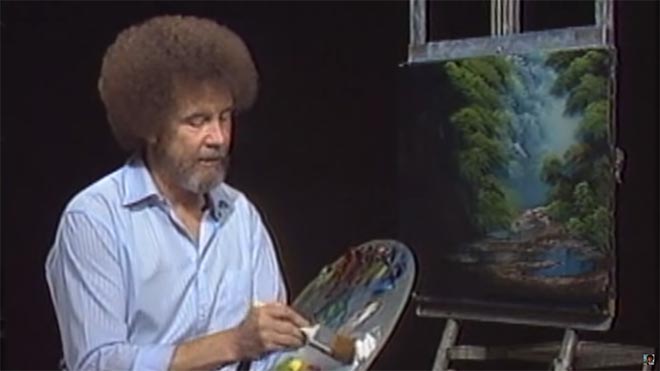
Regular Joy of Painting viewers soon notice that the more distant layers of Bob’s paintings use a lot more Titanium White than the closer ones. Bob frequently explains that each layer should be darker and more detailed than the one behind it, “and that’s what creates the illusion of depth”.

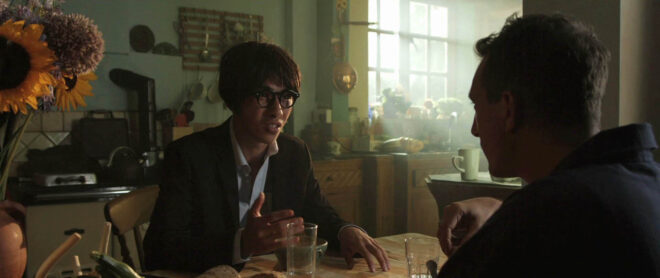
“The Gong Fu Connection” (dir. Ted Duran)

Distant objects seem lighter and less contrasty because of a phenomenon called aerial perspectivebasically atmospheric scattering of light. As a DP, you can simulate this by lighting deeper areas of your frame brightly, and keeping closer areas dark. This might be achieved by setting up a flag to provide negative fill to an object in the foreground, or by placing a battery-powered LED fixture at the end of a dark street. The technique works for night scenes and small interiors, just as well as daytime landscapes, even though aerial perspective would never occur there in real life. The viewer’s brain will subconsciously recognise the depth cue and appreciate the three-dimensionality of the set much more.


3. “Don’t kill the little misty area; that’s your separator.”

After completing each layer, particularly hills and mountains, Bob takes a clean, dry brush and taps gently along the bottom of it. This has a blurring and fading effect, giving the impression that the base of the layer is dissolving into mist. When he paints the next layer, he takes care to leave a little of this misty area showing behind it.

“Heretiks” (dir. Paul Hyett)

We DPs can add atmos (smoke) to a scene to create separation. Because there will be more atmos between the lens and a distant object than between the lens and a close object, it really aids the eye in identifying different plains. That makes the image both clearer and more aesthetically pleasing. Layers can also be separated with backlight, or a differentiation of tones or colours.


4. “You need the dark in order to show the light.”

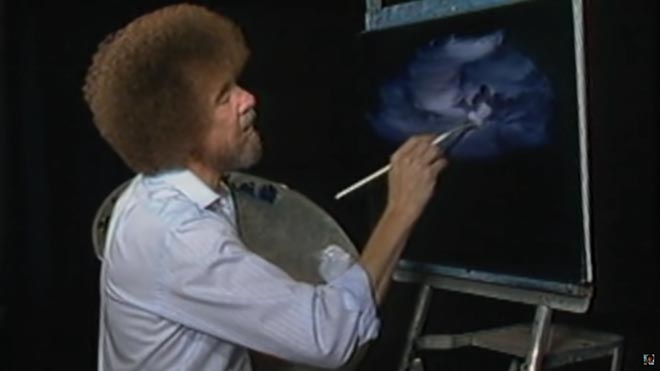
Hinting at the tragedy in his own life, Bob often underlines the importance of playing dark tones against light ones. “It’s like in life. Gotta have a little sadness once in a while so you know when the good times come,” he wisely remarks, as he taps away at the canvas with his fan-brush, painting in the dark rear leaves of a tree. Then he moves onto the lighter foreground leaves, “but don’t kill your dark areas,” he cautions.

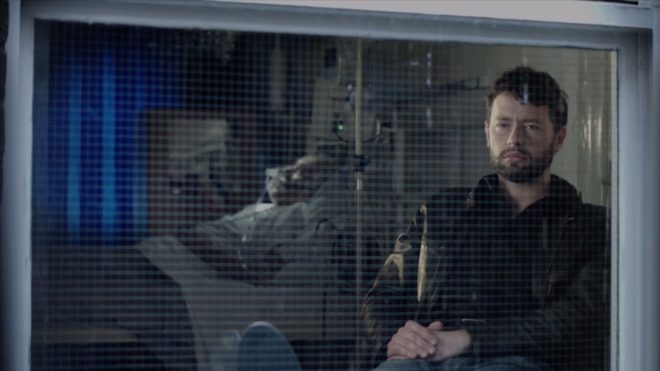
“Closer Each Day” promo (dir. Oliver Park)

If there’s one thing that makes a cinematic image, it’s contrast. It can be very easy to over-light a scene, and it’s often a good idea to try turning a fixture or two off to see if the mood is improved. However bright or dark your scene is, where you don’t put light is just as important as where you do. Flagging a little natural light, blacking out a window, or removing the bubble from a practical can often add a nice bit of shape to the image.


5. “Maybe… maybe… maybe… Let’s DROP in an almighty tree.”

As the end of the episode approaches, and the painting seems complete, Bob has a habit of suddenly adding a big ol’ tree down one or both sides of the canvas. Since this covers up background layers that have been carefully constructed earlier in the show, Bob often gets letters complaining that he has spoilt a lovely painting. “Ruined!” is the knowing, light-hearted comment of the modern internet viewer.

“Synced” (dir. Devon Avery)

The function of these trees is to provide a foreground framing element which anchors the side of the image. I discussed this technique in my article on composing a wide shot. A solid, close object along the side or base of the frame makes the image much stronger. It gives a reason for the edge of the frame to be there rather than somewhere else. As DPs, we may not be able to just paint a tree in, but there’s often a fence, a pillar, a window frame, even a supporting artist that we can introduce to the foreground with a little tweaking of the camera position.

The ol’ clock on the wall tells me it’s time to go, so until next time: happy filming, and God bless, my friend.

If you’re keen to learn more about cinematography, don’t forget I have an in-depth course available on Udemy.

5 Things Bob Ross Can Teach Us About Cinematography

8 Things to Look For When Buying a Cinema Camera

A couple of weeks ago I shared my thoughts about whether a director of photography should own equipment. My conclusion was that it can be useful early in your career, when you’re shooting corporates or tiny films with no hire budget. So what is the best camera for indie cinematography?

I’m not going to answer that, but I will tell you what to look for when investing in a camera. Hopefully these tips will help you choose the one that’s right for you from the huge and ever-changing array of professional cameras on the market, from the humble DSLR to the ubiquitous Reds and everything in between.


1. Image quality

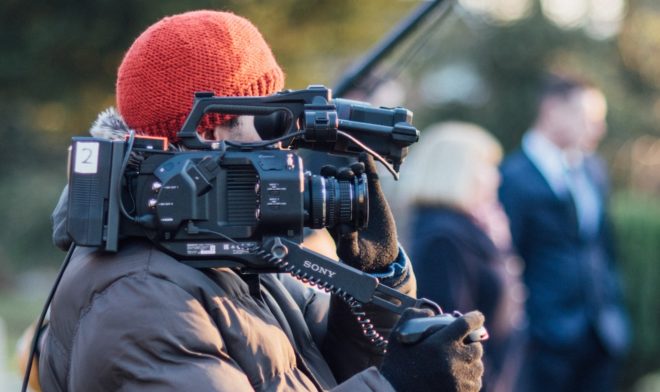
Shooting on a Sony FS7 for “Finding Hope”

The quality of the image is of course the most imporant attribute of any camera. Rather than any technical specifications, I’m talking about the aesthetic quality here: how does it feel? Does it have that elusive “cinematic” quality? Is it “filmic”? Does it remind you of certain kinds of movies?

A good place to start is to look up sample footage on YouTube, or better still Vimeo for less compression muddying the issue. If you can borrow the camera and try it out before you buy, even better. Take away some test footage and try grading it too.


2. Resolution

Resolution, the sheer number of pixels a camera can record, is part of image quality, but I include it as a separate point because I see it as more of a technical consideration than an aesthetic one. You should ask yourself what longevity you require from your films – will people still be watching them, say two or three years from now, and if so what sort of resolution might be the norm by then?

Also consider your delivery platform. If everything you shoot is going on YouTube, perhaps you don’t need more than 1080P (standard HD).


3. Dynamic Range

Dynamic range is a measure of how much contrast a camera can handle. Too small a dynamic range and you will frequently struggle with bright areas “clipping” – i.e. losing details – or dark areas getting lost in the image noise. Also, the wider the dynamic range, the more flexibility you will have in grading.

For a cinematic image, 12 stops of dynamic range is the absolute minimum, with 14 or more being ideal.


4. Maximum ISO

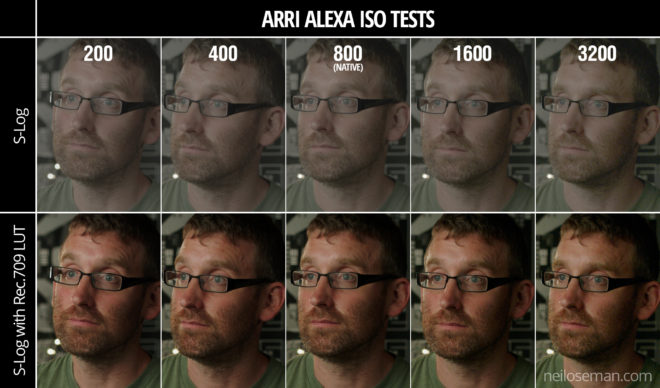
Some ISO tests I conducted on an Arri Alexa Classic in 2017

The ISO (International Standards Organisation) scale rates the light sensitivity of a camera. The most important thing is the native ISO, the one at which the camera is optimised to give the cleanest image with the most detail. On some cameras, setting an ISO other than the native one reduces the image quality considerably.

The higher the ISO, the less light will be required to expose an image correctly. 800 is typical these days, but many cameras go much higher than that. It is worth thinking about spending more money to get a camera with a higher native ISO, because you may save a lot of money on lighting.


5. Lens Mount

This is crucial because you may already have a collection of lenses, or you may intend to hire certain lenses, and you need to be sure that they will fit your new camera’s mount.

The Canon EF mount is extremely common and will open up a huge range of options for stills glass as well as some low-end cinema glass. The smaller MFT (micro four-thirds) mount also has a wide range of lenses.

Top-end cameras have PL mounts which take all the beautiful cinema lenses used on big movies, but only choose this route if you are willing to part with a lot of cash!


6. Form Factor

A Blackmagic Micro Cinema Camera, not so micro once it’s rigged with rails, matte box, wireless follow focus, battery, monitor and video transmitter!

When I started in the industry, cameras were all ergonomically designed to sit on your shoulder, with a nice handgrip to the right of the lens and an EVF (electronic viewfinder) to provide a third point of stabilising contact. Nowadays cameras tend to be boxy, heavy and uncomfortable to hold without additional accessories (see below).

Again, try to gets your hands on the camera in a shop and see how it feels before you purchase. As well as handheld shooting, consider how easy it will be to rig onto dollies, sliders, gimbals, etc.


7. Required Accessories

Buying the camera body itself is unlikely to be the end of your expenditure. You will need lenses, batteries, a battery charger, cards, a card reader and almost certainly some kind of stabilising system, be it a simple shoulder rig or an electronic gimbal.

You may also want an EVF, a tripod, matte box, follow focus – the list can seem endless! Be careful to budget your essential accessories before buying the camera. Some cameras seem like bargains until you add up all the extras. Pay particular attention to the media, and to exactly what speed of media you need in order to shoot at the resolution and frame rate that you require, as this can get very expensive.


8. Codec

What file type and codec does the camera shoot? Does your editing system support that format? If not, how time-consuming will it be to convert everything?

What compression ratios does the camera support? How much hard drive space will you need to store an hour of footage at that ratio? What about ten hours, plus back-ups? Often there is a trade-off between a highly compressed format like H.264 which is light on disc space but may need converting before you can edit it, and a lightly compressed format like ProRes which burns through disc space but can be dropped straight into most editing software.

8 Things to Look For When Buying a Cinema Camera

How to Process Black-and-White Film

A few weeks ago, I came very close to investing in an Ilford/Paterson Starter Kit so that I could process film at home. I have four exposed rolls of 35mm HP5+ sitting on my shelf, and I thought that developing them at home might be a nice way to kill a bit of lockdown time. However, I still wouldn’t be able to print them, due to the difficulties of creating a darkroom in my flat. And with lockdown now easing, it probably won’t be long until I can get to Holborn Studios and hire their darkroom as usual.

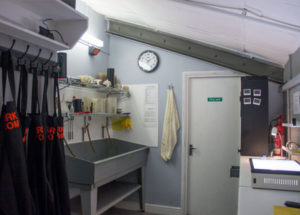
So in this article I’ll talk through the process of developing a roll of black-and-white 35mm, as I would do it in the Holborn darkoom. If you haven’t already, you might want to read my post about how film works first.


You will need


Loading the developing tank

Holborn Studios’ darkroom, run by Bill Ling, displays this handy reminder.

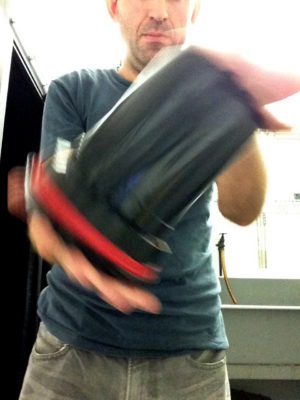
The first step is to transfer the exposed film from its cassette – which is of course light-proof – into the Paterson tank, which is designed to admit the developing chemicals but not light. This transfer must take place in complete darkness, to avoid fogging the film. I’ve always done this using a changing bag, which is a black bag with a double seal and elasticated arm-holes.

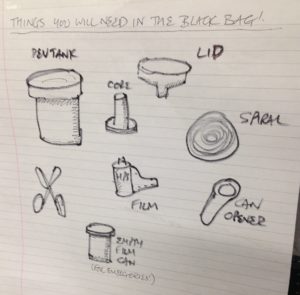
Start by putting the following items into the bag: the film cassette, scissors and the various components of the Paterson tank, including the spiral. It’s wise to put in an empty film canister too, in case something goes wrong, and if the tail of your film isn’t sticking out of the cassette then you’ll need a can opener as well.

Seal the bag, put your arms in, and pull all the film out of the cassette. It’s important NOT to remove your arms from the bag now, until the film is safely inside the closed tank, otherwise light can get in through the arm-holes and fog the film.

Use the scissors to cut the end of the film from the cassette, and to trim the tongue (narrower part) off the head of the film.

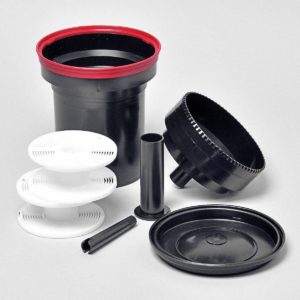
Paterson Universal Developing Tank components, clockwise from the white items: developing reels or spirals, tank, light-proof lid, waterproof cap, and agitator – which I never use. In the centre is the core.

Now we come to the most difficult part, the part which always has me sweating and swearing and regretting all my life choices: loading the film onto the spiral. I have practised this with dead film many times, but when I’m fumbling around in the dark of the changing bag it’s a hundred times harder.

It’s hard to describe loading the spiral verbally, but this blog post by Chris Waller is very clear and even includes pictures. (Chris recommends cutting a slight chamfer onto the leading corners of the film, which I shall certainly try next time, as well as using your thumbs to keep the film flat on its approach to the reel.)

If you’re working with 120 film, the loading process is very slightly different, and this video describes it well.

Once the spiral is loaded, you can thread it onto the core, place the core inside the tank, and then put the lid on. It is now safe to open the bag.


Developing

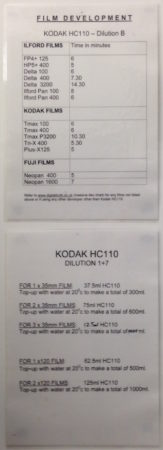
Developing time info displayed at Holborn Studios

Holborn Studios’ darkroom is stocked with a working solution of Kodak HC-110 developer, but if you don’t have this luxury, or you’re not using the Ilford Simplicity packs, then you’ll need to make up a working solution yourself by diluting the developer according to the manufacturer’s instructions. For HC-110 dilution B, which is what Holborn uses, it’s 1+31, i.e.one part concentrated developer to 31 parts water. The working solution has a limited shelf life, so again consult the manufacturer’s instructions.

Further dilution is required at the point of development, at a ratio of 1+7 in this case, but once more this may vary depending on the chemicals you choose. For one roll of 35mm, you need 37.5ml of the HC-110 dilution B, and 262.5ml of water for a total of 300ml.

The developing time depends on the type of film stock, the speed you rated it at, the type of developer and its dilution, and the temperature of the chemicals. Digital Truth has all the figures you need to find the right development time.

Agitating

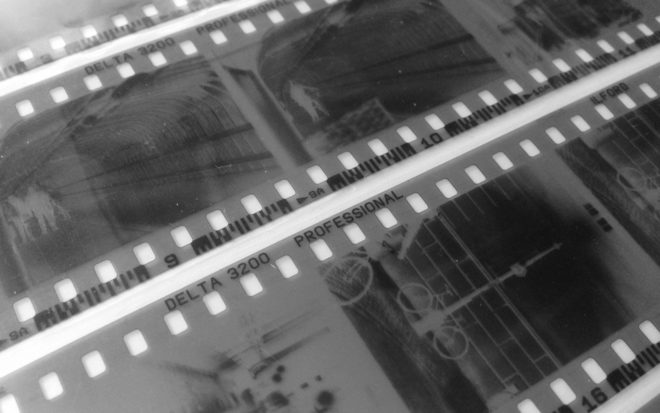
I was taught to ensure my water is always at 20°C before mixing it with the developer, to keep the timing calculations a little simpler. At this temperature, a roll of Ilford HP5+ rated at its box speed of ISO 400 needs five minutes to develop in HC-110 dilution B. Ilford Delta, on the other hand, needs a whopping 14.5 minutes to process at its box speed of 3200.

Once your diluted developer is ready, pour it into the Paterson tank and put on the cap. It is now necessary to agitate the chemicals in order to distribute them evenly around the film. My technique is inversion, i.e. turning the tank upside-down and back again. Do this continuously for the first 30 seconds, then for 10 seconds every minute after that.

Inside the tank, your latent image is being transformed into an image proper, wherein every exposed silver halide crystal is now black metallic silver.


Fixing

Once the developing time is up, remove the cap from the tank, and pour away the developer immediately. At this point some people will say you need to use a stop bath to put a firm halt to the developing process, but I was taught simply to rinse the tank out with tap water and then proceed straight to fixing. This method has always worked fine for me.

After rinsing the tank, pour in enough fix solution (again prepared to the manufacturer’s instructions) to fill it completely. Put the cap back on, agitate it for 30 seconds, then leave it for ten minutes.

During this time, the fixer renders the film’s unexposed crystals inactive and water soluble. When the ten minutes is up, pour the fixer back into its container (it’s reuseable) and leave the tank under running water for a further ten minutes. This washes away the unused silver halide crystals, leaving only the exposed black silver corresponding with light areas of the scene, and just the transparent plastic base corresponding with the dark areas.

Squirt a little diluted washing-up liquid into the tank to prevent drying rings, then drain it. You can now open the tank and see your negative for the first time.


Drying

Remove the film from the developing spiral, taking care to only touch the ends and the edges. Squeegee the top part of the film, dry your hands, then squeegee the rest. This removes droplets which can otherwise mark the negative.

Now attach two hooks to the film, a light one at the top to hang it from, and a heavy one at the bottom to stop the film curling as it dries. Holborn Studios is equipped with a heated drying cabinet, but with patience you can hang a film to dry in any dust-free area.

When your film is dry, you can cut it into strips of six frames and insert them into a negative storage sheet.

You can now scan your negatives, or better still print them photo-chemically, as I’ll describe in a future post.

How to Process Black-and-White Film

Should DPs Own Equipment?

Recently I discovered Tailslate, a podcast by DPs Ed Moore, BSC and Benedict Spence. The second episode focuses on equipment, and the two men discuss the pros and cons of having your own gear. I have some pretty strong feelings on this myself, so I thought I’d share them here.

I owned equipment for the first 17 years of my career. I was fortunate that at the time I first went freelance (late 1999) I had a small inheritance which I was able to invest in the wonderful new Mini-DV/Firewire technology that had recently emerged. I bought my first semi-professional camera, a Canon XM-1, along with a decent Manfrotto 501/520 tripod, a basic tracking dolly, sound gear, and for editing a PowerMac G4, Mini-DV/VHS deck and a pair of Yamaha MSP5 active nearfield speakers. (The speakers are the only things I still have, and I’m using them as I write, 20 years on. They are the best thing I’ve ever bought. Nothing else has ever served me for so long, so frequently and so reliably.)

Shooting on my Canon XL1-S back in 2003

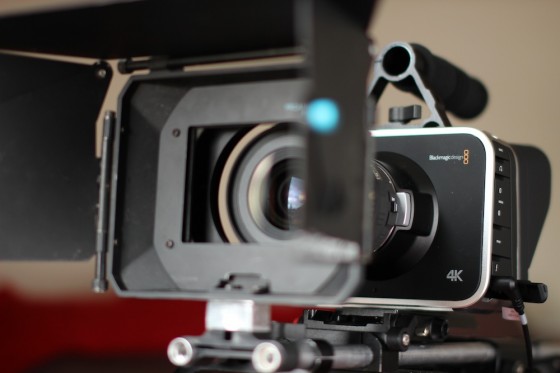
Apart from the speakers, everything else got replaced every few years as it fell into obsolescence or simply packed up. The XM-1 was replaced with an XL-1S, then I moved onto HDV with a Sony A1, then onto DSLRs with a Canon 600D/T3i, then a Blackmagic Production Camera, which turned out to be my last camera.

Immediately you can see one of the key problems with owning equipment: the fast pace of technological progression and the need to upgrade regularly to keep up. But owning equipment had disadvantages even before the fast-paced digital revolution. In a fascinating Clubhouse Conversation from the American Society of Cinematographers, M. David Mullen, ASC recounts his own experience with gear:

I ended up never owning a camera package. Because of that, I shot mostly 35mm in my early days… People I know who bought a [super]-16 camera, they ended up shooting [super]-16 films for the next ten years or so. So you can get tied to your own equipment.

But there are benefits to owning kit, of course. Corporate clients expect you to provide the gear yourself or to hire it in without any fuss. Clearly the former allows you to make more money from these jobs.

My last camera, the Blackmagic Production Camera 4K

For creative jobs, things aren’t so cut and dried. Owning a camera will certainly get you more work of a certain type. That type is unpaid and low-paid. If you expect to charge a hire fee on your gear, forget it. The type of productions that want you to have your own gear is the type that can’t afford to hire, either from you or from a facilities house. They’ll expect you to come along and bring your gear for free.

We all need to do this type of work at the start of our careers, which is why owning equipment is great at that point. But ultimately I sold my Blackmagic in 2017 and didn’t replace it because I no longer wanted that type of work.

I think things are a little different if you can afford to own a high-end camera. I’m pretty certain that I’ve lost jobs in the past, despite being a better cinematographer than the successful applicant, because they had a Red and I only had a DSLR or a Blackmagic. If you can afford an Alexa then you might well be able to get quality jobs off the back of it, but most of us aren’t in that position!

A camera that I could never afford to buy

The best thing about not owning gear is that you’re free to select the best equipment to tell each particular story (budget and production mandates notwithstanding). Each production is different, and there is no single camera or lens set that is best for all of them. Resolution, high frame rates, colour science, contrast, sharpness, weight, size, cost – all these factors and more influence a DP’s choice, and it’s a critical choice to make. If you’re pushing your own camera or lenses to the production just so you can recoup some of the cash you spent to buy them, you’re doing the story a disservice.

In conclusion, whether or not to invest equipment depends on your budget and the type of work you want to do. But if you’re shooting a drama, even if you own equipment, you should be asking yourself what camera and lenses will best set the tone and tell this story.

Should DPs Own Equipment?

6 Tips for Making DIY Lighting Look Pro

Good lighting can boost the production values of a film tremendously, making the difference between an amateur and a professional-looking piece. For filmmakers early in their careers, however, the equipment typically used to achieve these results can be prohibitively expensive. Far from the Hollywood productions attended by trucks full of lights, a micro-budget film may be unable to rent even a single HMI. Do not despair though, as there are ways to light scenes well without breaking the bank. Here are my top six tips for lighting on the cheap.


1. Make the most of natural light

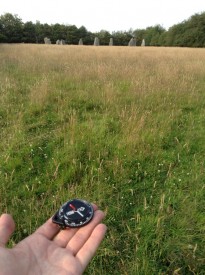
Checking my compass at the stone circle
Guesstimating the sun path on location

The hardest shots to light without the proper equipment are wide shots. Where a fully-budgeted production would rig Maxi Brutes on cherry-pickers, or pound HMIs through windows, a filmmaker of limited means simply won’t have access to the raw power of such fixtures. Instead, plan your day carefully to capture the wide shots at the time when natural light gives you the most assistance. For a day interior, this means shooting when the sun is on the correct side of the building.

See also: “Sun Paths”


2. Keep L.E.D.s to the background

£2 LED camping light

There are a plethora of LED fixtures on the market, designed for all kinds of applications, some of them very reasonably priced. It might be tempting to purchase some of these to provide your primary illumination, but I advise against it. Cheap LED units (and fluorescents) have a terrible Colour Rendering Index (CRI), making for unnatural and unappealing skintones. Such units are therefore best restricted to backgrounds, accent lighting and “specials”. For example, I purchased a little LED camping light from a charity shop for about £2, and I often use it to create the blue glow from computer screens or hang it from the ceiling to produce a hint of hair-light.

See also my article on LEDs from my “Know Your Lights” series.


3. Key with tungsten or halogen

Worklight
Halogen floodlight

By far the best solution for a high output, high CRI, low cost key is a halogen floodlight; 500W models are available for as little as £5. Their chief disadvantage is the lack of barn doors, making the light hard to control, though if you can stretch to a roll of black wrap you can fashion a kind of snoot. Alternatively, consider investing in a secondhand tungsten movie fixture. With many people switching to LEDs, there are plenty of old tungsten units out there. Try to get a reputable brand like Arri or Ianiro, as some of the unbranded units available on Ebay are poorly wired and can be unsafe.

See also: “DIY Interview Lighting for the ‘Ren’ EPK”


4. Control the light

Lace curtains used to break up light in a Camerimage workshop last year

Flooding a halogen light onto a scene is never going to look good, but then the same is often true of dedicated movie fixtures. Instead it’s more how you modify the light that creates the nuanced, professional look. Improvise flags from pieces of cardboard to stop the light spilling into unwanted places – but be VERY careful how close you put them to a tungsten or halogen source, as these get extremely hot. For example, when shooting indoors, flag light off the background wall (especially if it’s white or cream) to help your subject stand out.

See also “Lighting Micro-sets” for an example of this.


5. Soften the light

Almost all cinematographers today prefer the subtlety of soft light to the harshness of hard light. You can achieve this by bouncing your fixture off a wall or ceiling, or a sheet of polystyrene or card. Or you could hang a white bedsheet or a shower curtain in front of the light as diffusion, but again be sure to leave a safe distance between them. Professional collapsible reflectors are available very cheaply online, and can be used in multiple ways to diffuse or reflect light.

Hot tub cover = bounce board
Hot tub cover = bounce board. Towel = flag

See also: “How to Soften Harsh Sunlight with Tinfoil and a Bedsheet”; and to read more about the pictured example: “Always Know Where Your Towel Is”


6. Make use of practicals

Black-wrapped ceiling light

Finally, don’t be afraid to use existing practical lighting in your scene. Turning on the main overhead light usually kills the mood, but sometimes it can be useful. You can generate more contrast and shape by covering up the top of the lampshade, thus preventing ceiling bounce, or conversely use the ceiling bounce to give some ambient top-light and cover the bottom of the lampshade to prevent a harsh hotspot underneath it. Table lamps and under-cupboard kitchen lights can add a lot of interest and production value to your backgrounds. If possible, swap out LED or fluorescent bulbs for conventional tungsten ones for a more attractive colour and to eliminate potential flickering on camera.

See also: “5 Tips for Working with Practicals”, and for an example of the above techniques, my blog from day two of the Forever Alone shoot.

6 Tips for Making DIY Lighting Look Pro

Colour Schemes

Last week I looked at the science of colour: what it is, how our eyes see it, and how cameras see and process it. Now I’m going to look at colour theory – that is, schemes of mixing colours to produce aesthetically pleasing results.


The Colour wheel

The first colour wheel was drawn by Sir Isaac Newton in 1704, and it’s a precursor of the CIE diagram we met last week. It’s a method of arranging hues so that useful relationships between them – like primaries and secondaries, and the schemes we’ll cover below – can be understood. As we know from last week, colour is in reality a linear spectrum which we humans perceive by deducing it from the amounts of light triggering our red, green and blue cones, but certain quirks of our visual system make a wheel in many ways a more useful arrangement of the colours than a linear spectrum.

One of these quirks is that our long (red) cones, although having peak sensitivity to red light, have a smaller peak in sensitivity at the opposite (violet) end of the spectrum. This may be what causes our perception of colour to “wrap around”.

Another quirk is in the way that colour information is encoded in the retina before being piped along the optic nerve to the brain. Rather than producing red, green and blue signals, the retina compares the levels of red to green, and of blue to yellow (the sum of red and green cones), and sends these colour opponency channels along with a luminance channel to the brain.

You can test these opposites yourself by staring at a solid block of one of the colours for around 30 seconds and then looking at something white. The white will initially take on the opposing colour, so if you stared at red then you will see green.

Hering’s colour wheels

19th century physiologist Ewald Hering was the first to theorise about this colour opponency, and he designed his own colour wheel to match it, having red/green on the vertical axis and blue/yellow on the horizontal.

RGB colour wheel

Today we are more familiar with the RGB colour wheel, which spaces red, green and blue equally around the circle. But both wheels – the first dealing with colour perception in the eye-brain system, and the second dealing with colour representation on an RGB screen – are relevant to cinematography.

On both wheels, colours directly opposite each other are considered to cancel each other out. (In RGB they make white when combined.) These pairs are known as complementary colours.


Complementary

A complementary scheme provides maximum colour contrast, each of the two hues making the other more vibrant. Take “The Snail” by modernist French artist Henri Matisse, which you can currently see at the Tate Modern; Matisse placed complementary colours next to each other to make them all pop.

“The Snail” by Henri Matisse (1953)

In cinematography, a single pair of complementary colours is often used, for example the yellows and blues of Aliens‘ power loader scene:

“Aliens” DP: Adrian Biddle, BSC

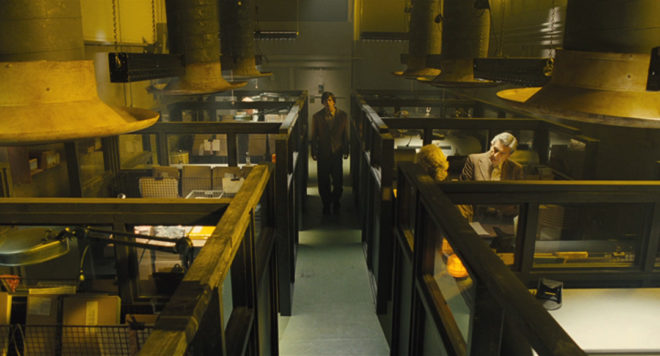
Or this scene from Life on Mars which I covered on my YouTube show Lighting I Like:

I frequently use a blue/orange colour scheme, because it’s the natural result of mixing tungsten with cool daylight or “moonlight”.

“The First Musketeer”, DP: Neil Oseman

And then of course there’s the orange-and-teal grading so common in Hollywood:

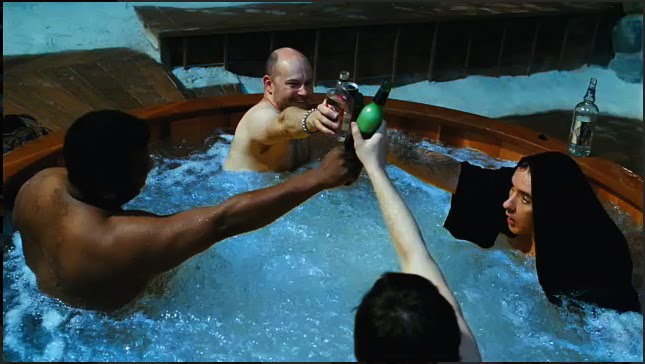
“Hot Tub Time Machine” DP: Jack N. Green, ASC

Amélie uses a less common complementary pairing of red and green:

“Amélie” DP: Bruno Belbonnel, AFC, ASC


Analogous

An analogous colour scheme uses hues adjacent to each other on the wheel. It lacks the punch and vibrancy of a complementary scheme, instead having a harmonious, unifying effect. In the examples below it seems to enhance the single-mindedness of the characters. Sometimes filmmakers push analogous colours to the extreme of using literally just one hue, at which point it is technically monochrome.

“The Matrix” DP: Bill Pope, ASC
“Terminator 2: Judgment Day” DP: Adam Greenberg, ASC
“The Double” DP: Erik Alexander Wilson
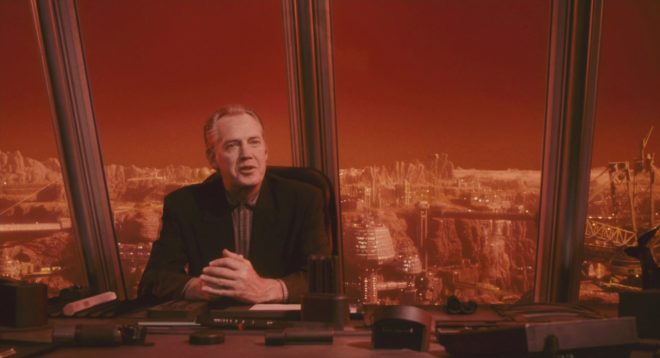
“Total Recall” (1990) DP: Jost Vacano, ASC, BVK


There are other colour schemes, such as triadic, but complementary and analogous colours are by far the most common in cinematography. In a future post I’ll look at the psychological effects of individual colours and how they can be used to enhance the themes and emotions of a film.

SaveSave

Colour Schemes

5 Things I Learnt from Editing

I used to do a lot of editing work alongside DPing, and although those days are now behind me, their influence lives on. Every day that I work as a cinematographer, I use some of the knowledge I gained while slaving over a multi-coloured keyboard. Here are some of the most important things I learnt from editing.


1. Performance always wins.

The editor will always use the take with the best performance. What this means for the DP is that there is really no point requesting another take because of a missed focus pull, bumpy dolly move or dodgy pan, because inevitably the performance will not be as spontaneous and engaging as it was when you cocked up the camerawork, so the editor will use the first take.

Of course you need to make the director aware of any significant technical issues, and if they want to do another take, that’s absolutely their prerogative. But the editor will still use the first take. So get it right on the first take, even if that means pushing for another rehearsal.


2. Your darlings will die.

You know all your favourite shots? All the ones you’ve been mentally ear-marking for your showreel? The beautifully-lit wides, the fancy camera moves, that cool scene with the really interesting set? Yeah, half of those won’t make the final cut.

That wide shot is used for a single second before they cut into the meaty mid-shots. The camera move slowed the scene down too much so they chopped it up. That scene with the cool set looked great but didn’t advance the plot.

Two things to learn from this: 1. Do a great job, but don’t be a perfectionist, because you might be wasting everyone’s time on something that is destined for the cutting room floor. 2. If you want that shot for your showreel, grab it from the DIT, otherwise you might never see it again.


3. Bring ’em in, let ’em leave.

I can’t count the number of times, when shooting a close-up, I’ve advised the director to run the whole scene. They just wanted to pick up a few lines, but I convince them to let the talent walk in at the start and walk out at the end. That way the editor has much more flexibility on when to cut, a flexibility which I know that I appreciated when I was the one wrangling the timeline.

Any angle you shoot, push to cover the entire scene from it. In most cases it takes only slightly more time, and it’s easier for the actors because they get to do the whole emotional arc. And the editor will have many more options.
 

4. Spot the Missing Shot.

The ability to edit in your head is incredibly useful on set. If you can mentally assemble the coverage you’ve just shot, you can quickly identify anything that’s missing. Years of editing trained me to do this, and it’s saved annoying pick-ups several times. Officially this is the script supervisor’s job, but smaller productions may not always have someone in this capacity, and even when they do, another person keeping track can’t hurt.


5. Respect the slate.

On smaller productions, the clapperboard is often treated as an inconvenience. People sometimes chat over it, directors giving last-minute instructions, or actors finishing their showbiz anecdotes before getting into character, rendering the audio announcement unintelligible. On no- or micro-budget productions there might not be a 2nd AC, so the board gets passed to whoever’s handy at the time, who has no idea what the current slate or take number are, and the whole thing becomes a meaningless farce.

Which is fine for everyone except the poor bastard in the edit suite who’s got to figure out which audio clip goes with which video clip. It can add hours of extra work for them. I’ve been there, and it ain’t pretty. So, for the sanity of the (assistant) editor, please respect the slate.

5 Things I Learnt from Editing

9 Uses for Central Framing

A couple of weeks ago I wrote a post on lead room, the amount of horizontal space the subject is given in front of them in the frame. Commonly the subject is placed to one side or the other, but there can be times when sitting that actor bang in the middle of the screen is most appropriate and effective. Here are some reasons you might want to do it.


1. To show immersion in the environment

When you surround a character with equal amounts of the background on both sides, you embed them into that background, creating a strong connection between them and their environment. This can be seen to great effect in the above frames from Road to Perdition and Butch Cassidy and the Sundance Kid (DP: Conrad Hall, ASC) and The Revenant (DP: Emmanuel Lubezki, ASC, AMC).


2. To create power

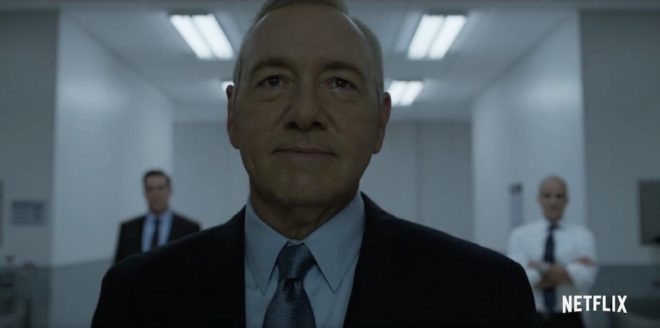
Central framing can give a subject tremendous power and dominance, particularly in combination with a low angle, as seen in the above examples from House of Cards (DP: David M. Dunlap) and Django Unchained (DP: Robert Richardson, ASC).


3. To suggest formality or rigidity

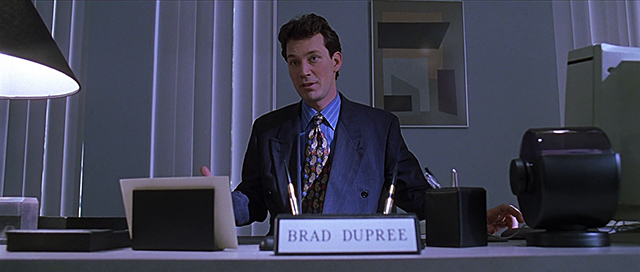
These scenes from American Beauty (DP: Conrad Hall, ASC) use central framing to emphasise the formality of Lester’s performance review, and the stilted, suffocating nature of his home life.


4. To create order

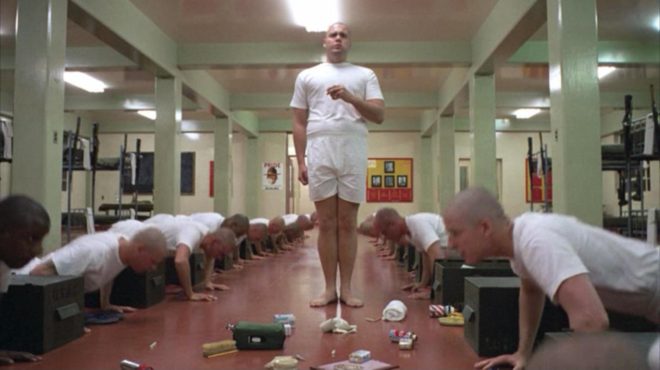
Kubrick used central framing with strong single-point perspective to create worlds of perfect order… so perfect that they would have to come crashing down sooner or later. The above examples are from Full Metal Jacket (DP: Douglas Milsome, BSC, ASC) and 2001: A Space Odyssey (DP: Geoffrey Unsworth, OBE, BSC).

This shot from The Matrix (DP: Bill Pope, ASC) also uses central framing to symbolise order, the calculatingly perfect order of the machines.


5. To suggest duality

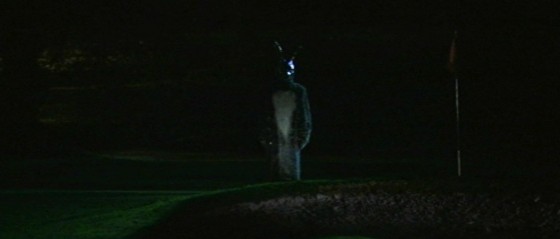
When you shoot a shot-reverse with both parties centred, the two characters appear to replace each other on screen every time you cut. This can suggest a strong connection between the characters, or a strong conflict as they battle for the same piece of screen. Donnie Darko (DP: Steven B. Poster, ASC, ICG) uses this technique to set up the antagonism of the rabbit, while also suggesting he’s a part of Donnie, a figment of his imagination.


6. For humour

Centre framing is of course a huge part of Wes Anderson’s style, as in The Life Aquatic with Steve Zissou and The Grand Budapest Hotel (DP: Robert Yeoman, ASC). But I don’t think it’s stylisation for stylisation’s sake; his movies all have the feeling of tall tales told by ageing relatives with the aid of a scrapbook full of dorky, posed photos. The symmetry helps create the dorkiness, and from thence – as Lee & Herring used to say – the humour arises. The same is true of this classic scene from Garden State (DP: Lawrence Sher, ASC).


7. For faster cutting

Mad Max: Fury Road (DP: John Seale, ACS, ASC) was framed centrally in service of the editing. Director George Hill realised that if he put everyone in the same place in frame, the audience wouldn’t need to search the screen for the subject after every cut, allowing him to edit faster without making the action incomprehensible. See this post for more on the cinematography of Fury Road.


8. For impact

When used judiciously, central framing can have a big impact, giving a character their moment in the spotlight, putting them centre stage. It can underline a key character or story beat. The examples above are from Hugo (DP: Robert Richardson, ASC), Rogue One (DP: Greig Fraser, ACS, ASC) and American Beauty again.


9. To Break the fourth wall

And finally, if your subject is looking into the lens, addressing the audience, then central framing is the natural composition. It’s not the only composition though; often the subject will be framed to one side so we can see the action continuing in the background even as it is narrated to us. But if the shot is just about the narrator, often central framing will be the most effective, as in the above shots from Amélie (DP: Bruno Delbonnel, AFC, ASC) and A Series of Unfortunate Events (DP: Bernard Couture).

9 Uses for Central Framing