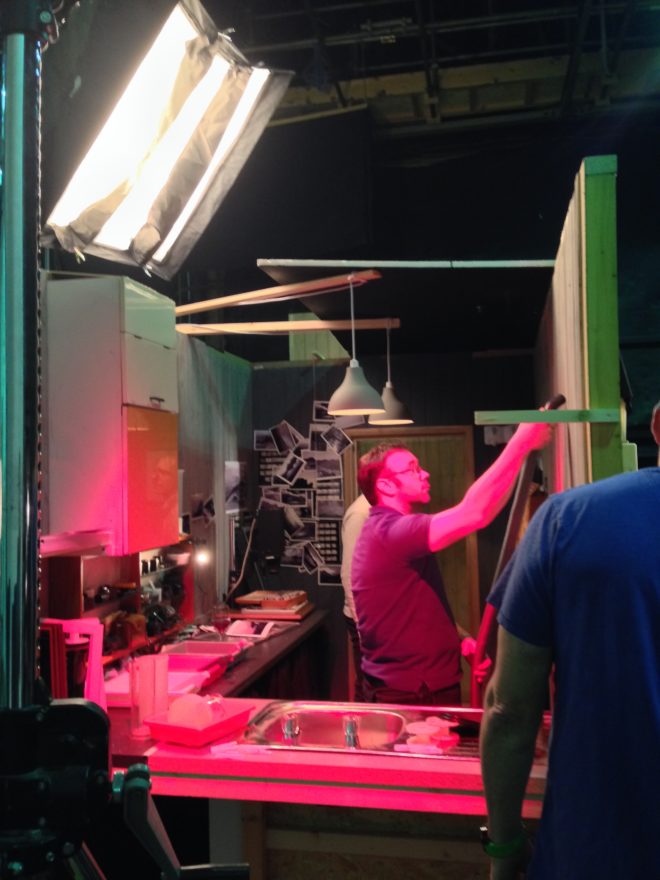
Working with White Walls

White walls are the bane of a DP’s existence. They bounce light around everywhere, killing the mood, and they look cheap and boring in the background of your shot. Nonetheless, with so many contemporary buildings decorated this way, it’s a challenge we all have to face. Today I’m going to look back on two short films I’ve photographed, and explain the different approaches I took to get the white-walled locations looking nice.

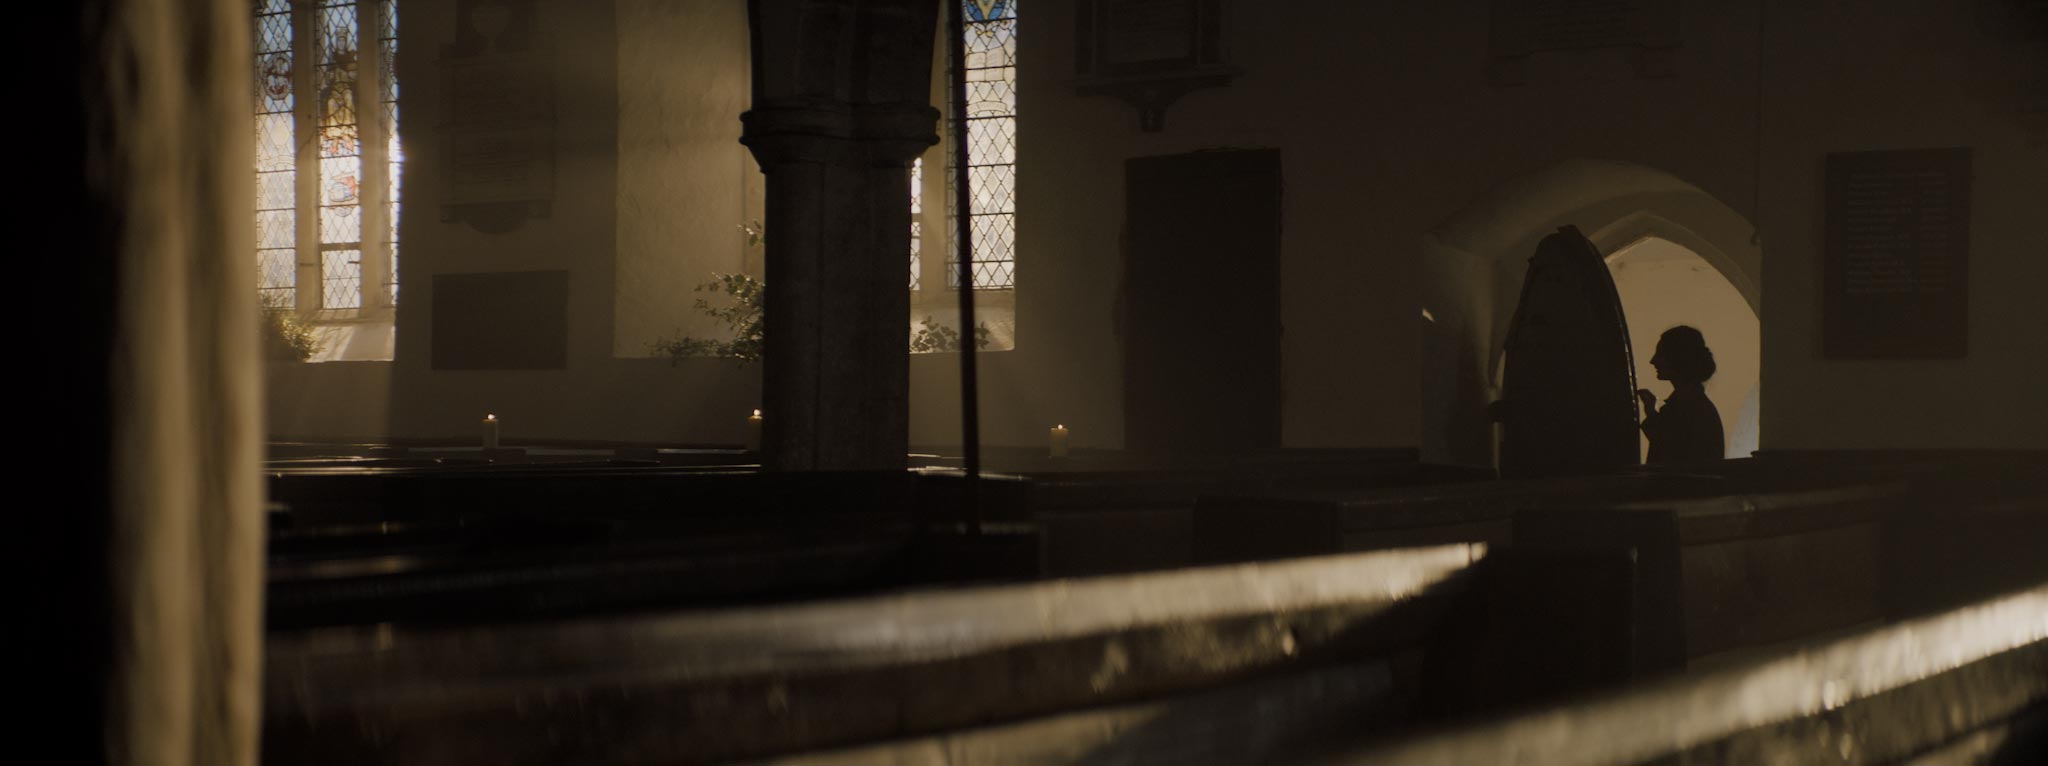
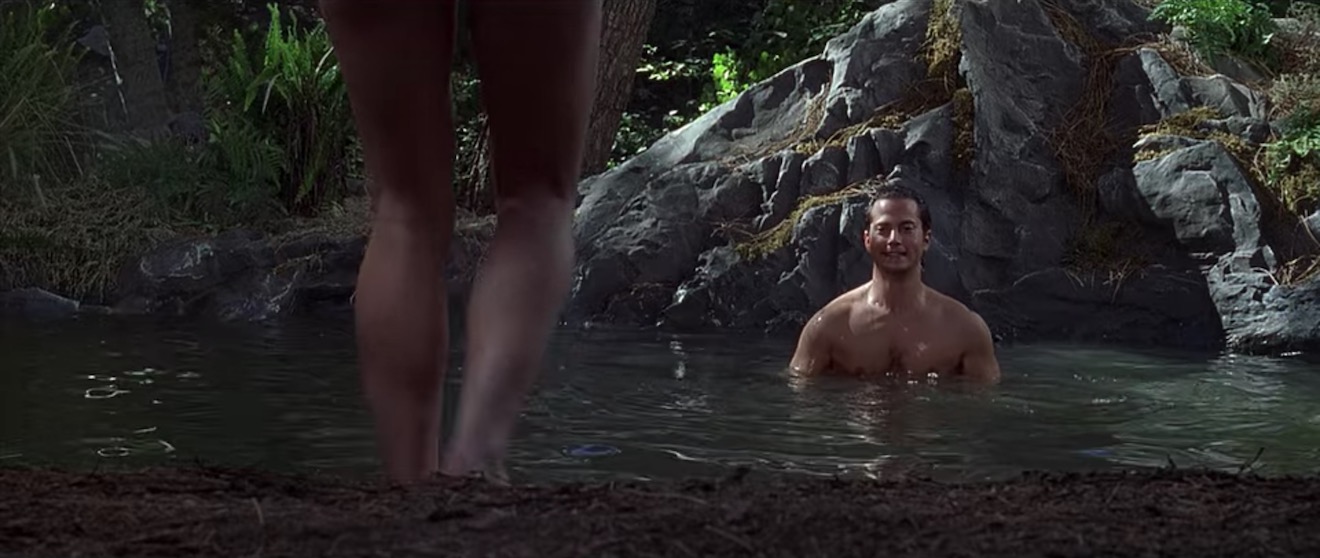
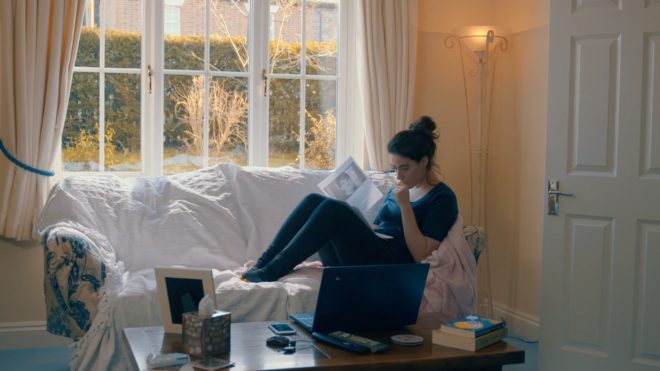
Finding Hope is a moving drama about a couple grieving for the baby they have lost. It was shot largely at the home of the producer, Jean Maye, on a Sony FS7 with Sigma and Pentax stills glass.

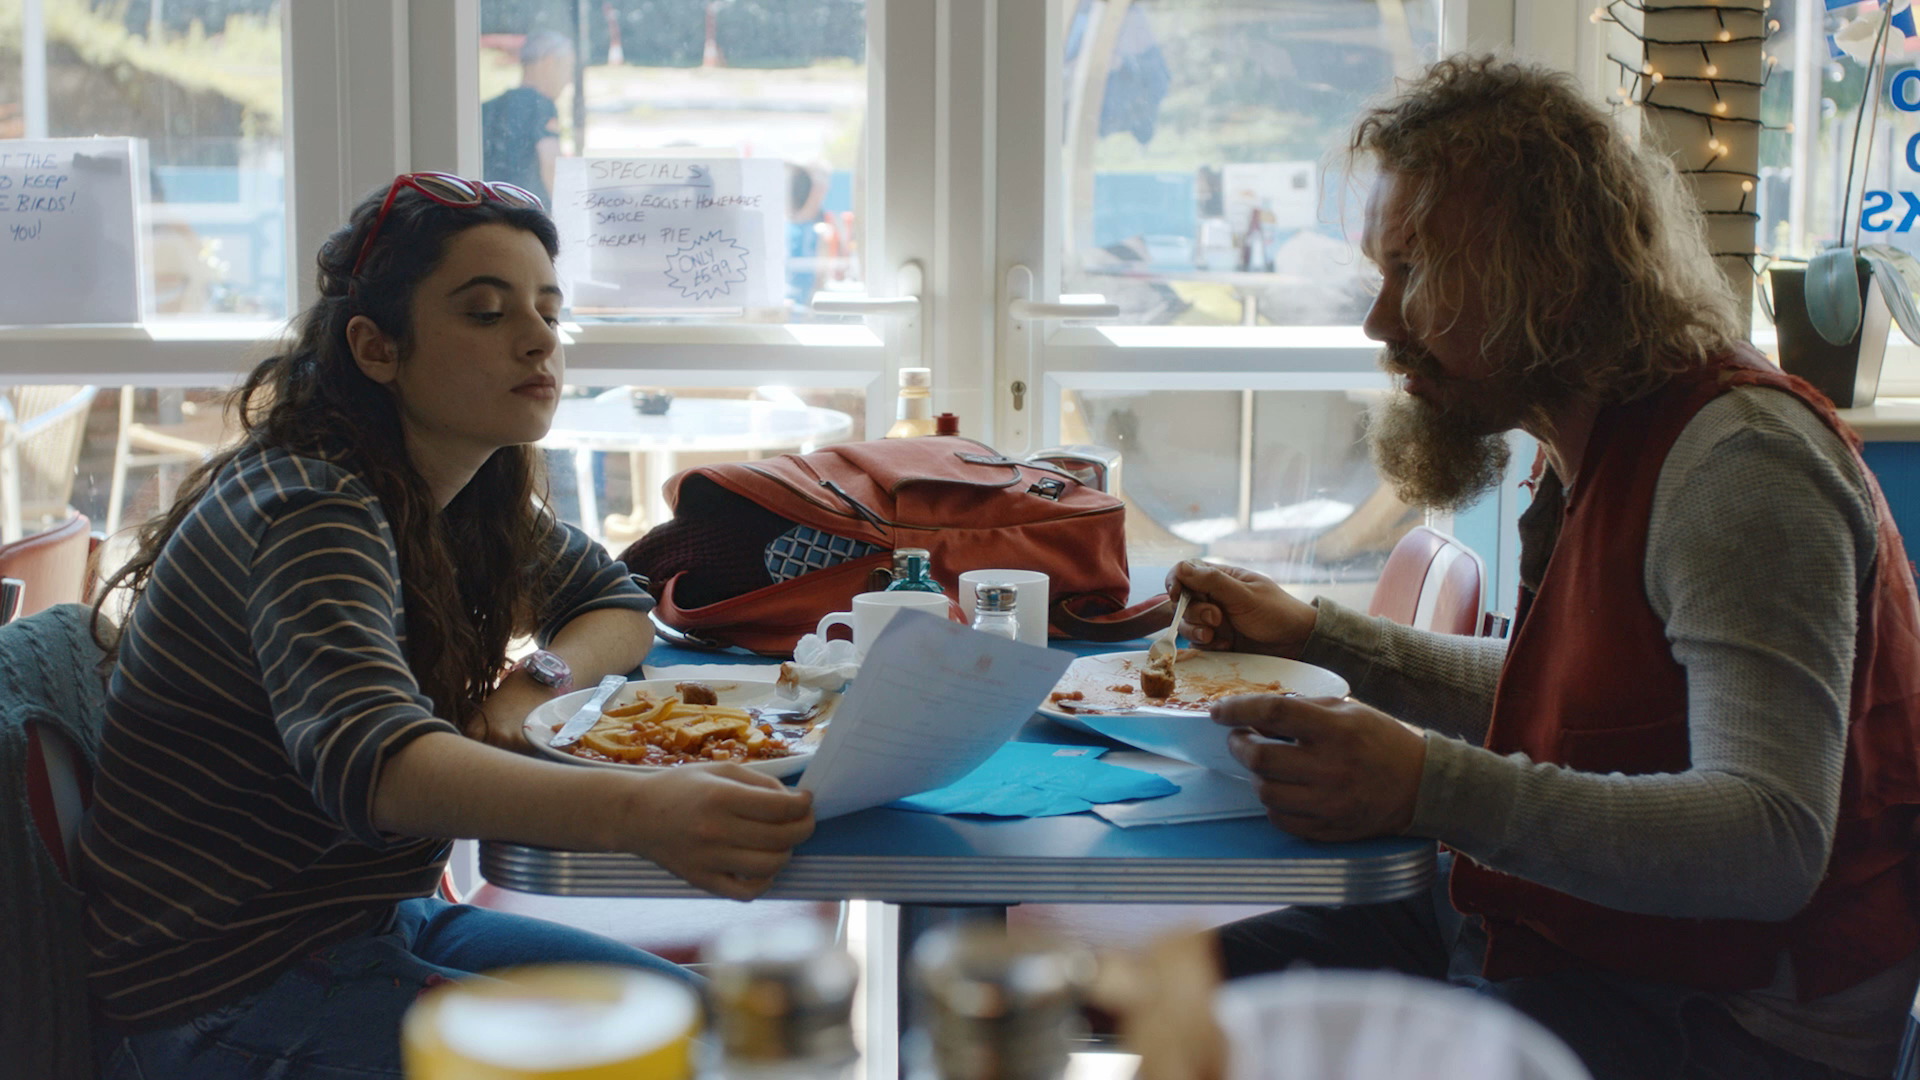
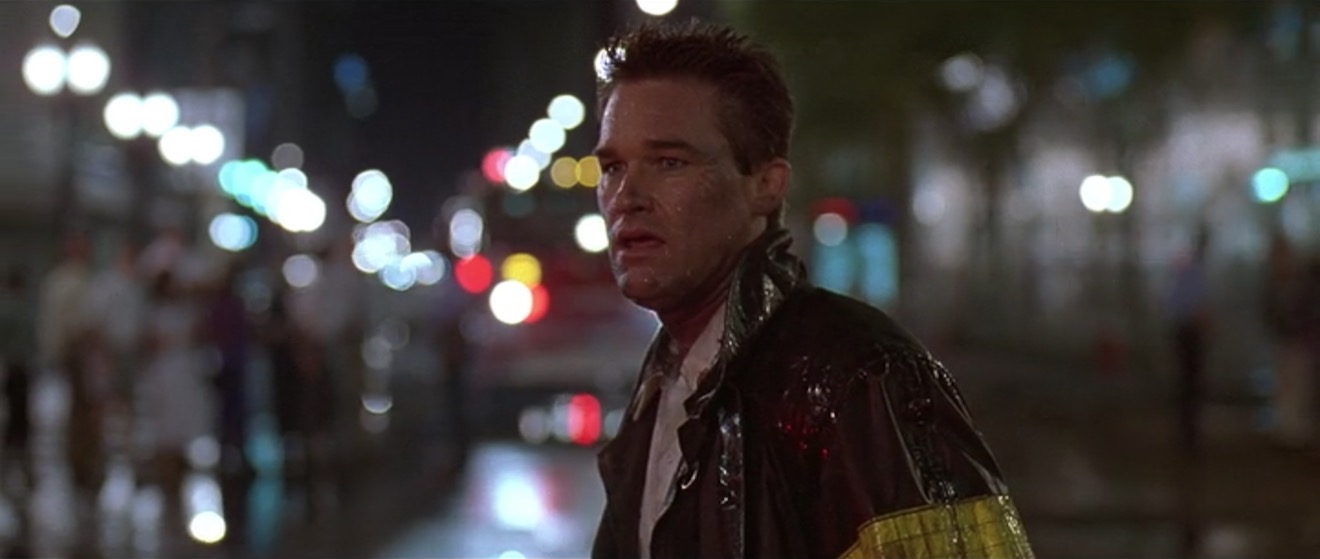
Exit Eve is a non-linear narrative about the dehumanisation of an au pair by her wealthy employers. With a fairly respectable budget for a short, this production shot in a luxurious Battersea townhouse on an Arri Alexa Classic with Ultra Primes.


“Crown”-inspired colour contrast

Cheap 300W dimmers like these are great for practicals.

It was January 2017 when we made Finding Hope, and I’d recently been watching a lot of The Crown. I liked how that series punctuated its daylight interior frames with pools of orange light from practicals. We couldn’t afford much of a lighting package, and I thought that pairing existing pracs with dimmers and tungsten bulbs would be a cheap and easy way to break up the white walls and bring some warmth – perhaps a visual representation of the titular hope – into the heavy story.

I shot all the daylight interiors at 5600K to get that warmth out of the pracs. Meanwhile I shaped the natural light as far as possible with the existing curtains, and beefed it up with a 1.2K HMI where I could. I used no haze or lens diffusion on the film because I felt it needed the unforgiving edges.

For close-ups, I often cheated the pracs a little closer and tweaked the angle, but I chose not to supplement them with movie lamps. The FS7’s native ISO of 2500 helped a lot, especially in a nighttime scene where the grieving parents finally let each other in. Director Krysten Resnick had decided that there would be tea-lights on the kitchen counter, and I asked art director Justine Arbuthnot to increase the number as much as she dared. They became the key-light, and again I tweaked them around for the close-ups.

My favourite scene in Finding Hope is another nighttime one, in which Crystal Leaity sits at a piano while Kevin Leslie watches from the doorway. I continued the theme of warm practicals, bouncing a bare 100W globe off the wall as Crystal’s key, and shaping the existing hall light with some black wrap, but I alternated that with layers of contrasting blue light: the HMI’s “moonlight” coming in through the window, and the flicker of a TV in the deep background. This latter was a blue-gelled 800W tungsten lamp bounced off a wobbling reflector.

When I saw the finished film, I was very pleased that the colourist had leant into the warm/cool contrast throughout the piece, even teasing it out of the daylight exteriors.


Trapped in a stark white townhouse

I took a different approach to colour in Exit Eve. Director Charlie Parham already knew that he wanted strong red lighting in party scenes, and I felt that this would be most effective if I kept colour out of the lighting elsewhere. As the film approaches its climax, I did start to bring in the orange of outside streetlamps, and glimpses of the party’s red, but otherwise I kept the light stark and white.

Converted from a Victorian schoolhouse, the location had high ceilings, huge windows and multiple floors, so I knew that I would mostly have to live with whatever natural light did or didn’t shine in. We were shooting during the heatwave of 2018, with many long handheld takes following lead actor Thalissa Teixeria from room to room and floor to floor, so even the Alexa’s dynamic range struggled to cope with the variations in light level.

For a night scene in the top floor bedroom, I found that the existing practicals were perfectly placed to provide shape and backlight. I white-balanced to 3600K to keep most of the colour out of them, and rigged black solids behind the camera to prevent the white walls from filling in the shadows.

(Incidentally, the night portions of this sequence were shot as one continuous take, despite comprising two different scenes set months apart. The actors did a quick-change and the bed was redressed by the art department while it was out frame, but sadly this tour de force was chopped up in the final cut.)

I had most control over the lighting when it came to the denouement in the ground floor living area. Here I was inspired by the work of Bradford Young, ASC to backlight the closed blinds (with tungsten units gelled to represent streetlights) and allow the actors inside to go a bit dim and murky. For a key moment we put a red gel on one of the existing spotlights in the living room and let the cast step into it.

So there we have it, two different approaches to lighting in a while-walled location: creating colour contrast with dimmed practicals, or embracing the starkness and saving the colour for dramatic moments. How will you tackle your next magnolia-hued background?

For another example of how I’ve tackled white-walled locations, see my Forever Alone blog.

Working with White Walls

Making an Analogue Print

This is the latest in my series about analogue photography. Previously, I’ve covered the science behind film capture, and how to develop your own black-and-white film. Now we’ll proceed to the next step: taking your negative and producing a print from it. Along the way we’ll discover the analogue origins of Photoshop’s dodge and burn tools.


Contact printing

35mm contact sheet

To briefly summarise my earlier posts, we’ve seen that photographic emulsion – with the exception of colour slide film – turns black when exposed to light, and remains transparent when not. This is how we end up with a negative, in which dark areas correspond to the highlights in the scene, and light areas correspond with the shadows.

The simplest way to make a positive print from a negative is contact-printing, so called because the negative is placed in direct contact with the photographic printing paper. This is typically done in a spring-loaded contact printing frame, the top of which is made of glass. You shine light through the glass, usually from an enlarger – see below – for a measured period of time, determined by trial and error. Where the negative is dark (highlights) the light can’t get through, and the photographic emulsion on the paper remains transparent, allowing the white paper base to show through. Where the negative is transparent (shadows) the light passes through, and the emulsion – once developed and fixed in the same way as the original film – turns black. Thus a positive image is produced.

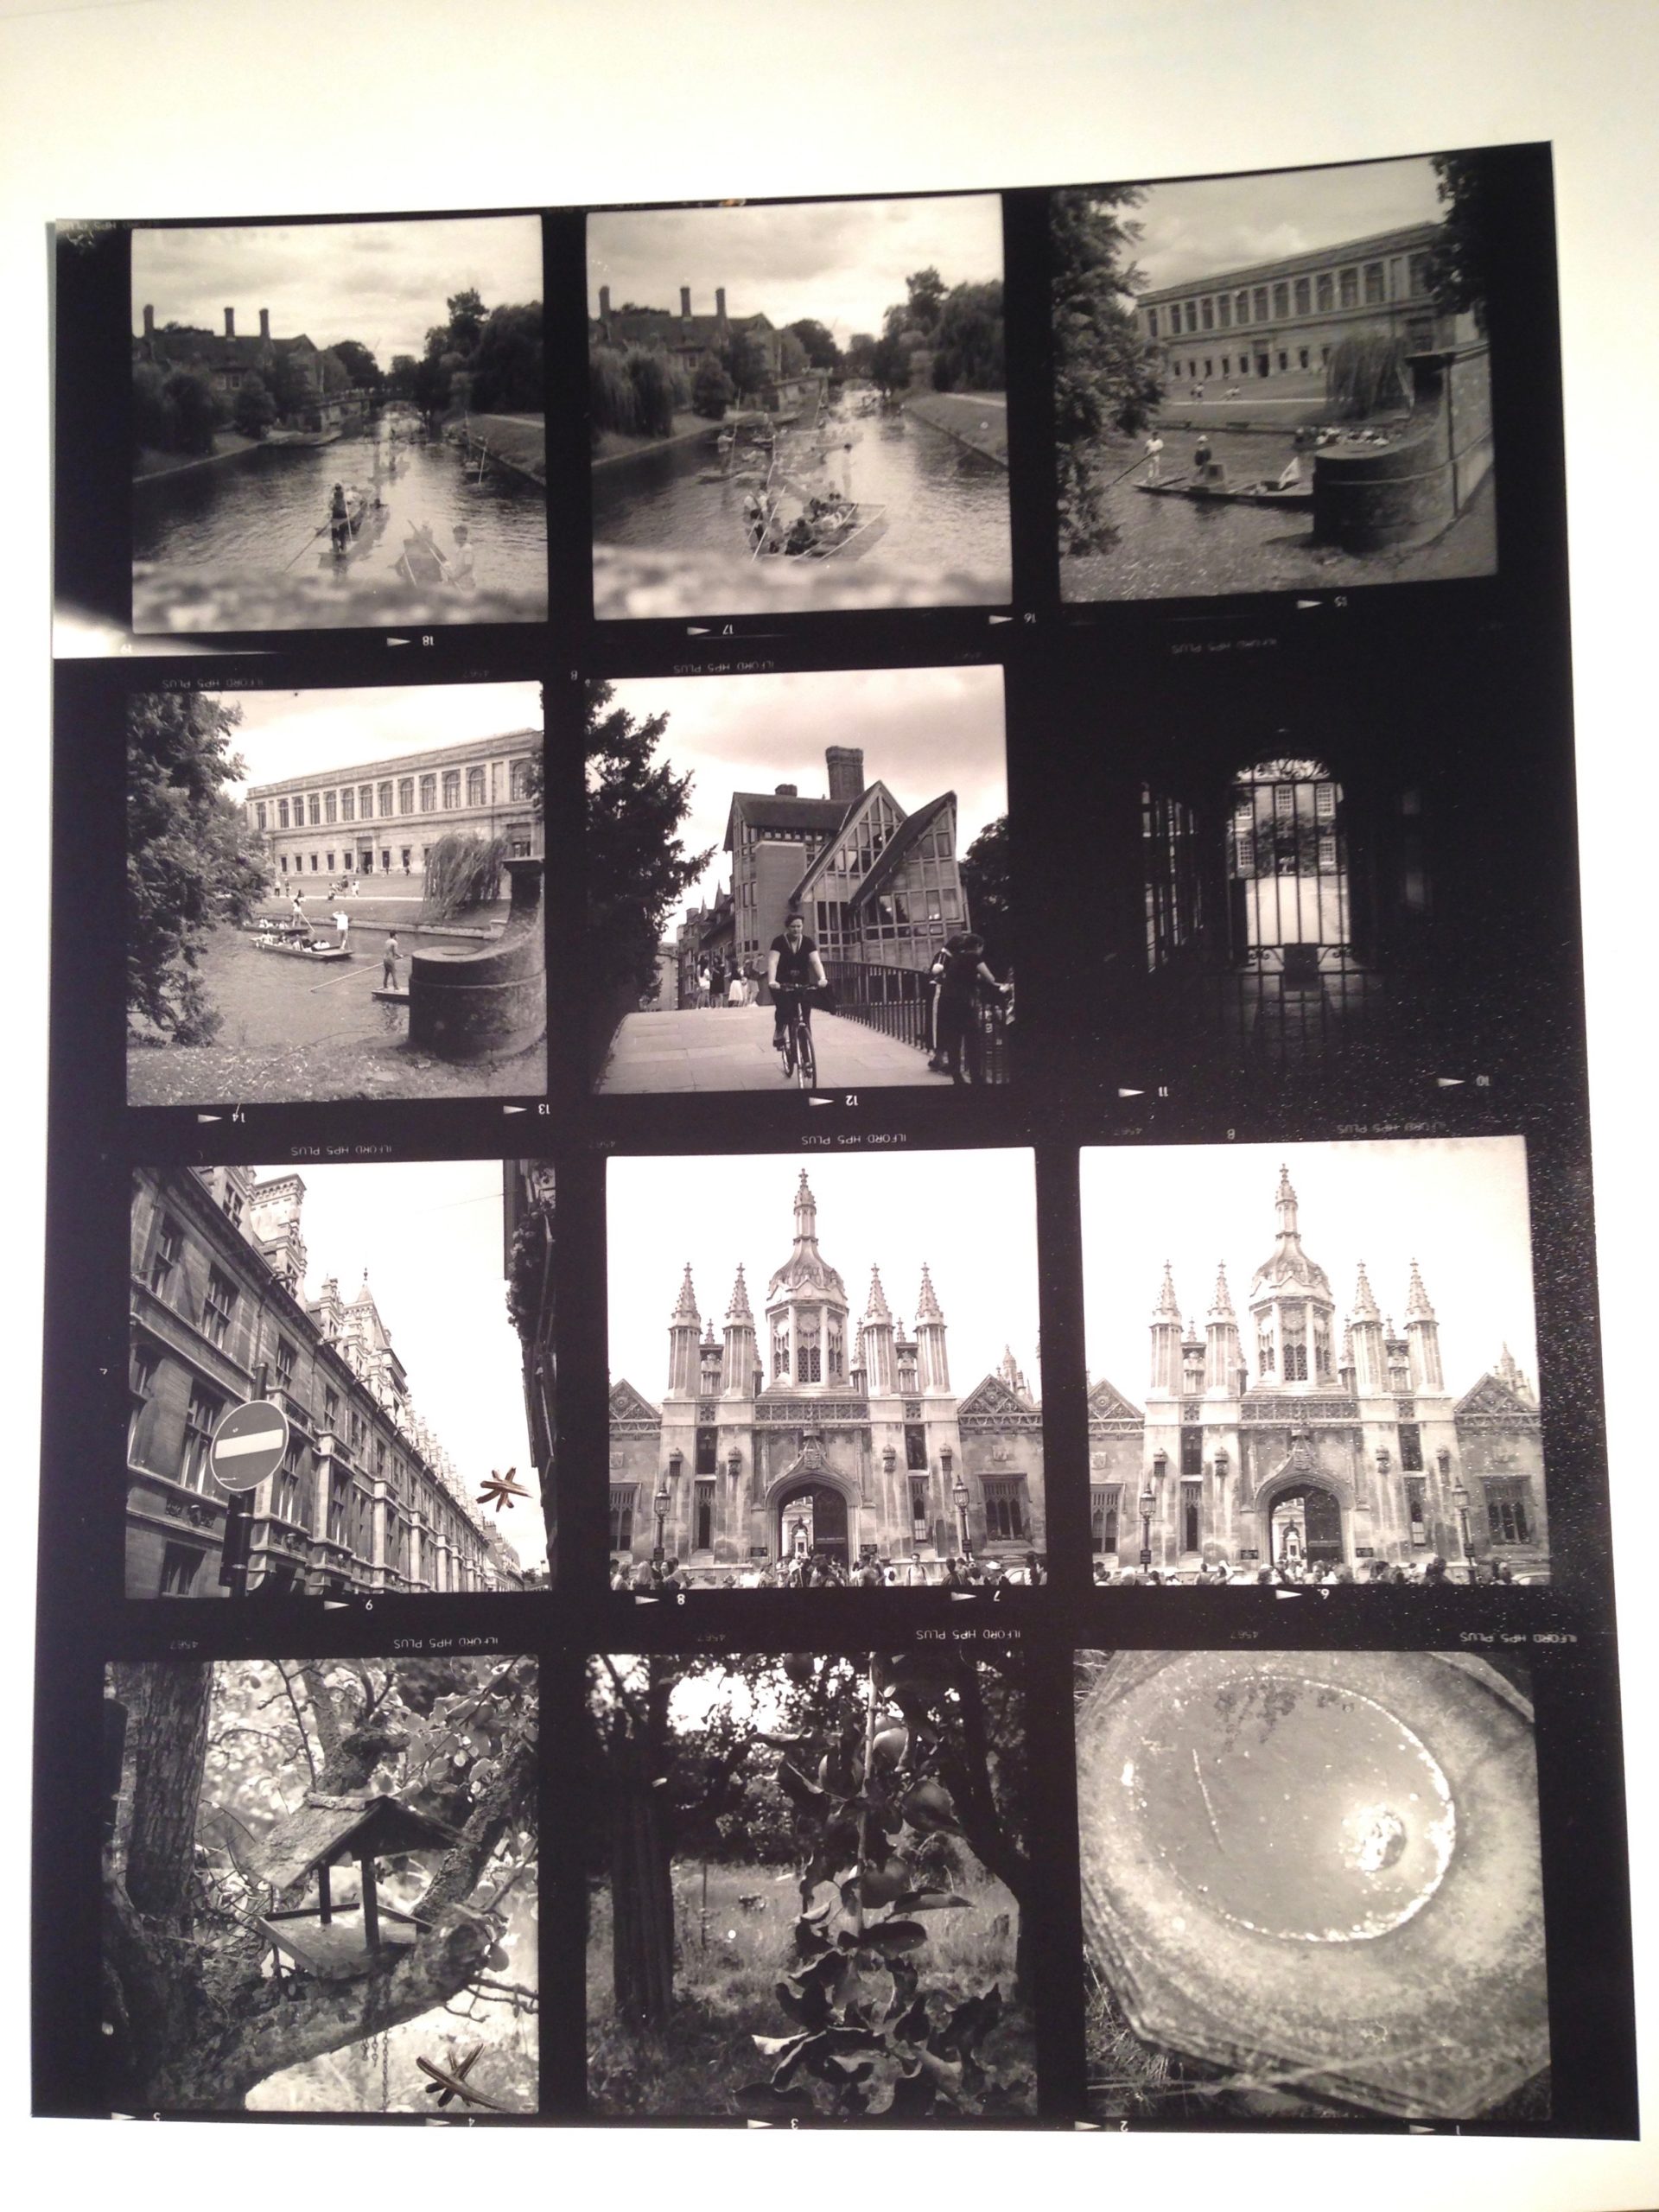
Normally you would contact-print multiple strips of negative at the same time, perhaps an entire roll of film’s worth, if your paper is large enough to fit them all. Then you can examine them through a loupe to decide which ones are worth enlarging. You have probably seen contact sheets, complete with circled images, stars and arrows indicating which frames the photographer or picture editor likes, where they might crop it, and which areas need doctoring. In fact, contact sheets are so aesthetically pleasing that it’s not uncommon these days for graphic designers to create fake digital ones.

The correct exposure time for a contact print can be found by exposing the whole sheet for, say, ten seconds, then covering a third of it with a piece of card, exposing it for another ten seconds, then covering that same third plus another third and exposing it for ten seconds more. Once developed, you can decide which exposure you like best, or try another set of timings.

120 contact sheet


Making an enlargement

Contact prints are all well and good, but they’re always the same size as the camera negative, which usually isn’t big enough for a finished product, especially with 35mm. This is where an enlarger comes in.

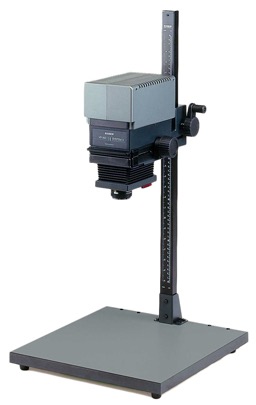
An enlarger is essentially a projector mounted on a stand. You place the negative of your chosen image into a drawer called the negative carrier. Above this is a bulb, and below it is a lens. When the bulb is turned on, light shines through the negative, and the lens focuses the image (upside-down of course) onto the paper below. By adjusting the height of the enlarger’s stand, you can alter the size of the projected image.

Just like a camera lens, an enlarger’s lens has adjustable focus and aperture. You can scrutinise the projected image using a loupe; if you can see the grain of the film, you know that the image is sharply focused.

The aperture is marked in f-stops as you would expect, and just like when shooting, you can trade off the iris size against the exposure time. For example, a print exposed for 30 seconds at f/8 will have the same brightness as one exposed for 15 seconds at f/5.6. (Opening from f/8 to f/5.6 doubles the light, or increases exposure by one stop, while halving the time cuts the light back to its original value.)


Dodging and burning

As with contact-printing, the optimum exposure for an enlargement can be found by test-printing strips for different lengths of time. This brings us to dodging and burning, which are respectively methods of decreasing or increasing the exposure time of specific parts of the image.

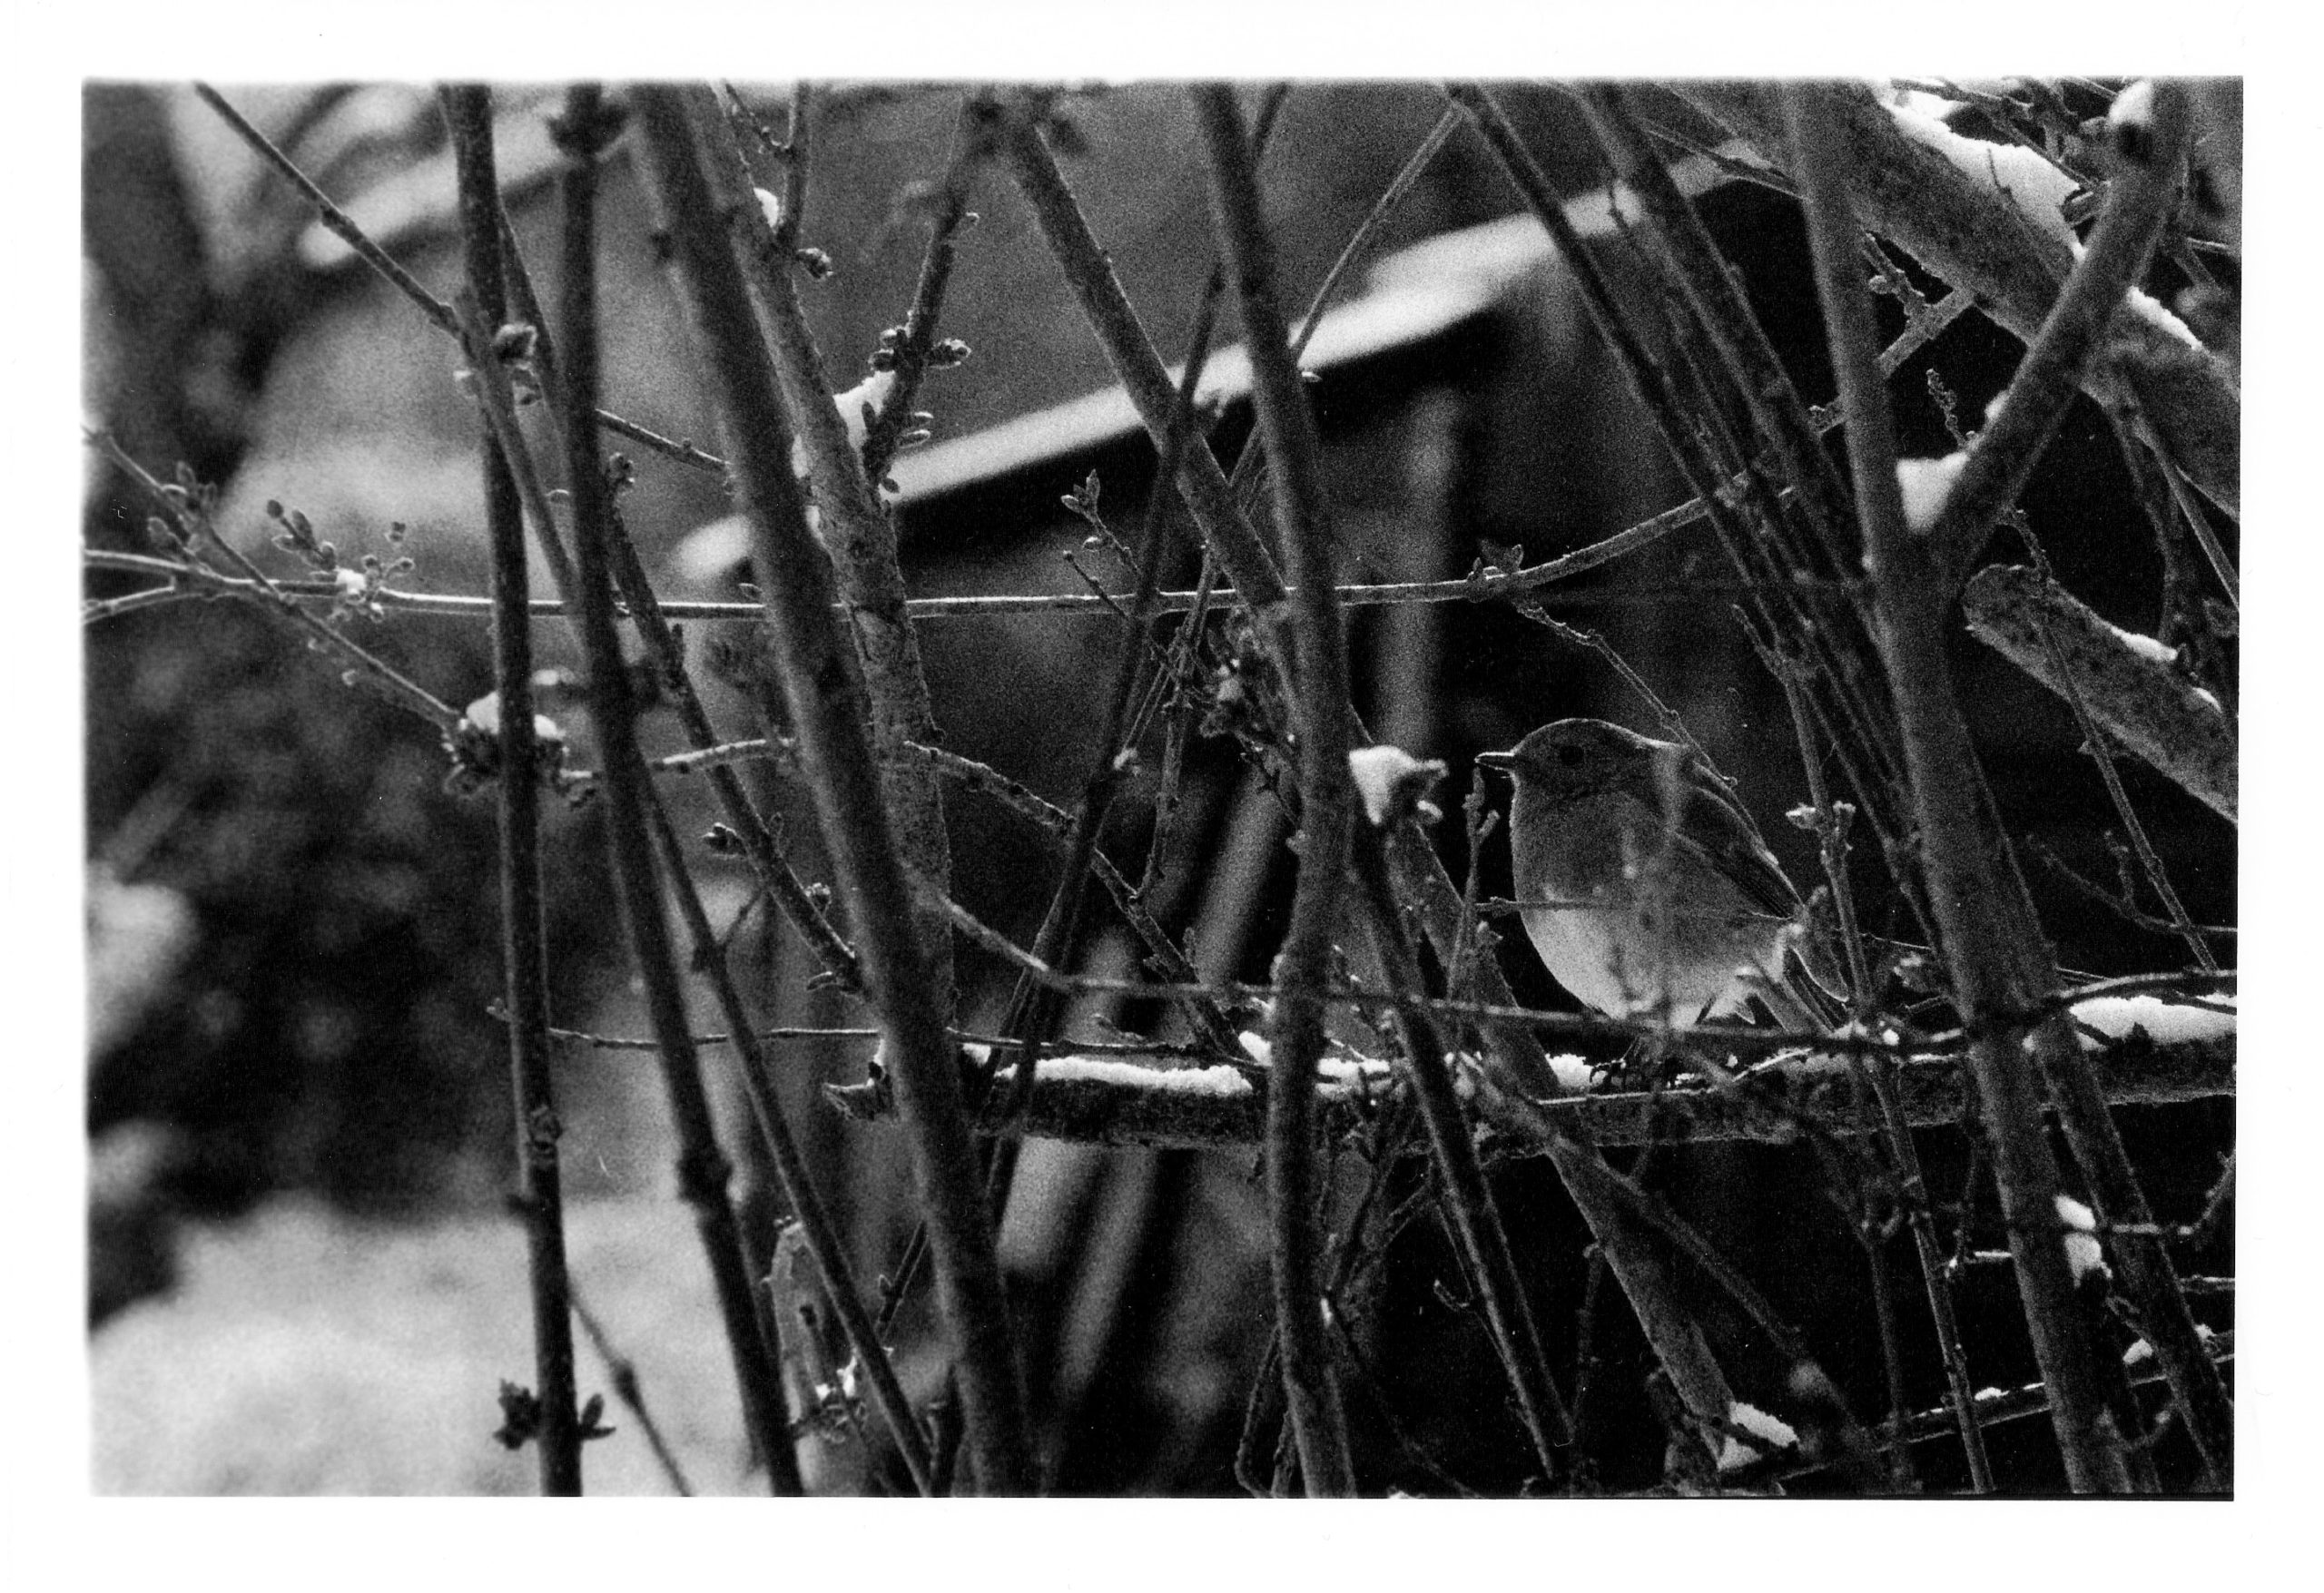
Remember that the printing paper starts off bright white, and turns black with exposure, so to brighten part of the image you need to reduce its exposure. This can be achieved by placing anything opaque between the projector lens and the paper for part of the exposure time. Typically a circle of cardboard on a piece of wire is used; this is known as a dodger. That’s the “lollipop” you see in the Photoshop icon. It’s important to keep the dodger moving during the exposure, otherwise you’ll end up with a sharply-defined bright area (not to mention a visible line where the wire handle was) rather than something subtle.

I dodged the robin in this image, to help him stand out.

Let me just say that dodging is a joyful thing to do. It’s such a primitive-looking tool, but you feel like a child with a magic wand when you’re using it, and it can improve an image no end. It’s common practice today for digital colourists to power-window a face and increase its luminance to draw the eye to it; photographers have been doing this for decades and decades.

Burning is of couse the opposite of dodging, i.e. increasing the exposure time of part of the picture to make it darker. One common application is to bring back detail in a bright sky. To do this you would first of all expose the entire image in such a way that the land will look good. Then, before developing, you would use a piece of card to cover the land, and expose the sky for maybe five or ten seconds more. Again, you would keep the card in constant motion to blend the edges of the effect.

To burn a smaller area, you would cut a hole in a piece of card, or simply form your hands into a rough hole, as depicted in the Photoshop icon.


Requirements of a darkroom

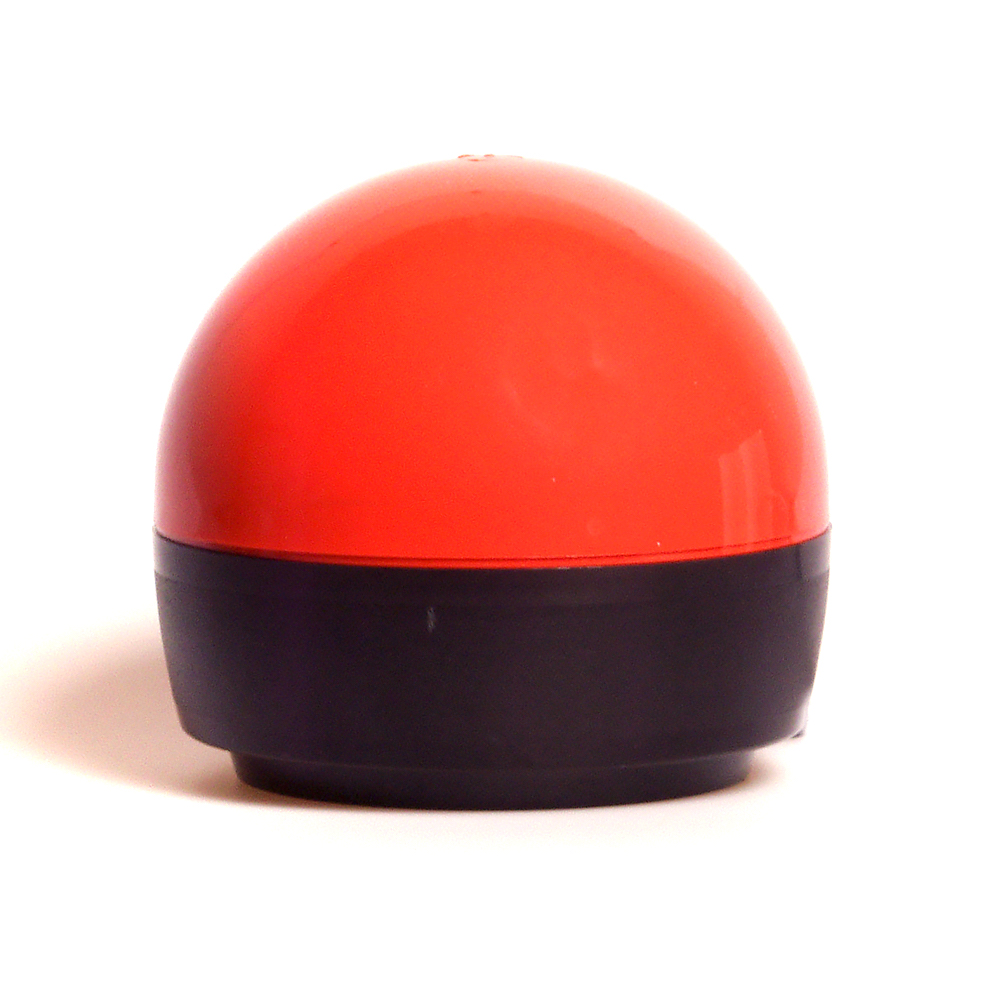
The crucial thing which I haven’t yet mentioned is that all of the above needs to take place in near-darkness. Black-and-white photographic paper is less sensitive to the red end of the spectrum, so a dim red lamp known as a safe-light can be used to see what you’re doing. Anything brighter – even your phone’s screen – will fog your photographic paper as soon as you take it out of its lightproof box.

Once your print is exposed, you need to agitate it in a tray of diluted developer for a couple of minutes, then dip it in a tray of water, then place it in a tray of diluted fixer. Only then can you turn on the main lights, but you must still fix the image for five minutes, then leave it in running water for ten minutes before drying it. (This all assumes you’re using resin-coated paper.)

Because you need an enlarger, which is fairly bulky, and space for the trays of chemicals, and running water, all in a room that is one hundred per cent lightproof, printing is a difficult thing to do at home. Fortunately there are a number of darkrooms available for hire around the country, so why not search for a local one and give analogue printing a go?

Some enlargements from 35mm on 8×10″ paper


Making an Analogue Print

8 Things to Look For When Buying a Cinema Camera

A couple of weeks ago I shared my thoughts about whether a director of photography should own equipment. My conclusion was that it can be useful early in your career, when you’re shooting corporates or tiny films with no hire budget. So what is the best camera for indie cinematography?

I’m not going to answer that, but I will tell you what to look for when investing in a camera. Hopefully these tips will help you choose the one that’s right for you from the huge and ever-changing array of professional cameras on the market, from the humble DSLR to the ubiquitous Reds and everything in between.


1. Image quality

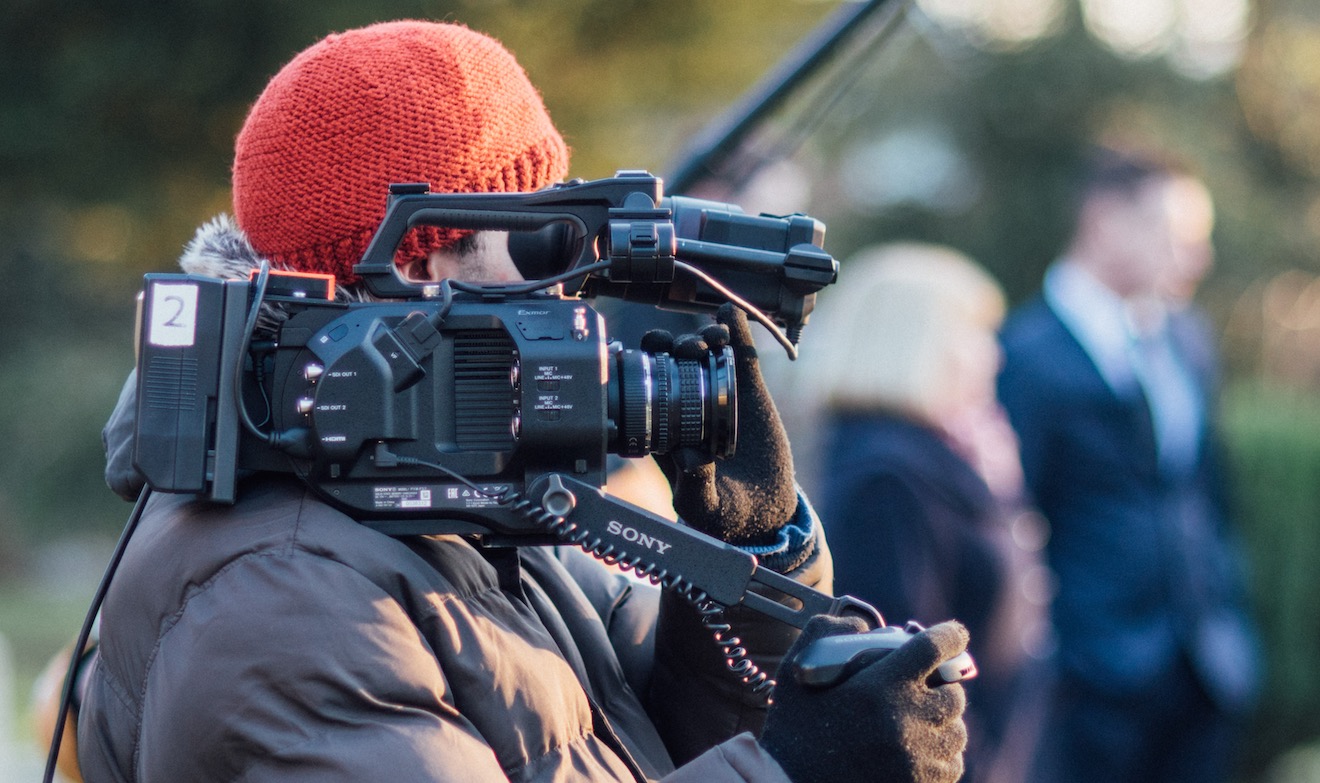
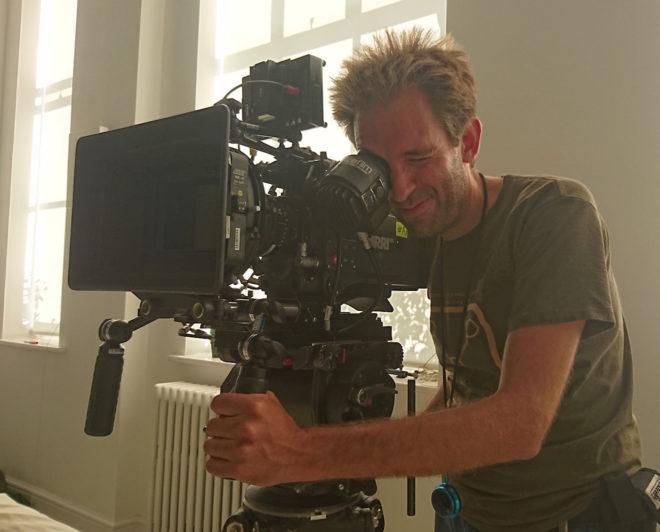
Shooting on a Sony FS7 for “Finding Hope”

The quality of the image is of course the most imporant attribute of any camera. Rather than any technical specifications, I’m talking about the aesthetic quality here: how does it feel? Does it have that elusive “cinematic” quality? Is it “filmic”? Does it remind you of certain kinds of movies?

A good place to start is to look up sample footage on YouTube, or better still Vimeo for less compression muddying the issue. If you can borrow the camera and try it out before you buy, even better. Take away some test footage and try grading it too.


2. Resolution

Resolution, the sheer number of pixels a camera can record, is part of image quality, but I include it as a separate point because I see it as more of a technical consideration than an aesthetic one. You should ask yourself what longevity you require from your films – will people still be watching them, say two or three years from now, and if so what sort of resolution might be the norm by then?

Also consider your delivery platform. If everything you shoot is going on YouTube, perhaps you don’t need more than 1080P (standard HD).


3. Dynamic Range

Dynamic range is a measure of how much contrast a camera can handle. Too small a dynamic range and you will frequently struggle with bright areas “clipping” – i.e. losing details – or dark areas getting lost in the image noise. Also, the wider the dynamic range, the more flexibility you will have in grading.

For a cinematic image, 12 stops of dynamic range is the absolute minimum, with 14 or more being ideal.


4. Maximum ISO

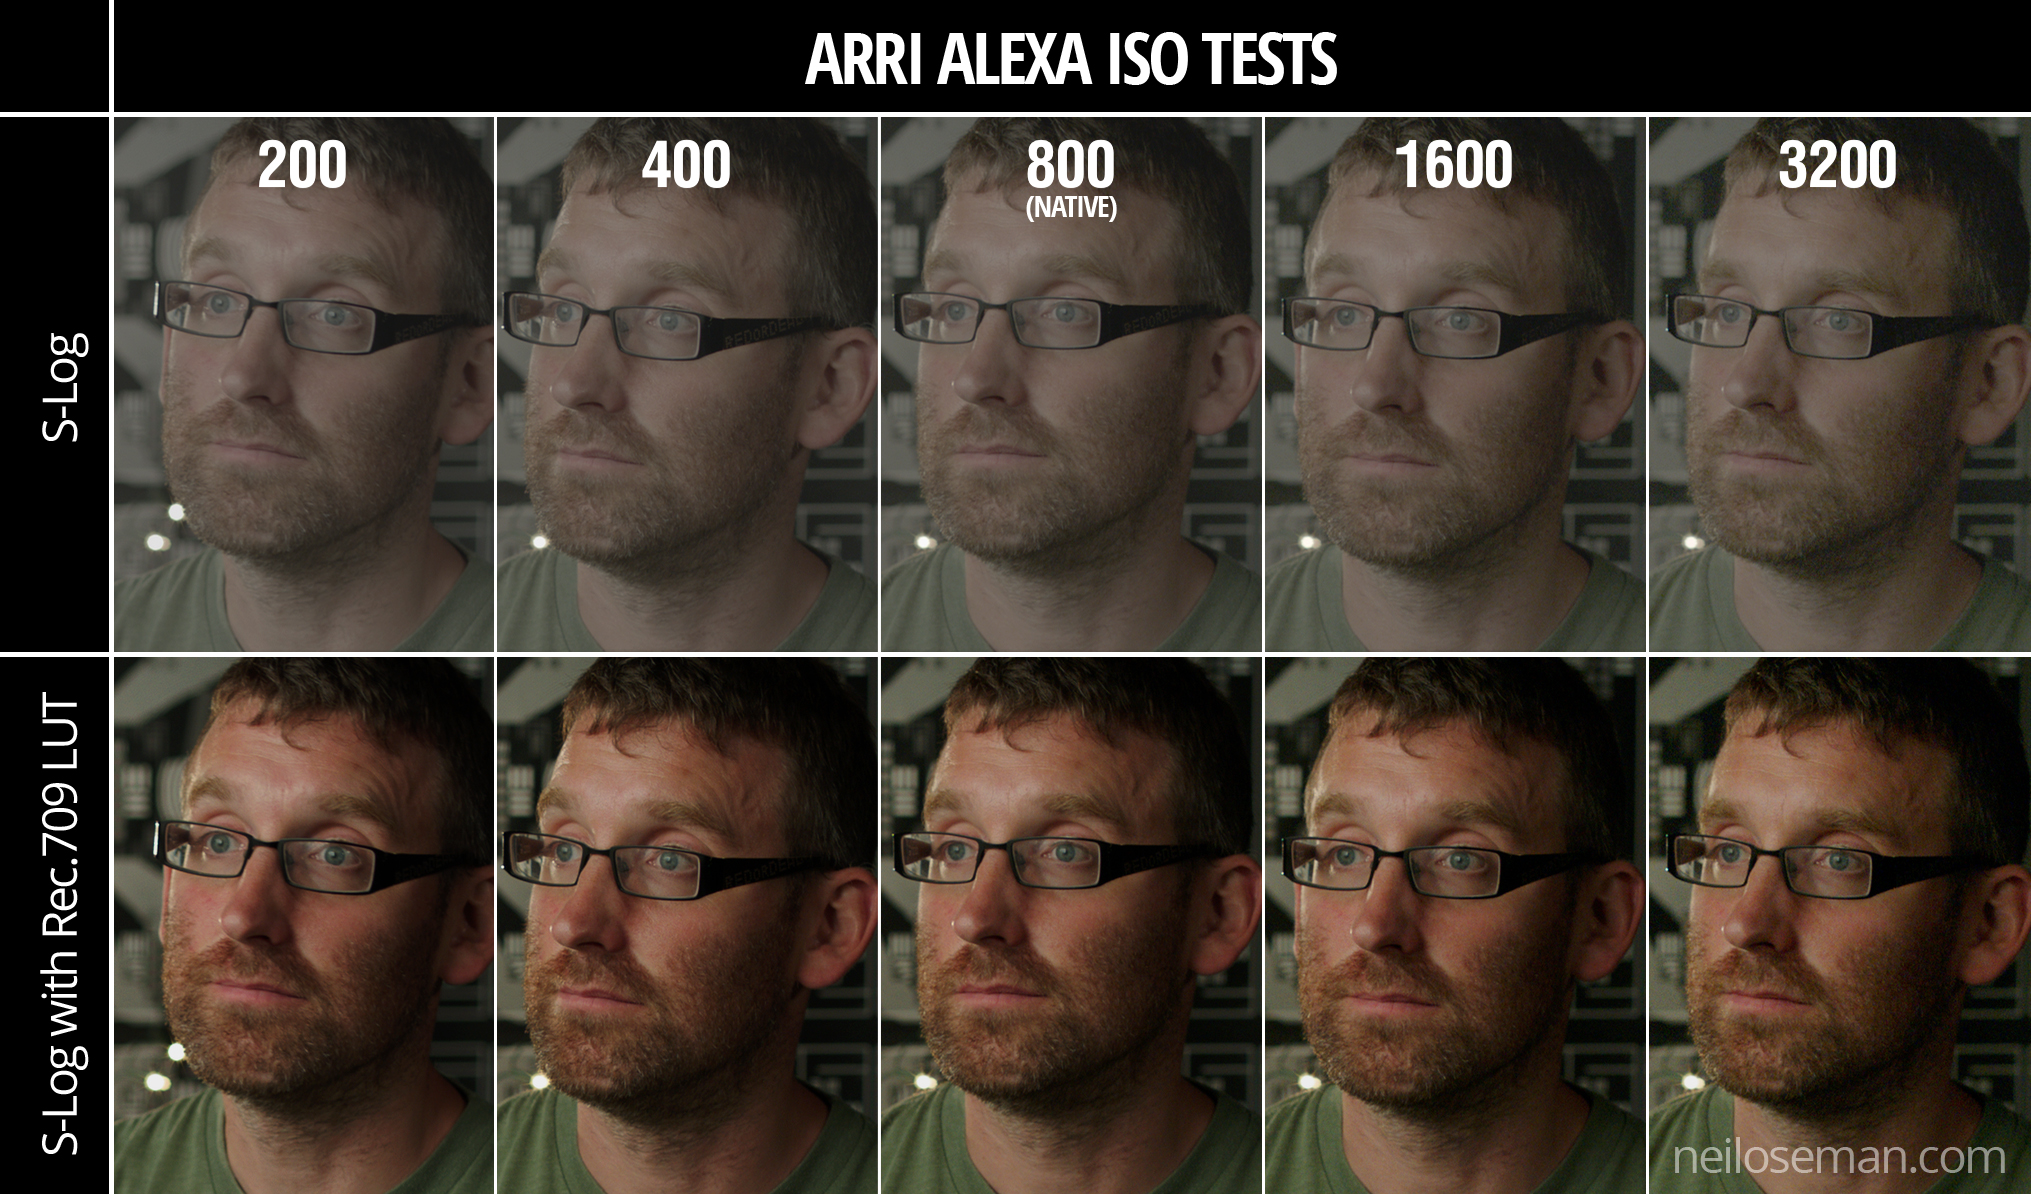
Some ISO tests I conducted on an Arri Alexa Classic in 2017

The ISO (International Standards Organisation) scale rates the light sensitivity of a camera. The most important thing is the native ISO, the one at which the camera is optimised to give the cleanest image with the most detail. On some cameras, setting an ISO other than the native one reduces the image quality considerably.

The higher the ISO, the less light will be required to expose an image correctly. 800 is typical these days, but many cameras go much higher than that. It is worth thinking about spending more money to get a camera with a higher native ISO, because you may save a lot of money on lighting.


5. Lens Mount

This is crucial because you may already have a collection of lenses, or you may intend to hire certain lenses, and you need to be sure that they will fit your new camera’s mount.

The Canon EF mount is extremely common and will open up a huge range of options for stills glass as well as some low-end cinema glass. The smaller MFT (micro four-thirds) mount also has a wide range of lenses.

Top-end cameras have PL mounts which take all the beautiful cinema lenses used on big movies, but only choose this route if you are willing to part with a lot of cash!


6. Form Factor

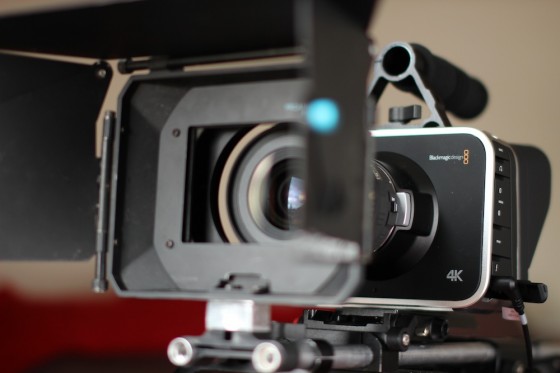
A Blackmagic Micro Cinema Camera, not so micro once it’s rigged with rails, matte box, wireless follow focus, battery, monitor and video transmitter!

When I started in the industry, cameras were all ergonomically designed to sit on your shoulder, with a nice handgrip to the right of the lens and an EVF (electronic viewfinder) to provide a third point of stabilising contact. Nowadays cameras tend to be boxy, heavy and uncomfortable to hold without additional accessories (see below).

Again, try to gets your hands on the camera in a shop and see how it feels before you purchase. As well as handheld shooting, consider how easy it will be to rig onto dollies, sliders, gimbals, etc.


7. Required Accessories

Buying the camera body itself is unlikely to be the end of your expenditure. You will need lenses, batteries, a battery charger, cards, a card reader and almost certainly some kind of stabilising system, be it a simple shoulder rig or an electronic gimbal.

You may also want an EVF, a tripod, matte box, follow focus – the list can seem endless! Be careful to budget your essential accessories before buying the camera. Some cameras seem like bargains until you add up all the extras. Pay particular attention to the media, and to exactly what speed of media you need in order to shoot at the resolution and frame rate that you require, as this can get very expensive.


8. Codec

What file type and codec does the camera shoot? Does your editing system support that format? If not, how time-consuming will it be to convert everything?

What compression ratios does the camera support? How much hard drive space will you need to store an hour of footage at that ratio? What about ten hours, plus back-ups? Often there is a trade-off between a highly compressed format like H.264 which is light on disc space but may need converting before you can edit it, and a lightly compressed format like ProRes which burns through disc space but can be dropped straight into most editing software.

8 Things to Look For When Buying a Cinema Camera

How to Process Black-and-White Film

A few weeks ago, I came very close to investing in an Ilford/Paterson Starter Kit so that I could process film at home. I have four exposed rolls of 35mm HP5+ sitting on my shelf, and I thought that developing them at home might be a nice way to kill a bit of lockdown time. However, I still wouldn’t be able to print them, due to the difficulties of creating a darkroom in my flat. And with lockdown now easing, it probably won’t be long until I can get to Holborn Studios and hire their darkroom as usual.

So in this article I’ll talk through the process of developing a roll of black-and-white 35mm, as I would do it in the Holborn darkoom. If you haven’t already, you might want to read my post about how film works first.


You will need


Loading the developing tank

Holborn Studios’ darkroom, run by Bill Ling, displays this handy reminder.

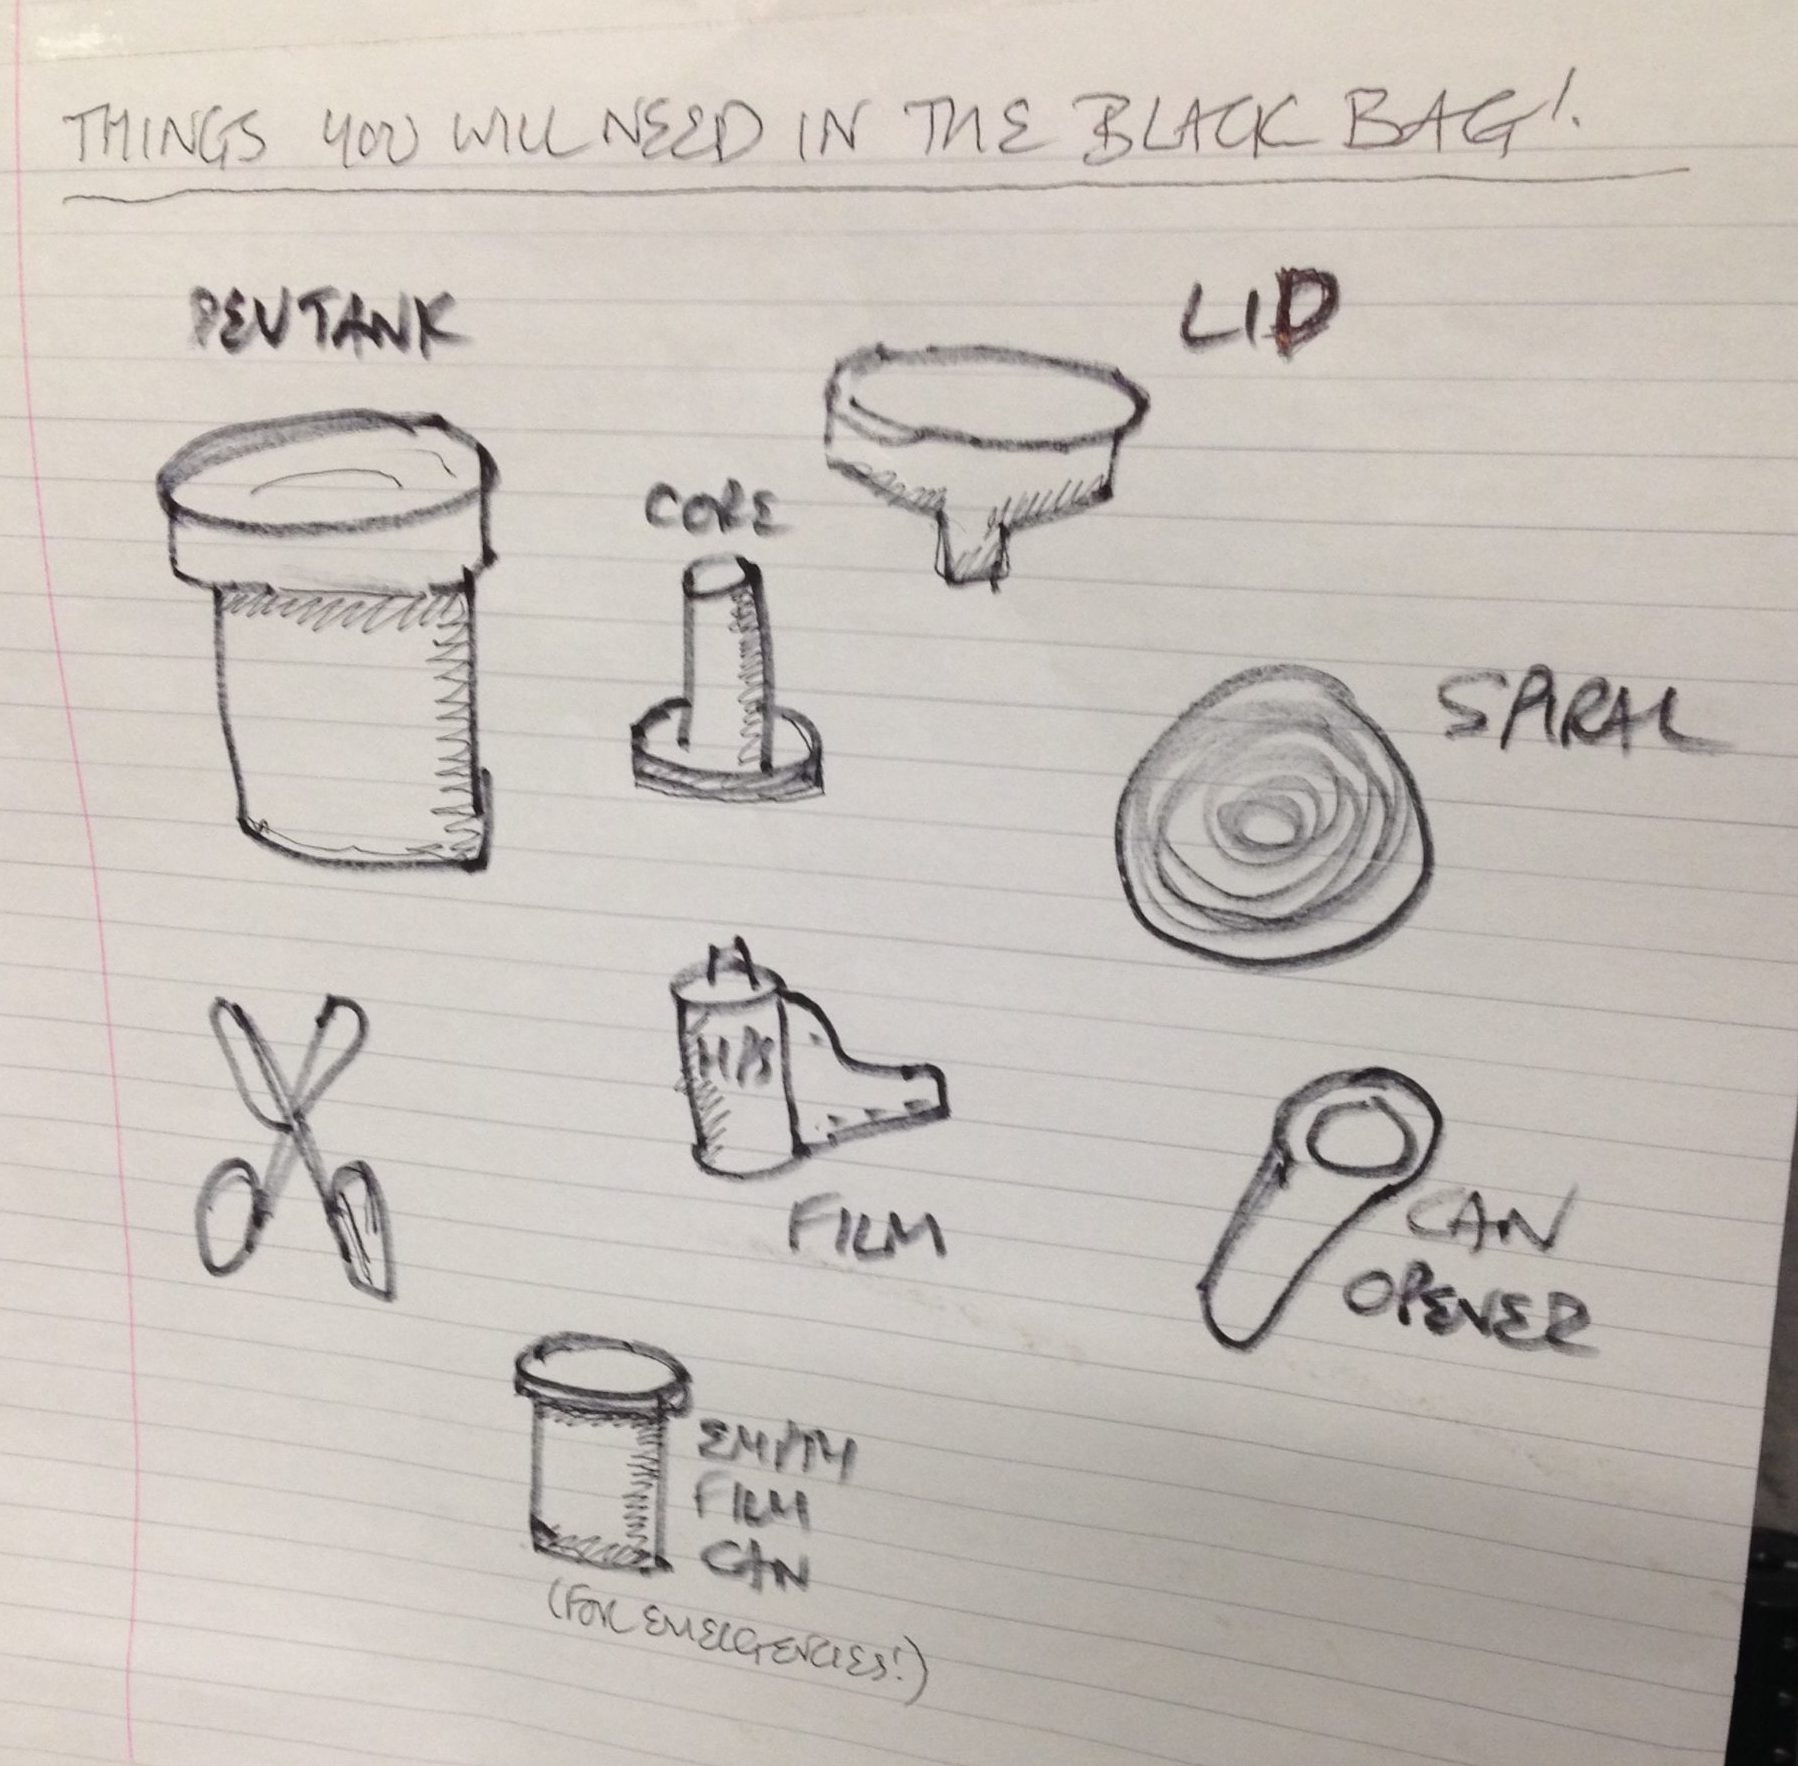
The first step is to transfer the exposed film from its cassette – which is of course light-proof – into the Paterson tank, which is designed to admit the developing chemicals but not light. This transfer must take place in complete darkness, to avoid fogging the film. I’ve always done this using a changing bag, which is a black bag with a double seal and elasticated arm-holes.

Start by putting the following items into the bag: the film cassette, scissors and the various components of the Paterson tank, including the spiral. It’s wise to put in an empty film canister too, in case something goes wrong, and if the tail of your film isn’t sticking out of the cassette then you’ll need a can opener as well.

Seal the bag, put your arms in, and pull all the film out of the cassette. It’s important NOT to remove your arms from the bag now, until the film is safely inside the closed tank, otherwise light can get in through the arm-holes and fog the film.

Use the scissors to cut the end of the film from the cassette, and to trim the tongue (narrower part) off the head of the film.

Paterson Universal Developing Tank components, clockwise from the white items: developing reels or spirals, tank, light-proof lid, waterproof cap, and agitator – which I never use. In the centre is the core.

Now we come to the most difficult part, the part which always has me sweating and swearing and regretting all my life choices: loading the film onto the spiral. I have practised this with dead film many times, but when I’m fumbling around in the dark of the changing bag it’s a hundred times harder.

It’s hard to describe loading the spiral verbally, but this blog post by Chris Waller is very clear and even includes pictures. (Chris recommends cutting a slight chamfer onto the leading corners of the film, which I shall certainly try next time, as well as using your thumbs to keep the film flat on its approach to the reel.)

If you’re working with 120 film, the loading process is very slightly different, and this video describes it well.

Once the spiral is loaded, you can thread it onto the core, place the core inside the tank, and then put the lid on. It is now safe to open the bag.


Developing

Developing time info displayed at Holborn Studios

Holborn Studios’ darkroom is stocked with a working solution of Kodak HC-110 developer, but if you don’t have this luxury, or you’re not using the Ilford Simplicity packs, then you’ll need to make up a working solution yourself by diluting the developer according to the manufacturer’s instructions. For HC-110 dilution B, which is what Holborn uses, it’s 1+31, i.e.one part concentrated developer to 31 parts water. The working solution has a limited shelf life, so again consult the manufacturer’s instructions.

Further dilution is required at the point of development, at a ratio of 1+7 in this case, but once more this may vary depending on the chemicals you choose. For one roll of 35mm, you need 37.5ml of the HC-110 dilution B, and 262.5ml of water for a total of 300ml.

The developing time depends on the type of film stock, the speed you rated it at, the type of developer and its dilution, and the temperature of the chemicals. Digital Truth has all the figures you need to find the right development time.

Agitating

I was taught to ensure my water is always at 20°C before mixing it with the developer, to keep the timing calculations a little simpler. At this temperature, a roll of Ilford HP5+ rated at its box speed of ISO 400 needs five minutes to develop in HC-110 dilution B. Ilford Delta, on the other hand, needs a whopping 14.5 minutes to process at its box speed of 3200.

Once your diluted developer is ready, pour it into the Paterson tank and put on the cap. It is now necessary to agitate the chemicals in order to distribute them evenly around the film. My technique is inversion, i.e. turning the tank upside-down and back again. Do this continuously for the first 30 seconds, then for 10 seconds every minute after that.

Inside the tank, your latent image is being transformed into an image proper, wherein every exposed silver halide crystal is now black metallic silver.


Fixing

Once the developing time is up, remove the cap from the tank, and pour away the developer immediately. At this point some people will say you need to use a stop bath to put a firm halt to the developing process, but I was taught simply to rinse the tank out with tap water and then proceed straight to fixing. This method has always worked fine for me.

After rinsing the tank, pour in enough fix solution (again prepared to the manufacturer’s instructions) to fill it completely. Put the cap back on, agitate it for 30 seconds, then leave it for ten minutes.

During this time, the fixer renders the film’s unexposed crystals inactive and water soluble. When the ten minutes is up, pour the fixer back into its container (it’s reuseable) and leave the tank under running water for a further ten minutes. This washes away the unused silver halide crystals, leaving only the exposed black silver corresponding with light areas of the scene, and just the transparent plastic base corresponding with the dark areas.

Squirt a little diluted washing-up liquid into the tank to prevent drying rings, then drain it. You can now open the tank and see your negative for the first time.


Drying

Remove the film from the developing spiral, taking care to only touch the ends and the edges. Squeegee the top part of the film, dry your hands, then squeegee the rest. This removes droplets which can otherwise mark the negative.

Now attach two hooks to the film, a light one at the top to hang it from, and a heavy one at the bottom to stop the film curling as it dries. Holborn Studios is equipped with a heated drying cabinet, but with patience you can hang a film to dry in any dust-free area.

When your film is dry, you can cut it into strips of six frames and insert them into a negative storage sheet.

You can now scan your negatives, or better still print them photo-chemically, as I’ll describe in a future post.

How to Process Black-and-White Film

Should DPs Own Equipment?

Recently I discovered Tailslate, a podcast by DPs Ed Moore, BSC and Benedict Spence. The second episode focuses on equipment, and the two men discuss the pros and cons of having your own gear. I have some pretty strong feelings on this myself, so I thought I’d share them here.

I owned equipment for the first 17 years of my career. I was fortunate that at the time I first went freelance (late 1999) I had a small inheritance which I was able to invest in the wonderful new Mini-DV/Firewire technology that had recently emerged. I bought my first semi-professional camera, a Canon XM-1, along with a decent Manfrotto 501/520 tripod, a basic tracking dolly, sound gear, and for editing a PowerMac G4, Mini-DV/VHS deck and a pair of Yamaha MSP5 active nearfield speakers. (The speakers are the only things I still have, and I’m using them as I write, 20 years on. They are the best thing I’ve ever bought. Nothing else has ever served me for so long, so frequently and so reliably.)

Shooting on my Canon XL1-S back in 2003

Apart from the speakers, everything else got replaced every few years as it fell into obsolescence or simply packed up. The XM-1 was replaced with an XL-1S, then I moved onto HDV with a Sony A1, then onto DSLRs with a Canon 600D/T3i, then a Blackmagic Production Camera, which turned out to be my last camera.

Immediately you can see one of the key problems with owning equipment: the fast pace of technological progression and the need to upgrade regularly to keep up. But owning equipment had disadvantages even before the fast-paced digital revolution. In a fascinating Clubhouse Conversation from the American Society of Cinematographers, M. David Mullen, ASC recounts his own experience with gear:

I ended up never owning a camera package. Because of that, I shot mostly 35mm in my early days… People I know who bought a [super]-16 camera, they ended up shooting [super]-16 films for the next ten years or so. So you can get tied to your own equipment.

But there are benefits to owning kit, of course. Corporate clients expect you to provide the gear yourself or to hire it in without any fuss. Clearly the former allows you to make more money from these jobs.

My last camera, the Blackmagic Production Camera 4K

For creative jobs, things aren’t so cut and dried. Owning a camera will certainly get you more work of a certain type. That type is unpaid and low-paid. If you expect to charge a hire fee on your gear, forget it. The type of productions that want you to have your own gear is the type that can’t afford to hire, either from you or from a facilities house. They’ll expect you to come along and bring your gear for free.

We all need to do this type of work at the start of our careers, which is why owning equipment is great at that point. But ultimately I sold my Blackmagic in 2017 and didn’t replace it because I no longer wanted that type of work.

I think things are a little different if you can afford to own a high-end camera. I’m pretty certain that I’ve lost jobs in the past, despite being a better cinematographer than the successful applicant, because they had a Red and I only had a DSLR or a Blackmagic. If you can afford an Alexa then you might well be able to get quality jobs off the back of it, but most of us aren’t in that position!

A camera that I could never afford to buy

The best thing about not owning gear is that you’re free to select the best equipment to tell each particular story (budget and production mandates notwithstanding). Each production is different, and there is no single camera or lens set that is best for all of them. Resolution, high frame rates, colour science, contrast, sharpness, weight, size, cost – all these factors and more influence a DP’s choice, and it’s a critical choice to make. If you’re pushing your own camera or lenses to the production just so you can recoup some of the cash you spent to buy them, you’re doing the story a disservice.

In conclusion, whether or not to invest equipment depends on your budget and the type of work you want to do. But if you’re shooting a drama, even if you own equipment, you should be asking yourself what camera and lenses will best set the tone and tell this story.

Should DPs Own Equipment?

“Above the Clouds”: The Spoiler Blogs

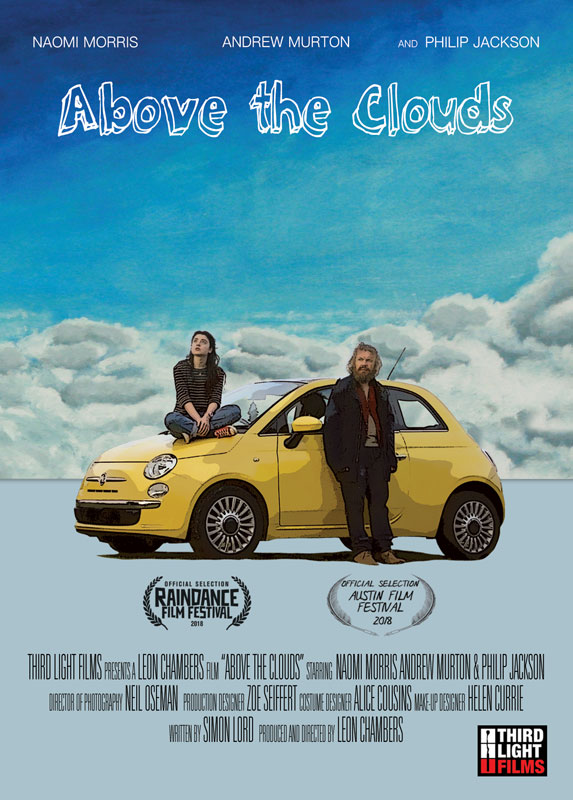
During 2016-2017 I blogged about the production of Above the Clouds, a comedy road movie which I shot for director Leon Chambers. It premiered at Raindance in 2018, closely followed by Austin Film Festival, where it won the audience award for Best Narrative Feature, the first of four gongs it would collect.

In two decades of filmmaking, Above the Clouds is easily in the top five productions I’m most proud of. Since this January it has been available on AmazoniTunesGoogle Play and other platforms, and I highly recommend you give it a watch. DO NOT continue reading this blog unless you have, because what follows are two blog entries that I held back due to spoilers.


DAY 14

(from Week 3)

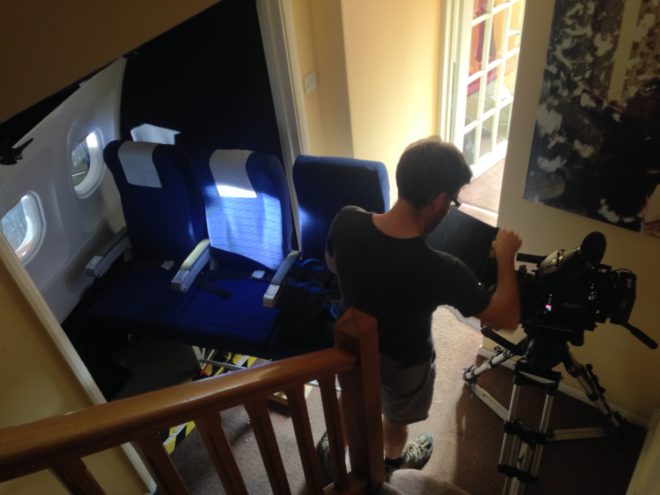
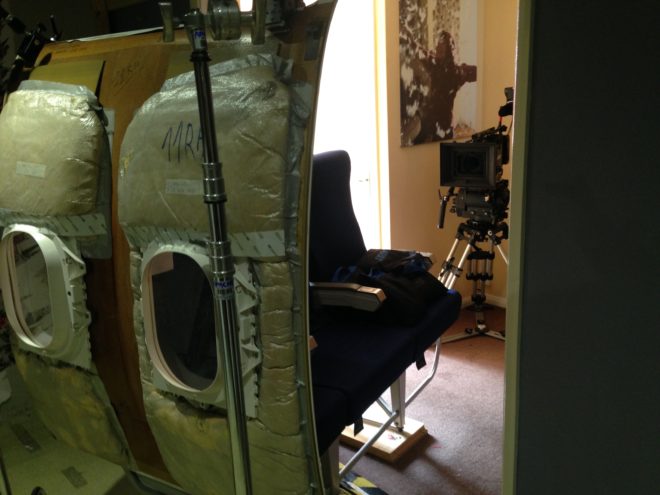
The script calls for Charlie to be seen sitting in the window seat of a plane as it rises quite literally above the clouds. This is another micro-set filmed in Leon’s living room, in fact half in the living room and half in the hall, to leave enough room for the lights beyond.

Although the view out of the window will be added in post, I need to simulate the lighting effect of bursting through the clouds. My plan involves a 1.2K HMI, and a 4×4 poly board held horizontally with a triple layer of 4×4 Opal sheets hanging from one edge.

We start with the HMI pointed straight into the window and the poly board held high up so that the Opal hangs in front of the lamp. As the plane supposedly rises through the cloud layer, Colin lowers the poly until it is below the level of the lamp, while Gary tilts the HMI down so its light skips off the poly (like sun skipping off the top of clouds) and bounces back up into the window. Gary then tilts the HMI back up to point straight into the window, to suggest further banking or climbing of the aircraft. This direct light is so hot that it bounces off the armrest of Charlie’s seat and gives a glow to her cheek which syncs perfectly with a smile she’s doing.


DAY 25

(from February 2017 pick-ups)

Today’s set is a dark room. A photographer’s dark room, that is. Not just a random dimly-lit room.

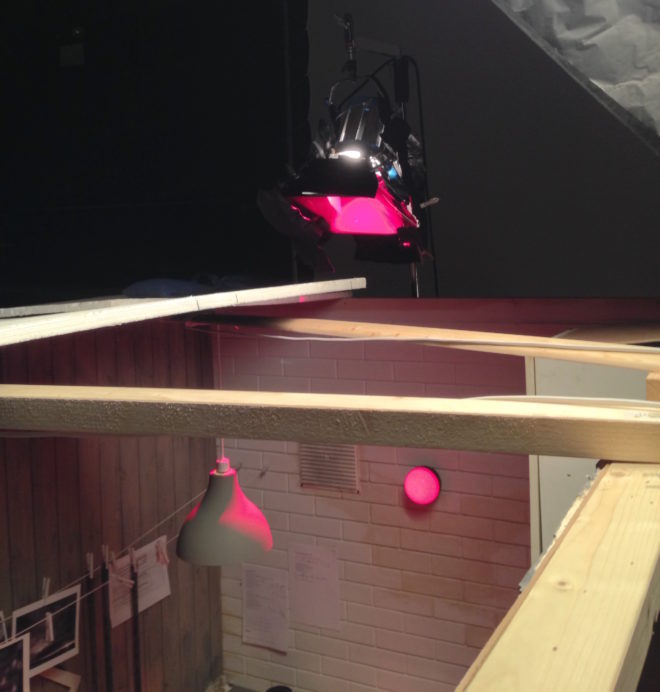
We begin with only the red safe-light in play. The wall-mounted practical has a 15W bulb, so it needs some serious help to illuminate the room. Micky rigs a 1K pup with Medium Red gel and fires it over the top of the set, above the practical. The effect is very convincing. Pure red light can make everything look out of focus on camera, which is why I chose the slightly magenta Medium Red gel, rather than the more realistic Primary Red. The colourist will be able to add some green/yellow to correct this.

During the scene, Naomi pulls a cord and the normal lights come on. These are two hanging practicals, fitted with dimmed 100W tungsten globes. In a very similar set-up to yesterday, we use a 2K with a chimera, poking over the set wall on the camera’s down-side, to enhance and soften the practicals’ light.

To read all the Above the Clouds blogs from the start, click here.

“Above the Clouds”: The Spoiler Blogs

How Digital Sensors Work

Last week I delved into the science of how film captures an image. This time we’ll investigate the very different means by which electronic sensors achieve the same result.


CCD

In the twentieth century, the most common type of electronic imaging sensor was the charge-coupled device or CCD. A CCD is made up of metal-oxide-semiconductor (MOS) capacitors, invented by Bell Labs in the late fifties. Photons striking a MOS capacitor give it a charge proportional to the intensity of the light. The charges are passed down the line through adjacent capacitors to be read off by outputs at the edges of the sensor. This techniques limits the speed at which data can be output.

My first camcorder, an early nineties analogue 8mm video device by Sanyo, contained a single CCD. Professional cameras of that time had three: one sensor each for red, green and blue. Prisms and dichroic filters would split the image from the lens onto these three CCDs, resulting in high colour fidelity.

A CCD alternates between phases of capture and read-out, similar to how the film in a traditional movie camera pauses to record the image, then moves on through the gate while the shutter is closed. CCD sensors therefore have a global shutter, meaning that the whole of the image is recorded at the same time.

CCDs are still used today in scientific applications, but their slow data output, higher cost and greater power consumption have seen them fall by the wayside in entertainment imaging, in favour of CMOS.


CMOS

Complementary metal-oxide-semiconductor sensors (a.k.a. APS or active-pixel sensors) have been around just as long as their CCD cousins, but until the turn of the millennium they were not capable of the same imaging quality.

Each pixel of a typical CMOS sensors consists of a pinned photodiode, to detect the light, and a metal-oxide-semiconductor field-effect transistor. This MOSFET is an amplifier – putting the “active” into the name “active-pixel sensor” – which reduces noise and converts the photodiode’s charge to a voltage. Other image processing technology can be built into the sensor too.

The primary disadvantage of CMOS sensors is their rolling shutter. Because they capture an image row by row, top to bottom, rather than all at once, fast-moving subjects will appear distorted. Classic examples include vertical pillars bending as a camera pans quickly over them, or a photographer’s flash only lighting up half of the frame. (See the video below for another example, shot an iPhone.) The best CMOS sensors read the rows quickly, reducing this distortion but not eliminating it.

Today, all the major cinema cameras use CMOS sensors, from Blackmagics to Alexas. Medium format stills cameras clung on to CCD technology longest for that higher image quality, but even these are now CMOS.

CMOS sensors are cheaper, less power-hungry, and not suspectible to the highlight blooming or smearing of CCDs. They are also faster in terms of data output, and in recent years their low-light sensitivity has surpassed CCD technology too.


Beyond the Sensor

The analogue voltages from the sensor, be it CCD or CMOS, are next passed to an analogue-to-digital convertor (ADC) and thence to the digital signal processor (DSP). How much work the DSP does depends whether you’re recording in RAW or not, but it could include things like correcting the gamma and colour balance, and converting linear values to log. Debayering the image is a very important task for the DSP, and I’ve covered this in detail in my article on how colour works.

After the DSP, the signal is sent to the monitor outputs and the storage media, but that’s another story.

How Digital Sensors Work

How Film Works

Over the ten weeks of lockdown to date, I have accumulated four rolls of 35mm film to process. They may have to wait until it is safe for me to visit my usual darkroom in London, unless I decide to invest in the equipment to process film here at home. As this is something I’ve been seriously considering, I thought this would be a good time to remind myself of the science behind it all, by describing how film and the negative process work.


Black and White

The first thing to understand is that the terminology is full of lies. There is no celluloid involved in film – at least not any more – and there never has been any emulsion.

However, the word “film” itself is at least accurate; it is quite literally a strip of plastic backing coated with a film of chemicals, even if that plastic is not celluloid and those chemicals are not an emulsion. Celluloid (cellulose mononitrate) was phased out in the mid-twentieth century due to its rampant inflammability, and a variety of other flexible plastics have been used since.

As for “emulsion”, it is in fact a suspension of silver halide crystals in gelatine. The bigger the crystals, the grainier the film, but the more light-sensitive too. When the crystals are exposed to light, tiny specks of metallic silver are formed. This is known as the latent image. Even if we could somehow view the film at this stage without fogging it completely, we would see no visible image as yet.

For that we need to process the film, by bathing it in a chemical developer. Any sufficiently large specks of silver will react with the developer to turn the entire silver halide crystal into black metallic silver. Thus areas that were exposed to light turn black, while unlit areas remain transparent; we now have a negative image.

Before we can examine the negative, however, we must use a fixer to turn the unexposed silver halide crystals into a light-insensitive, water-soluble compound that we can wash away.

Now we can dry our negative. At this stage it can be scanned for digital manipulation, or printed photo-chemically. This latter process involves shining light through the negative onto a sheet of paper coated with more photographic emulsion, then processing and fixing that paper as with the film. (As the paper’s emulsion is not sensitive to the full spectrum of light, this procedure can be carried out under dim red illumination from a safe-light.) Crystals on the paper turn black when exposed to light – as they are through the transparent portions of the negative, which you will recall correspond to the shadows of the image – while unexposed crystals again remain transparent, allowing the white of the paper to show through. Thus the negative is inverted and a positive image results.


Colour

Things are a little more complicated with colour, as you might expect. I’ve never processed colour film myself, and I currently have no intention of trying!

The main difference is that the film itself contains multiple layers of emulsion, each sensitive to different parts of the spectrum, and separated by colour filters. When the film is developed, the by-products of the chemical reaction combine with colour couplers to create colour dyes.

An additional processing step is introduced between the development and the fixing: the bleach step. This converts the silver back to silver halide crystals which are then removed during fixing. The colour dyes remain, and it is these that form the image.

Many cinematographers will have heard of a process call bleach bypass, used on such movies as 1984 and Saving Private Ryan. You can probably guess now that this process means skipping or reducing the bleach step, so as to leave the metallic silver in the negative. We’ve seen that this metallic silver forms the entire image in black-and-white photography, so by leaving it in a colour negative you are effectively combining colour and black-and-white images in the same frame, resulting in low colour saturation and increased contrast.

“1984” (DP: Roger Deakins CBE, ASC, BSC)

Colour printing paper also contains colour couplers and is processed again with a bleach step. Because of its spectral sensitivity, colour papers must be printed and processed in complete darkness or under a very weak amber light.


Coming Up

In future posts I will cover the black-and-white processing and printing process from a much more practical standpoint, guiding you through it, step by step. I will also look at the creative possibilities of the enlargement process, and we’ll discover where the Photoshop “dodge” and “burn” tools had their origins. For those of you who aren’t Luddites, I’ll delve into how digital sensors capture and process images too!

How Film Works

Cinematic Lighting: An Online Course Available Now

My online course, Cinematic Lighting, is available now on Udemy. It’s an advanced and in-depth guide to arguably the most important part of a director of photography’s job: designing the illumination.

The course is aimed at cinematography students, camera operators looking to move up to DP, corporate/industrial filmmakers looking to move into drama, and indie filmmakers looking to increase their production values.

Rather than demonstrating techniques in isolation in a studio, the course takes place entirely on location. The intent is to show the realities of creating beautiful lighting while dealing with the usual challenges of real independent film production, like time, weather and equipment, as well as meeting the requirements of the script.

Cinematic Lighting consists of four hour-long modules: Day Exterior, Day Interior, Night Interior and Night Exterior. Each module follows the blocking, lighting and shooting of a short scripted scene (inspired by the fantasy web series Ren: The Girl with the Mark) with two actors in full costume. Watch me and my team set up all the fixtures, control the light with flags and rags, and make adjustments when the camera moves around for the coverage. Every step of the way, I explain what I’m doing and why, as well as the alternatives you could consider for your own films. Each module concludes with the final edited scene so that you can see the end result.

Students should already have a grasp of basic cinematography concepts like white balance and depth of field. A familiarity with the principle of three-point lighting will be useful, but not essential.

You will learn:

  • how to create depth and contrast in your shots;
  • how to light for both the master shot and the coverage;
  • how and when to use HMI, fluorescent, LED and traditional tungsten lighting;
  • how to use natural light to your advantage, and how to mould it;
  • how to use a light meter and false colours to correctly expose your image;
  • how to use smoke or haze to create atmosphere, and
  • how to simulate sunlight, moonlight and firelight.

Get lifetime access to Cinematic Lighting now.

Below is a full breakdown of the course content.


MODULE 1: DAY EXTERIOR

Learn how to block your scene to make the most of the natural light, and how to modify that light with flags, bounce and diffusion, as well as how to expose your image correctly.

1.1 Principles & Prep

  • What to look for on a recce/scout
  • How to predict the sun path using apps or a compass
  • How to block action relative to the sun
  • Three-point lighting
  • The importance of depth in cinematography
  • When to shoot in cross-light vs. backlight
  • How to get rippling reflections off water

1.2 Blocking for Success

  • Observing a rehearsal with actors Kate and Ivan
  • What to look for in the blocking
  • How to get reflections off a blade
  • When to shoot the master shot
  • How to choose what order to shoot your coverage in
  • Using a white poly/bead-board as bounce

1.3 Exposure

  • Why light meters are still important
  • Dynamic range and log recording
  • How to use an incident meter and a spot reflectance meter
  • The f-stop series
  • How to use false colours
  • How to arrive at the right exposure from all this information
  • How to select the appropriate ND (neutral density) filter
  • Shooting the wide shot

1.4 Shaping the Singles

  • Short- and broad-key lighting
  • Types of reflector
  • Positioning a reflector
  • Paying attention to eye reflections
  • Negative fill
  • How to use 4×4 floppy flags
  • Shooting Ivan’s close-up
  • Using a trace frame
  • “Health bounce”
  • Shooting Kate’s close-up
  • Summary
  • The final edited scene

MODULE 2: DAY INTERIOR

This module introduces some common lighting instruments, demonstrates how to imitate natural light entering a room, and how to create depth and contrast with black-out and smoke.

2.1 Scouting & Equipment

  • Identifying light sources in the room
  • Using apps or a compass to predict how sun will enter through the windows
  • The principle of dark-to-light depth
  • Using curtains to modify interior light
  • Introduction to some common lighting instruments: Dedolights, Kino Flos, an HMI and a Rayzr MC LED panel

2.2 Lighting through a Window

  • Observing the blocking with actors Kate and Ivan
  • Direct lighting using an HMI
  • Controlling contrast with black-out
  • Diffusing the light with a trace frame
  • Bouncing the light off poly/bead-board
  • Bouncing the light off parts of the set
  • Use of a light meter and false colours to set the correct exposure

2.3 Atmosphere

  • Use of smoke or haze to add atmosphere to the scene
  • Reasons to add atmosphere
  • The concept of aerial perspective
  • Shooting the master shot
  • Comparison of the final shot to the other versions demonstrated in 2.2 and 2.3

2.4 Lighting the Reverse

  • Use of viewfinder apps to find a frame and select a lens
  • Challenges of front-light
  • Adjusting the window light to highlight certain areas
  • Demonstrating a “window wrap” using a Kino Flo
  • Using light readings and ND filters to arrive at the correct exposure
  • Shooting the reverse
  • Summary
  • The final edited scene

MODULE 3: NIGHT INTERIOR

Create a moody night-time look indoors using practical sources, toplight, and simulated moonlight and firelight.

3.1 Internal vs. External Light

  • Observing the blocking with actors Kate and Ivan
  • Approaches to lighting a night interior scene
  • Lighting from outside with an HMI “moon”
  • Working with bounced “moonlight” inside the room
  • Choosing an overhead source as the key light

3.2 Working with Toplight

  • Time and safety considerations of working with top-light
  • Rigging a top-light safely
  • Controlling top-light spill on the set walls
  • Using unbleached muslin to soften and warm up the light
  • The inverse square law

3.3 Firelight & Moonlight

  • Working with practical candles
  • Reinforcing candles with a hidden LED fixture
  • Simulating an off-camera fireplace
  • Lighting the view outside the window
  • Bringing moonlight into the room to add colour contrast and depth
  • Shooting the master shot

3.4 Tweaking for the Coverage

  • Checking the blocking for the first single
  • Filling in shadows using additional unbleached muslin
  • Flagging the top-light to control the background
  • Adjusting the external light to maintain colour contrast
  • Shooting Kate’s single
  • Adjusting the fireplace effect to work for a close-up
  • Shooting Ivan’s single
  • Summary
  • The final edited scene

MODULE 4: NIGHT EXTERIOR

Paint with light on the blank canvas of night; set up an artificial moon; create depth, contrast and colour contrast; and use shadows to your advantage.

4.1 Setting the Moon

  • Observing the blocking with actors Kate and Ivan
  • Principles of night exterior lighting
  • Creating believable moonlight
  • Features of HMI lighting
  • Choosing a position and height for the HMI “moon”

4.2 Finessing the Master

  • Use of a practical fire source
  • Reinforcing a practical fire with an LED fixture
  • Colour contrast
  • Using a Kino Flo as an additional soft source
  • Tackling a difficult shadow
  • Reading and adjusting lighting ratios using an incident meter
  • Working with smoke/atmos outdoors
  • Shooting the master shot

4.3 Shooting the Singles

  • Adjusting the existing sources to work for a close-up
  • Shooting Ivan’s single
  • Diffusing the HMI
  • Monitoring exposure using false colours
  • Shooting Kate’s single

4.4 Lighting the Reverse

  • The pros and cons of flipping the backlight
  • Example of cheating the moonlight around
  • Using established sources to your advantage
  • Adding diffusion vs. a gobo to the HMI
  • Creating a “branch-a-loris”
  • Shooting the reverse
  • Summary
  • The final edited scene

APPENDICES

Useful links, a full kit list and a deleted scene

Get lifetime access to Cinematic Lighting now.

Cinematic Lighting: An Online Course Available Now

Where to Place Your Horizon

I once had an argument with a director about the composition of a wide shot. I wanted to put the horizon nearer the top of the frame than the bottom, and he felt that this was the wrong way around. In reality there is no right and wrong in composition, only a myriad of possibilities that are all valid and can all make your viewers feel different ways. In this article I will take a metaphorical ramble through these possibilities, and ponder their effects.

You would think that the most natural position for the horizon would be in the vertical centre of the frame. After all, in our day-to-day life, when we look straight ahead, this is where it appears to be.

In practice, a central horizon is not a popular choice. This article by Art Wolfe, for example, argues that it robs the image of dynamism, sending the eye straight to the horizon rather than letting it wander around the frame. The technique is also at odds with the Rule of Thirds, though as I’ve written before, that’s not a rule I place much stock in.

The talented photographer and vlogger Arian Vila, however, describes the merits of a central horizon when composing for a square aspect ratio. And this is an excellent reminder that the horizon does not exist in a vacuum; like anything else, it must be judged in the context of the aspect ratio and the other compositional elements of the frame.

For Leon Chambers’ Above the Clouds (out now on Amazon Prime and other platforms!), I placed the horizon centrally several times:

This was a deliberate echo of the painting “Above the Clouds” which appears in the film and provides the thematic backbone.

A year or two after shooting Clouds, I came across Photograms of the Year: 1949 in a charity shop. Amongst its pages I found another diptych, one created by the book designer rather than the two entirely separate photographers:

These two images, perfectly paired, demonstrate contrasting horizon placement. At Grey Dawn emphasises the sky by placing the horizon low in the frame, creating a sense of space. Meanwhile, Homeward Bound positions its horizon somewhere beyond the trees near the top of frame, drawing attention to the sand and the wheel ruts and indeed to the figures of the caravan itself, rather than to the destination or surroundings.

Horizon placement is closely tied to two other creative choices: headroom, which I dedicated a whole article to, and lens height, i.e. is this a low or a high angle? Even a GCSE media student can tell you that a low angle imbues power while a high angle implies vulnerability, but these are terms most applicable to closer shots. When we think of horizon placement we are probably concerned with big wides, where creating a mood for the scene or setting is more important than visualising a character’s power or lack thereof.

Breaking Bad is an example of a series that predominantly chooses low horizons to show off the big skies of its New Mexico locations. “[Showrunner] Vince [Gilligan] is a student of cinema and knows movies like the back of his hand,” says DP Michael Slovis, ASC. “It was always in his mind that this was a Western in the style of Sergio Leone and the Italian Neo-realists.”

Incidentally, there’s an amazing desert scene in the episode “Crawl Space” where a sunlit close-up cuts to a big wide. The wide holds as clouds roll over the sun. The action continues and the shot still holds, the line between sunlight and shade visible as it rolls away across the desert, until finally a new line slides under the camera and sun breaks over the actors once more. Only then are we permitted to see the scene up close again.

This creative choice, to set the character’s small concerns against the vast immutability of nature, comes from the same place as the choice to put the horizon low in frame.

Returning to Photograms of the Year: 1949, my eyes light upon another pair of contrasting images:

Despite its title, Towards the Destination shows us little of where the sailors are heading, by placing the horizon high in the frame and focusing on the water and the reflections therein. Rendezvous at Chincoteague, by placing its horizon low in the frame, radiates a feeling of isolation that is in contrast to the meeting of the title.

As we consider the figures in these photographs I am forced to concede that the argument I alluded to in the introduction may have been less about the position of the horizon and more about the position of the actor. I think the director felt that it was unnatural for an person to appear in the top half of the frame rather than the bottom half.

I can see his point. The vision of our naked eyes is definitely framed along the bottom by the ground, while the top remains open and unlimited – outdoors, at least. So if a person is standing on the ground, we naturally expect them to appear low down in an image.

But this – like nose room, the Rule of Thirds, the 180° Rule, short-key lighting, so many things in cinematography – is merely a guideline. There are times when it just isn’t helpful, when it can lead to wasted opportunities.

Here is a shot of mine from The Gong Fu Connection (dir. Ted Duran) where the horizon and the cast are placed in the upper half of frame:

Would it really have been better to frame them lower, losing out on the reflections and the foreround rushes, and gaining just empty sky? I think not. This composition was especially important to me, because the film’s titular connection is all about man and the natural world. By showing the water and greenery, we root the characters in it. A composition with more sky might have made them seem dwarfed by nature, lost in it.

This article has been something of a stream of consciousness, but the point I’m trying to make is this: always consider the content and meaning of your shot; reflecting those in your composition is infinitely more important than adhering to any guidelines.

If you enjoyed this, you may be interested in some of my other articles on composition:

Where to Place Your Horizon