How to Light Efficiently and Minimise Changes Between Angles

Exciting title, right? It’s not the glamorous side of a DP’s job, but enabling a scene to be shot quickly is a skill which definitely has its place, as long as you balance it with creative and technical quality, of course.

When a scene has been blocked and the cast have gone off to have their make-up and costuming finished, and even the director has disappeared to make plans for future scenes, the DP is left on the set to light it. Though there is always time pressure on a film, it is at a minimum during this initial lighting period (usually for the wide shot). But once the wide is in the can, the DP is expected to move quickly when tweaking lights for the coverage, as all the cast and crew are standing around waiting for you.

So a wise DP always thinks ahead to the coverage, setting up as much as possible for it concurrently with the wide, or better still sets up the wide’s lighting so that it works for the coverage too.

If we boil things right down, light looks best when it comes in from the side or the back, not the front. A common technique is to block and/or light the scene so that the main light source, be that the real sun, a window or an artificial source, is behind the cast in the wide. Let’s imagine this from the top down with the camera at 6 o’clock, the key light at 12 o’clock, and the actors in the centre.

Because of the 180º Rule, otherwise known as the Line of Action, the camera positions for the coverage are likely to all be on the bottom half of the clock face between 3 o’clock and 9 o’clock. At either of those two positions the 12 o’clock key light is now coming in from the side, so your image still has mood.

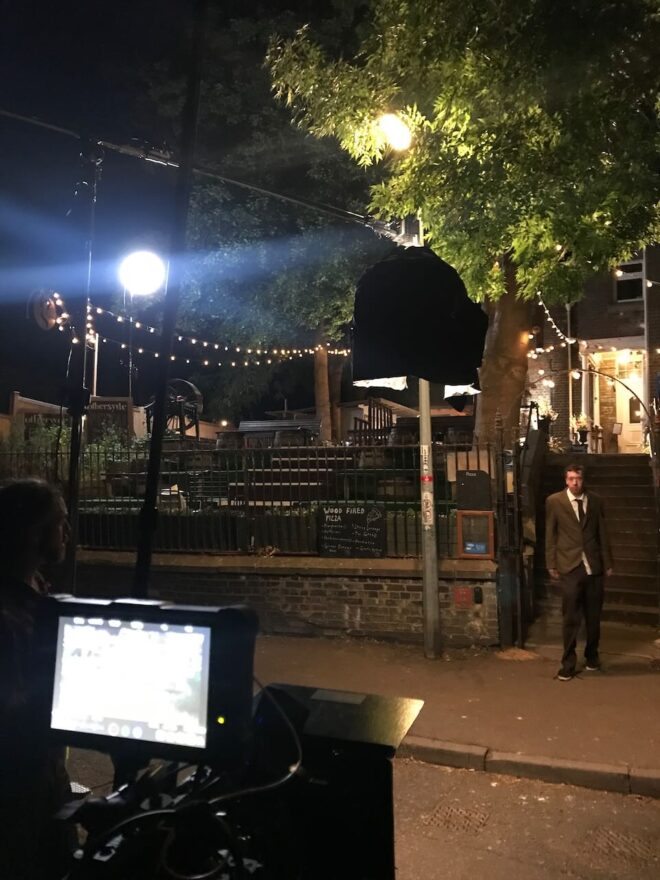
This date scene in “Harvey Greenfield is Running Late” was cross-backlit; you can just see the second light in the top right of this photo.

Another common set-up is cross-backlight. Here you would have two lights, one at about 10:30 and the other at 1:30. These give a three-quarter backlight in the wide and a three-quarter key light in the singles.

Something basic to avoid is lights actually being in shot when you move to a new camera position. Early in my career I used to put all my lamps on stands because I didn’t know any better (or have any rigging kit to do anything else), but that means you’re forever moving them. Much better to rig things to the ceiling, or to position them outside the room shining in through doors and windows. 

Practicals lights are really helpful too, because you can get them in shot with impunity. You can save hours of pain on set by collaborating with the art department in pre-production to make sure there are enough practicals to justify light from all the angles you might need it. Put them all on dimmers and use a fast lens or high ISO and you may well find that when you change camera position you only need to dim down the frontal ones and bring up the back ones to get the shot looking nice.

A behind-the-scenes view of some of the lights we rigged in the “Heretiks” chapel.

I once had to light a scene in a medieval chapel for a horror film called Heretiks. The master was a Steadicam shot moving 360º around the set. The gaffer and I invested the time beforehand to rig numerous 300W and 650W tungsten fresnels around the tops of all the walls, connected to dimmers. (The light was motivated by numerous candles.) With a bit of practice the gaffer and sparks were able to dim each lamp as the camera passed in front of it – to avoid camera shadows and the flat look of front light – and bring them back up afterwards, so there was always a wrapping backlight. A convenient side effect was that when we moved onto conventional coverage we could light shots in seconds by turning a few dimmers down or off and others up.

DP Benedict Spence used a similar principle on the recent BBC series This is Going to Hurt; he had 250 Astera Titan tubes built into the hospital set. While this was time-consuming and expensive upfront, it meant that shots could be lit very quickly by making a few tweaks at a lighting desk. And since the tubes looked like fluorescent strip-lights, there was never any problem with getting them in shot.

Once you start shooting a scene it’s important to keep up the pace so that the cast can stay in the zone. Spending extra time in prep or when lighting the wides will pay dividends in faster coverage, giving the director more time to get the best performances and to tell the story, which is ultimately what it’s all about.

How to Light Efficiently and Minimise Changes Between Angles

“Harvey Greenfield is Running Late”: Week 3 Part 2

Day 21

Photo by Jonnie Howard

A morning full of short running scenes, all shot as oners on the Steadicam by Luke Oliver. Pretty much every crew member had had a cameo by this point, and today it was my turn. My character: Nerdy Cyclist. Alright, technically it was just Cyclist. The nerdy bit was just me (a) beefing up my part and (b) playing to type.

For the afternoon we moved to The Lab, a cocktail bar, where we filmed one of the fantasy/imaginary scenes that cuts with the very first shot we did of Harvey back on Day 1. Mixologist Tom was dressed in an elaborate all-black costume so Stephen and I hit him with two tungsten lamps, one either side, at an angle somewhere between side-light and backlight. This cut him out from the background, showed up the layering in the costume, edge-lit the cocktail shaker and liquids being poured, and deliberately kept Tom’s face dark. Quadruple win!


Day 22

We returned to Othersyde to pick up the one scene we dropped there on our most packed day of principal photography, Day 7. I referred to the blog post to help get the vibe of the lighting the same. The main motivation was the real streetlamp at the front of the site, which we wrapped using an Aputure with a lantern attachment, rigged on a mini boom. Another Aputure lantern gave a cool moonlight wash on the venue’s terraced outdoor seating, and a blue-gelled 300W tungsten fresnel uplighter replicated what we did on the other side of the building last year. A 2K blasted light from the direction Harvey has come; this light represented the ongoing wedding, so we had a couple of people moving around in front of it for dynamic shadows.

I ended up turning off the first Aputure for the wide as it seemed to kill the mood, but we brought it back for the close-up to show more of Paul’s face. To represent the light of his phone as he turns it on, Stephen held a PavoTube just above the camera and twisted it quickly around to face Paul on cue. We adjusted the eyebrow on the camera to flag the tube’s light off the phone itself.

There were a few bitty pick-ups to do while we were outside with access to power, including a “BOV” – a POV of a bee. We did this with the probe lens on Jonnie’s Canon C200, which I had to float around and then jab into Paul’s neck. Sorry, Paul.

At 1am we moved into an adjacent industrial street – having decided that it was unreasonable to have Paul shouting dialogue in a residential area at that hour – for some Steadicam shots. I went to the Gemini’s low-light ISO 3200 and Stephen hand-bashed a lantern on a boom pole to fill Paul in between streetlamps, which became a fun dance when we had to do a 270° orbit!


Day 23

We convened at Cambridge’s Castle Hill. Nearby Indian restaurant Namaste Village kindly agreed to let us shoot a brief scene there at the last minute, even having one of the staff do a spot of acting. I posted a video breakdown on Instagram – here it is:


View this post on Instagram


A post shared by Neil Oseman (@neiloseman)

Back outside we filmed a nice sequence of shots ending with a 360° pan following Harvey as he walks around the top of Castle Hill talking on the phone. As the other end of the phone call had been shot with Steve’s head sometimes out of frame, we went the other way and gave Harvey loads of headroom, capturing some nice clouds along the way.

Then it was time for another pick-up from Day 7, reshooting the tent scene for continuity reasons. Again we put a light on one side and black-draped the other to get some shape into the light inside. This time we used a wider lens, the 14mm, and with the help of a runner I handheld it over Paul rather than trying to squeeze the tripod in around him like last time. He got a nasty shock when I accidentally knocked the matte box off and it hit him in the face. Er, sorry again.

After wrapping a few of us went back across the road to Namaste Village, where the food was excellent.


Day 24

On our last day we caught up to the elusive pick-up that was always meant to be a pick-up: the scenes with Harvey’s mum. We took over Rachel’s grandmother’s house for several hours, most of the shots being in a corner of her living room. Unusually I was drawn to a corner that didn’t have a window in it, because it had the best furniture and dressing to establish the character in our standard 24mm tableau shot.

But this meant – with all the windows behind camera – that it was a challenge to make the lighting interesting. We faked a window just off camera left using a diffusion frame with muslin and a grid over it; Stephen bounced the 600D into it from across the room. I closed the room’s curtains as much as I could get away with before the lack of natural fill light started to make it look like night. (For later scenes we closed them all the way and put a 300D behind the muslin, as pictured above.)

To add more interest to the shot I played around with the positions of two table lamps and a floor lamp. Pausing to check my script breakdown notes from last year I saw that I had written “a single practical floor lamp” in the lighting column; too many lamps would kill the scene’s sad tone. This is a good example of a breakdown keeping me honest as a DP and preventing me from getting carried away doing stuff on set just because I can (though that definitely still happens sometimes). I ended up with just one lamp in the back of the main shot.

After some variations on that main shot for later scenes, and a brief scene in the kitchen, we packed up and headed out for exteriors. Most of these were happy flashbacks from the early days of Harvey and Alice’s relationship, and Jonnie wanted to fill them with filmic references. First up was a Jules et Jim homage with the pair racing across a bridge, then a “remake” of one of Jonnie’s own amateur films with Harvey and Alice spinning around holding hands. For POV reverse shots we put the tripod on the point which they span around, and I set the panning tension to zero so that they could pull the camera around themselves by holding the moose bars (handgrips).

Next was a Manhattan-esque shot with the couple on a bench looking up at Ely Cathedral. We clearly weren’t going to light the cathedral on our budget, so we set up around sunset and waited for the streetlamps to come on and the ambient light to drop to a nice dusky level. We rolled when the daylight was metering at T1.4 at ISO 800, though I exposed at T2. To cut Harvey and Alice out from the background a bit Stephen stood just out of frame with an LED lantern motivated by a nearby streetlamp.

He pulled the same trick at our next location, a passageway beside Prezzo, where we did actually have to light a small portion of the cathedral wall as well, using a battery-powered Aputure (200X I think). We couldn’t have done it for long on the batteries we had, but fortunately it was a brief scene.

Our final set-up was a Poor Man’s shot of Harvey running at night. We did this on the green beside the cathedral because it was a handy open space where we could get a completely dark background save for a few dots of distant lights. Stephen armed a FalconEyes over Paul and swung it back and forth to create the illusion of passing streetlamps. The shot needed a tiny touch of fill, so we taped a PavoTube to the top of the matte box, setting it to 1% intensity and taping over most of it to get it down to a low enough level. (I was at ISO 3200 and on a 14mm lens, so mere inches from Paul’s face.)

Then Rob said the magic words, “It’s a wrap.” Like most micro-budget projects there are still a few loose ends to be shot, but those will be done with Jonnie’s camera and no crew. For most of the cast and crew Harvey Greenfield has run his course and I’ll see them at some distant time for the premiere. Thank you Stephen Allwright (gaffer), Jeremy Dawson (spark), Hamish Nichols (1st AC), Fiyin Oladimeji (2nd AC) and Nana Nabi (2nd AC daily) for all your hard work, and to Jonnie for bringing me onto this fun and creative film. Huge thanks also to Global Distribution, Red and Sigma who supported us with equipment which brought the whole thing up a level. The rough cut is already fantastic and I can’t wait to see it finished.

Read all my Harvey Greenfield is Running Late posts:

“Harvey Greenfield is Running Late”: Week 3 Part 2

“Harvey Greenfield is Running Late”: June 2022 Pick-ups

Last summer I lensed Harvey Greenfield is Running Late, a hilarious comedy feature starring Paul Richards, based on his acclaimed one-man play, soon to have its 100th performance. We had a 14-day window in Paul’s schedule for the shoot, during which we captured two thirds of the film – less than we’d hoped, but still a remarkable achievement given the resources we had and the production value we achieved. This summer we shoot the rest.


Day 15

Ten months on, we returned to the house from days 11 and 12. It’s on the verge of being sold, and this was our last chance to mop up the outstanding material here.

We eased into it gradually with simple inserts, recreating the look and lighting in the kitchen using Fifi’s camera notes, clips from the assembly edit, and this blog (yes, it’s not just for you, dear reader). At times like this I wish I recorded even more information – intensity and colour temperature readings for every source would be extremely useful, but is that really practical?

After traumatising Paul with a reshoot of a scene in which he gets slapped (accidentally for real the first time around) we popped outside to get a shot of him on the street, filmed through a car windscreen. Last year we captured the first monologue of the film as a oner, but with hindsight director Jonnie Howard decided it needed breaking up; this windscreen shot is one of several that he has added to illustrate the things Harvey monologues about. Proving that there are no easy shots, it took me an embarrassingly long time to eliminate annoying reflections in the glass by covering shiny parts of the dashboard with matt black tape and putting a polarising filter in the matte box.
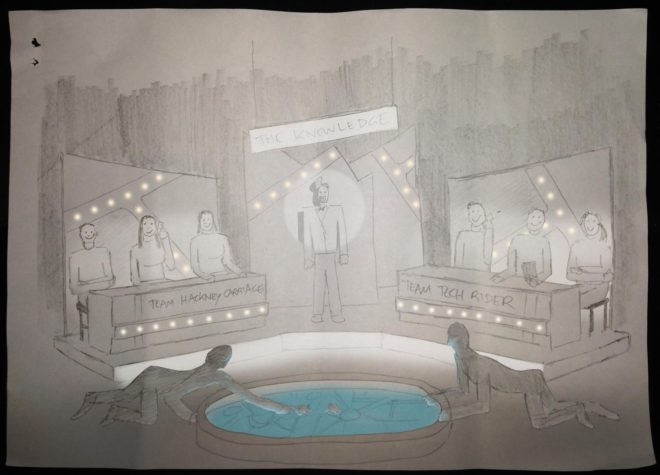
Next we moved to the back garden for one of the film’s most complicated shots. It starts off as a two-shot of Harvey and Alice (Liz Barker) in a nighttime interior setting then – via a low-tech, Michel Gondry-style transition – becomes a single of Harvey in a daytime exterior. Gaffer Stephen Allwright and spark Jeremy Dawson built a dark box out of flags and bolton, parts of which had to swing away to let in the natural light during the transition. A light had to be panned off and a reflector swung in too, while production designer Amanda Stekly and her helpers performed their own magic with the set. By the time we got it in the can we were losing the light, but the result was well worth it.

The dusk gave us just the look we needed for a quick scene in the bedroom, then we were into full nighttime scenes. I climbed into the wardrobe to get the right camera angle – we were without our beloved 14mm lens this time around, so the locations felt a little tighter!

Later we had to recreate the lighting of the aforementioned oner, so we could shoot coverage, again with extensive reference to the camera notes, rushes and R3D metadata, this blog, and on-set photos captured on my phone. Last year we dialled a custom cyan colour into the Astera tubes and I really wish I had noted the XY or HSL numbers so that we could have dialled those into the Rayzr MC 200 that was replacing them for the pick-ups. Instead we had to judge it by eye.

It was now about midnight and we still had an important sequence in the kitchen and living room to shoot; we ultimately captured it in two set-ups and an insert. This day’s filming had seen the most extreme examples of the colour scheme I planned last year: orangey-red colours to represent Harvey’s stress, and cooler, greenish shades for calmer moments. By the end of the night it was starting to look like The Neon Demon and I was wondering if I had gone too far. I guess I will find out when it’s all cut together.


Day 16

A pleasant cycle ride through Cambridge and out across a meadow brought me to the brand-new village of Eddington and the impressive Storey’s Field Centre where we would be filming the office of Harvey’s boss, Bryan (Alan Hay). First up was a fantastic shot of Harvey huffing and puffing up a spiral staircase in the centre’s main hall. The high-tech building had its lights and two layers of blinds controlled electronically, and Stephen was able to completely reshape the natural light in the huge wide shot and even put a glorious streak of light on the staircase just by pressing a few buttons. If only every location was equipped so.

A smaller, but still obscenely spacious, hall served as Bryan’s office. French windows faced east into a beautiful courtyard garden. High windows on the opposite side of the room featured motorised blinds again, which sadly would not stop halfway, forcing us to close them completely to control the light. An overhang above the French windows, combined with the high walls of the courtyard, meant that very little natural light now entered the room. For a key, Stephen constructed a book-light by pointing an Aputure 600D up into a tilted frame of Ultrabounce and then hanging some diffusion (half grid, I think) off the top edge. We added a tungsten fresnel on a boom to give some orange, stress-themed hair-light to characters in the middle of the room.

The first shot was effectively the POV of a dartboard, so we stuck three darts to the matte box with Blu Tack. Sharp points and oily substances – exactly the things you want right next to your lens! – but it looked great.

The next couple of shots featured co-writer Raymond Howard’s baby daughter. One was a contra-zoom, captured on the 18-35mm which I zoomed manually off the barrel while pushing in on the Tango ProSup slider. The other required me to brandish the handheld camera right in baby’s face for a very long time until she eventually cried.

Then it was onto the big scene. This featured Bryan referring to a PowerPoint presentation, which meant a lighting transition as the screen came down and the projector fired up. For Harvey’s angle, with his back to the projector, we boomed an Aputure 300D behind him to simulate the projection beam, and sat a pocket LED light on the matte box to represent the bounce off the screen; these faded up as the 600D book-light and tungsten hair-light dimmed down. For Bryan’s angle the real projection light wasn’t doing enough on his face, so we “extended” the practical lamp on his desk with a small tungsten fresnel. For the wide shot we could get away with re-angling the practical so that it cast a dramatic, Citizen Kane-esque shadow from Bryan up onto the screen.

All in all, the day’s work added a huge amount of scale and humour to the movie. It was lovely to see and work with everyone again for the weekend. Next month most of us will be back for eight more days of running late.

“Harvey Greenfield is Running Late”: June 2022 Pick-ups

“Harvey Greenfield is Running Late”: Week 2-and-a-Bit

Day 11

In a conference room at a business centre in north Cambridge we set up for a scene in which the titular Harvey arrives titularly late for a big meeting at work. Here we were joined by my good friend Alan Hay, who voiced all the pre-recorded male characters in the stage play, and now portrays Harvey’s overbearing boss Bryan on screen.

A TV monitor in the background of Bryan’s shot, displaying relevant graphics, gave us some trouble. Neither the 50Hz or 60Hz “flicker free” modes in the monitor’s menu lived up to their names. The best – though not perfect – results were achieved by setting the camera’s shutter to 144°, which works out as 60Hz at our frame rate of 24fps. (Next week’s post will be dedicated to the maths behind this. I bet you can’t wait.)

Stephen and James rigged several Astera tubes to the ceiling, which we mostly used to give everyone a tungsten-coloured backlight whichever direction we shot in (Harvey’s stress colour again). The key light was motivated from the window, which we weren’t able to light from outside of, but we generally used the Litemat 2S to punch up or wrap the natural light from that direction. We used floppy flags on the opposite side of the room to stop too much ambience from the atrium spilling in.

Unfortunately by the time we wrapped the meeting scene we were left with a difficult choice: to rush a long and funny scene in Bryan’s office, or to postpone it for some future pick-up shoot when we could do it justice. Jonnie wisely chose the latter, allowing us to decamp to a private home in Arbury and get ahead with the scenes set in Harvey’s house.

First up at the house was a happy flashback of Harvey and Alice dancing in the bedroom, which Amanda had dressed in calming shades of green. We shot towards the window at 48fps and supplemented the natural light with a single Astera tube in a corner.

Next was a less positive flashback set at night. As it was still broad daylight I closed the curtains, framed out the window and set the white balance to 3600K to turn the remaining light seeping through the curtains into a dim nighttime ambience. I had asked Amanda to provide matching practicals on the bedside cabinets, which we now turned on and dimmed to get a nice warm orange glow. This looked great but left the actors’ faces very under-exposed, so we added a 300W tungsten fresnel motivated by one of the tablelamps. (The thing you see hanging in front of it in the above photo is a makeshift flag to stop the other tablelamp from casting an unrealistic shadow.)

Then it was back to daylight – again natural light supplemented by an Astera – and the camera had to stay locked off so that Jonnie could jump-cut to this shot from the same angle at night. Stephen and James set up the lighting while the daylight faded. The main element that I wanted was a streak of sodium streetlight through a gap in the curtains, again part of the stress colour theme, which was achieved with the Aputure 300D gelled appropriately. We wanted to give the impression that this was bouncing off the wall and edge-lighting Harvey in his second position, but in reality we used the tungsten 300W fresnel – now hidden on top of the wardrobe – to get this effect. We bounced two Astera tubes, set very blue with a bit of green mixed in, off a wall to provide ambience.

Overall the frame was still pretty dark, so I decided to do something I’ve seen advised for night scenes before but never actually done: I reduced the ISO by one stop and opened the iris to compensate. Read my article about ISO if you want to understand all the ins and outs, but essentially doing this allowed one more stop of light to reach the sensor – that’s more information to grade with – without increasing the apparent brightness of the image.


Day 12

Back in the house, this time downstairs in the kitchen. We had three daylight scenes to shoot here, and the lighting approach was to push in soft light through the windows using the Litemat or an Aladdin, with some harder streaks where appropriate from the Aputure. Hiding another Aladdin on top of a cabinet and firing it into a corner of the ceiling was a good move by Stephen to raise the ambience in the room while still keeping some directionality.


Day 13

Our first task today was to return to the cemetery and pick up a dropped shot from day 8. Then it was another Steadicam/rickshaw scene on an Ely street where rain, traffic and a recalcitrant beer can combined to make things quite tricky.

After lunch we had a strict two-hour window in which to shoot three scenes with a hired limousine. The first required it to be driving around, so Filipe (sound mixer), Olga (focus puller) and I squeezed into the front of the main cabin, shooting down the length of the vehicle on the 14mm to where Paul and Alan’s characters were sitting at the back. Jonnie rode in the front passenger seat and watched the monitor over my shoulder. Next to him was an Aladdin which I could use for fill when necessary, but mostly I relied on the dynamic natural light. The heavily tinted windows were a big help, allowing me to retain most of the detail in the sky outside without under-exposing the talent.

When we returned to base, Stephen had all the flags, bolton and lights ready to move into position around the limo for the night scene. His custom-built LED was gelled with Urban Sodium again to key Alan, and an Astera tube inside the limo provided the impression of a passing ambulance.

Then we were left with less than 25 minutes to capture a daytime dialogue scene around the limo. Jonnie had storyboarded it as three set-ups but there was only time for one. Rupert came to the rescue, quickly balancing his Steadicam as Jonnie devised a camera move that would hit all the needed beats.

After a couple more Steadicam shots we moved on to a scene in a hospital car park, a rare moment of calm for the beleagured Harvey. We shot this mostly on the slider, capturing the dialogue in another single developing shot that taxed poor Filipe again but set exactly the right mood for the story. The natural light was very shapeless, so Stephen set up some floppies on one side and bounce on the other.

The day brought principal photography to an end for Stephen and for leading man Paul Richards, both of whom have done stellar work despite the long hours and high energy levels required.

Just after I wrote this Jonnie sent me a rough edit of the limo/hospital sequence and it has turned out very nicely indeed.


Day 14

We convened at a farm near Mildenhall to film Billy the pig farmer, one of the many people who hassles Harvey by phone during the story. In a last-minute casting coup Billy was portrayed by 1st AD Rob Oliver with the unscripted addition of his mother Shirley. A comedy duo to be reckoned with. Between takes we scattered food around to entice the porcine supporting artists into the right positions.

After completing this sequence we all took it in turns to hold a piglet. I’m not sure why.

The final scene of principal photography was a spoof charity appeal for “No More Racism UK”. We shot this down at Ely riverside again, where a crowd steadily gathered to watch us film an old white lady throwing bread at a black couple. We captured the whole thing on the slider with the 50-100mm zoom at 48fps and with the Soft FX 1 for extra cheesiness. To get the depth of field as shallow as possible with our limited ND filters I went down to ISO 250, the downside being a reduction in highlight detail which threatened to blow out the feathers of a white swan in shot. I’m sure that’s symbolic somehow.

We wrapped at the astonishingly reasonable time of 3pm and reconvened in the evening for a pizza-fuelled celebration at Othersyde. The shoot was great fun, the whole team has worked really hard, and I look forward to seeing everyone again for the pick-ups.

The “Harvey Greenfield” camera department: 1st AC Olga Lagun, 2nd AC Fiyin Oladimeji and me
“Harvey Greenfield is Running Late”: Week 2-and-a-Bit

Undisclosed Project: Culmination

Today filming begins on the Shakespearian feature I have been prepping since early February. All of last week was again spent in rehearsals, this time focusing on the second half of the script.

By the end of the week I had storyboarded almost the entire film, using Artemis Pro. The production designer was able to print these out and go through them looking for any backgrounds that he might not yet have dressed, or any obtrusive existing objects that should be removed. The 1st AD was also using them to help him plan, as he had not been present at rehearsals. This led to a minor panic when I erroneously included some characters in the background of a shot that those actors were not scheduled for!

Aside from producing these storyboards and getting a fantastic understanding of how all the scenes are going to be played and blocked, a big benefit of the rehearsal weeks was the opportunity to get to know the cast. Normally I have to wave a big camera in an actor’s face the first time I meet them. It’s much better to ease them and me into the process the way we’ve done on this production. A particular highlight was when the well-known lead actor performed some of the famous soliloquies – in the absence of a camera – right into my eyes.

It was a very busy week for all concerned. When the cast weren’t in rehearsals they were in costume fittings or make-up tests, or training for the sword-fight, or doing press interviews.

The gaffer started work on Wednesday, and was joined by the best boy and spark on Thursday. After loading in the equipment, their first task was to re-globe all the sconces and ceiling lights in the auditorium. Later they gelled all the emergency lights to make them dimmer and warmer in colour, ran distro to various convenient points, and cut poly-boards to size.

The camera kit also turned up on Thursday, a slightly surreal event for me after so long working in the building with just my laptop and iPhone. For a few scenes Sean wants to create a kaleidoscopic effect, so I had purchased some cheap kaleidoscope party glasses, a 6” teaching prism, and a set of crystals which can be hung off the matte box. Ironically the cheap glasses give the best effect! These will be hand-bashed in front of the lens, whereas the prism can be clamped to a noga arm for a more controlled effect.

I gave the focus puller a tour of the building so that he could start to think about monitor positions. That will definitely be a tricky aspect of the production with all the cramped backstage spaces.

I feel better-prepared now than I have ever felt going into a feature. It is such a contrast to, say, Heretiks, where I had just one week to get up to speed, and the gaffer had no prep time whatsoever. Nonetheless, there are some things you just can’t work out until the day, and that’s where the stress and excitement come from!

I’ll continue to write a blog during production, but I won’t be publishing it until the film is released. So there will be no new posts for the next few weeks, but normal service will resume in May! See you on the other side.

Undisclosed Project: Culmination

Undisclosed Project: Organisation

By the time you read this I will have entered the Covid bubble for the still-as-yet-unannounced Shakespearian film, the beginning of two weeks of full time prep before cameras finally roll.

The week just gone has been something of a calm before the storm. It started with two important Zoom meetings: one about practicals, the other about the schedule.

The first meeting involved going through all the locations with the production designer explaining what practical lamps he planned to put in each, and me sometimes asking for additional ones. Practicals are going to be a big part of our lighting, and this sort of collaboration with the art department can make a real difference between a smoothly-running shoot and a world of pain wherever you’re trying to hide film lights because you don’t have enough practical sources.

The second meeting, coming shortly after I saw the shooting schedule for the first time, was an in-depth discussion of it with the director, producer, line producer and 1st AD. Most of my concerns – other than some days which felt uncomfortably heavy, and even one or two that seemed wastefully light – were around times of day and equipment. For example, one daylight interior scene was scheduled for the end of day, when we might be losing the light. (The next day I went through it all again by myself and made sure that any night scenes scheduled for daytime could be reasonably done with blacked-out windows.)

We also talked a lot about how things could be rejigged to get as much value as possible out of the two days that we have the crane. It’s expensive, and no-one wants it sitting around while we shoot little dialogue scenes in tiny rooms. Nor do I want one or two scenes in the film to have lots of crane shots and the rest to have none; a sprinkling of them throughout the film would be preferable, though it would mean lots of costume and make-up changes.

Another draft of the script was issued , with pretty minor changes, though one extra room has been introduced, so that will need a proper recce next time I’m there. Reading through a new draft and updating my notes takes the best part of a day, and though it can sometimes feel like a chore, every reading helps me understand the story and characters better.

I did a little more shot-listing later in the week, but it will be much better and easier to do this at the rehearsals over the next fortnight, when I can see how the actors are approaching their characters and how they’re going to use the spaces. I can even take Artemis photos if it doesn’t interrupt their process too much. Roll on rehearsals!

Undisclosed Project: Organisation

Working with White Walls

White walls are the bane of a DP’s existence. They bounce light around everywhere, killing the mood, and they look cheap and boring in the background of your shot. Nonetheless, with so many contemporary buildings decorated this way, it’s a challenge we all have to face. Today I’m going to look back on two short films I’ve photographed, and explain the different approaches I took to get the white-walled locations looking nice.

Finding Hope is a moving drama about a couple grieving for the baby they have lost. It was shot largely at the home of the producer, Jean Maye, on a Sony FS7 with Sigma and Pentax stills glass.

Exit Eve is a non-linear narrative about the dehumanisation of an au pair by her wealthy employers. With a fairly respectable budget for a short, this production shot in a luxurious Battersea townhouse on an Arri Alexa Classic with Ultra Primes.


“Crown”-inspired colour contrast

Cheap 300W dimmers like these are great for practicals.

It was January 2017 when we made Finding Hope, and I’d recently been watching a lot of The Crown. I liked how that series punctuated its daylight interior frames with pools of orange light from practicals. We couldn’t afford much of a lighting package, and I thought that pairing existing pracs with dimmers and tungsten bulbs would be a cheap and easy way to break up the white walls and bring some warmth – perhaps a visual representation of the titular hope – into the heavy story.

I shot all the daylight interiors at 5600K to get that warmth out of the pracs. Meanwhile I shaped the natural light as far as possible with the existing curtains, and beefed it up with a 1.2K HMI where I could. I used no haze or lens diffusion on the film because I felt it needed the unforgiving edges.

For close-ups, I often cheated the pracs a little closer and tweaked the angle, but I chose not to supplement them with movie lamps. The FS7’s native ISO of 2500 helped a lot, especially in a nighttime scene where the grieving parents finally let each other in. Director Krysten Resnick had decided that there would be tea-lights on the kitchen counter, and I asked art director Justine Arbuthnot to increase the number as much as she dared. They became the key-light, and again I tweaked them around for the close-ups.

My favourite scene in Finding Hope is another nighttime one, in which Crystal Leaity sits at a piano while Kevin Leslie watches from the doorway. I continued the theme of warm practicals, bouncing a bare 100W globe off the wall as Crystal’s key, and shaping the existing hall light with some black wrap, but I alternated that with layers of contrasting blue light: the HMI’s “moonlight” coming in through the window, and the flicker of a TV in the deep background. This latter was a blue-gelled 800W tungsten lamp bounced off a wobbling reflector.

When I saw the finished film, I was very pleased that the colourist had leant into the warm/cool contrast throughout the piece, even teasing it out of the daylight exteriors.


Trapped in a stark white townhouse

I took a different approach to colour in Exit Eve. Director Charlie Parham already knew that he wanted strong red lighting in party scenes, and I felt that this would be most effective if I kept colour out of the lighting elsewhere. As the film approaches its climax, I did start to bring in the orange of outside streetlamps, and glimpses of the party’s red, but otherwise I kept the light stark and white.

Converted from a Victorian schoolhouse, the location had high ceilings, huge windows and multiple floors, so I knew that I would mostly have to live with whatever natural light did or didn’t shine in. We were shooting during the heatwave of 2018, with many long handheld takes following lead actor Thalissa Teixeria from room to room and floor to floor, so even the Alexa’s dynamic range struggled to cope with the variations in light level.

For a night scene in the top floor bedroom, I found that the existing practicals were perfectly placed to provide shape and backlight. I white-balanced to 3600K to keep most of the colour out of them, and rigged black solids behind the camera to prevent the white walls from filling in the shadows.

(Incidentally, the night portions of this sequence were shot as one continuous take, despite comprising two different scenes set months apart. The actors did a quick-change and the bed was redressed by the art department while it was out frame, but sadly this tour de force was chopped up in the final cut.)

I had most control over the lighting when it came to the denouement in the ground floor living area. Here I was inspired by the work of Bradford Young, ASC to backlight the closed blinds (with tungsten units gelled to represent streetlights) and allow the actors inside to go a bit dim and murky. For a key moment we put a red gel on one of the existing spotlights in the living room and let the cast step into it.

So there we have it, two different approaches to lighting in a while-walled location: creating colour contrast with dimmed practicals, or embracing the starkness and saving the colour for dramatic moments. How will you tackle your next magnolia-hued background?

For another example of how I’ve tackled white-walled locations, see my Forever Alone blog.

Working with White Walls

6 Tips for Making DIY Lighting Look Pro

Good lighting can boost the production values of a film tremendously, making the difference between an amateur and a professional-looking piece. For filmmakers early in their careers, however, the equipment typically used to achieve these results can be prohibitively expensive. Far from the Hollywood productions attended by trucks full of lights, a micro-budget film may be unable to rent even a single HMI. Do not despair though, as there are ways to light scenes well without breaking the bank. Here are my top six tips for lighting on the cheap.


1. Make the most of natural light

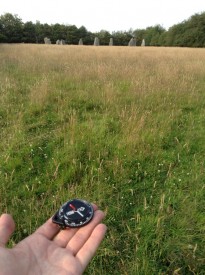
Checking my compass at the stone circle
Guesstimating the sun path on location

The hardest shots to light without the proper equipment are wide shots. Where a fully-budgeted production would rig Maxi Brutes on cherry-pickers, or pound HMIs through windows, a filmmaker of limited means simply won’t have access to the raw power of such fixtures. Instead, plan your day carefully to capture the wide shots at the time when natural light gives you the most assistance. For a day interior, this means shooting when the sun is on the correct side of the building.

See also: “Sun Paths”


2. Keep L.E.D.s to the background

£2 LED camping light

There are a plethora of LED fixtures on the market, designed for all kinds of applications, some of them very reasonably priced. It might be tempting to purchase some of these to provide your primary illumination, but I advise against it. Cheap LED units (and fluorescents) have a terrible Colour Rendering Index (CRI), making for unnatural and unappealing skintones. Such units are therefore best restricted to backgrounds, accent lighting and “specials”. For example, I purchased a little LED camping light from a charity shop for about £2, and I often use it to create the blue glow from computer screens or hang it from the ceiling to produce a hint of hair-light.

See also my article on LEDs from my “Know Your Lights” series.


3. Key with tungsten or halogen

Worklight
Halogen floodlight

By far the best solution for a high output, high CRI, low cost key is a halogen floodlight; 500W models are available for as little as £5. Their chief disadvantage is the lack of barn doors, making the light hard to control, though if you can stretch to a roll of black wrap you can fashion a kind of snoot. Alternatively, consider investing in a secondhand tungsten movie fixture. With many people switching to LEDs, there are plenty of old tungsten units out there. Try to get a reputable brand like Arri or Ianiro, as some of the unbranded units available on Ebay are poorly wired and can be unsafe.

See also: “DIY Interview Lighting for the ‘Ren’ EPK”


4. Control the light

Lace curtains used to break up light in a Camerimage workshop last year

Flooding a halogen light onto a scene is never going to look good, but then the same is often true of dedicated movie fixtures. Instead it’s more how you modify the light that creates the nuanced, professional look. Improvise flags from pieces of cardboard to stop the light spilling into unwanted places – but be VERY careful how close you put them to a tungsten or halogen source, as these get extremely hot. For example, when shooting indoors, flag light off the background wall (especially if it’s white or cream) to help your subject stand out.
See also “Lighting Micro-sets” for an example of this.


5. Soften the light

Almost all cinematographers today prefer the subtlety of soft light to the harshness of hard light. You can achieve this by bouncing your fixture off a wall or ceiling, or a sheet of polystyrene or card. Or you could hang a white bedsheet or a shower curtain in front of the light as diffusion, but again be sure to leave a safe distance between them. Professional collapsible reflectors are available very cheaply online, and can be used in multiple ways to diffuse or reflect light.

Hot tub cover = bounce board
Hot tub cover = bounce board. Towel = flag

See also: “How to Soften Harsh Sunlight with Tinfoil and a Bedsheet”; and to read more about the pictured example: “Always Know Where Your Towel Is”


6. Make use of practicals

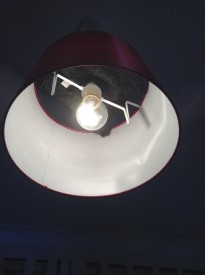
Black-wrapped ceiling light

Finally, don’t be afraid to use existing practical lighting in your scene. Turning on the main overhead light usually kills the mood, but sometimes it can be useful. You can generate more contrast and shape by covering up the top of the lampshade, thus preventing ceiling bounce, or conversely use the ceiling bounce to give some ambient top-light and cover the bottom of the lampshade to prevent a harsh hotspot underneath it. Table lamps and under-cupboard kitchen lights can add a lot of interest and production value to your backgrounds. If possible, swap out LED or fluorescent bulbs for conventional tungsten ones for a more attractive colour and to eliminate potential flickering on camera.

See also: “5 Tips for Working with Practicals”, and for an example of the above techniques, my blog from day two of the Forever Alone shoot.

6 Tips for Making DIY Lighting Look Pro

“The Knowledge”: Lighting a Multi-camera Game Show

Metering the key-light. Photo: Laura Radford

Last week I discussed the technical and creative decisions that went into the camerawork of The Knowledge, a fake game show for an art installation conceived by Ian Wolter and directed by Jonnie Howard. This week I’ll break down the choices and challenges involved in lighting the film.

The eighties quiz shows which I looked at during prep were all lit with the dullest, flattest light imaginable. It was only when I moved forward to the nineties shows which Jonnie and I grew up on, like Blockbusters and The Generation Game, that I started to see some creativity in the lighting design: strip-lights and glowing panels in the sets, spotlights and gobos on the backgrounds, and moodier lighting states for quick-fire rounds.

Jonnie and I both wanted The Knowledge‘s lighting to be closer to this nineties look. He was keen to give each team a glowing taxi sign on their desks, which would be the only source of illumination on the contestants at certain moments. Designer Amanda Stekly and I came up with plans for additional practicals – ultimately LED string-lights – that would follow the map-like lines in the set’s back walls.

Once the set design had been finalised, I did my own dodgy pencil sketch and Photoshopped it to create two different lighting previsualisations for Jonnie.

He felt that these were a little too sophisticated, so after some discussion I produced a revised previz…

…and a secondary version showing a lighting state with one team in shadow.

These were approved, so now it was a case of turning those images into reality.

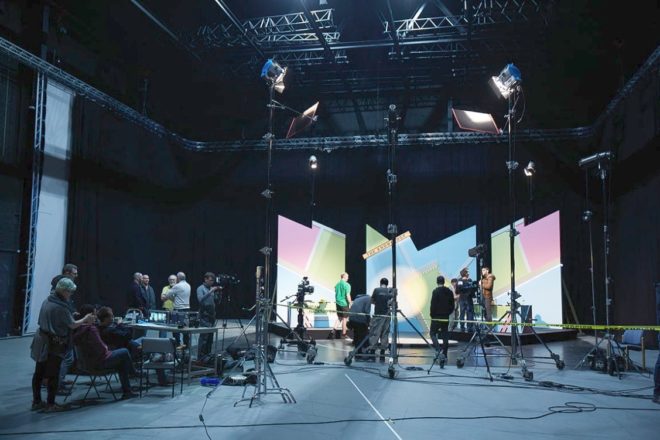
We were shooting on a soundstage, but for budget reasons we opted not to use the lighting grid. I must admit that this worried me for a little while. The key-light needed to come from the front, contrary to normal principles of good cinematography, but very much in keeping with how TV game shows are lit. I was concerned that the light stands and the cameras would get in each others’ way, but my gaffer Ben Millar assured me it could be done, and of course he was right.

Ben ordered several five-section Strato Safe stands (or Fuck-offs as they’re charmingly known). These were so high that, even when placed far enough back to leave room for the cameras, we could get the 45° key angle which we needed in order to avoid seeing the contestants’ shadows on the back walls. (A steep key like this is sometimes known as a butterfly key, for the shape of the shadow which the subject’s nose casts on their upper lip.)  Using the barn doors, and double nets on friction arms in front of the lamp-heads, Ben feathered the key-light to hit as little as possible of the back walls and the fronts of the desks. As well as giving the light some shape, this prevented the practical LEDs from getting washed out.

Note the nets mounted below the key-lights (the tallest ones). Photo: Laura Radford

Once those key-lights were established (a 5K fresnel for each team), we set a 2K backlight for each team as well. These were immediately behind the set, their stands wrapped in duvetyne, and the necks well and truly broken to give a very toppy backlight. A third 2K was placed between the staggered central panels of the set, spilling a streak of light out through the gap from which host Robert Jezek would emerge.

A trio of Source Fours with 15-30mm zoom lenses were used for targeted illumination of certain areas. One was aimed at The Knowledge sign, its cutters adjusted to form a rectangle of light around it. Another was focused on the oval map on the floor, which would come into play during the latter part of the show. The last Source Four was used as a follow-spot on Robert. We had to dim it considerably to keep the exposure in range, which conveniently made him look like he had a fake tan! Ben hooked everything, in fact, up to a dimmer board, so that various lighting cues could be accomplished in camera.

The bulk of the film was recorded in a single day, following a day’s set assembly and a day of pre-rigging. A skeleton crew returned the next day to shoot pick-ups and promos, a couple of which you can see on Vimeo here.

I’ll leave you with some frame grabs from the finished film. Find out more about Ian Wolter’s work at ianwolter.com.

SaveSave

SaveSave

SaveSave

“The Knowledge”: Lighting a Multi-camera Game Show

Creating “Stasis”

Stasis is a personal photography project about time and light. You can view all the images here, and in this post I’ll take you through the technical and creative process of making them.

I got into cinematography directly through a love of movies and filmmaking, rather than from a fine art background. To plug this gap, over the past few of years I’ve been trying to give myself an education in art by going to galleries, and reading art and photography books. I’ve previously written about how JMW Turner’s work captured my imagination, but another artist whose work stood out to me was Gerrit (a.k.a. Gerard) Dou. Whereas most of the Dutch 17th century masters painted daylight scenes, Dou often portrayed people lit by only a single candle.

“A Girl Watering Plants” by Gerrit Dou

At around the same time as I discovered Dou, I researched and wrote a blog post about Barry Lyndon‘s groundbreaking candlelit scenes. This got me fascinated by the idea that you can correctly expose an image without once looking at a light meter or digital monitor, because tables exist giving the appropriate stop, shutter and ISO for any given light level… as measured in foot-candles. (One foot-candle is the amount of light received from a standard candle that is one foot away.)

So when I bought a 35mm SLR (a Pentax P30T) last autumn, my first thought was to recreate some of Dou’s scenes. It would be primarily an exercise in exposure discipline, training me to judge light levels and fall-off without recourse to false colours, histograms or any of the other tools available to a modern DP.

I conducted tests with Kate Madison, who had also agreed to furnish period props and costumes from the large collection which she had built up while making Born of Hope and Ren: The Girl with the Mark. Both the tests and the final images were captured on Fujifilm Superia X-tra 400. Ideally I would have tested multiple stocks, but I must confess that the costs of buying and processing several rolls were off-putting. I’d previously shot some basic latitude tests with Superia, so I had some confidence about what it could and couldn’t do. (It can be over-exposed at least five stops and still look good, but more than a stop under and it falls apart.) I therefore confined myself to experimenting with candle-to-subject distances, exposure times and filtration.

The tests showed that the concept was going to work, and also confirmed that I would need to use an 80B filter to cool the “white balance” of the film from its native daylight to tungsten (3400K). (As far as I can tell, tungsten-balanced stills film is no longer on the market.) Candlelight has a colour temperature of about 1800K, so it still reads as orange through an 80B, but without the filter it’s an ugly red.

Meanwhile, the concept had developed beyond simply recreating Gerrit Dou’s scenes. I decided to add a second character, contrasting the historical man lit only by his candle with a modern girl lit only by her phone. Flames have a hypnotic power, tapping into our ancient attraction to light, and today’s smartphones have a similarly powerful draw.

The candlelight was 1600K warmer than the filtered film, so I used an app called Colour Temp to set my iPhone to 5000K, making it 1600K cooler than the film; the phone would therefore look as blue as the candle looked orange. (Unfortunately my phone died quickly and I had trouble recharging it, so some of the last shots were done with Izzi’s non-white-balanced phone.) To match the respective colours of light, we dressed Ivan in earthy browns and Izzi in blues and greys.

Artemis recce image

We shot in St. John’s Church in Duxford, Cambridgeshire, which hasn’t been used as a place of worship since the mid-1800s. Unique markings, paintings and graffiti from the middle ages up to the present give it simultaneously a history and a timelessness, making it a perfect match to the clash of eras represented by my two characters. It resonated with the feelings I’d had when I started learning about art and realised the continuity of techniques and aims from me in my cinematography back through time via all the great artists of the past to the earliest cave paintings.

I knew from the tests that long exposures would be needed. Extrapolating from the exposure table, one foot-candle would require a 1/8th of a second shutter with my f1.4 lens wide open and the Fujifilm’s ISO of 400. The 80B has a filter factor of three, meaning you need three times more light, or, to put it another way, it cuts 1 and 2/3rds of a stop. Accounting for this, and the fact that the candle would often be more than a foot away, or that I’d want to see further into the shadows, the exposures were all at least a second long.

As time had become very much the theme of the project, I decided to make the most of these long exposures by playing with motion blur. Not only does this allow a static image – paradoxically – to show a passage of time, but it recalls 19th century photography, when faces would often blur during the long exposures required by early emulsions. Thus the history of photography itself now played a part in this time-fluid project.

I decided to shoot everything in portrait, to make it as different as possible from my cinematography work. Heavily inspired by all the classical art I’d been discovering, I used eye-level framing, often flat-on and framed architecturally with generous headroom, and a normal lens (an Asahi SMC Pentax-M 50mm/f1.4) to provide a natural field of view.

I ended up using my light meter quite a lot, though not necessarily exposing as it indicated. It was all educated guesswork, based on what the meter said and the tests I’d conducted.

I was tempted more than once to tell a definite story with the images, and had to remind myself that I was not making a movie. In the end I opted for a very vague story which can be interpreted many ways. Which of the two characters is the ghost? Or is it both of them? Are we all just ghosts, as transient as motion blur? Do we unwittingly leave an intangible imprint on the universe, like the trails of light my characters produce, or must we consciously carve our mark upon the world, as Ivan does on the wall?

Models: Izzi Godley & Ivan Moy. Stylist: Kate Madison. Assistant: Ash Maharaj. Location courtesy of the Churches Conservation Trust. Film processing and scanning by Aperture, London.

Creating “Stasis”