How to Work with Natural Light

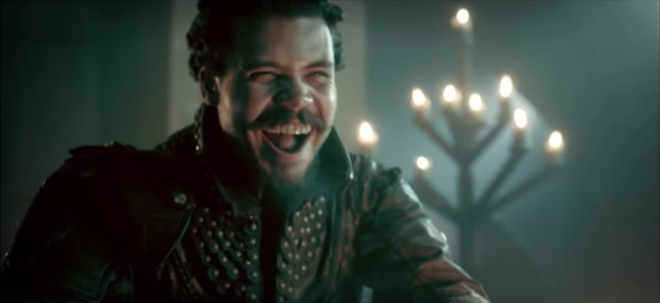
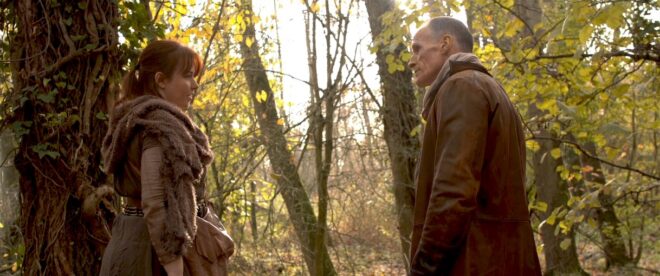
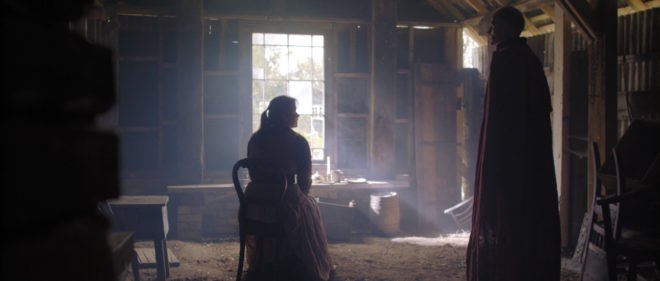
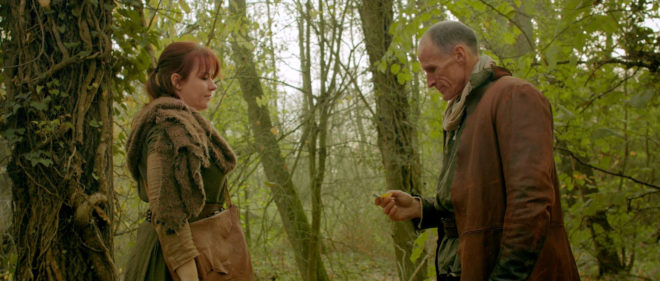
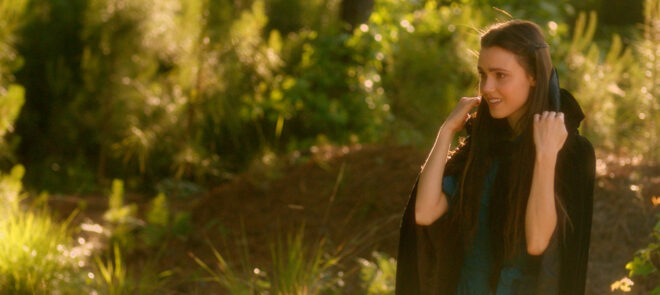
Poppy Drayton in a scene from “The Little Mermaid” where we were blessed with beautiful evening light

Natural light can be beautiful, but it is not easy for a cinematographer to work with. Continuity, dynamic range, hardness and intensity are all potential challenges.

The most obvious difficulty with natural light is that it is forever changing. It can do stunning and unexpected things, but if you don’t move quickly it’s gone. Anyone who’s ever filmed a sunset scene and had the director push for another take after the perfect light has gone knows the disappointment it can bring.

Preparation is key. Previewing the sun path using an app like Helios Pro or Sun Seeker is essential, as is working out the blocking to make the best use of the light. For The Little Mermaid I shot a sunset scene with three actors up to their waists in the Atlantic Ocean. I had to make sure, through rehearsals on dry land, that they would end up with their backs to the sun so that I would be shooting towards it.
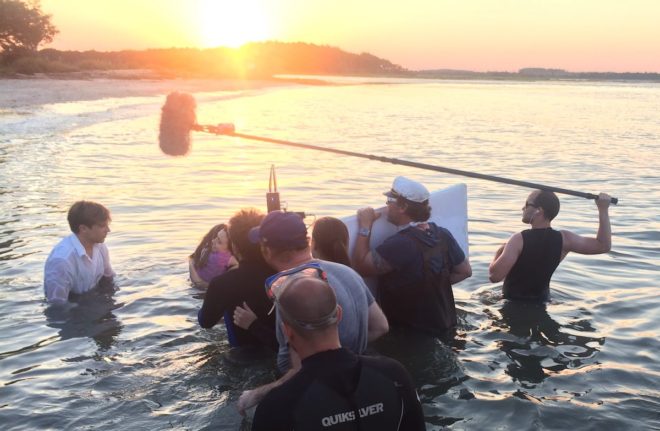
Shooting the ocean scene for “The Little Mermaid”

I also had a grip next to me with a poly-board to bounce some of the sunlight back into the actors’ faces. This brings us to dynamic range, the fact that there may be too much or too little difference between the brightest and darkest areas. Too much contrast is common with exteriors under direct sun, or interiors with small windows or dark walls. Too little is often the case with overcast exteriors, or interiors with large windows or white walls.

As in my Mermaid example, shadows can be filled in using a reflector, be that the 5-in-1 collapsible kind that are widely and cheaply available, a white poly-board, a frame of Ultrabounce or even a white bedsheet. These will be much less effective indoors, where you may well need to add an artificial fill light, perhaps bounced off the ceiling.

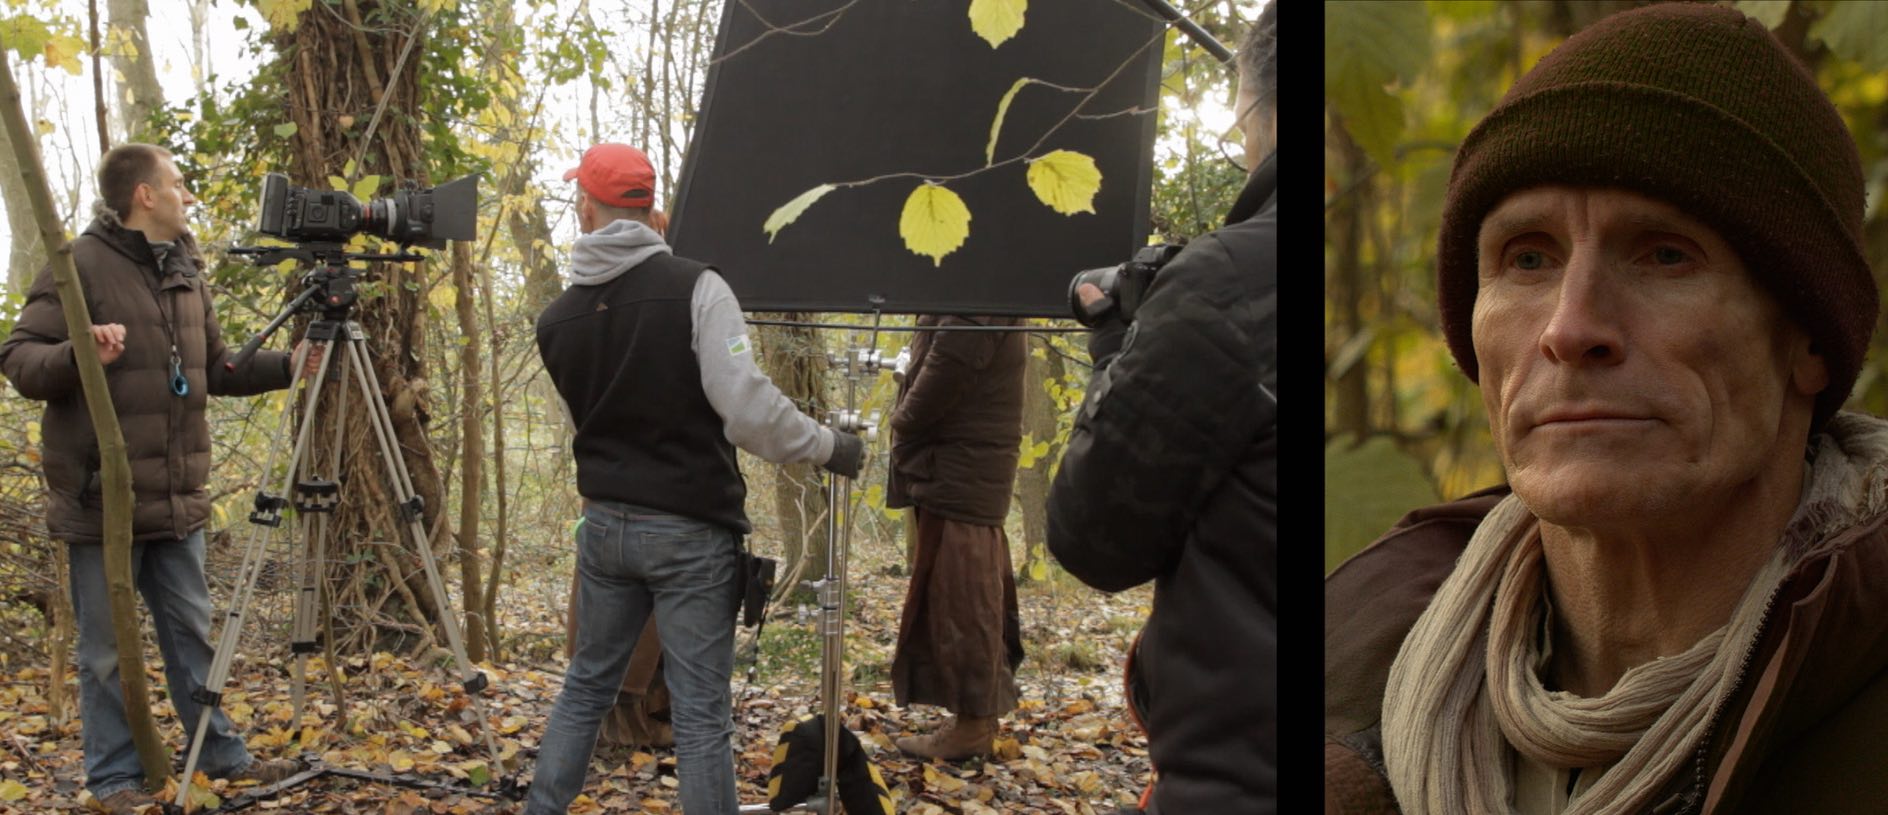
If the light is too flat, contrast can be reduced using negative fill. Anything black can be used for this – a flag, a bedsheet, or the black side of a poly-board or 5-in-1 reflector. Typically this is placed to cut the light on the side of the talent’s face nearest camera to get the most shape in the image.
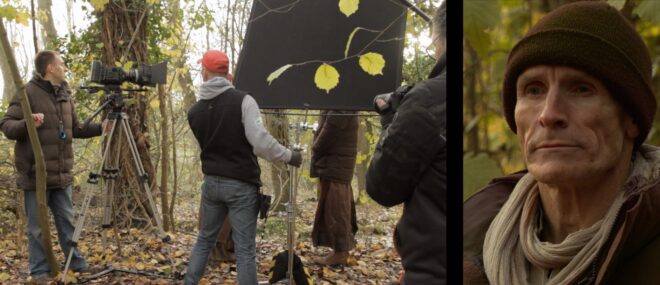
A demo of negative fill from my online course, “Cinematic Lighting”, available on Udemy

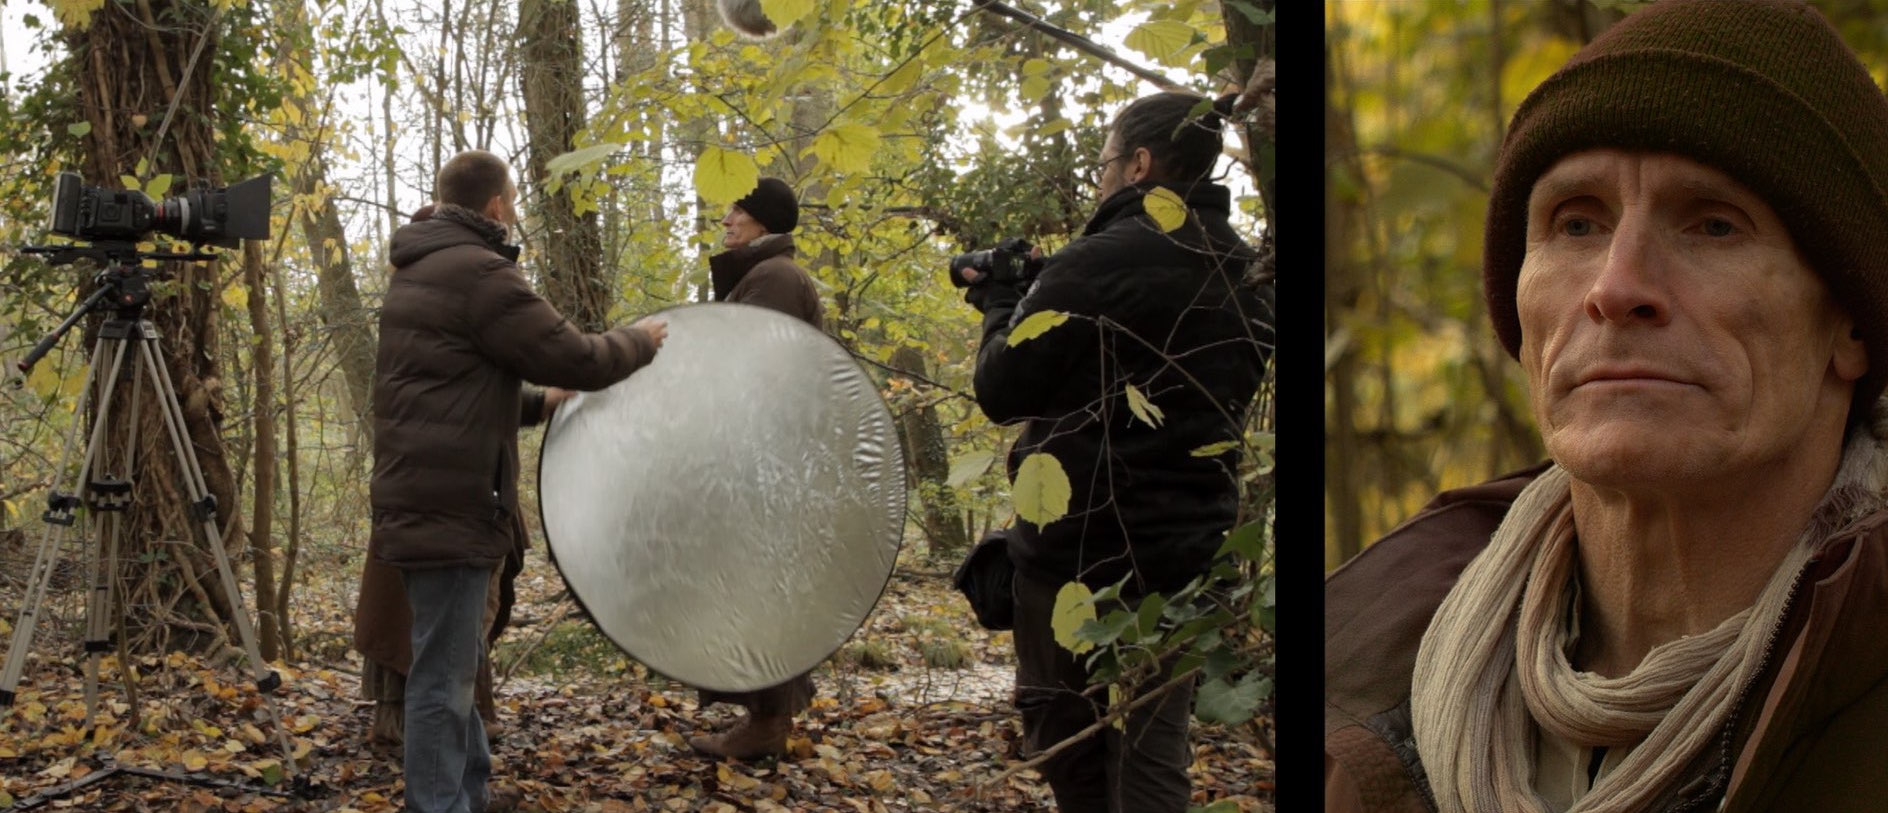
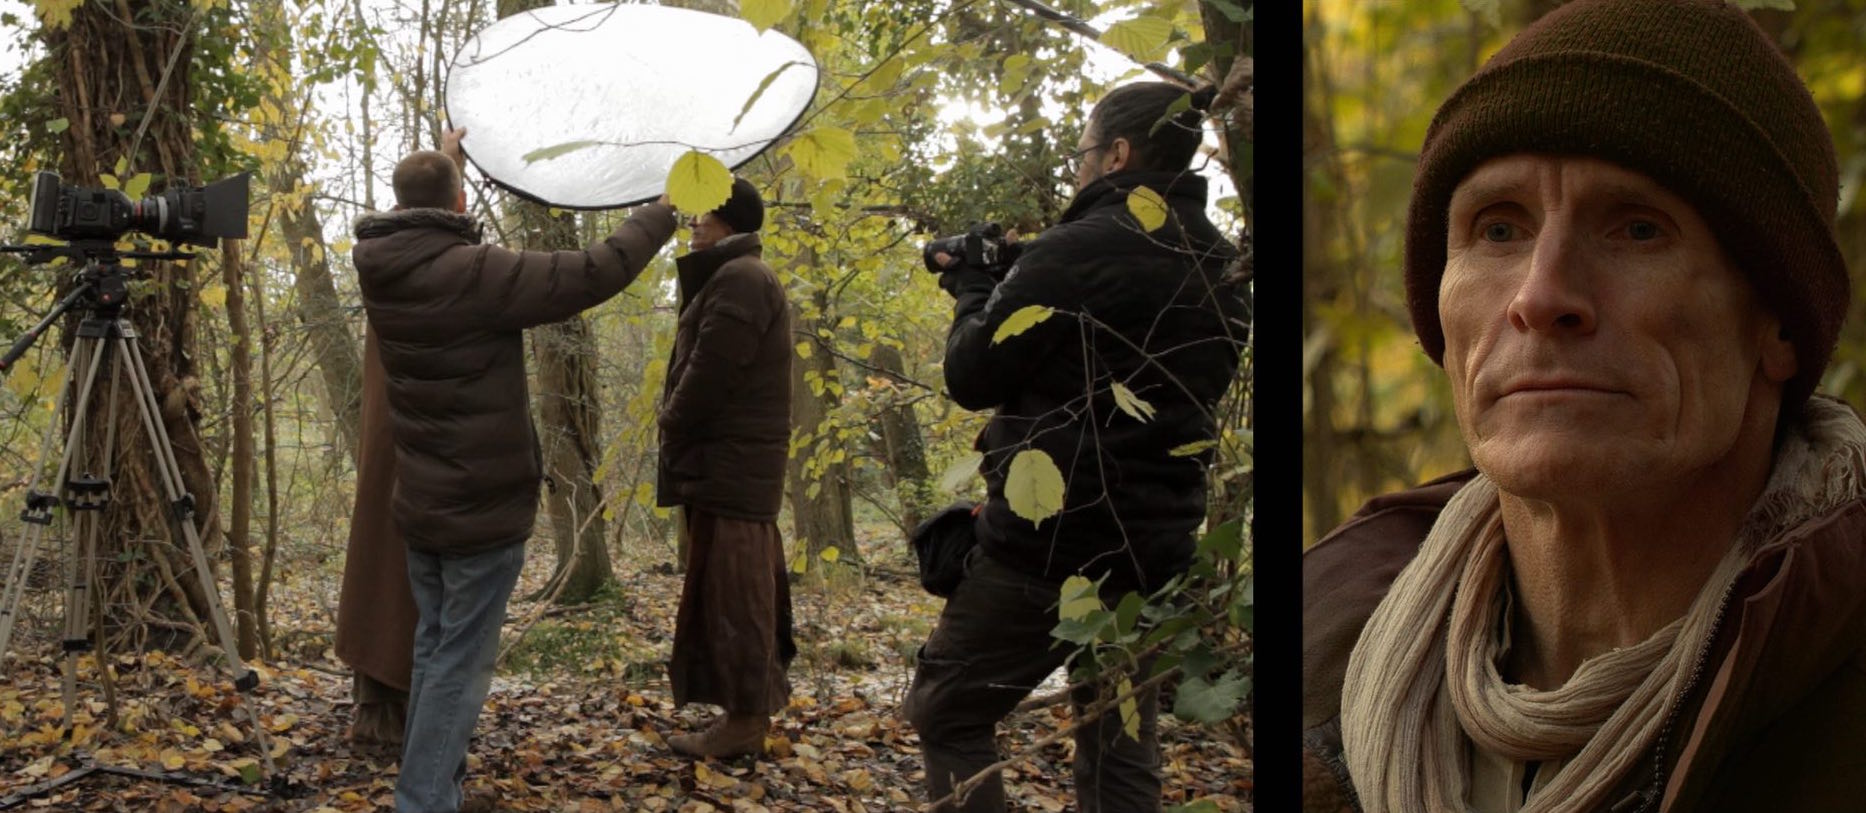
Direct sun is often too hard to be flattering, particularly in closer shots. The solution is to introduce some kind of diffusion between the actor and the sun. This could be anything from a shower curtain to a 12×12’ frame of Full Silk. 5-in-1 reflectors can be stripped down to a translucent white disc that works well for tight shots.

Indoors the trouble with natural light is that there might not be enough of it. If you like what it’s doing but just need more, try setting up a soft artificial source outside the window. A bigger production will often use 12K or 18K HMIs firing into Ultrabounce, but that requires a serious rental budget and a big generator. A smaller HMI pushing through a diffusion frame won’t be quite as soft but will be much cheaper. 

If that’s not possible either, the next best thing is a soft source like an LED panel rigged indoors above the window. By having the source indoors you will lose the natural shaping of the light that the window frame gives you, but some of this can be regained by fitting a honeycomb or egg-crate.
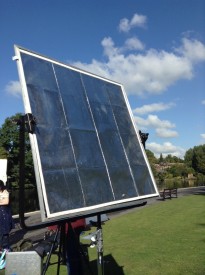
Hard reflector

Another option is to place a hard reflector – essentially a mirror on a C-stand – outside the window and angle it to reflect the brightest part of the sky, or even direct sun, into the room. The great news for anyone working on a tight budget is that any old mirror will do, so long as you can find a way to position and angle it conveniently.

The opposite problem is one all DPs have to tackle at some point – namely direct sun coming into a room and moving across it, spoiling continuity. Choosing a north-facing location will save a lot of trouble here, otherwise flags will need to be rigged and regularly adjusted as the sun moves, unless you can move quickly enough to shoot everything before the light has noticeably changed.

Natural light can be one of the biggest challenges for a cinematographer, but also one of the greatest gifts and highest goals to emulate.

How to Work with Natural Light

How to Light Efficiently and Minimise Changes Between Angles

Exciting title, right? It’s not the glamorous side of a DP’s job, but enabling a scene to be shot quickly is a skill which definitely has its place, as long as you balance it with creative and technical quality, of course.

When a scene has been blocked and the cast have gone off to have their make-up and costuming finished, and even the director has disappeared to make plans for future scenes, the DP is left on the set to light it. Though there is always time pressure on a film, it is at a minimum during this initial lighting period (usually for the wide shot). But once the wide is in the can, the DP is expected to move quickly when tweaking lights for the coverage, as all the cast and crew are standing around waiting for you.

So a wise DP always thinks ahead to the coverage, setting up as much as possible for it concurrently with the wide, or better still sets up the wide’s lighting so that it works for the coverage too.

If we boil things right down, light looks best when it comes in from the side or the back, not the front. A common technique is to block and/or light the scene so that the main light source, be that the real sun, a window or an artificial source, is behind the cast in the wide. Let’s imagine this from the top down with the camera at 6 o’clock, the key light at 12 o’clock, and the actors in the centre.

Because of the 180º Rule, otherwise known as the Line of Action, the camera positions for the coverage are likely to all be on the bottom half of the clock face between 3 o’clock and 9 o’clock. At either of those two positions the 12 o’clock key light is now coming in from the side, so your image still has mood.

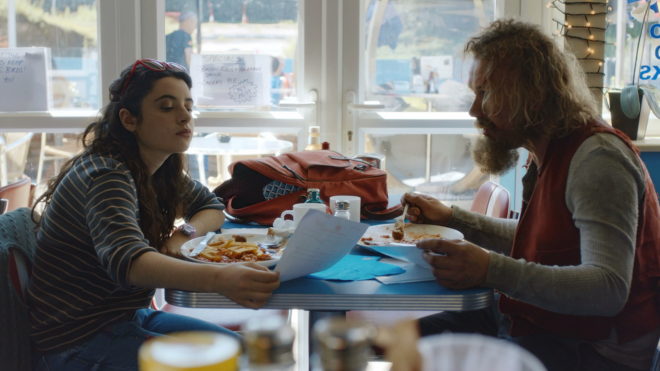
This date scene in “Harvey Greenfield is Running Late” was cross-backlit; you can just see the second light in the top right of this photo.

Another common set-up is cross-backlight. Here you would have two lights, one at about 10:30 and the other at 1:30. These give a three-quarter backlight in the wide and a three-quarter key light in the singles.

Something basic to avoid is lights actually being in shot when you move to a new camera position. Early in my career I used to put all my lamps on stands because I didn’t know any better (or have any rigging kit to do anything else), but that means you’re forever moving them. Much better to rig things to the ceiling, or to position them outside the room shining in through doors and windows. 

Practicals lights are really helpful too, because you can get them in shot with impunity. You can save hours of pain on set by collaborating with the art department in pre-production to make sure there are enough practicals to justify light from all the angles you might need it. Put them all on dimmers and use a fast lens or high ISO and you may well find that when you change camera position you only need to dim down the frontal ones and bring up the back ones to get the shot looking nice.

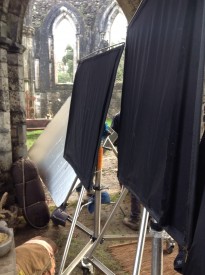
A behind-the-scenes view of some of the lights we rigged in the “Heretiks” chapel.

I once had to light a scene in a medieval chapel for a horror film called Heretiks. The master was a Steadicam shot moving 360º around the set. The gaffer and I invested the time beforehand to rig numerous 300W and 650W tungsten fresnels around the tops of all the walls, connected to dimmers. (The light was motivated by numerous candles.) With a bit of practice the gaffer and sparks were able to dim each lamp as the camera passed in front of it – to avoid camera shadows and the flat look of front light – and bring them back up afterwards, so there was always a wrapping backlight. A convenient side effect was that when we moved onto conventional coverage we could light shots in seconds by turning a few dimmers down or off and others up.

DP Benedict Spence used a similar principle on the recent BBC series This is Going to Hurt; he had 250 Astera Titan tubes built into the hospital set. While this was time-consuming and expensive upfront, it meant that shots could be lit very quickly by making a few tweaks at a lighting desk. And since the tubes looked like fluorescent strip-lights, there was never any problem with getting them in shot.

Once you start shooting a scene it’s important to keep up the pace so that the cast can stay in the zone. Spending extra time in prep or when lighting the wides will pay dividends in faster coverage, giving the director more time to get the best performances and to tell the story, which is ultimately what it’s all about.

How to Light Efficiently and Minimise Changes Between Angles

5 Ways to Use Astera Tubes

Astera Titan Tubes seem to be everywhere at the moment, every gaffer and DP’s favourite tool. Resembling fluorescent tubes, Asteras are wireless, flicker-free LED batons comprised of 16 pixels which can be individually coloured, flashed and programmed from an app to produce a range of effects.

Here are five ways in which I used Titan Tubes on my most recent feature, Hamlet. I’m not being sponsored by Astera to write this. I just know that loads of people out there are using them and I thought it would be interesting to share my own experiences.


1. Substitute fluorescents

We had a lot of scenes with pre-existing practical fluorescents in them. Sometimes we gelled these with ND or a colour to get the look we wanted, but other times it was easier to remove the fluorescent tube and cable-tie an Astera into the housing. As long as the camera didn’t get too close you were never going to see the ties, and the light could now be altered with the tap of an app.

On other occasions, when we moved in for close-ups, the real fluorescents weren’t in an ideal position, so we would supplement or replace them with an Astera on a stand and match the colour.


2. Hidden behind corners

Orientated vertically, Asteras are easy to hide behind pillars and doorways. One of the rooms we shot in had quite a dark doorway into a narrow corridor. There was just enough space to put in a vertical pole-cat with a tube on it which would light up characters standing in the doorway without it being seen by the camera.


3. Eye light

Ben Millar, Hamlet‘s gaffer, frequently lay an Astera on the floor to simulate a bit of floor bounce and put a sparkle in the talent’s eye. On other occasions when our key light was coming in at a very sidey angle, we would put an Astera in a more frontal position, to ping the eyes again and to wrap the side light very slightly.


4. rigged to the ceiling

We had a scene in a bathroom that was all white tiles. It looked very flat with the extant overhead light on. Our solution was to put up a couple of pole-cats, at the tops of the two walls that the camera would be facing most, and hang Asteras horizontally from them. Being tubes they have a low profile so it wasn’t hard to keep them out of the top of frame. We put honeycombs on them and the result was that we always had soft, wrappy backlight with minimal illumination of the bright white tiles.


5. Special effects

One of the most powerful things about Titan Tubes is that you can programme them with your own special effects. When we needed a Northern Lights effect, best boy Connor Adams researched the phenomenon and programmed a pattern of shifting greens into two tubes rigged above the set.

On War of the Worlds in 2019 we used the Asteras’ emergency lights preset to pick up some close-ups which were meant to have a police car just out of shot.

There are all kinds of other effects you could use the tubes for. There is a good example by DP Rowan Biddiscombe in this article I wrote for British Cinematographer.

5 Ways to Use Astera Tubes

The Colour of Moonlight

What colour is moonlight? In cinema, the answer is often blue, but what is the reality? Where does the idea of blue moonlight come from? And how has the colour of cinematic moonlight evolved over the decades?


The science bit

According to universetoday.com the lunar surface “is mostly oxygen, silicon, magnesium, iron, calcium and aluminium”. These elements give the moon its colour: grey, as seen best in photographs from the Apollo missions and images taken from space.

When viewed from Earth, Rayleigh scattering by the atmosphere removes the bluer wavelengths of light. This is most noticeable when the moon is low in the sky, when the large amount of atmosphere that the light has to travel through turns the lunar disc quite red, just as with the sun, while at its zenith the moon merely looks yellow.

Yellow is literally the opposite (or complement) of blue, so where on (or off) Earth did this idea of blue cinematic moonlight come from?

One explanation is that, in low light, our vision comes from our rods, the most numerous type of receptor in the human retina (see my article “How Colour Works” for more on this). These cells are more sensitive to blue than any other colour. This doesn’t actually mean that things look blue in moonlight exactly, just that objects which reflect blue light are more visible than those that don’t.

In reality everything looks monochromatic under moonlight because there is only one type of rod, unlike the three types of cones (red, green and blue) which permit colour vision in brighter situations. I would personally describe moonlight as a fragile, silvery grey.

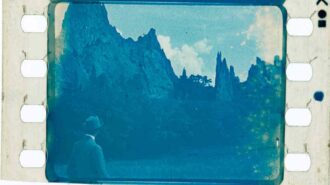
Blue moonlight on screen dates back to the early days of cinema, before colour cinematography was possible, but when enterprising producers were colour-tinting black-and-white films to get more bums on seats. The Complete Guide to Colour by Tom Fraser has this to say:

As an interesting example of the objectivity of colour, Western films were tinted blue to indicate nighttime, since our eyes detect mostly blue wavelengths in low light, but orange served the same function in films about the Far East, presumably in reference to the warm evening light there.

It’s entirely possible that that choice to tint night scenes blue has as much to do with our perception of blue as a cold colour as it does with the functioning of our rods. This perception in turn may come from the way our skin turns bluer when cold, due to reduced blood flow, and redder when hot. (We saw in my recent article on white balance that, when dealing with incandescence at least, bluer actually means hotter.)

Whatever the reason, by the time it became possible to shoot in colour, blue had lodged in the minds of filmmakers and moviegoers as a shorthand for night.


Examples

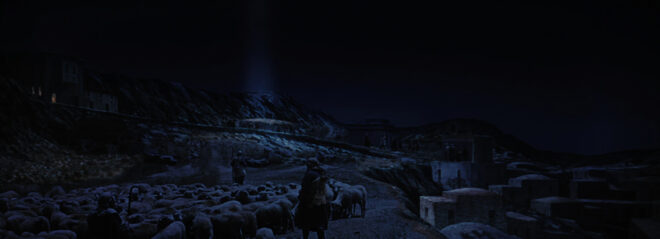
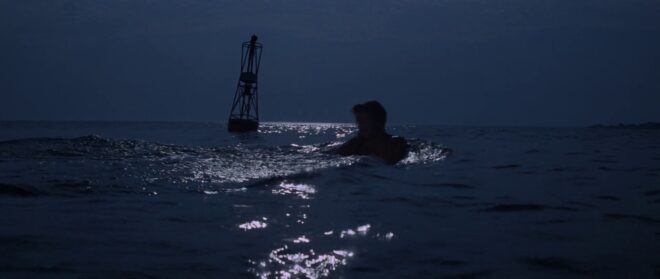
Early colour films often staged their night scenes during the day; DPs underexposed and fitted blue filters in their matte boxes to create the illusion. It is hard to say whether the blue filters were an honest effort to make the sunlight look like moonlight or simply a way of winking to the audience: “Remember those black-and-white films where blue tinting meant you were watching a night scene? Well, this is the same thing.”

This scene from “Ben Hur” (1959, DP: Robert Surtees, ASC) appears to be a matte painting combined with a heavily blue-tinted day-for-night shot.
A classic and convincing day-for-night scene from “Jaws” (1975, DP: Bill Butler, ASC)

Day-for-night fell out of fashion probably for a number of reasons: 1. audiences grew more savvy and demanded more realism; 2. lighting technology for large night exteriors improved; 3. day-for-night scenes looked extremely unconvincing when brightened up for TV broadcast. Nonetheless, it remains the only practical way to show an expansive seascape or landscape, such as the desert in Mad Max: Fury Road.

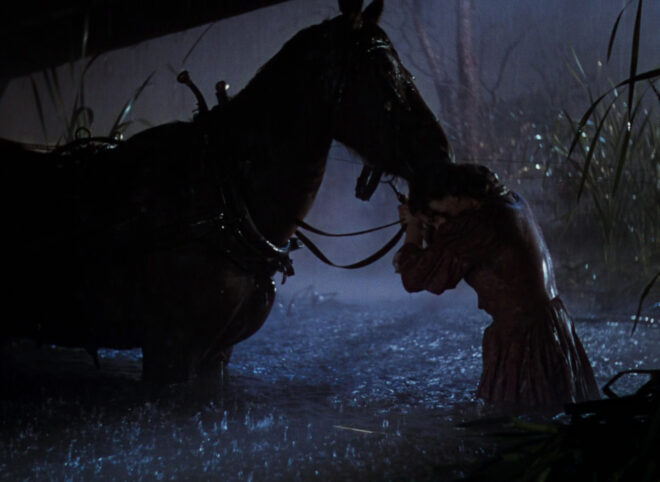
Blue moonlight on stage for “Gone with the Wind” (1939, DP: Ernest Haller)
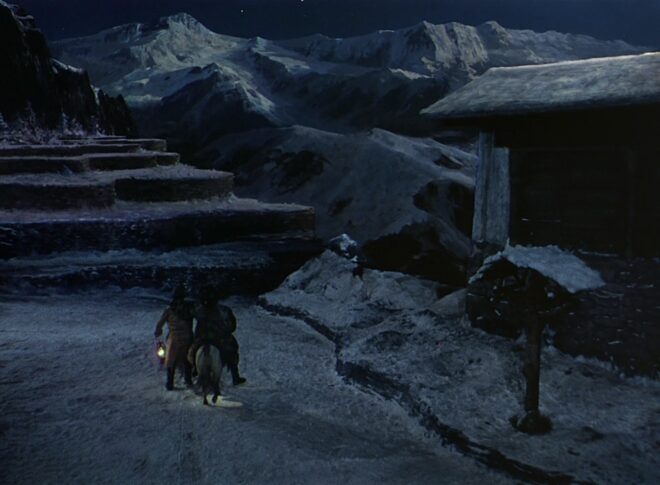
Cold stage lighting matches the matte-painted mountains in “Black Narcissus” (1947, DP: Jack Cardiff, OBE)

One of the big technological changes for night shooting was the availability of HMI lighting, developed by Osram in the late 1960s. With these efficient, daylight-balanced fixtures large areas could be lit with less power, and it was easy to render the light blue without gels by photographing on tungsten film stock.

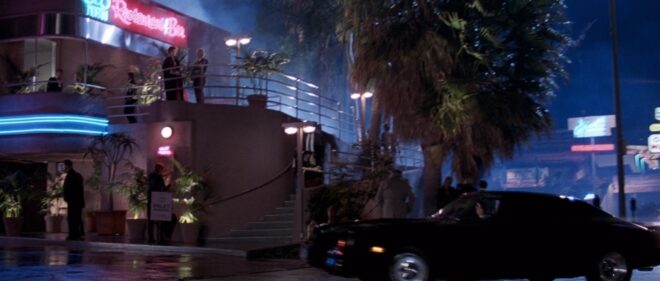
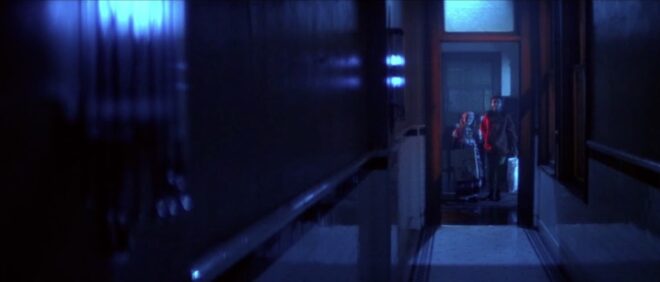
Cinematic moonlight reached a peak of blueness in the late 1980s and early ’90s, in keeping with the general fashion for saturated neon colours at that time. Filmmakers like Tony Scott, James Cameron and Jan de Bont went heavy on the candy-blue night scenes.

“Beverly Hills Cop II” (1987, DP: Jeffrey Kimball, ASC)
“Flatliners” (1990, DP: Jan de Bont, ASC)
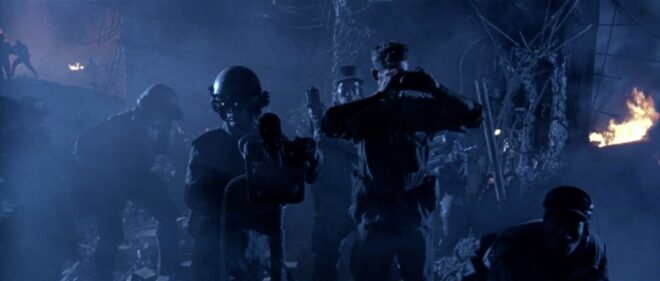
“Terminator 2: Judgment Day” (1991, DP: Adam Greenberg, ASC) uses a lot of strong, blue light, partly to symbolise the cold inhumanity of the robots, and partly because it’s a hallmark of director James Cameron.

By the start of the 21st century bright blue moonlight was starting to feel a bit cheesy, and DPs were experimenting with other looks.

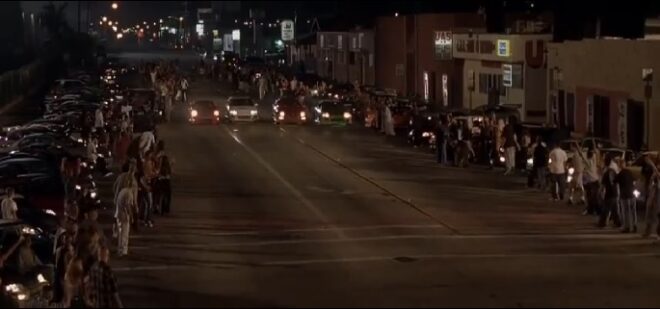
“The Fast and the Furious” (2001, DP: Ericson Core) has generally warm-coloured night scenes to reflect LA’s mild weather after dark, but often there is a cooler area of moonlight in the deep background.
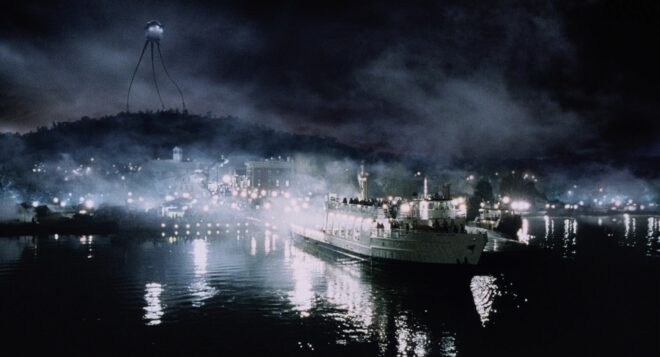
“War of the Worlds” (2005, DP: Janusz Kaminski, ASC)

Speaking of the above ferry scene in War of the Worlds, Janusz Kaminski, ASC said:

I didn’t use blue for that night lighting. I wanted the night to feel more neutral. The ferryboat was practically illuminated with warm light and I didn’t want to create a big contrast between that light and a blue night look.

The invention of the digital intermediate (DI) process, and later the all-digital cinematography workflow, greatly expanded the possibilities for moonlight. It can now be desaturated to produce something much closer to the silvery grey of reality. Conversely, it can be pushed towards cyan or even green in order to fit an orange-and-teal scheme of colour contrast.

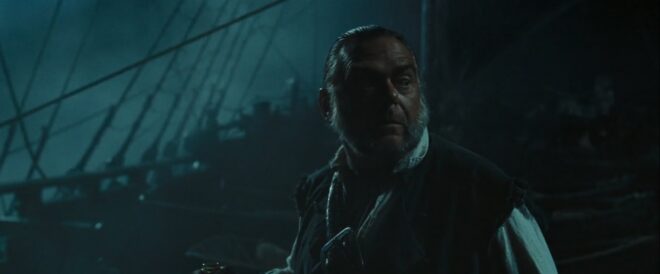
“Pirates of the Carribean: Dead Man’s Chest” (2006, DP: Darius Wolski, ASC)

Darius Wolksi, ASC made this remark to American Cinematographer in 2007 about HMI moonlight on the Pirates of the Caribbean movies:

The colour temperature difference between the HMIs and the firelight is huge. If this were printed without a DI, the night would be candy blue and the faces would be red. [With a digital intermediate] I can take the blue out and turn it into more of a grey-green, and I can take the red out of the firelight and make it more yellow.

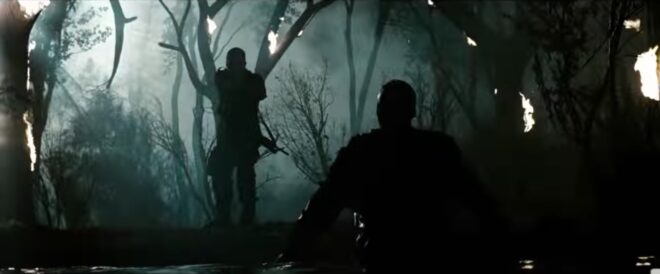
Compare Shane Hurlbut, ASC’s moonlight here in “Terminator Salvation” (2009) to the “Terminator 2” shot earlier in the article.
The BBC series “The Musketeers” (2014-2016, pilot DP: Stephan Pehrsson) employed very green moonlight, presumably to get the maximum colour contrast with orange candles and other fire sources.

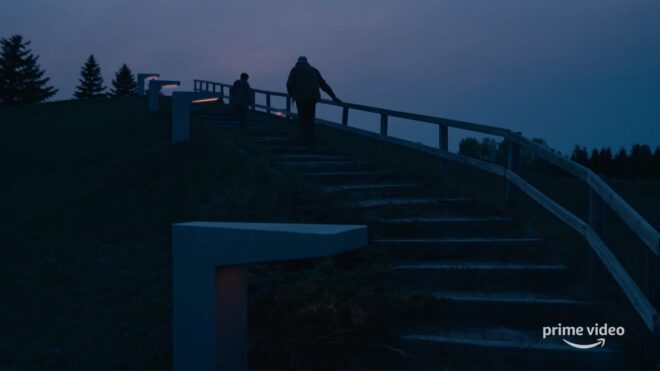
My favourite recent approach to moonlight was in the Amazon sci-fi series Tales from the Loop. Jeff Cronenweth, ASC decided to shoot all the show’s night scenes at blue hour, a decision motivated by the long dusks (up to 75 minutes) in Winnipeg, where the production was based, and the legal limits on how late the child actors could work.

The results are beautiful. Blue moonlight may be a cinematic myth, but Tales from the Loop is one of the few places where you can see real, naturally blue light in a night scene.

“Tales from the Loop” (2020, DP: Jeff Cronenweth, ASC)

If you would like to learn how to light and shoot night scenes, why not take my online course, Cinematic Lighting? 2,300 students have enrolled to date, awarding it an average of 4.5 stars out of 5. Visit Udemy to sign up now.

The Colour of Moonlight

What is Negative Fill and How Do You Use It?

The 4×4 flags and matt silver bounce board used to shape the “Heretiks” shot later in the article.

If you’ve ever learnt anything about lighting, you’ll have heard of the Three Point System: key, backlight and fill. That last one is a soft light which raises the shadows and reduces contrast in the image.

As you might expect, negative fill is the exact opposite. It brings the shadows down, increasing contrast. It’s a big part of cinematography today because the dynamic range of digital cameras is so wide and their light sensitivity is so high that taking away light has become just as important as adding it.

Negative fill – neg fill or just neg for short – can be accomplished with anything black, most commonly a polystyrene board (American name: bead-board), blackout material (usually bolton in the UK or duvetyne in the US) or a flag. 5-in-1 reflectors have a black side that can be used for neg fill too. The term solids or black solids can be applied to any of these tools, indicating that they are completely opaque, as opposed to nets.

When DPs talk about neg fill you often hear the word “shape” come up in their reasoning. Neg fill is typically applied to the camera side (broad side) of the talent, allowing their other side (short side) to remain bright. This has the effect of making the face – or any other object – look more three-dimensional. Hence “shape”. (This is all part of the theory of short key lighting, which I’ve covered in detail before.)

Below is an example from my online course, Cinematic Lighting. In these before and after shots, I use the black side of a 5-in-1 reflector (though you see silver facing camera) to neg-fill Ivan’s short side, adding mood and contrast.

We made it more permanent by replacing the reflector with a 4×4′ floppy flag on a C-stand.

Here’s an example from Heretiks where I chose to put a glint of light back into the darkness created by the neg fill, by using a matt silver reflector to create a rim-light. (There are many more diagrams like this on my Instagram feed.)

Neg fill is most commonly used outdoors, but it can be desirable indoors too, for example when white walls are bouncing light around everywhere. For the shot below from Exit Eve, I had the white wall behind camera covered with bolton so that the light would all be coming from behind the talent. (See my article on lighting from the back.)

In the café scene from Above the Clouds we shot towards the windows, but there was still too much ambience (mainly from skylights in the roof) on the camera sides of the actors for my taste. We only had a limited supply of flags, so we pressed the sides of the Easy-Up tent into service too!

I’ll leave you with this extreme example of negative fill from Instagram.


View this post on Instagram


A post shared by Shane Ellis (@gameoverman47)

What is Negative Fill and How Do You Use It?

The First Light a Cinematographer Should Put Up

Where do you start, as a director of photography lighting a set? What should be the first brushstroke when you’re painting with light?

I believe the answer is backlight, and I think many DPs would agree with me.

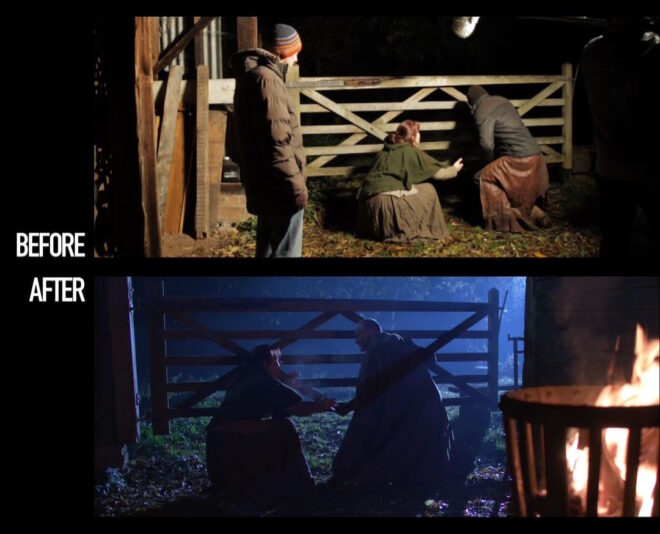
Let’s take the example of a night exterior in a historical fantasy piece, as featured in my online course, Cinematic Lighting. The main source of light in such a scene would be the moon. Where am I going to put it? At the back.

The before image is lit by an LED panel serving purely as a work-light while we rehearsed. It’s not directly above the camera, but off to the right, so the lighting isn’t completely flat, but there is very little depth in the image. Beyond the gate is a boring black void.

The after image completely transforms the viewer’s understanding of the three-dimensional space. We get the sense of a world beyond the gate, an intriguing world lighter than the foreground, with a glimpse of trees and space. Composing the brazier in the foreground has added a further plane, again increasing the three-dimensional impression.

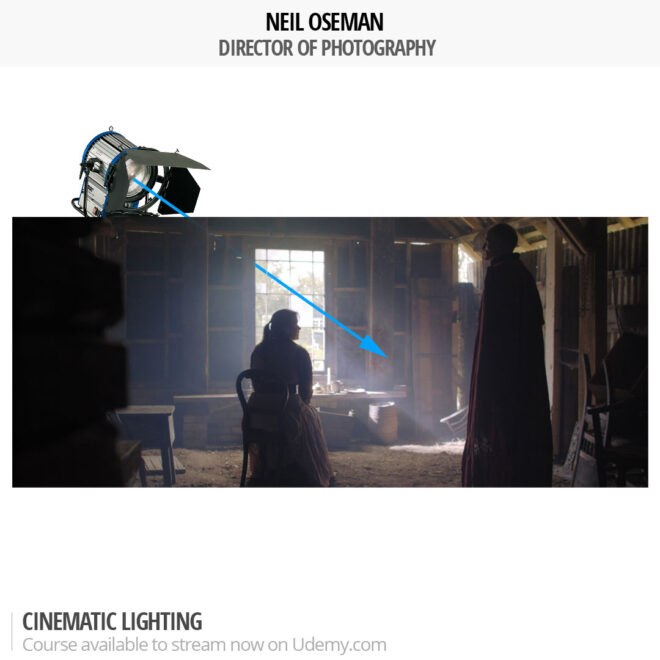
Here is the lighting diagram for the scene. (Loads more diagrams like this can be seen on my Instagram feed.)

The “moon” is a 2.5KW HMI fresnel way back amongst the trees, hidden from camera by the wall on the right. This throws the gate and the characters into silhouette, creating a rim of light around their camera-right sides.

To shed a little light on Ivan’s face as he looks camera-left, I hid a 4×4′ Kino Flo behind the lefthand wall, again behind the actors.

The LED from the rehearsal, a Neewer 480, hasn’t moved, but now it has an orange gel and is dimmed very low to subtly enhance the firelight. Note how the contrasting colours in the frame add to the depth as well.

So I’ll always go into a scene looking at where to put a big backlight, and then seeing if I need any additional sources. Sometimes I don’t, like in this scene from the Daylight Interior module of the course.

Backlight for interior scenes is different to night interiors. You cannot simply put it where you want it. You must work with the position of the windows. When I’m prepping interiors, I always work with the director to try to block the scene so that we can face towards the window as much as possible, making it our backlight. If a set is being built, I’ll talk to the production designer at the design stage to get windows put in to backlight the main camera positions whenever possible.

In the above example, lit by just the 2.5K HMI outside the window, I actually blacked out windows behind camera so that they would not fill in the nice shadows created by the backlight.

Daylight exteriors are different again. I never use artificial lights outdoors in daytime any more. I prefer to work with the natural light and employ reflectors, diffusion or negative fill to mould it where necessary.

So it’s very important to block the scene with the camera facing the sun whenever possible. Predicting the sun path may take a little work, but it will always be worth it.

Here I’ve shot south, towards the low November sun, and didn’t need to modify the light at all.

Shooting in the opposite direction would have looked flat and uninteresting, not to mention causing potential problems with the cast squinting in the sunlight, and boom and camera shadows being cast on them.

You can learn much more about the principles and practice of cinematic lighting by taking my online course on Udemy. Currently you can get an amazing 90% off using the voucher code INSTA90 until November 19th.

For more examples of building a scene around backlight, see my article “Lighting from the Back”.

The First Light a Cinematographer Should Put Up

5 Ways to Fake Firelight

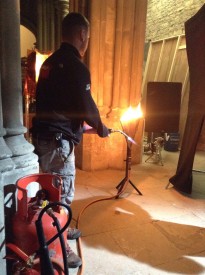
Real SFX run a fishtail on the set of “Heretiks”

Firelight adds colour and dynamism to any lighting set-up, not to mention being essential for period and fantasy films. But often it’s not practical to use real firelight as your source. Even if you could do it safely, continuity could be a problem.

A production that can afford an experienced SFX crew might be able to employ fishtails, V-shaped gas outlets that produce a highly controllable bar of flame, as we did on Heretiks. If such luxuries are beyond your budget, however, you might need to think about simulating firelight. As my gaffer friend Richard Roberts once said while operating an array of flickering tungsten globes (method no. 3), “There’s nothing like a real fire… and this is nothing like a real fire.”


1. Waving Hands

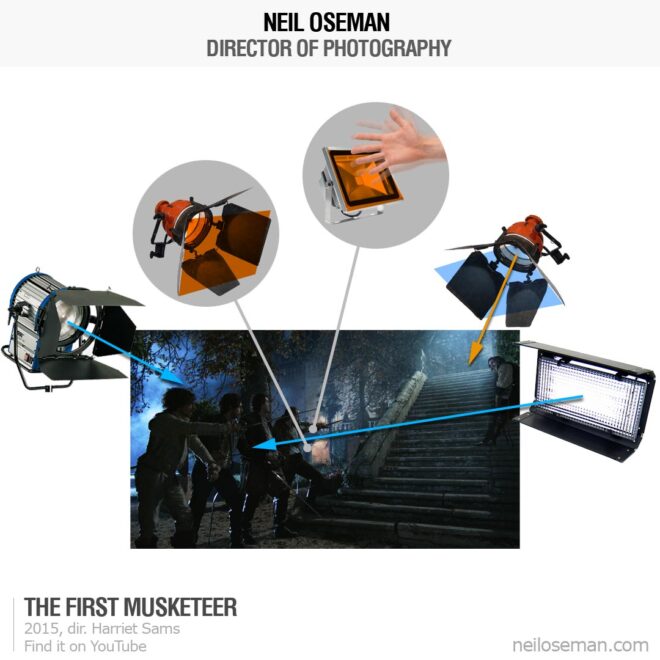
The simplest way to fake firelight is to wave your hands in front of a light source. This will work for any kind of source, hard or soft; just experiment with movements and distances and find out what works best for you. A layer of diffusion on the lamp, another in a frame, and the waving hands in between, perhaps?

Visit my Instagram feed for loads more diagrams like this.

One of my favourite lighting stories involves a big night exterior shot from The First Musketeer which was done at the Chateau de Fumel in the Lot Valley, France. We were just about to turnover when a bunch of automatic floodlights came on, illuminating the front of the chateau and destroying the period illusion of our scene. We all ran around for a while, looking for the off switch, but couldn’t find it. In the end I put orange gel on the floodlights and had someone crouch next to each one, wiggling their hands like a magician, and suddenly the chateau appeared to be lit by burning braziers.


2. Wobbling Reflector

This is my go-to technique – quick, easy and effective. It’s demonstrated in my Cinematic Lighting course on Udemy and also in this episode of Lensing Ren:

All you need is a collapsible reflector with a gold side, and an open-face tungsten fixture. Simply point the latter at the former and wobble the reflector during the take to create the flickering effect.


3. Tungsten Array

If you want to get more sophisticated, you can create a rig of tungsten units hooked up to a dimmer board. Electronic boxes exist to create a flame-like dimming pattern, but you can also just do it by pushing the sliders up and down randomly. I’ve done this a lot with 100W tungsten globes in simple pendant fittings, clipped to parts of the set or to wooden battens. You can add more dynamics by gelling the individual lamps with different colours – yellows, oranges and reds.

John Higgins’ 2MW firelight rig from “1917”

Larger productions tend to use Brutes, a.k.a. Dinos, a.k.a. 9-lights, which are banks of 1K pars. The zenith of this technique is the two megawatt rig built by gaffer John Higgins for Roger Deakins, CBE, BSC, ASC on 1917.


4. Programmed L.E.D.

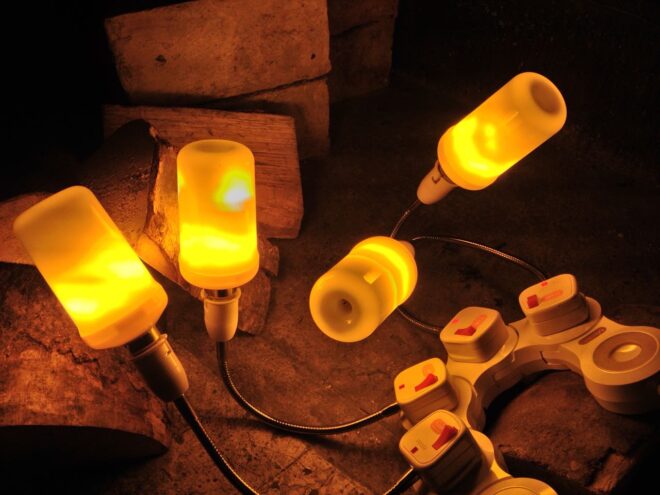
Technological advances in recent years have provided a couple of new methods of simulating firelight. One of these is the emergence of LED fixtures with built-in effects programmes like police lights, lightning and flames. These units come in all shapes, sizes and price-ranges.

Philip Bloom’s budget fire-effect rig on location for “Filmmaking for Photographers”

On War of the Worlds: The Attack last year, gaffer Callum Begley introduced me to Astera tubes, and we used their flame effect for a campfire scene in the woods when we were having continuity problems with the real fire. For the more financially challenged, domestic fire-effect LED bulbs are cheap and screw into standard sockets. Philip Bloom had a few of these on goose-neck fittings which we used extensively in the fireplaces of Devizes Castle when shooting a filmmaking course for Mzed.


5. L.e.D. Screen

A logical extension of an LED panel or bulb that crudely represents the pattern of flames is an LED screen that actually plays video footage of a fire. The oil rig disaster docu-drama Deep Horizon and Christoper Nolan’s Dunkirk are just two films that have used giant screens to create the interactive light of off-camera fires. There are many other uses for LED screens in lighting, which I’ve covered in detail before, with the ultimate evolution being Mandalorian-style virtual volumes.

You don’t necessarily need a huge budget to try this technique. What about playing one of those festive YouTube videos of a crackling log fire on your home TV? For certain shots, especially given the high native ISOs of some cameras today, this might make a pretty convincing firelight effect. For a while now I’ve been meaning to try fire footage on an iPad as a surrogate candle. There is much here to explore.

So remember, there may be no smoke without fire, but there can be firelight without fire.

5 Ways to Fake Firelight

Beautiful/Realistic/Cheap: The Lighting Triangle

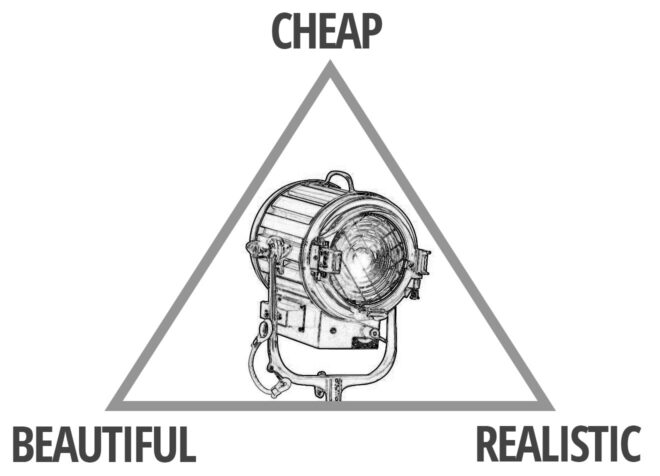
We’re all familiar with the “good/fast/cheap” triangle. You can pick any two, but never all three. When it comes to lighting films, I would posit that there is a slightly different triangle of truth labelled “beautiful/realistic/cheap”. When you’re working to a tight budget, a DP often has to choose between beautiful or realistic lighting, where a better-funded cinematographer can have both.

I first started thinking about this in 2018 when I shot Annabel Lee. Specifically it was when we were shooting a scene from this short period drama – directed by Amy Coop – in a church. Our equipment package was on the larger side for a short, but still far from ideal for lighting up a building of that size. Our biggest instrument was a Nine-light Maxi Brute, which is a grid of 1KW par globes, then we had a couple of 2.5K HMIs and nothing else of any signifcant power.

Director Amy Coop during the church recce for “Annabel Lee”

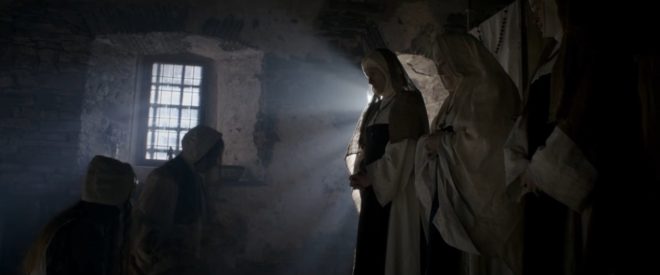
The master shot for the scene was a side-on dolly move parallel to the central aisle, with three large stained-glass windows visible in the background. My choices were either to put a Maxi Brute or an HMI outside each window, to use only natural light, or to key the scene from somewhere inside the building. The first option was beautiful but not realistic, as I shall explain, the second option would have been realistic but not beautiful (and probably under-exposed) and the third would have been neither.

I went with the hard source outside of each window. I could not diffuse or bounce the light because that would have reduced the intensity to pretty much nothing. (Stained-glass windows don’t transmit a lot of light through them.) For the same reason, the lamps had to be pretty close to the glass.

The result is that, during this dolly shot, each of the three lamps is visible at one time or another. You can’t tell they’re lamps – the blown-out panes of glass disguise them – but the fact that there are three of them rather gives away that they are not the sun! (There is also the issue that contiguous scenes outside the church have overcast light, but that is a discontinuity I have noticed in many other films and series.)

I voiced my concerns to Amy at the time – trying to shirk responsibility, I suppose! Fortunately she found it beautiful enough to let the realism slide.

But I couldn’t help thinking that, with a larger budget and thus larger instruments, I could have had both beauty and realism. If I had had three 18K HMIs, for example, plus the pre-rig time to put them on condors or scaffolding towers, they could all have been high enough and far enough back from the windows that they wouldn’t have been seen. I would still have got the same angle of light and the nice shafts in the smoke, but they would have passed much more convincingly as a single sun source. Hell, if I’d had the budget for a 100KW SoftSun then I really could have done it with one source!

There have been many other examples of the beauty/realism problem throughout my career. One that springs to mind is Above the Clouds, where the 2.5K HMI which I was using as a backlight for a night exterior was in an unrealistic position. The ground behind the action sloped downwards, so the HMI on its wind-up stand threw shafts of light upwards. With the money for a cherry-picker, a far more moon-like high-angle could have been achieved. Without such funds, my only alternative was to sacrifice the beauty of a backlight altogether, which I was not willing to do.

The difference between that example and Annabel Lee is that Clouds director Leon Chambers was unable to accept the unrealistic lighting, and ended up cutting around it. So I think it’s quite important to get on the same page as your director when you’re lighting with limited means.

I remember asking Paul Hyett when we were prepping Heretiks, “How do you feel about shafts of ‘sunlight’ coming into a room from two different directions?” He replied that “two different directions is fine, but not three.” That was a very nice, clear drawing of the line between beauty (or at least stylisation) and realism, which helped me enormously during production.

The beauty/realism/cost triangle is one we all have to navigate. Although it might sometimes give us regrets about what could have been, as long we’re on the same page as our directors we should still get results we can all live with.
Beautiful/Realistic/Cheap: The Lighting Triangle

Cinematic Lighting: An Online Course Available Now

My online course, Cinematic Lighting, is available now on Udemy. It’s an advanced and in-depth guide to arguably the most important part of a director of photography’s job: designing the illumination.

The course is aimed at cinematography students, camera operators looking to move up to DP, corporate/industrial filmmakers looking to move into drama, and indie filmmakers looking to increase their production values.

Rather than demonstrating techniques in isolation in a studio, the course takes place entirely on location. The intent is to show the realities of creating beautiful lighting while dealing with the usual challenges of real independent film production, like time, weather and equipment, as well as meeting the requirements of the script.

Cinematic Lighting consists of four hour-long modules: Day Exterior, Day Interior, Night Interior and Night Exterior. Each module follows the blocking, lighting and shooting of a short scripted scene (inspired by the fantasy web series Ren: The Girl with the Mark) with two actors in full costume. Watch me and my team set up all the fixtures, control the light with flags and rags, and make adjustments when the camera moves around for the coverage. Every step of the way, I explain what I’m doing and why, as well as the alternatives you could consider for your own films. Each module concludes with the final edited scene so that you can see the end result.
Students should already have a grasp of basic cinematography concepts like white balance and depth of field. A familiarity with the principle of three-point lighting will be useful, but not essential.

You will learn:

  • how to create depth and contrast in your shots;
  • how to light for both the master shot and the coverage;
  • how and when to use HMI, fluorescent, LED and traditional tungsten lighting;
  • how to use natural light to your advantage, and how to mould it;
  • how to use a light meter and false colours to correctly expose your image;
  • how to use smoke or haze to create atmosphere, and
  • how to simulate sunlight, moonlight and firelight.

Get lifetime access to Cinematic Lighting now.

Below is a full breakdown of the course content.


MODULE 1: DAY EXTERIOR

Learn how to block your scene to make the most of the natural light, and how to modify that light with flags, bounce and diffusion, as well as how to expose your image correctly.

1.1 Principles & Prep

  • What to look for on a recce/scout
  • How to predict the sun path using apps or a compass
  • How to block action relative to the sun
  • Three-point lighting
  • The importance of depth in cinematography
  • When to shoot in cross-light vs. backlight
  • How to get rippling reflections off water

1.2 Blocking for Success

  • Observing a rehearsal with actors Kate and Ivan
  • What to look for in the blocking
  • How to get reflections off a blade
  • When to shoot the master shot
  • How to choose what order to shoot your coverage in
  • Using a white poly/bead-board as bounce

1.3 Exposure

  • Why light meters are still important
  • Dynamic range and log recording
  • How to use an incident meter and a spot reflectance meter
  • The f-stop series
  • How to use false colours
  • How to arrive at the right exposure from all this information
  • How to select the appropriate ND (neutral density) filter
  • Shooting the wide shot

1.4 Shaping the Singles

  • Short- and broad-key lighting
  • Types of reflector
  • Positioning a reflector
  • Paying attention to eye reflections
  • Negative fill
  • How to use 4×4 floppy flags
  • Shooting Ivan’s close-up
  • Using a trace frame
  • “Health bounce”
  • Shooting Kate’s close-up
  • Summary
  • The final edited scene

MODULE 2: DAY INTERIOR

This module introduces some common lighting instruments, demonstrates how to imitate natural light entering a room, and how to create depth and contrast with black-out and smoke.

2.1 Scouting & Equipment

  • Identifying light sources in the room
  • Using apps or a compass to predict how sun will enter through the windows
  • The principle of dark-to-light depth
  • Using curtains to modify interior light
  • Introduction to some common lighting instruments: Dedolights, Kino Flos, an HMI and a Rayzr MC LED panel

2.2 Lighting through a Window

  • Observing the blocking with actors Kate and Ivan
  • Direct lighting using an HMI
  • Controlling contrast with black-out
  • Diffusing the light with a trace frame
  • Bouncing the light off poly/bead-board
  • Bouncing the light off parts of the set
  • Use of a light meter and false colours to set the correct exposure

2.3 Atmosphere

  • Use of smoke or haze to add atmosphere to the scene
  • Reasons to add atmosphere
  • The concept of aerial perspective
  • Shooting the master shot
  • Comparison of the final shot to the other versions demonstrated in 2.2 and 2.3

2.4 Lighting the Reverse

  • Use of viewfinder apps to find a frame and select a lens
  • Challenges of front-light
  • Adjusting the window light to highlight certain areas
  • Demonstrating a “window wrap” using a Kino Flo
  • Using light readings and ND filters to arrive at the correct exposure
  • Shooting the reverse
  • Summary
  • The final edited scene

MODULE 3: NIGHT INTERIOR

Create a moody night-time look indoors using practical sources, toplight, and simulated moonlight and firelight.

3.1 Internal vs. External Light

  • Observing the blocking with actors Kate and Ivan
  • Approaches to lighting a night interior scene
  • Lighting from outside with an HMI “moon”
  • Working with bounced “moonlight” inside the room
  • Choosing an overhead source as the key light

3.2 Working with Toplight

  • Time and safety considerations of working with top-light
  • Rigging a top-light safely
  • Controlling top-light spill on the set walls
  • Using unbleached muslin to soften and warm up the light
  • The inverse square law

3.3 Firelight & Moonlight

  • Working with practical candles
  • Reinforcing candles with a hidden LED fixture
  • Simulating an off-camera fireplace
  • Lighting the view outside the window
  • Bringing moonlight into the room to add colour contrast and depth
  • Shooting the master shot

3.4 Tweaking for the Coverage

  • Checking the blocking for the first single
  • Filling in shadows using additional unbleached muslin
  • Flagging the top-light to control the background
  • Adjusting the external light to maintain colour contrast
  • Shooting Kate’s single
  • Adjusting the fireplace effect to work for a close-up
  • Shooting Ivan’s single
  • Summary
  • The final edited scene

MODULE 4: NIGHT EXTERIOR

Paint with light on the blank canvas of night; set up an artificial moon; create depth, contrast and colour contrast; and use shadows to your advantage.

4.1 Setting the Moon

  • Observing the blocking with actors Kate and Ivan
  • Principles of night exterior lighting
  • Creating believable moonlight
  • Features of HMI lighting
  • Choosing a position and height for the HMI “moon”

4.2 Finessing the Master

  • Use of a practical fire source
  • Reinforcing a practical fire with an LED fixture
  • Colour contrast
  • Using a Kino Flo as an additional soft source
  • Tackling a difficult shadow
  • Reading and adjusting lighting ratios using an incident meter
  • Working with smoke/atmos outdoors
  • Shooting the master shot

4.3 Shooting the Singles

  • Adjusting the existing sources to work for a close-up
  • Shooting Ivan’s single
  • Diffusing the HMI
  • Monitoring exposure using false colours
  • Shooting Kate’s single

4.4 Lighting the Reverse

  • The pros and cons of flipping the backlight
  • Example of cheating the moonlight around
  • Using established sources to your advantage
  • Adding diffusion vs. a gobo to the HMI
  • Creating a “branch-a-loris”
  • Shooting the reverse
  • Summary
  • The final edited scene

APPENDICES

Useful links, a full kit list and a deleted scene

Get lifetime access to Cinematic Lighting now.

Cinematic Lighting: An Online Course Available Now

Why You Can’t Re-light Footage in Post

The concept of “re-lighting in post” is one that has enjoyed a popularity amongst some no-budget filmmakers, and which sometimes gets bandied around on much bigger sets as well. If there isn’t the time, the money or perhaps simply the will to light a scene well on the day, the flexibility of RAW recording and the power of modern grading software mean that the lighting can be completely changed in postproduction, so the idea goes.

I can understand why it’s attractive. Lighting equipment can be expensive, and setting it up and finessing it is one of the biggest consumers of time on any set. The time of a single wizard colourist can seem appealingly cost-effective – especially on an unpaid, no-budget production! – compared with the money pit that is a crew, cast, location, catering, etc, etc. Delaying the pain until a little further down the line can seem like a no-brainer.

There’s just one problem: re-lighting footage is fundamentally impossible. To even talk about “re-lighting” footage demonstrates a complete misunderstanding of what photographing a film actually is.

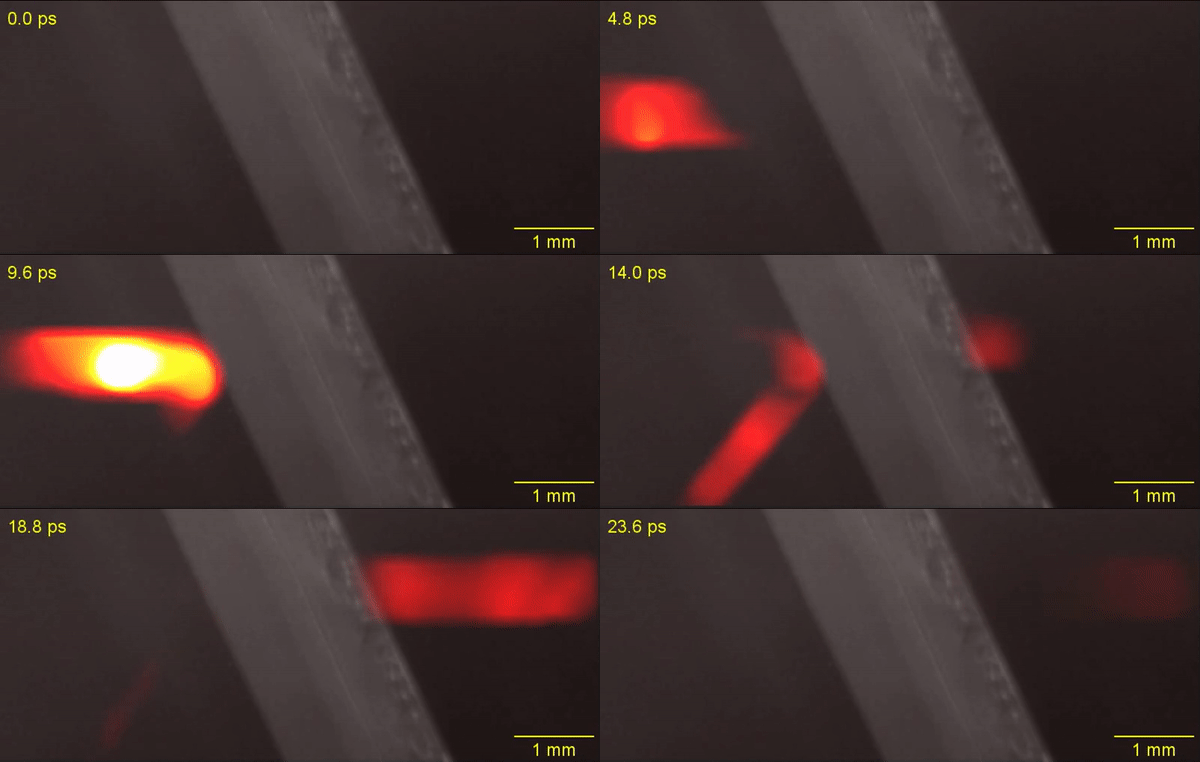
This video, captured at a trillion frames per second, shows the tranmission and reflection of light.

The word “photography” comes from Greek, meaning “drawing with light”. This is not just an excuse for pompous DPs to compare themselves with the great artists of the past as they “paint with light”; it is a concise explanation of what a camera does.

A camera can’t record a face. It can’t record a room, or a landscape, or an animal, or objects of any kind. The only thing a camera can record is light. All photographs and videos are patterns of light which the viewer’s brain reverse-engineers into a three-dimensional scene, just as our brains reverse-engineer the patterns of light on the retinae every moment of every day, to make sense of our surroundings.

The light from this object gets gradually brighter then gradually darker again – therefore it is a curved surface. There is light on the top of that nose but not on the underneath, so it must be sticking out. These oval surfaces are absorbing all the red and blue light and reflecting only green, so it must be plant life. Such are the deductions made continuously by the brain’s visual centre.

A compound lens for a prototype light-field camera by Adobe

To suggest that footage can be re-lit is to suggest that recorded light can somehow be separated from the underlying physical objects off which that light reflected. Now of course that is within the realms of today’s technology; you could analyse a filmed scene and build a virtual 3D model of it to match the footage. Then you could “re-light” this recreated scene, but it would be a hell of a lot of work and would, at best, occupy the Uncanny Valley.

Some day, perhaps some day quite soon, artificial intelligence will be clever enough to do this for us. Feed in a 2D video and the computer will analyse the parallax and light shading to build a moving 3D model to match it, allowing a complete change of lighting and indeed composition.

Volumetric capture is already a functioning technology, currently using a mix of infrared and visible-light cameras in an environment lit as flatly as possible for maximum information – like log footage pushed to its inevitable conclusion. By surrounding the subject with cameras, a moving 3D image results.

Sir David Attenborough getting his volume captured by Microsoft

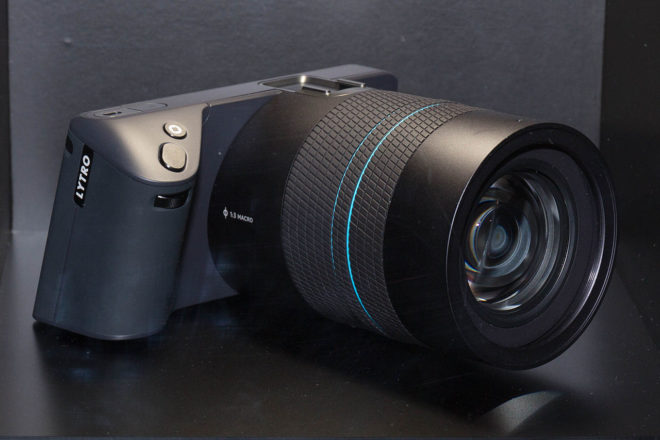
Such rigs are a type of light-field imaging, a technology that reared its head a few years ago in the form of Lytro, with viral videos showing how depth of field and even camera angle (to a limited extent) could be altered with this seemingly magical system. But even Lytro was capturing light, albeit it in a way that allowed for much more digital manipulation.

Perhaps movies will eventually be captured with some kind of Radar-type technology, bouncing electromagnetic waves outside the visible spectrum off the sets and actors to build a moving 3D model. At that point the need for light will have been completely eliminated from the production process, and the job of the director of photography will be purely a postproduction one.

While I suspect most DPs would prefer to be on a physical set than hunched over a computer, we would certainly make the transition if that was the only way to retain meaningful authorship of the image. After all, most of us are already keen to attend grading sessions to ensure our vision survives postproduction.

The Lytro Illum 2015 CP+ by Morio – own work, CC BY-SA 3.0, https://commons.wikimedia.org/w/index.php?curid=38422894

But for the moment at least, lighting must be done on set; re-lighting after the fact is just not possible in any practical way. This is not to take away from the amazing things that a skilled colourist can do, but the vignettes, the split-toning, the power windows, the masking and the tracking – these are adjustments of emphasis.

A soft shadow can be added, but without 3D modelling it can never fall and move as a real shadow would. A face can be brightened, but the quality of light falling on it can’t be changed from soft to hard. The angle of that light can’t be altered. Cinematographers refer to a key-light as the “modelling” light for a reason: because it defines the 3D model which your brain reverse-engineers when it sees the image.

So if you’re ever tempted to leave the job of lighting to postproduction, remember that your footage is literally made of light. If you don’t take the time to get your lighting right, you might as well not have any footage at all.

Why You Can’t Re-light Footage in Post